2005 FORD TAURUS length
[x] Cancel search: lengthPage 71 of 248
Do not place any objects on the cargo area cover. They may
obstruct your vision or strike occupants of the vehicle in the
case of a sudden stop or collision.
The cover may cause injury in a sudden stop or accident if it is
not securely installed.
Rewinding the shade
With extended use, the cargo shade may lose its spring tension. If this
occurs, the shade must be manually rewound. This is a two-person
operation.
1. Remove the shade from the vehicle and extend it with the smooth
grain facing you.
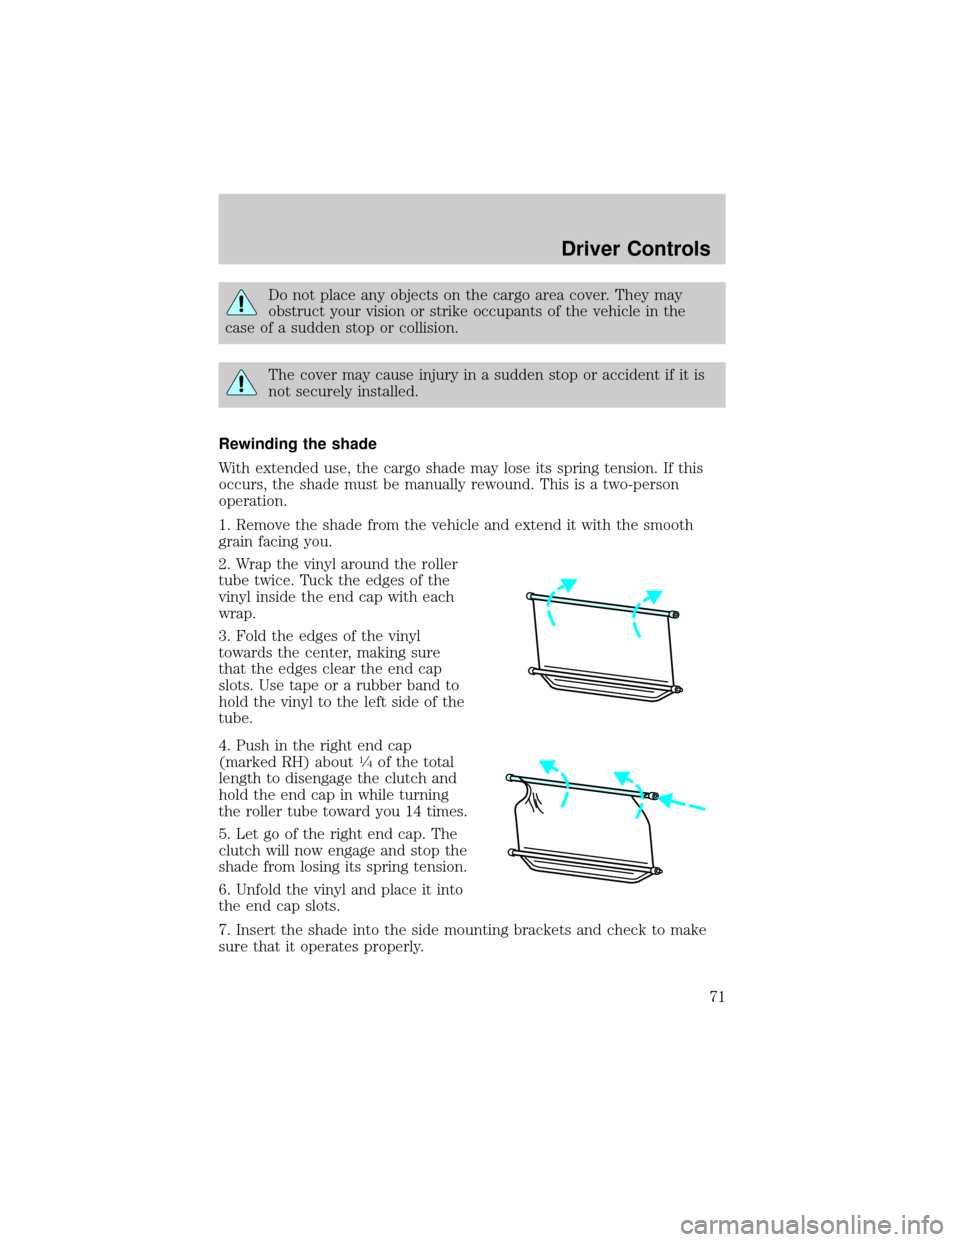
2. Wrap the vinyl around the roller
tube twice. Tuck the edges of the
vinyl inside the end cap with each
wrap.
3. Fold the edges of the vinyl
towards the center, making sure
that the edges clear the end cap
slots. Use tape or a rubber band to
hold the vinyl to the left side of the
tube.
4. Push in the right end cap
(marked RH) about
1¤4of the total
length to disengage the clutch and
hold the end cap in while turning
the roller tube toward you 14 times.
5. Let go of the right end cap. The
clutch will now engage and stop the
shade from losing its spring tension.
6. Unfold the vinyl and place it into
the end cap slots.
7. Insert the shade into the side mounting brackets and check to make
sure that it operates properly.
Driver Controls
71
Page 97 of 248
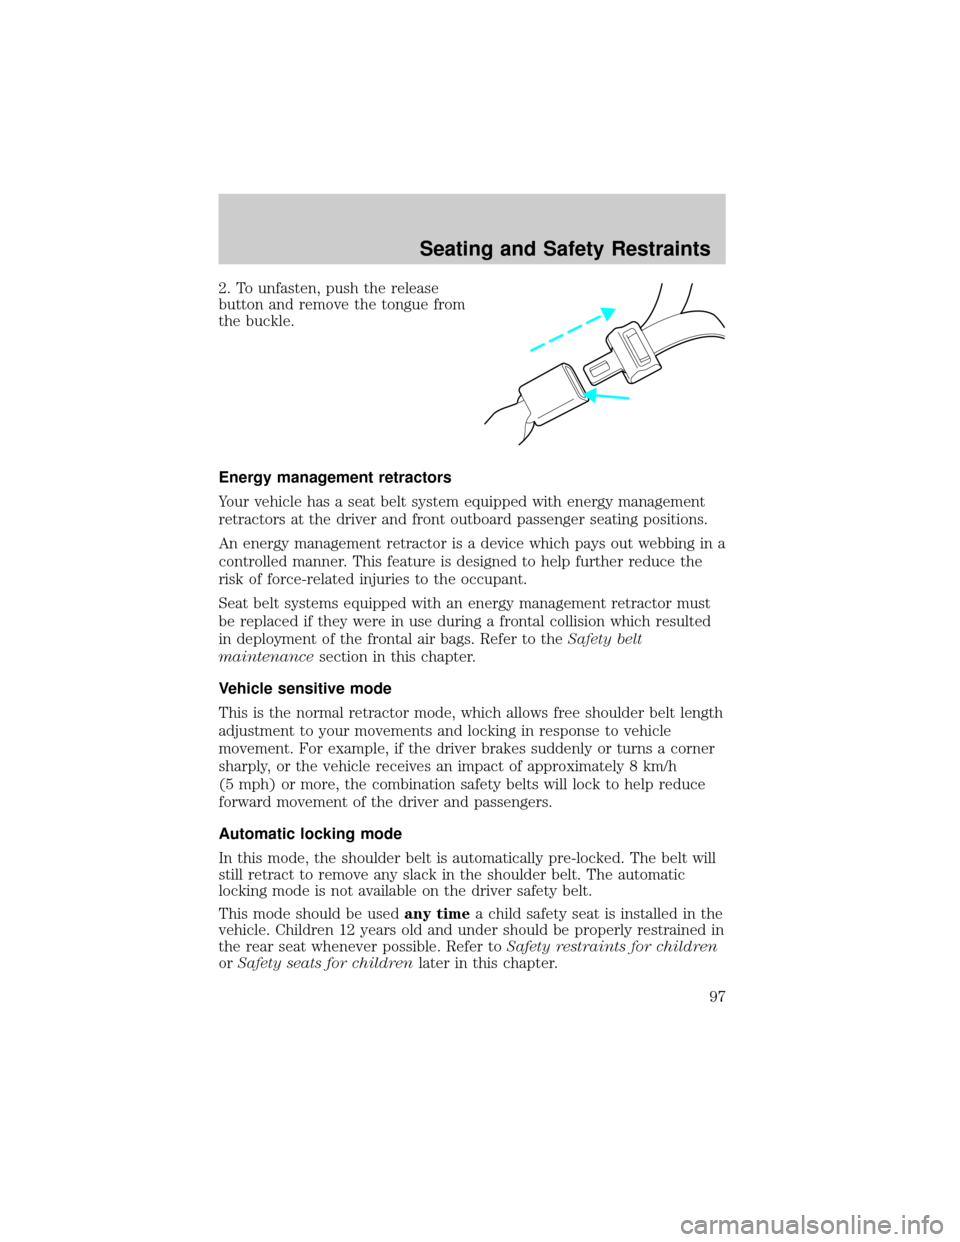
2. To unfasten, push the release
button and remove the tongue from
the buckle.
Energy management retractors
Your vehicle has a seat belt system equipped with energy management
retractors at the driver and front outboard passenger seating positions.
An energy management retractor is a device which pays out webbing in a
controlled manner. This feature is designed to help further reduce the
risk of force-related injuries to the occupant.
Seat belt systems equipped with an energy management retractor must
be replaced if they were in use during a frontal collision which resulted
in deployment of the frontal air bags. Refer to theSafety belt
maintenancesection in this chapter.
Vehicle sensitive mode
This is the normal retractor mode, which allows free shoulder belt length
adjustment to your movements and locking in response to vehicle
movement. For example, if the driver brakes suddenly or turns a corner
sharply, or the vehicle receives an impact of approximately 8 km/h
(5 mph) or more, the combination safety belts will lock to help reduce
forward movement of the driver and passengers.
Automatic locking mode
In this mode, the shoulder belt is automatically pre-locked. The belt will
still retract to remove any slack in the shoulder belt. The automatic
locking mode is not available on the driver safety belt.
This mode should be usedany timea child safety seat is installed in the
vehicle. Children 12 years old and under should be properly restrained in
the rear seat whenever possible. Refer toSafety restraints for children
orSafety seats for childrenlater in this chapter.
Seating and Safety Restraints
97
Page 101 of 248
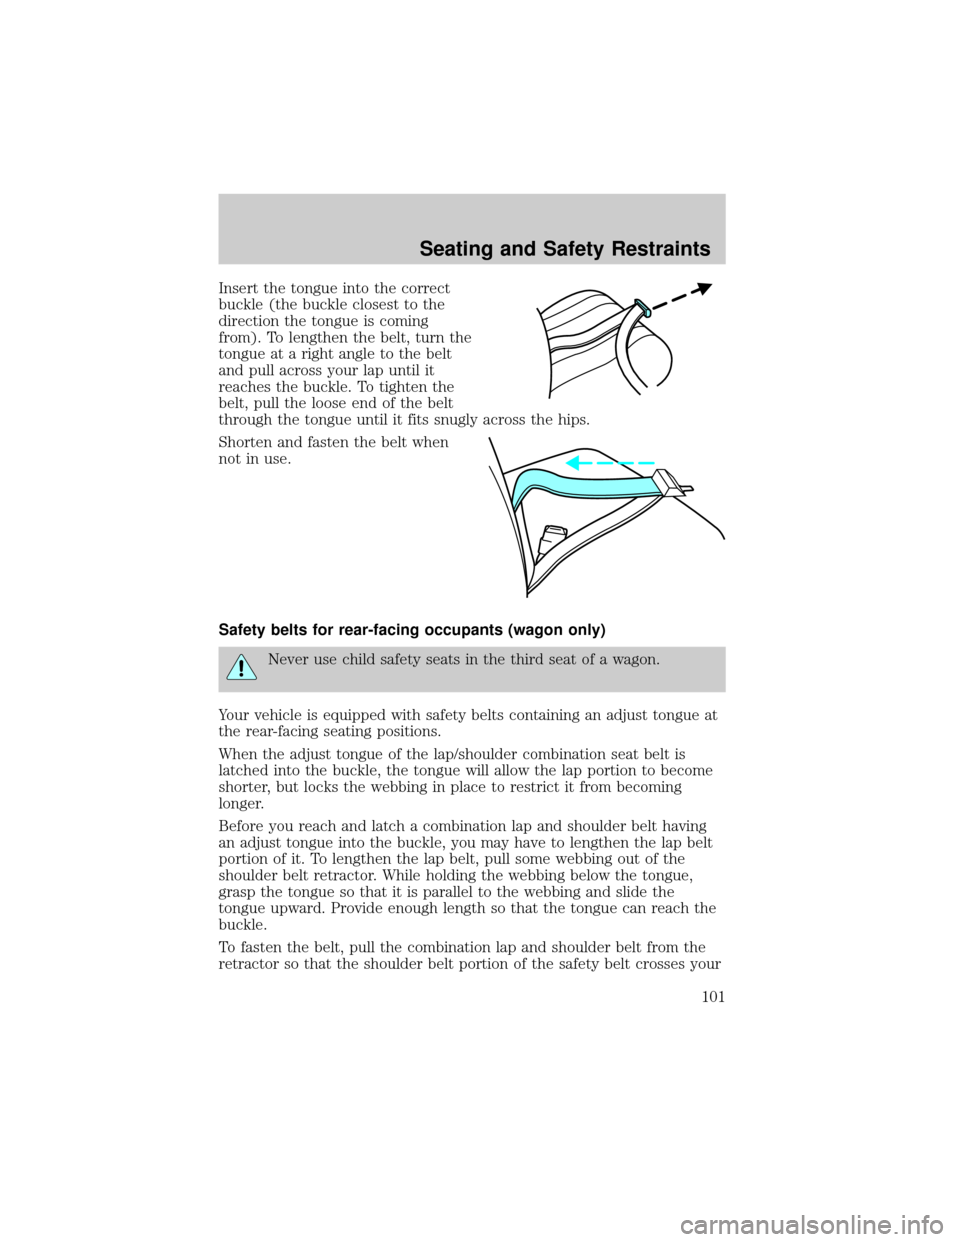
Insert the tongue into the correct
buckle (the buckle closest to the
direction the tongue is coming
from). To lengthen the belt, turn the
tongue at a right angle to the belt
and pull across your lap until it
reaches the buckle. To tighten the
belt, pull the loose end of the belt
through the tongue until it fits snugly across the hips.
Shorten and fasten the belt when
not in use.
Safety belts for rear-facing occupants (wagon only)
Never use child safety seats in the third seat of a wagon.
Your vehicle is equipped with safety belts containing an adjust tongue at
the rear-facing seating positions.
When the adjust tongue of the lap/shoulder combination seat belt is
latched into the buckle, the tongue will allow the lap portion to become
shorter, but locks the webbing in place to restrict it from becoming
longer.
Before you reach and latch a combination lap and shoulder belt having
an adjust tongue into the buckle, you may have to lengthen the lap belt
portion of it. To lengthen the lap belt, pull some webbing out of the
shoulder belt retractor. While holding the webbing below the tongue,
grasp the tongue so that it is parallel to the webbing and slide the
tongue upward. Provide enough length so that the tongue can reach the
buckle.
To fasten the belt, pull the combination lap and shoulder belt from the
retractor so that the shoulder belt portion of the safety belt crosses your
Seating and Safety Restraints
101
Page 124 of 248
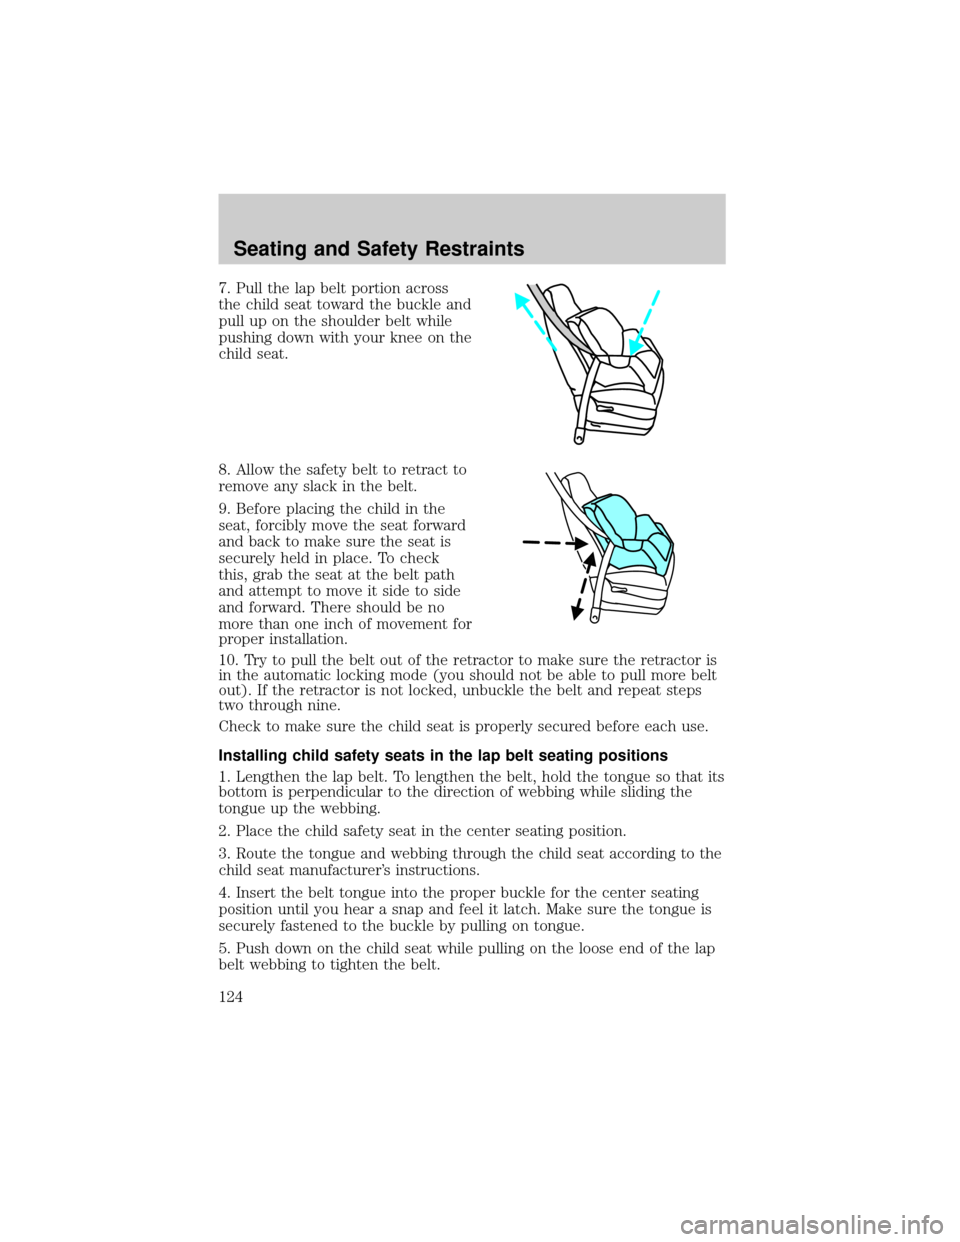
7. Pull the lap belt portion across
the child seat toward the buckle and
pull up on the shoulder belt while
pushing down with your knee on the
child seat.
8. Allow the safety belt to retract to
remove any slack in the belt.
9. Before placing the child in the
seat, forcibly move the seat forward
and back to make sure the seat is
securely held in place. To check
this, grab the seat at the belt path
and attempt to move it side to side
and forward. There should be no
more than one inch of movement for
proper installation.
10. Try to pull the belt out of the retractor to make sure the retractor is
in the automatic locking mode (you should not be able to pull more belt
out). If the retractor is not locked, unbuckle the belt and repeat steps
two through nine.
Check to make sure the child seat is properly secured before each use.
Installing child safety seats in the lap belt seating positions
1. Lengthen the lap belt. To lengthen the belt, hold the tongue so that its
bottom is perpendicular to the direction of webbing while sliding the
tongue up the webbing.
2. Place the child safety seat in the center seating position.
3. Route the tongue and webbing through the child seat according to the
child seat manufacturer's instructions.
4. Insert the belt tongue into the proper buckle for the center seating
position until you hear a snap and feel it latch. Make sure the tongue is
securely fastened to the buckle by pulling on tongue.
5. Push down on the child seat while pulling on the loose end of the lap
belt webbing to tighten the belt.
Seating and Safety Restraints
124
Page 177 of 248

Making a decision
Board members review all available information related to each
complaint, including oral presentations, and arrive at a fair and impartial
decision. Board review may be terminated at any time by either party.
Every effort is made to decide the case within 40 days of the date that
all requested information is received by the Board. Since the Board
generally meets once a month, it may take longer for the Board to
consider some cases.
After a case is reviewed, the Board mails you a decision letter and a
form on which to accept or reject the Board's decision. The decisions of
the Board are binding on Ford (and, in some cases, on the dealer) but
not on consumers who are free to pursue other remedies available to
them under state or federal law.
To request a DSB Brochure/Application
For a brochure/application, speak to your dealer or write/call the Board
at the following address/phone number:
Dispute Settlement Board
P.O. Box 1424
Waukesha, WI 53187±1424
1±800±428±3718
You may also contact the North American Customer Relationship Center
at 1-800-392-3673 (Ford), TDD for the hearing impaired: 1-800-232-5952
or by writing to the Center at the following address:
Ford Motor Company
Customer Relationship Center
P.O. Box 6248
Dearborn, Michigan 48121
UTILIZING THE MEDIATION/ARBITRATION PROGRAM
(CANADA ONLY)
In those cases where you continue to feel that the efforts by Ford and
the dealer to resolve a factory-related vehicle service concern have been
unsatisfactory, Ford of Canada participates in an impartial third party
mediation/arbitration program administered by the Canadian Motor
Vehicle Arbitration Plan (CAMVAP).
The CAMVAP program is a straight-forward and relatively speedy
alternative to resolve a disagreement when all other efforts to produce a
settlement have failed. This procedure is without cost to you and is
designed to eliminate the need for lengthy and expensive legal
proceedings.
Customer Assistance
177
Page 236 of 248
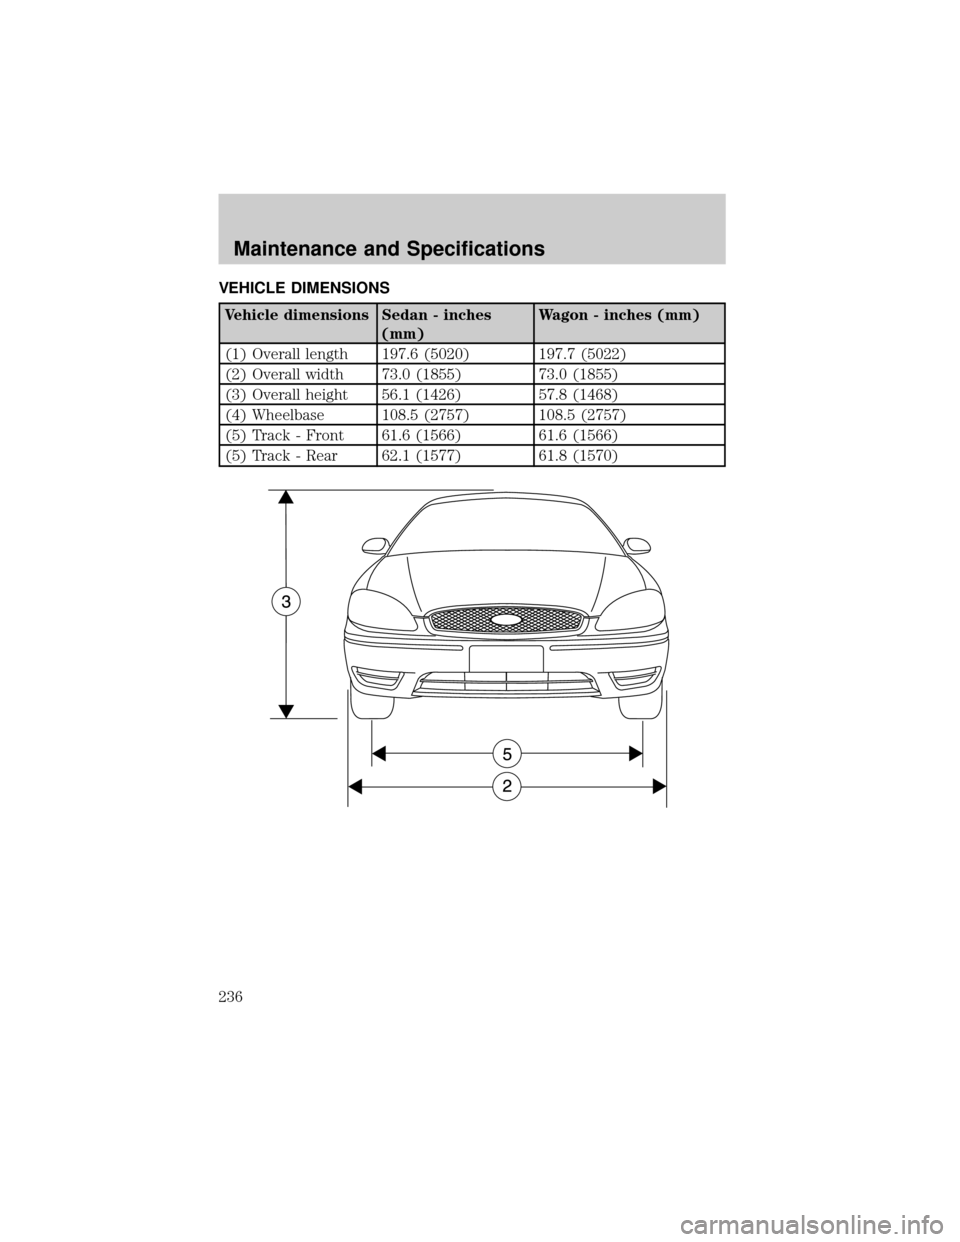
VEHICLE DIMENSIONS
Vehicle dimensions Sedan - inches
(mm)Wagon - inches (mm)
(1) Overall length 197.6 (5020) 197.7 (5022)
(2) Overall width 73.0 (1855) 73.0 (1855)
(3) Overall height 56.1 (1426) 57.8 (1468)
(4) Wheelbase 108.5 (2757) 108.5 (2757)
(5) Track - Front 61.6 (1566) 61.6 (1566)
(5) Track - Rear 62.1 (1577) 61.8 (1570)
Maintenance and Specifications
236
Page 241 of 248
GENUINE FORD ACCESSORIES FOR YOUR VEHICLE
A wide selection of Genuine Ford Accessories are available for your
vehicle through your local authorized Ford or Ford of Canada dealer.
These quality accessories have been specifically engineered to fulfill your
automotive needs; they are custom designed to complement the style
and aerodynamic appearance of your vehicle. In addition, each accessory
is made from high quality materials and meets or exceeds Ford's rigorous
engineering and safety specifications. Ford Motor Company will repair or
replace any properly dealer-installed Genuine Ford Accessory found to
be defective in factory-supplied materials or workmanship during the
warranty period, as well as any component damaged by the defective
accessory. The accessory will be warranted for whichever provides you
the greatest benefit:
²12 months or 12,000 miles (20,000 km) (whichever occurs first), or
²the remainder of your new vehicle limited warranty.
This means that Genuine Ford Accessories purchased along with your new
vehicle and installed by the dealer are covered for the full length of your
New Vehicle's Limited Warranty Ð 3 years or 36,000 miles (60,000 km)
(whichever occurs first). Contact your dealer for details and a copy of
the warranty.
Not all accessories are available for all models.
The following is a list of several Genuine Ford Accessory products for
your vehicle. Not all accessories are available for all models. For a
complete listing of the accessories that are available for your vehicle,
please contact your dealer or visit our online store at:
www.fordaccessoriesstore.com.
Exterior style
Bug shields
Deflectors
Exterior trim kits
Front end covers
Grille inserts
Headlamps, fog lights and Daytime Running Lamps (DRLs)
Splash guards
Wheels
Interior style
Cell phone holders
Electrochromatic compass/temperature interior mirrors
Accessories
Accessories
241