2005 FORD TAURUS height
[x] Cancel search: heightPage 32 of 248
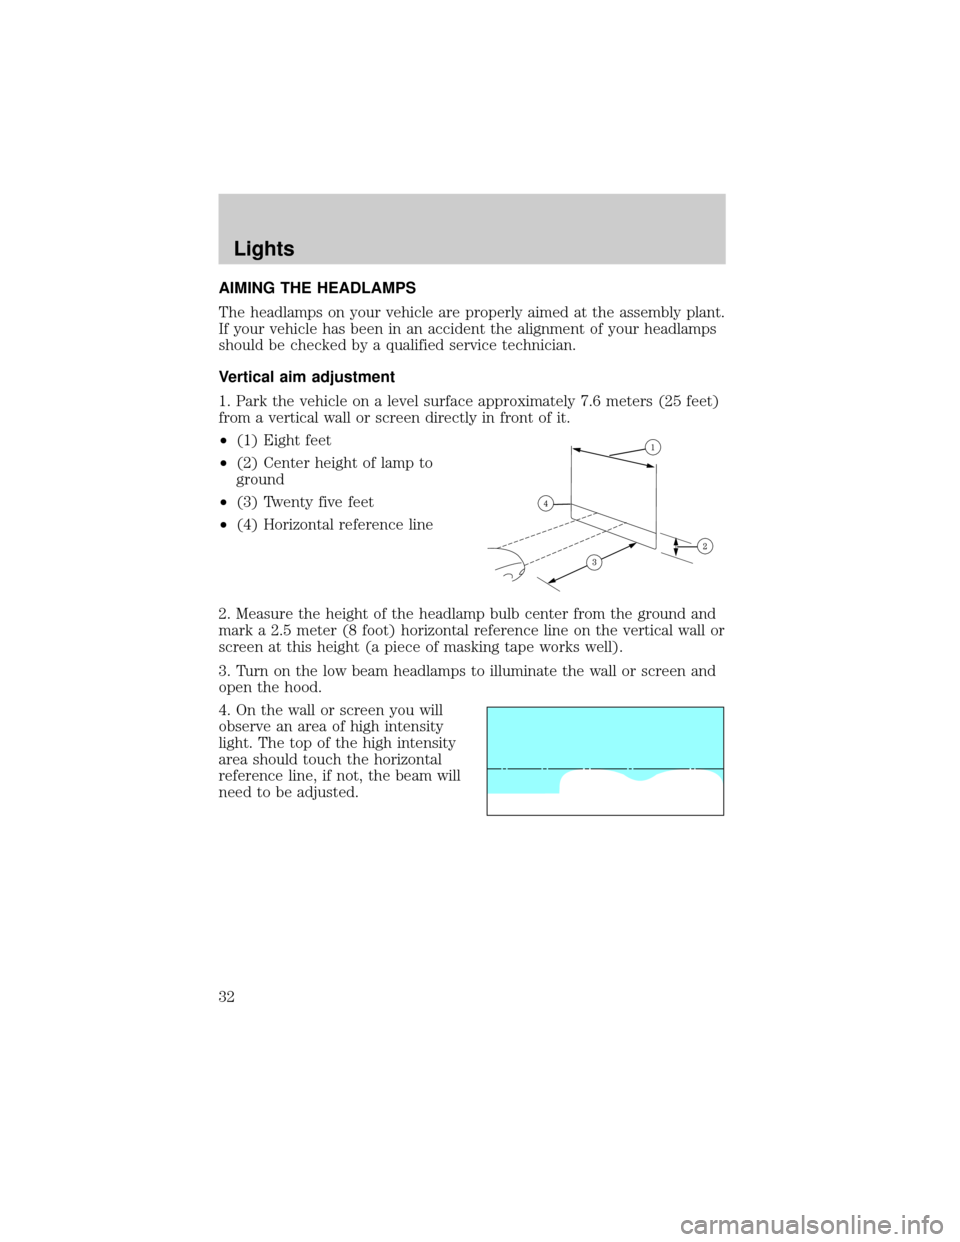
AIMING THE HEADLAMPS
The headlamps on your vehicle are properly aimed at the assembly plant.
If your vehicle has been in an accident the alignment of your headlamps
should be checked by a qualified service technician.
Vertical aim adjustment
1. Park the vehicle on a level surface approximately 7.6 meters (25 feet)
from a vertical wall or screen directly in front of it.
²(1) Eight feet
²(2) Center height of lamp to
ground
²(3) Twenty five feet
²(4) Horizontal reference line
2. Measure the height of the headlamp bulb center from the ground and
mark a 2.5 meter (8 foot) horizontal reference line on the vertical wall or
screen at this height (a piece of masking tape works well).
3. Turn on the low beam headlamps to illuminate the wall or screen and
open the hood.
4. On the wall or screen you will
observe an area of high intensity
light. The top of the high intensity
area should touch the horizontal
reference line, if not, the beam will
need to be adjusted.
Lights
32
Page 91 of 248
Make sure that the safety belt for the rear center passenger is properly
routed over the rear seatback.
3rd seat (if equipped) (wagon only)
The third seat faces the rear of the vehicle. For height and weight limits,
see the label on the seat cushion. When the seat is down, the back of
your wagon has a flat surface for carrying cargo.
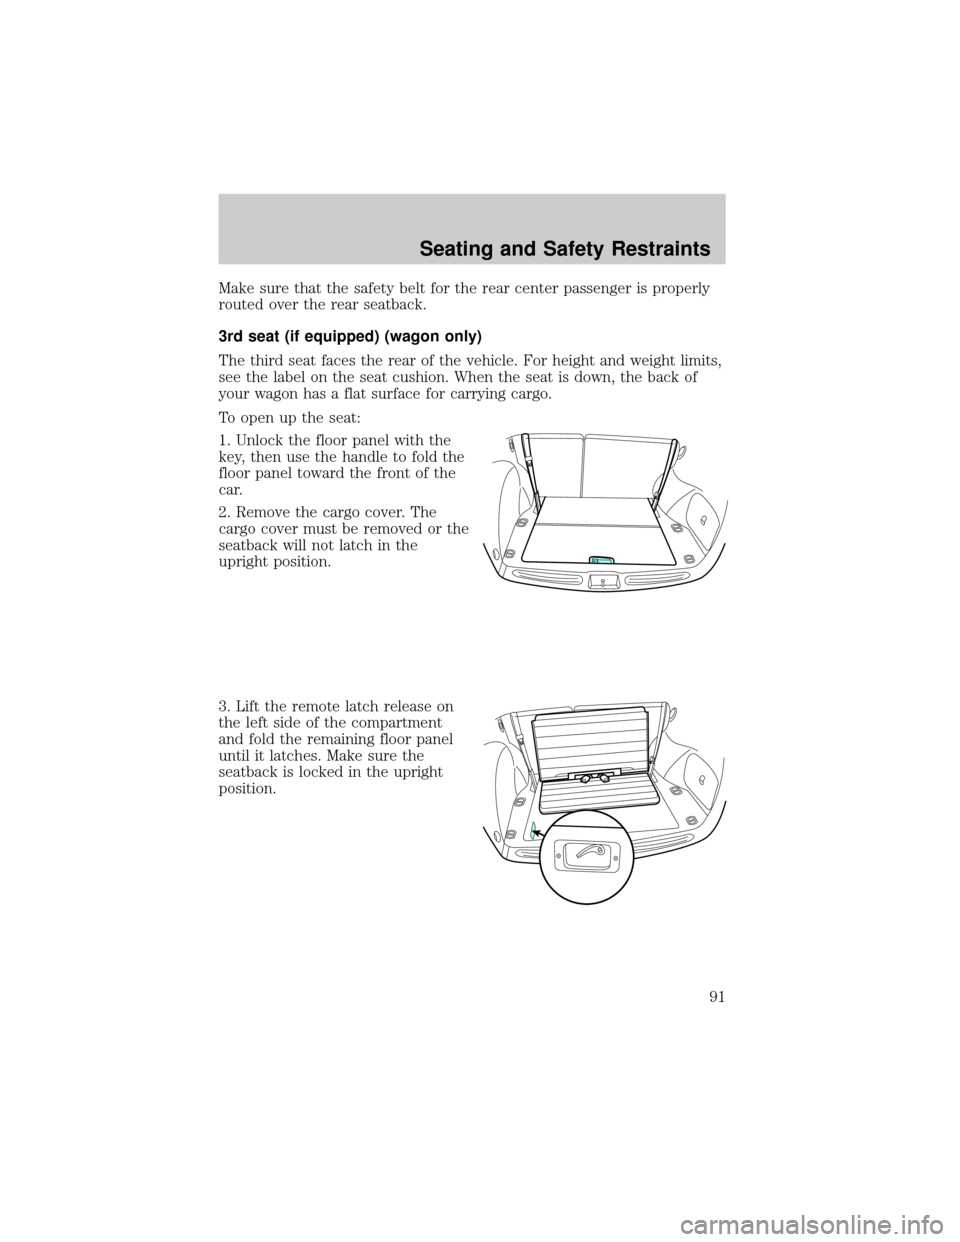
To open up the seat:
1. Unlock the floor panel with the
key, then use the handle to fold the
floor panel toward the front of the
car.
2. Remove the cargo cover. The
cargo cover must be removed or the
seatback will not latch in the
upright position.
3. Lift the remote latch release on
the left side of the compartment
and fold the remaining floor panel
until it latches. Make sure the
seatback is locked in the upright
position.
Seating and Safety Restraints
91
Page 99 of 248
After any vehicle collision, the seat belt system at all outboard
seating positions (except driver, which has no ªautomatic locking
retractorº feature) must be checked by a qualified technician to verify
that the ªautomatic locking retractorº feature for child seats is still
functioning properly. In addition, all seat belts should be checked for
proper function.
BELT AND RETRACTOR ASSEMBLY MUST BE REPLACED if
the seat belt assembly ªautomatic locking retractorº feature or
any other seat belt function is not operating properly when checked
according to the procedures in Workshop Manual.
Failure to replace the Belt and Retractor assembly could
increase the risk of injury in collisions.
Safety belt pretensioner
Your vehicle is equipped with safety belt pretensioners at the driver and
front outboard passenger seating positions.
The safety belt pretensioners are designed to activate when the safety
belt is fastened during certain frontal or near-frontal collisions, or in
certain side collisions that result in side airbag activation (if the vehicle
is equipped with side airbags). A safety belt pretensioner is a device
which tightens the webbing of the lap and shoulder belts in such a way
that they fit more snugly against the body.
When the front airbags are activated, the safety belt pretensioners for
the driver and right front passenger seating positions will be activated
when the respective safety belt is properly buckled. If a side airbag is
activated, the safety belt pretensioner for that seating position will be
activated if the seat belt is properly buckled.
The driver and front outboard passenger safety belt system (including
retractors, buckles and height adjusters) must be replaced if the vehicle
is involved in a collision that results in the activation of the safety belt
pretensioners. Refer to theSafety belt maintenancesection in this
chapter.
The driver and the right front passenger seat belt system
(including retractors, buckles and height adjusters) must be
replaced if the vehicle is involved in a collision that results in
deployment of front air bags or side airbags and safety belt
pretensioners.
Seating and Safety Restraints
99
Page 100 of 248
Safety belt usage sensors
The driver and front outboard passenger safety belt buckles are
equipped with sensors that detect if the safety belts are fastened. The
sensors provide information to the Personal Safety System which can
then adapt the air bag deployment or safety belt pretensioner activation
based upon safety belt usage.
The Personal Safety System provides the most benefit to belted
occupants. The system monitors and tailors the air bag
deployment based upon safety belt usage. Failure to properly wear
your safety belt will increase your risk of injury.
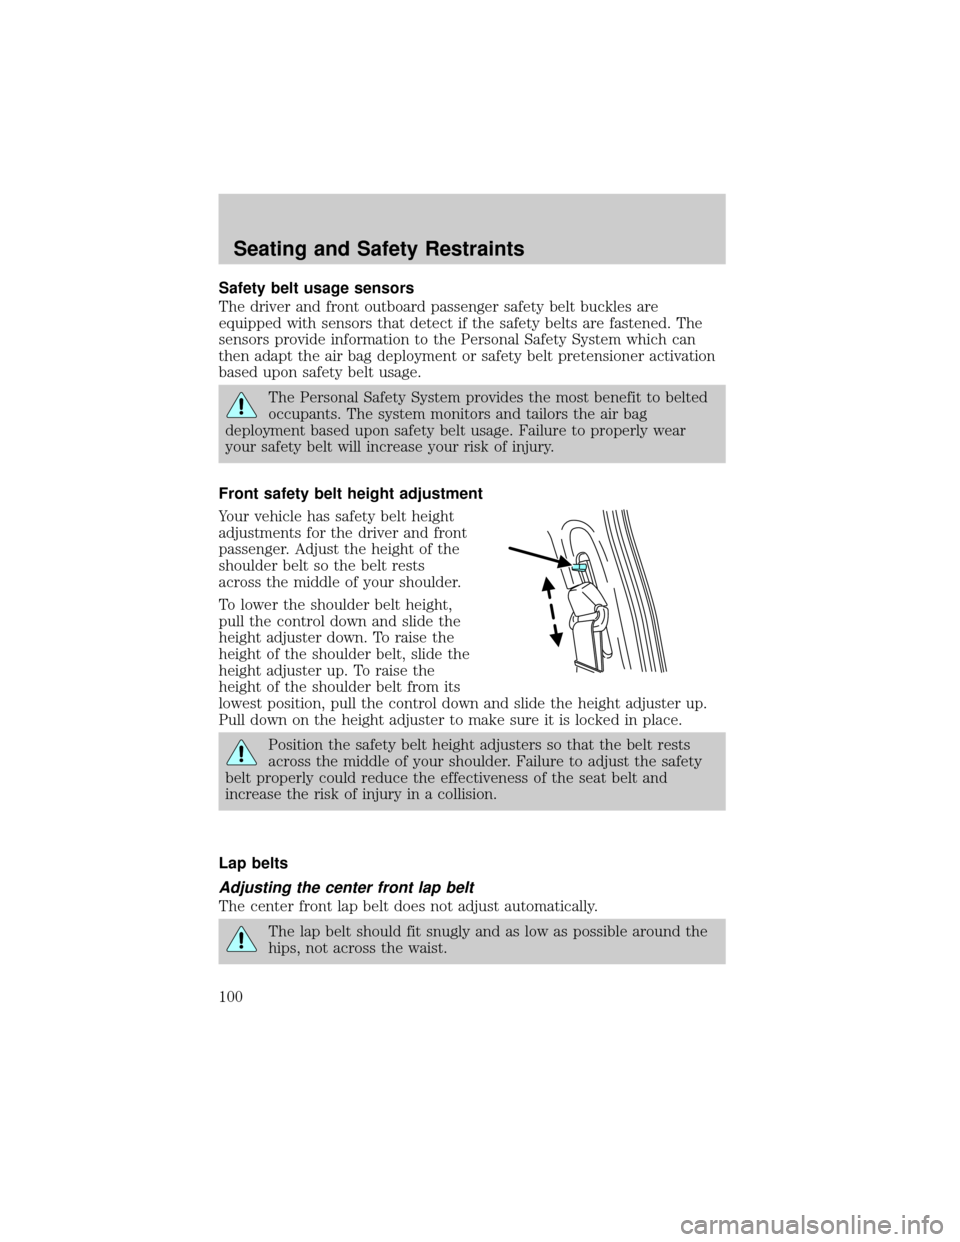
Front safety belt height adjustment
Your vehicle has safety belt height
adjustments for the driver and front
passenger. Adjust the height of the
shoulder belt so the belt rests
across the middle of your shoulder.
To lower the shoulder belt height,
pull the control down and slide the
height adjuster down. To raise the
height of the shoulder belt, slide the
height adjuster up. To raise the
height of the shoulder belt from its
lowest position, pull the control down and slide the height adjuster up.
Pull down on the height adjuster to make sure it is locked in place.
Position the safety belt height adjusters so that the belt rests
across the middle of your shoulder. Failure to adjust the safety
belt properly could reduce the effectiveness of the seat belt and
increase the risk of injury in a collision.
Lap belts
Adjusting the center front lap belt
The center front lap belt does not adjust automatically.
The lap belt should fit snugly and as low as possible around the
hips, not across the waist.
Seating and Safety Restraints
100
Page 108 of 248
there are no nicks, tears or cuts. Replace if necessary. All safety belt
assemblies, including retractors, buckles, front seat belt buckle
assemblies, buckle support assemblies (slide bar-if equipped), shoulder
belt height adjusters (if equipped), shoulder belt guide on seatback (if
equipped), child safety seat LATCH and tether anchors, and attaching
hardware, should be inspected after a collision. Ford Motor Company
recommends that all safety belt assemblies in use in vehicles involved in
a collision be replaced. However, if the collision was minor and a
qualified technician finds that the belts do not show damage and
continue to operate properly, they do not need to be replaced. Safety
belt assemblies not in use during a collision should also be inspected and
replaced if either damage or improper operation is noted.
Failure to inspect and if necessary replace the safety belt
assembly under the above conditions could result in severe
personal injuries in the event of a collision.
Refer toInteriorin theCleaningchapter.
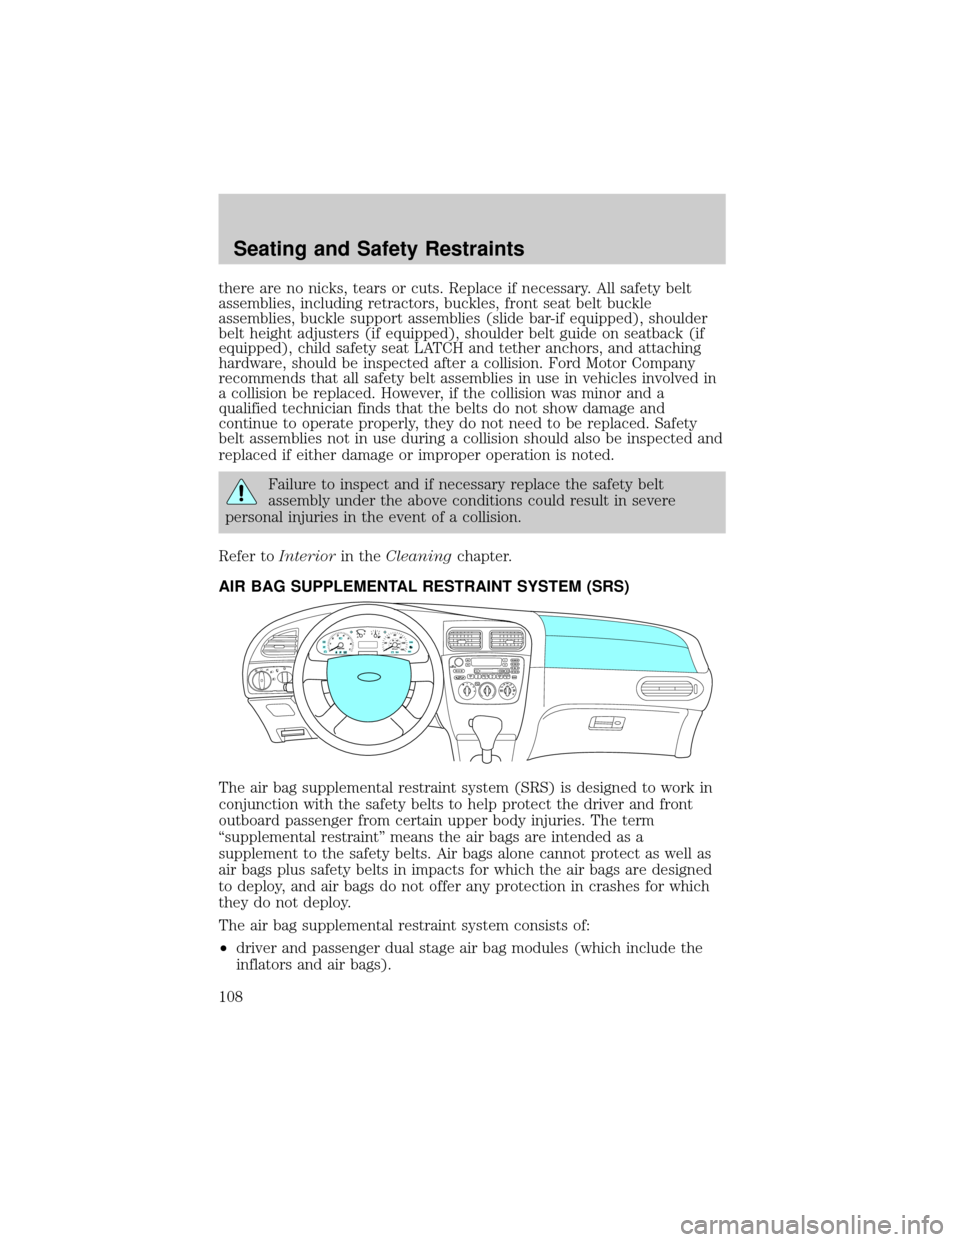
AIR BAG SUPPLEMENTAL RESTRAINT SYSTEM (SRS)
The air bag supplemental restraint system (SRS) is designed to work in
conjunction with the safety belts to help protect the driver and front
outboard passenger from certain upper body injuries. The term
ªsupplemental restraintº means the air bags are intended as a
supplement to the safety belts. Air bags alone cannot protect as well as
air bags plus safety belts in impacts for which the air bags are designed
to deploy, and air bags do not offer any protection in crashes for which
they do not deploy.
The air bag supplemental restraint system consists of:
²driver and passenger dual stage air bag modules (which include the
inflators and air bags).
Seating and Safety Restraints
108
Page 221 of 248
3.65:Indicates the aspect ratio which gives the tire's ratio of height to
width.
4.R:Indicates a ªradialº type tire.
5.15:Indicates the wheel or rim diameter in inches. If you change your
wheel size, you will have to purchase new tires to match the new wheel
diameter.
6.95:Indicates the tire's load index. It is an index that relates to how
much weight a tire can carry. You may find this information in your
owner's guide. If not, contact a local tire dealer.
Note:You may not find this information on all tires because it is not
required by federal law.
7.H:Indicates the tire's speed rating. The speed rating denotes the
speed at which a tire is designed to be driven for extended periods of
time under a standard condition of load and inflation pressure. The tires
on your vehicle may operate at different conditions for load and inflation
pressure. These speed ratings may need to be adjusted for the difference
in conditions. The ratings range from 99 mph (159 km/h) to 186 mph
(299 km/h). These ratings are listed in the following chart.
Note:You may not find this information on all tires because it is not
required by federal law.
Letter rating Speed rating - mph (km/h)
Q 99 mph (159 km/h)
R 106 mph (171 km/h)
S 112 mph (180 km/h)
T 118 mph (190 km/h)
U 124 mph (200 km/h)
H 130 mph (210 km/h)
V 149 mph (240 km/h)
W 168 mph (270 km/h)
Y 186 mph (299 km/h)
Note:For tires with a maximum speed capability over 149 mph
(240 km/h), tire manufacturers sometimes use the letters ZR. For
those with a maximum speed capability over 186 mph (299 km/h), tire
manufacturers always use the letters ZR.
8.U.S. DOT Tire Identification Number (TIN):This begins with the
letters ªDOTº and indicates that the tire meets all federal standards. The
Maintenance and Specifications
221
Page 224 of 248
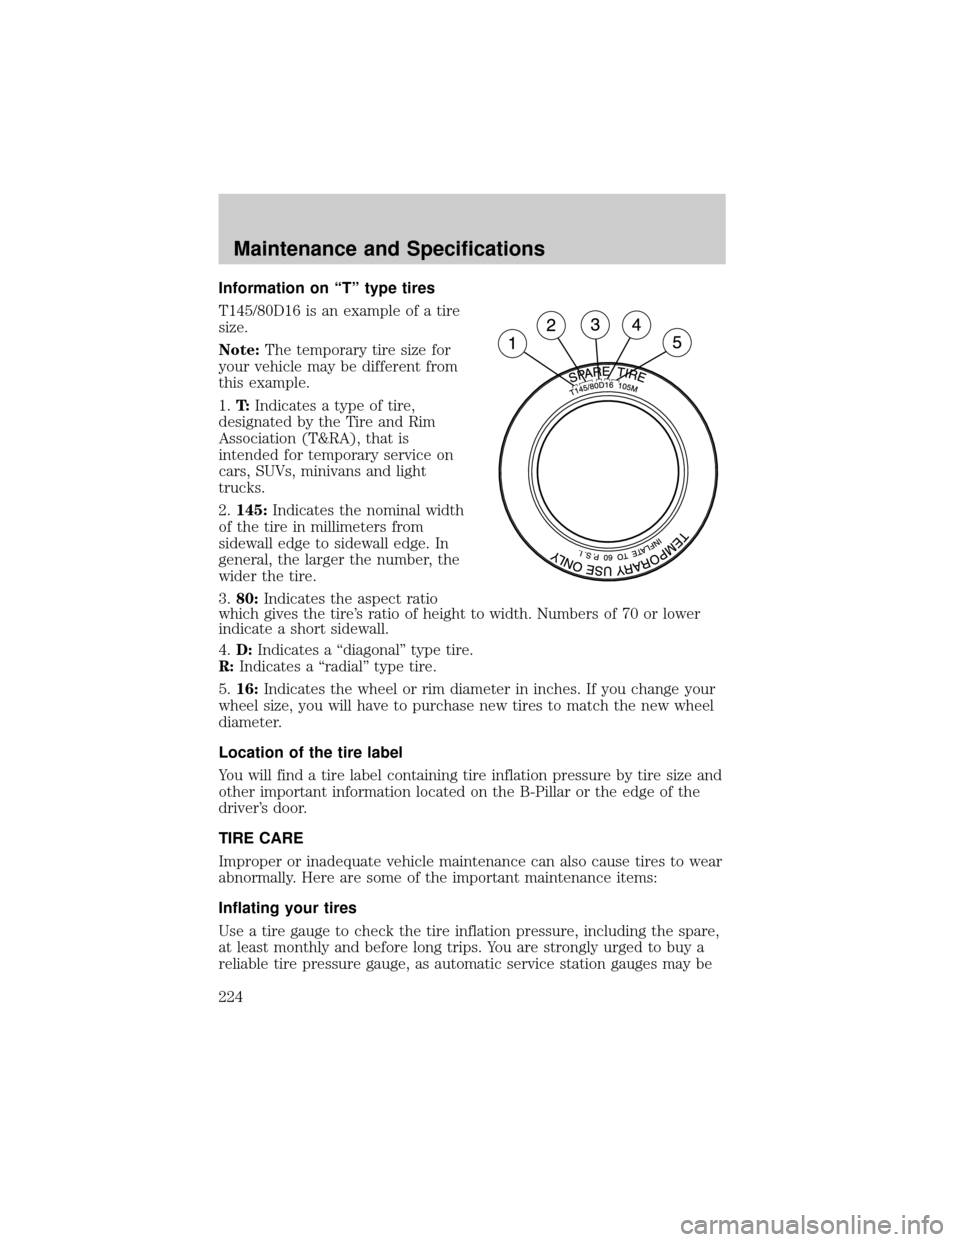
Information on ªTº type tires
T145/80D16 is an example of a tire
size.
Note:The temporary tire size for
your vehicle may be different from
this example.
1.T:Indicates a type of tire,
designated by the Tire and Rim
Association (T&RA), that is
intended for temporary service on
cars, SUVs, minivans and light
trucks.
2.145:Indicates the nominal width
of the tire in millimeters from
sidewall edge to sidewall edge. In
general, the larger the number, the
wider the tire.
3.80:Indicates the aspect ratio
which gives the tire's ratio of height to width. Numbers of 70 or lower
indicate a short sidewall.
4.D:Indicates a ªdiagonalº type tire.
R:Indicates a ªradialº type tire.
5.16:Indicates the wheel or rim diameter in inches. If you change your
wheel size, you will have to purchase new tires to match the new wheel
diameter.
Location of the tire label
You will find a tire label containing tire inflation pressure by tire size and
other important information located on the B-Pillar or the edge of the
driver's door.
TIRE CARE
Improper or inadequate vehicle maintenance can also cause tires to wear
abnormally. Here are some of the important maintenance items:
Inflating your tires
Use a tire gauge to check the tire inflation pressure, including the spare,
at least monthly and before long trips. You are strongly urged to buy a
reliable tire pressure gauge, as automatic service station gauges may be
Maintenance and Specifications
224
Page 236 of 248
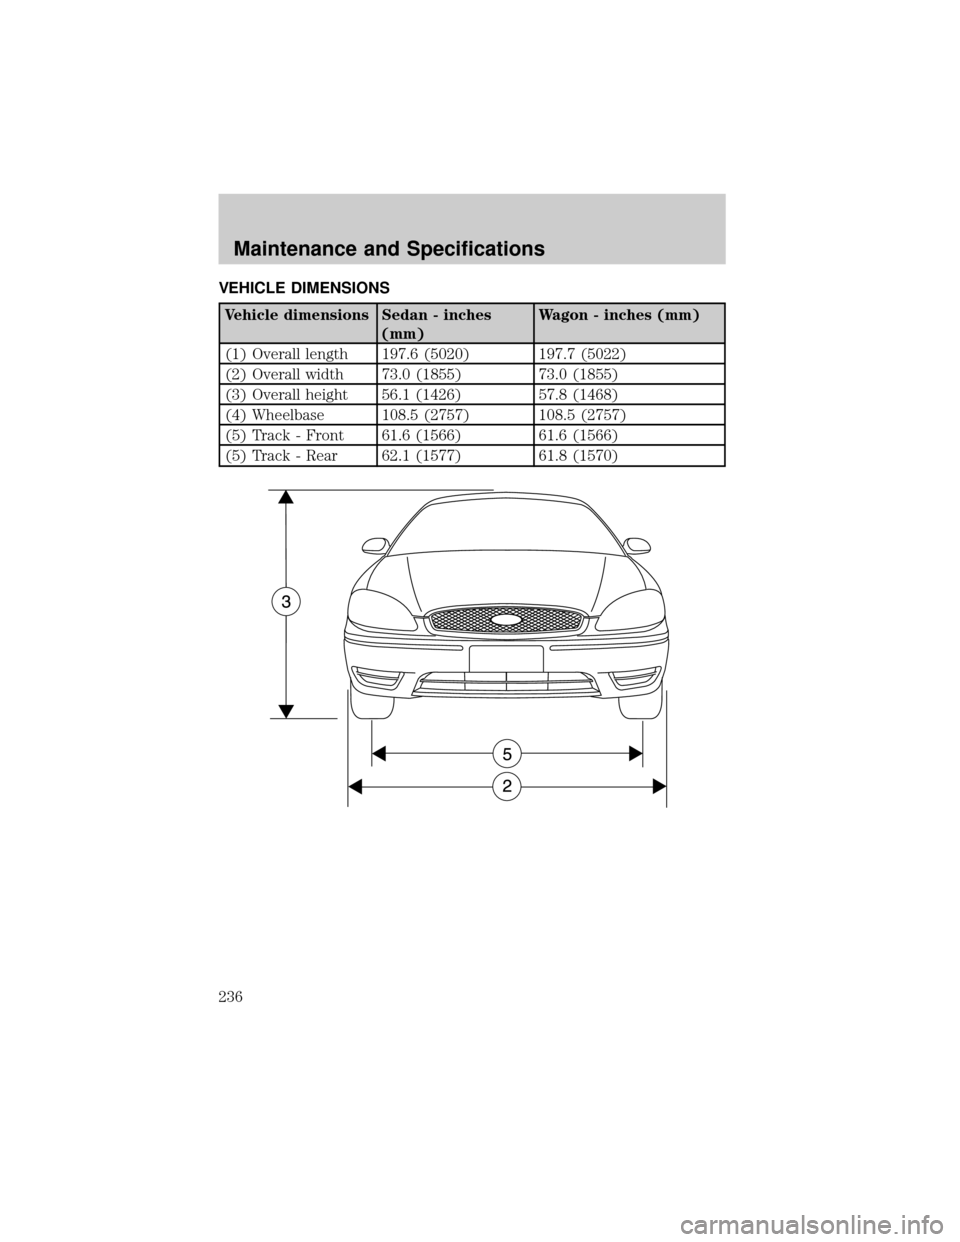
VEHICLE DIMENSIONS
Vehicle dimensions Sedan - inches
(mm)Wagon - inches (mm)
(1) Overall length 197.6 (5020) 197.7 (5022)
(2) Overall width 73.0 (1855) 73.0 (1855)
(3) Overall height 56.1 (1426) 57.8 (1468)
(4) Wheelbase 108.5 (2757) 108.5 (2757)
(5) Track - Front 61.6 (1566) 61.6 (1566)
(5) Track - Rear 62.1 (1577) 61.8 (1570)
Maintenance and Specifications
236