Page 43 of 248
Replacing license plate lamp bulbs
Wagon
1. Make sure headlamp switch is in
OFF position and remove screw and
the license plate lamp assembly
from liftgate.
2. Remove bulb socket by turning
counterclockwise.
3. Carefully pull the bulb out from
the socket and push in the new
bulb.
4. Install the lamp assembly on
liftgate with screw.
Sedan
1. Make sure headlamp switch is in
OFF position and remove two
screws, grommets and the license
plate lamp assembly from the trunk
lid.
2. Carefully pull the bulb from the
socket and push in the new bulb.
3. Install the lamp assembly on
trunk lid with two grommets,
ensuring the grommets are pushed all the way in to the trunk lid and
secure with two screws.
Lights
43
Page 44 of 248

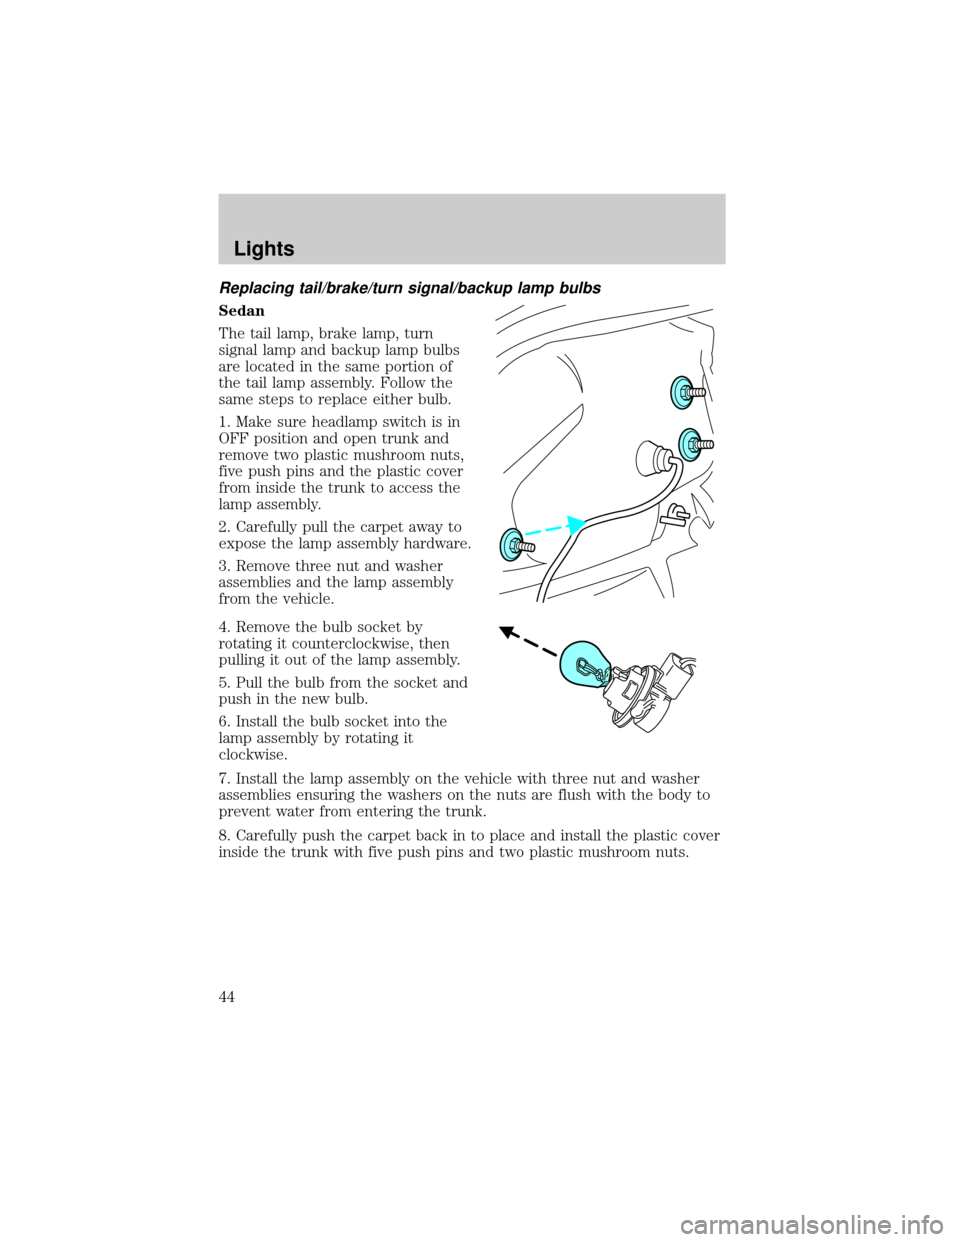
Replacing tail/brake/turn signal/backup lamp bulbs
Sedan
The tail lamp, brake lamp, turn
signal lamp and backup lamp bulbs
are located in the same portion of
the tail lamp assembly. Follow the
same steps to replace either bulb.
1. Make sure headlamp switch is in
OFF position and open trunk and
remove two plastic mushroom nuts,
five push pins and the plastic cover
from inside the trunk to access the
lamp assembly.
2. Carefully pull the carpet away to
expose the lamp assembly hardware.
3. Remove three nut and washer
assemblies and the lamp assembly
from the vehicle.
4. Remove the bulb socket by
rotating it counterclockwise, then
pulling it out of the lamp assembly.
5. Pull the bulb from the socket and
push in the new bulb.
6. Install the bulb socket into the
lamp assembly by rotating it
clockwise.
7. Install the lamp assembly on the vehicle with three nut and washer
assemblies ensuring the washers on the nuts are flush with the body to
prevent water from entering the trunk.
8. Carefully push the carpet back in to place and install the plastic cover
inside the trunk with five push pins and two plastic mushroom nuts.
Lights
44
Page 45 of 248
Wagon
The tail lamp/turn lamp
bulbs/brake/backup are located in
the same portion of the tail lamp
assembly, one just below the other.
Follow the same steps to replace
either bulb:
1. Make sure headlamp switch is in
OFF position and open the liftgate
to expose the lamp assemblies.
2. Remove the two bolts from the
tail lamp assembly.
3. Carefully pull the lamp assembly
from the tailgate.
4. Twist the bulb socket
counterclockwise and remove from
lamp assembly.
5. Pull the bulb straight out of the
socket and push in the new bulb.
6. Install bulb socket in lamp assembly by turning clockwise.
7. Carefully install the tail lamp assembly on tailgate and secure with two
bolts.
Lights
45
Page 47 of 248
Changing the wiper blades
1. Pull the wiper arm away from the
vehicle. Turn the blade at an angle
from the wiper arm. Push the lock
pin manually to release the blade
and pull the wiper blade down
toward the windshield to remove it
from the arm.
2. Attach the new wiper to the
wiper arm and press it into place
until a click is heard.
3. Replace wiper blades every 6
months for optimum performance.
TILT STEERING WHEEL
To adjust the steering wheel:
1. Pull and hold the steering wheel
release control toward you.
2. Move the steering wheel up or
down until you find the desired
location.
3. Release the steering wheel
release control. This will lock the
steering wheel in position.
Never adjust the steering wheel when the vehicle is moving.
Driver Controls
47
Page 49 of 248
Press and hold the bottom part of
the rocker switch to open the
window. Press and hold the top part
of the rocker switch to close the
window.
One touch down
Allows the driver's window to open
fully without holding the control
down. Press completely down on
AUTO and release quickly. Press
again to stop.
Window lock
The window lock feature allows only
the driver to operate the power
windows.
To lock out all the window controls
except for the driver's press the left
side of the control. Press the right
side to restore the window controls.
Accessory delay (if equipped)
With accessory delay, the window switches may be used for up to ten
minutes after the ignition switch is turned to the OFF position or until
any door is opened.
Driver Controls
49
Page 50 of 248

MIRRORS
Automatic dimming inside rear view mirror (if equipped)
Your vehicle is equipped with an inside rear view mirror which has an
auto-dimming function. The electronic day/night mirror will automatically
change from the normal, clear state to the darkened, non-glare state
when bright light (glare) reaches the mirror from behind the vehicle at
night.
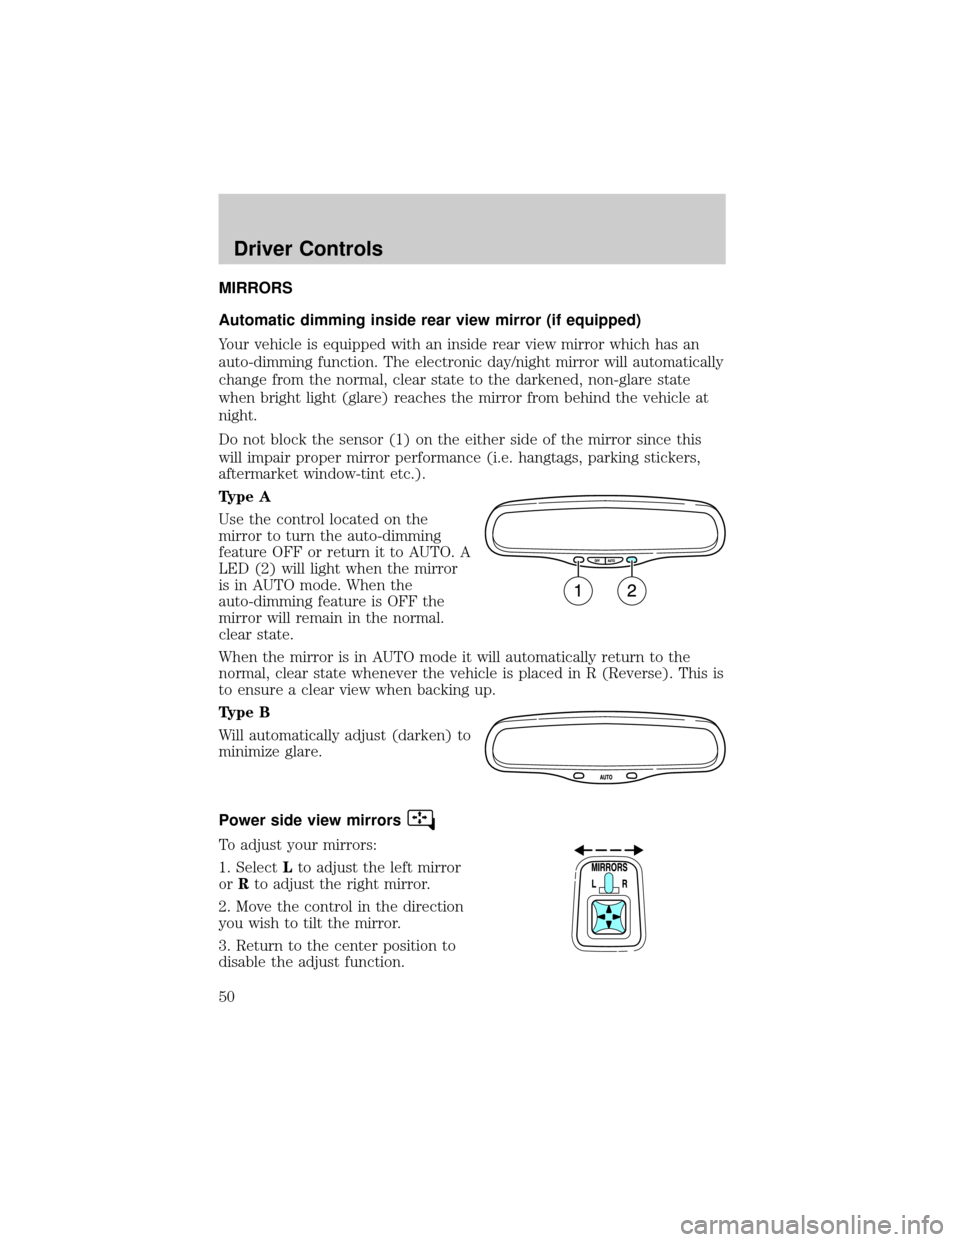
Do not block the sensor (1) on the either side of the mirror since this
will impair proper mirror performance (i.e. hangtags, parking stickers,
aftermarket window-tint etc.).
Type A
Use the control located on the
mirror to turn the auto-dimming
feature OFF or return it to AUTO. A
LED (2) will light when the mirror
is in AUTO mode. When the
auto-dimming feature is OFF the
mirror will remain in the normal.
clear state.
When the mirror is in AUTO mode it will automatically return to the
normal, clear state whenever the vehicle is placed in R (Reverse). This is
to ensure a clear view when backing up.
Type B
Will automatically adjust (darken) to
minimize glare.
Power side view mirrors
To adjust your mirrors:
1. SelectLto adjust the left mirror
orRto adjust the right mirror.
2. Move the control in the direction
you wish to tilt the mirror.
3. Return to the center position to
disable the adjust function.
Driver Controls
50
Page 55 of 248

with a single built-in device. This feature will learn the radio frequency
codes of most transmitters to operate garage doors, entry gate operators,
security systems, entry door locks, and home or office lighting.
When programming your HomeLinktWireless Control System to
a garage door or gate, be sure that people and objects are out of
the way to prevent potential harm or damage.
Do not use the HomeLinktWireless Control System with any garage
door opener that lacks safety stop and reverse features as required by
U.S. federal safety standards (this includes any garage door opener
model manufactured before April 1, 1982). A garage door which cannot
detect an object, signaling the door to stop and reverse, does not meet
current U.S. federal safety standards. For more information, contact
HomeLinktat:www.homelink.comor1±800±355±3515.
Retain the original transmitter for use in other vehicles as well as for
future programming procedures (i.e. new HomeLinktequipped vehicle
purchase). It is also suggested that upon the sale of the vehicle, the
programmed Homelinktbuttons be erased for security purposes, refer to
Programmingin this section.
Programming
Do not program HomeLinktwith the vehicle parked in the garage.
Note:Your vehicle may require the ignition switch to be turned to the
ACC position for programming and/or operation of the HomeLinkt.Itis
also recommended that a new battery be placed in the hand-held
transmitter of the device being programmed to HomeLinktfor quicker
training and accurate transmission of the radio-frequency signal.
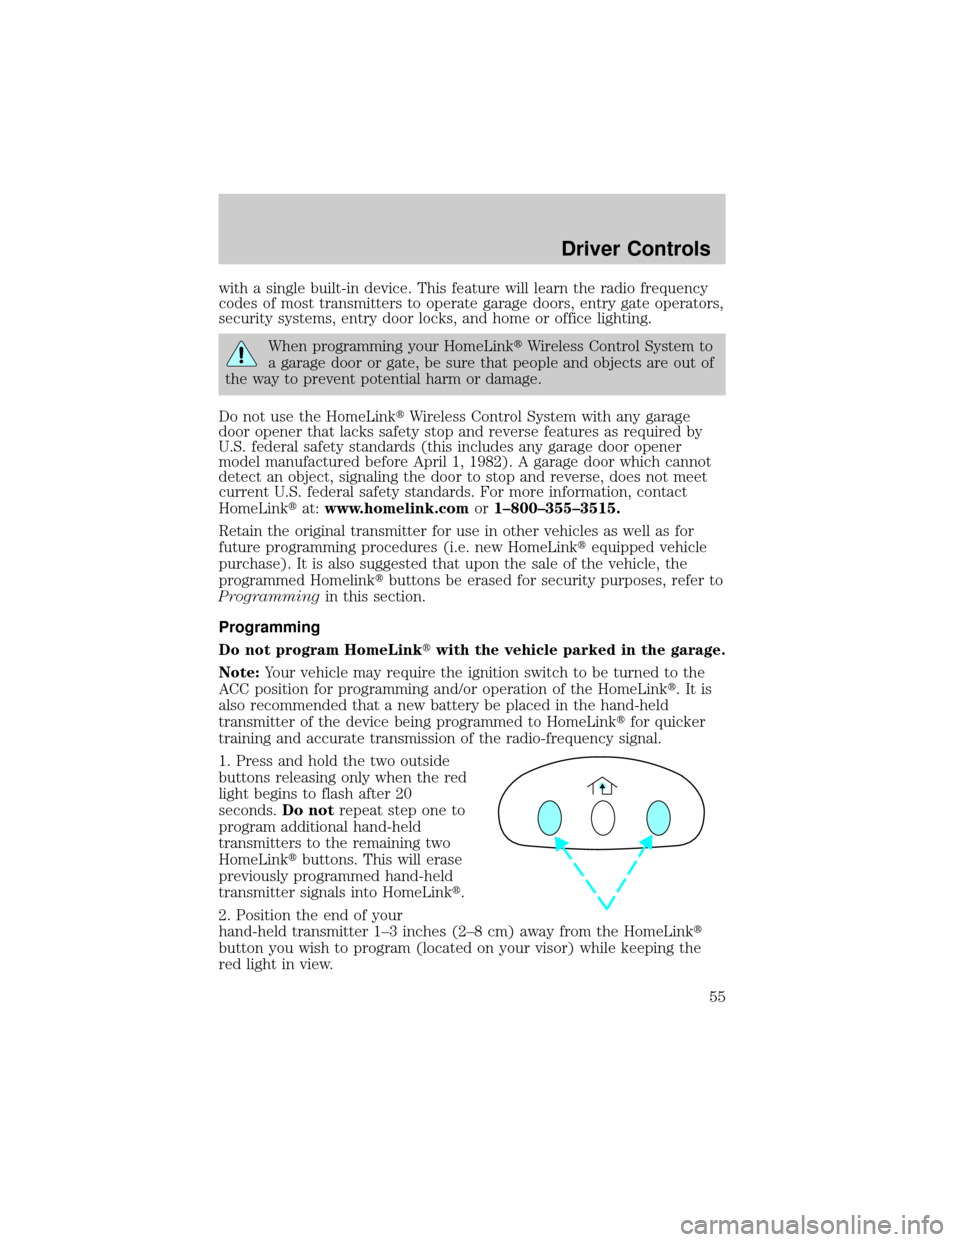
1. Press and hold the two outside
buttons releasing only when the red
light begins to flash after 20
seconds.Do notrepeat step one to
program additional hand-held
transmitters to the remaining two
HomeLinktbuttons. This will erase
previously programmed hand-held
transmitter signals into HomeLinkt.
2. Position the end of your
hand-held transmitter 1±3 inches (2±8 cm) away from the HomeLinkt
button you wish to program (located on your visor) while keeping the
red light in view.
Driver Controls
55
Page 57 of 248

Gate Operator & Canadian Programming
During programming, your
hand-held transmitter may
automatically stop transmitting Ð
not allowing enough time for
HomeLinktto accept the signal
from the hand-held transmitter.
After completing steps 1 and 2
outlined in theªProgrammingº
section, replace step 3 with the following:
Note:If programming a garage door opener or gate operator, it is
advised to unplug the device during the ªcyclingº process to prevent
overheating.
²Continue to press and hold the HomeLinktbutton (note step 3 in the
ªProgrammingº section) while you press and release Ðevery two
seconds(ªcycleº) your hand-held transmitter until the frequency
signal has been accepted by the HomeLinkt. The indicator light will
flash slowly and then rapidly after HomeLinktaccepts the radio
frequency signal.
²Proceed with step 4 in the ªProgrammingº section.
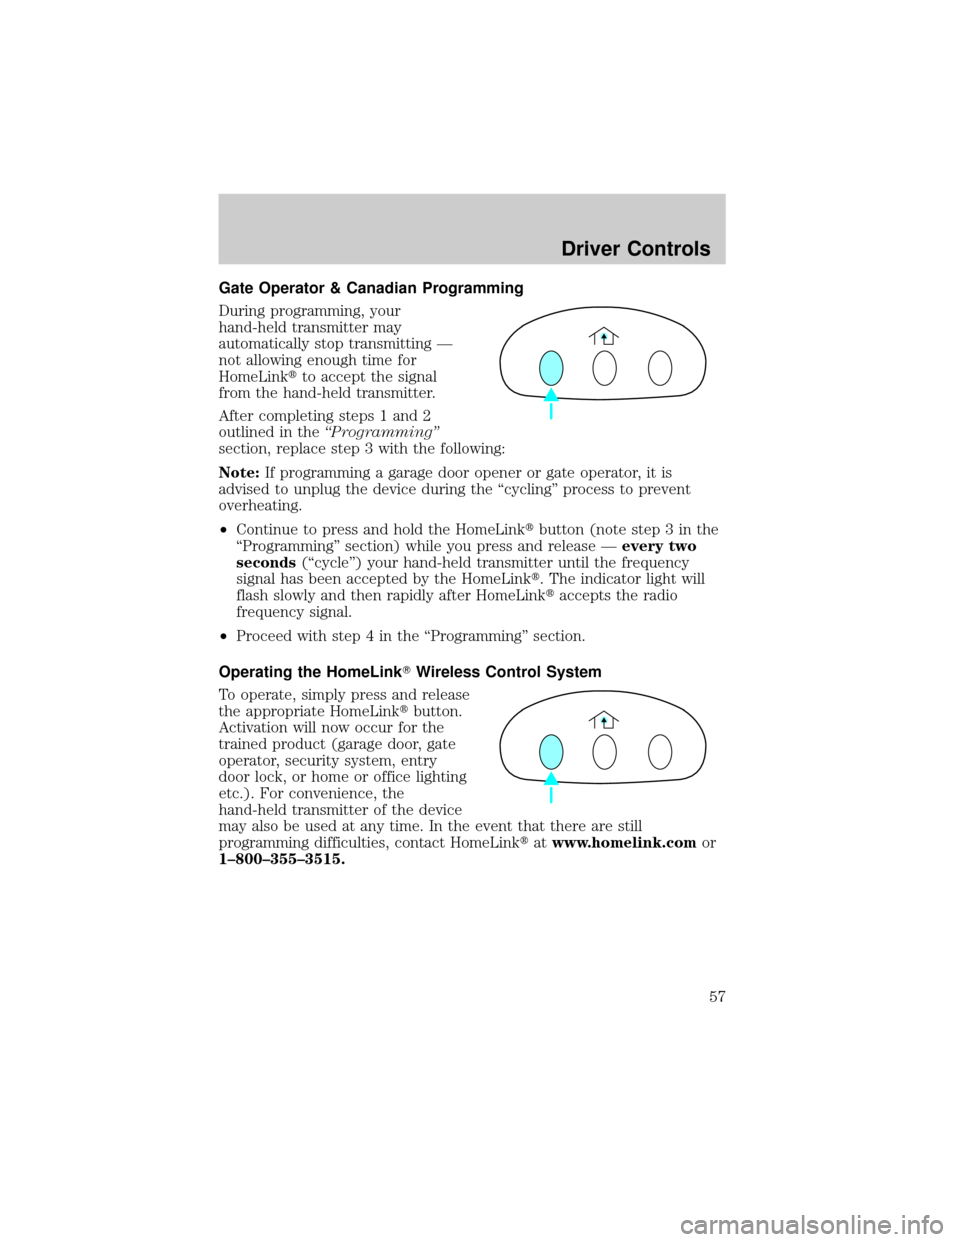
Operating the HomeLinkTWireless Control System
To operate, simply press and release
the appropriate HomeLinktbutton.
Activation will now occur for the
trained product (garage door, gate
operator, security system, entry
door lock, or home or office lighting
etc.). For convenience, the
hand-held transmitter of the device
may also be used at any time. In the event that there are still
programming difficulties, contact HomeLinktatwww.homelink.comor
1±800±355±3515.
Driver Controls
57