2005 FORD FREESTYLE key battery
[x] Cancel search: key batteryPage 95 of 288

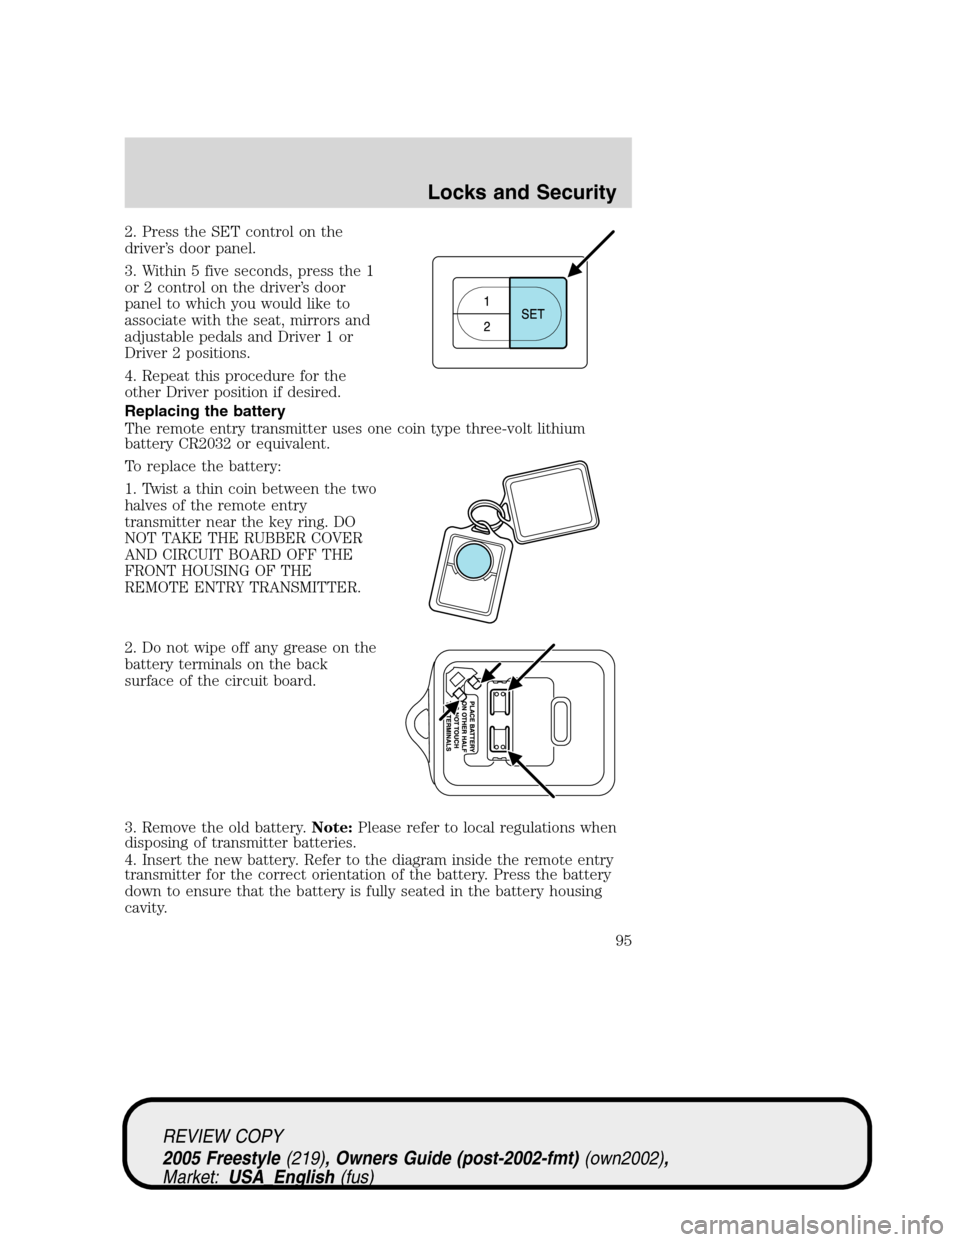
2. Press the SET control on the
driver’s door panel.
3. Within 5 five seconds, press the 1
or 2 control on the driver’s door
panel to which you would like to
associate with the seat, mirrors and
adjustable pedals and Driver 1 or
Driver 2 positions.
4. Repeat this procedure for the
other Driver position if desired.
Replacing the battery
The remote entry transmitter uses one coin type three-volt lithium
battery CR2032 or equivalent.
To replace the battery:
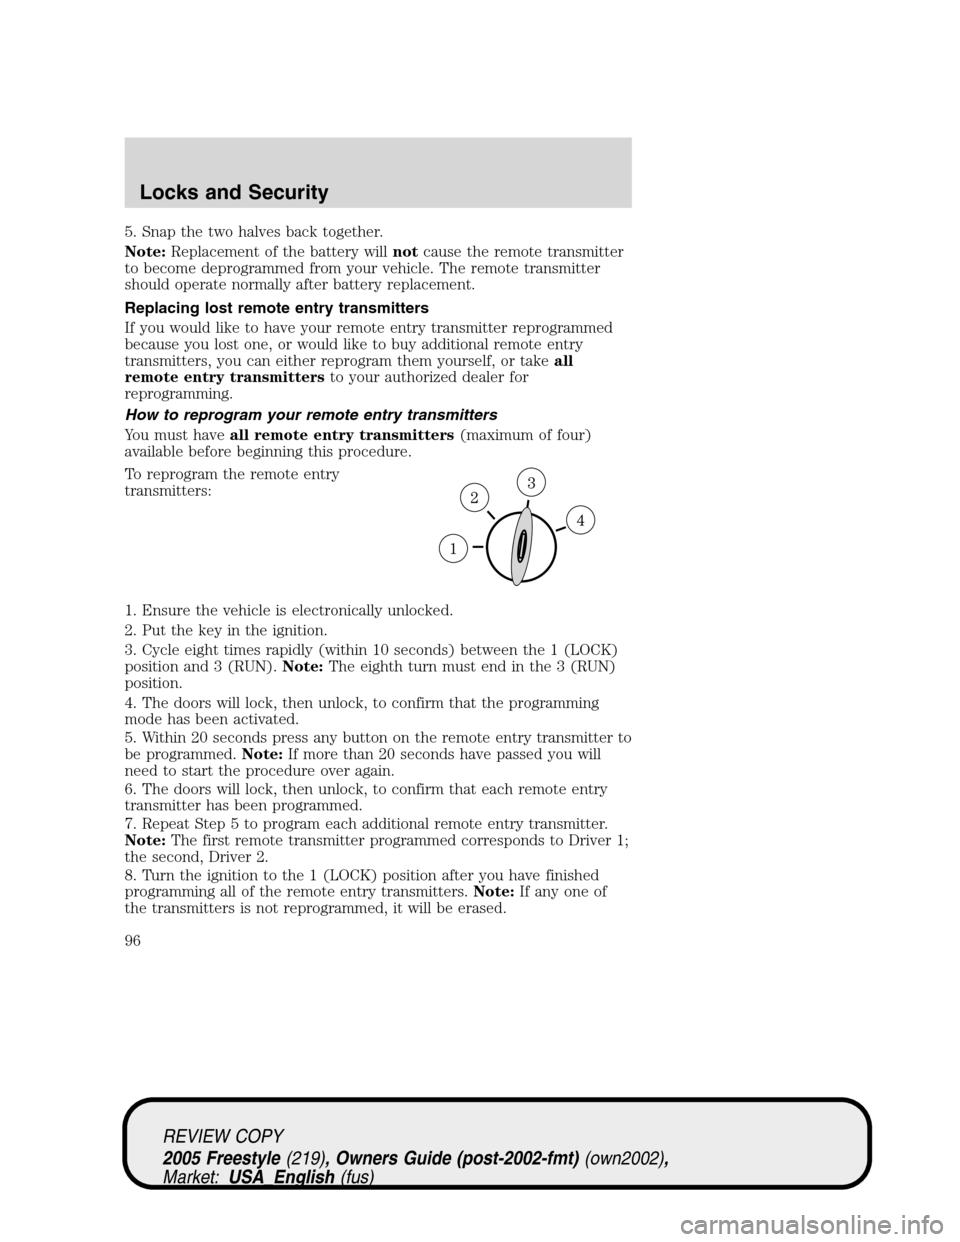
1. Twist a thin coin between the two
halves of the remote entry
transmitter near the key ring. DO
NOT TAKE THE RUBBER COVER
AND CIRCUIT BOARD OFF THE
FRONT HOUSING OF THE
REMOTE ENTRY TRANSMITTER.
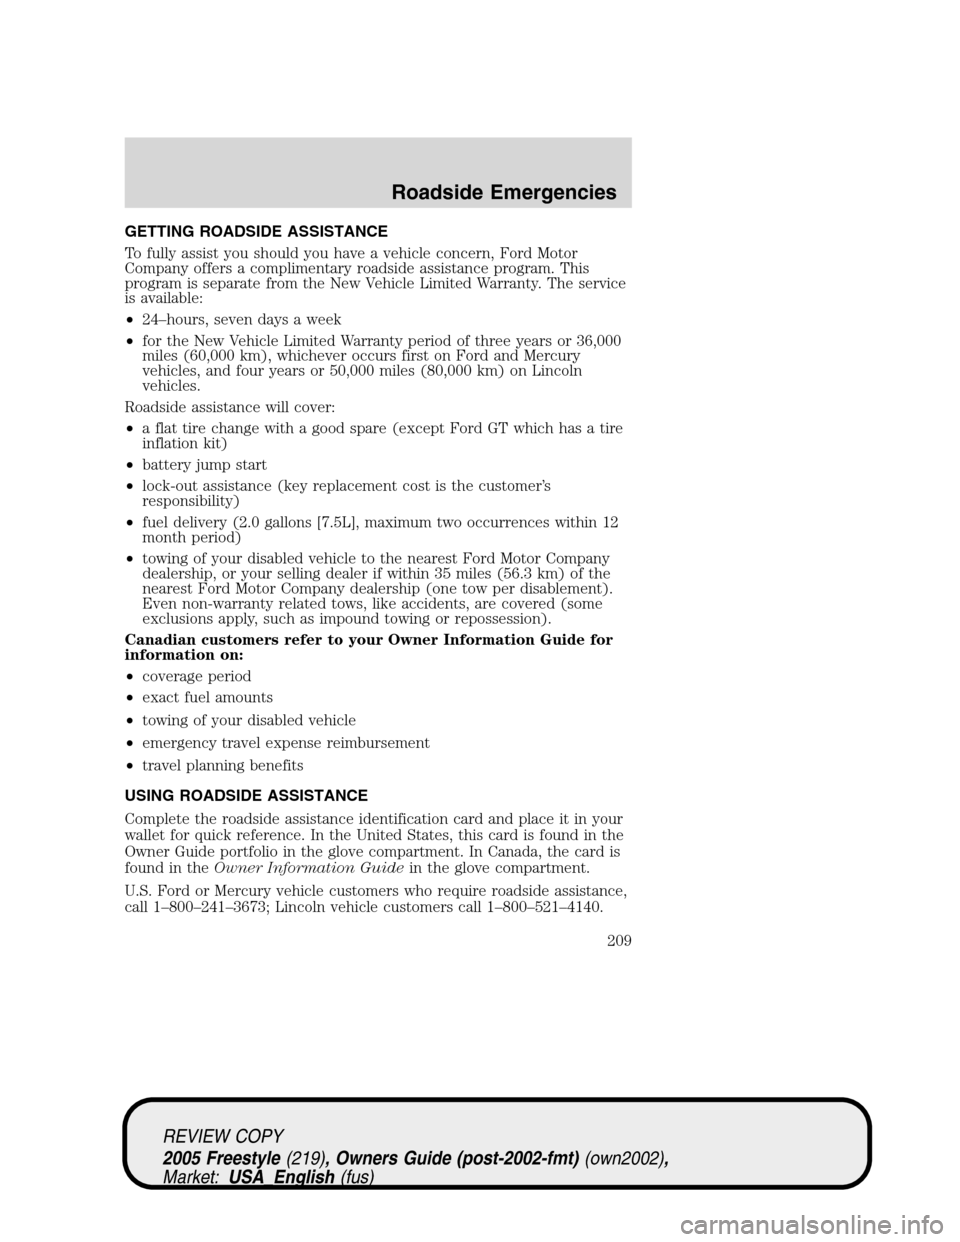
2. Do not wipe off any grease on the
battery terminals on the back
surface of the circuit board.
3. Remove the old battery.Note:Please refer to local regulations when
disposing of transmitter batteries.
4. Insert the new battery. Refer to the diagram inside the remote entry
transmitter for the correct orientation of the battery. Press the battery
down to ensure that the battery is fully seated in the battery housing
cavity.
REVIEW COPY
2005 Freestyle(219), Owners Guide (post-2002-fmt)(own2002),
Market:USA_English(fus)
Locks and Security
95
Page 96 of 288

5. Snap the two halves back together.
Note:Replacement of the battery willnotcause the remote transmitter
to become deprogrammed from your vehicle. The remote transmitter
should operate normally after battery replacement.
Replacing lost remote entry transmitters
If you would like to have your remote entry transmitter reprogrammed
because you lost one, or would like to buy additional remote entry
transmitters, you can either reprogram them yourself, or takeall
remote entry transmittersto your authorized dealer for
reprogramming.
How to reprogram your remote entry transmitters
You must haveall remote entry transmitters(maximum of four)
available before beginning this procedure.
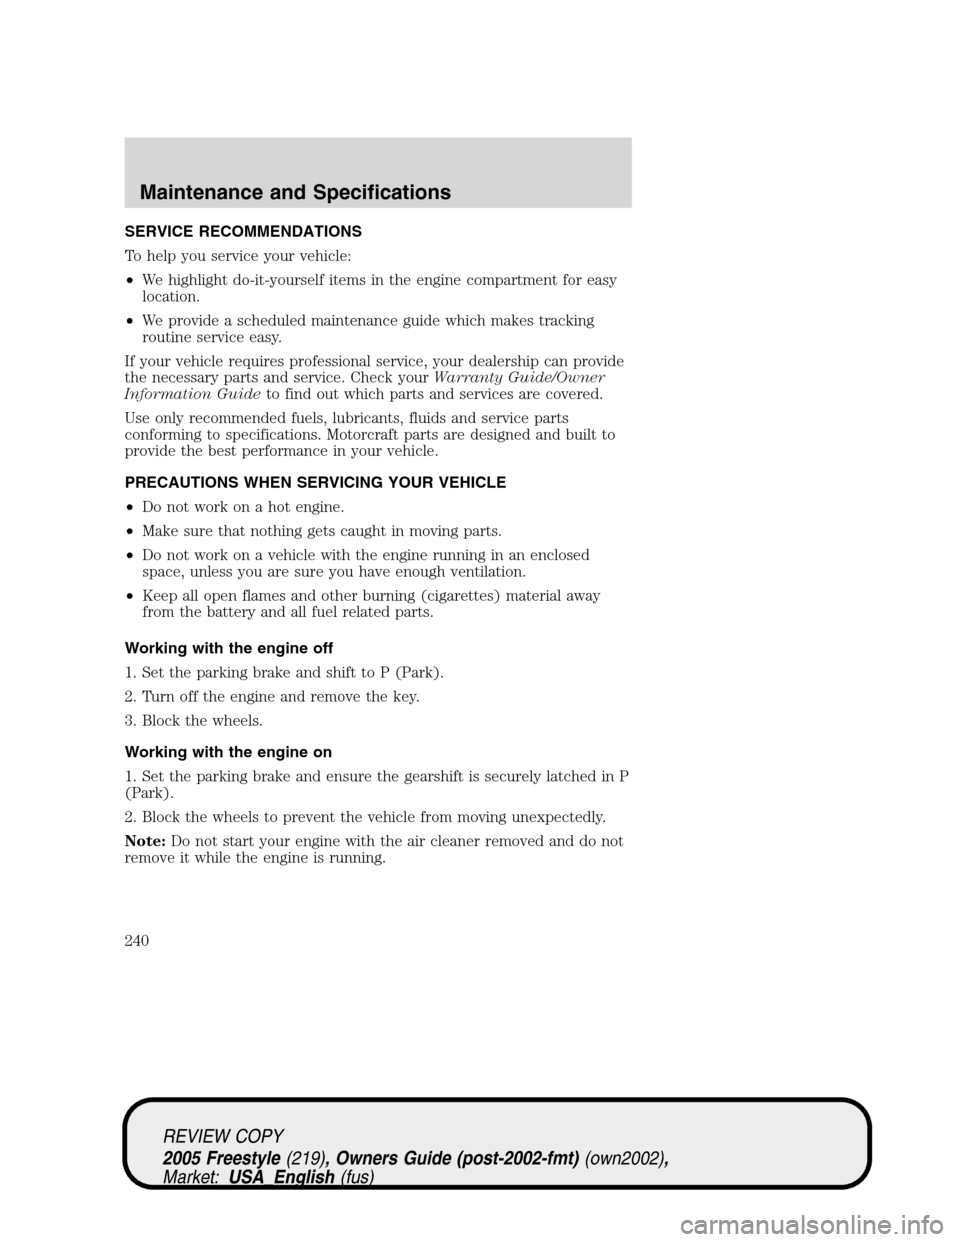
To reprogram the remote entry
transmitters:
1. Ensure the vehicle is electronically unlocked.
2. Put the key in the ignition.
3. Cycle eight times rapidly (within 10 seconds) between the 1 (LOCK)
position and 3 (RUN).Note:The eighth turn must end in the 3 (RUN)
position.
4. The doors will lock, then unlock, to confirm that the programming
mode has been activated.
5. Within 20 seconds press any button on the remote entry transmitter to
be programmed.Note:If more than 20 seconds have passed you will
need to start the procedure over again.
6. The doors will lock, then unlock, to confirm that each remote entry
transmitter has been programmed.
7. Repeat Step 5 to program each additional remote entry transmitter.
Note:The first remote transmitter programmed corresponds to Driver 1;
the second, Driver 2.
8. Turn the ignition to the 1 (LOCK) position after you have finished
programming all of the remote entry transmitters.Note:If any one of
the transmitters is not reprogrammed, it will be erased.
REVIEW COPY
2005 Freestyle(219), Owners Guide (post-2002-fmt)(own2002),
Market:USA_English(fus)
Locks and Security
96
Page 97 of 288

9. The doors will lock, then unlock, to confirm that the programming
mode has been exited.
Illuminated entry
The interior lamps illuminate when the remote entry system, the keyless
entry system keypad (if equipped) or the door lock cylinder (on vehicles
equipped with the perimeter alarm system) is used to unlock the
door(s).
The illuminated entry system will turn off the interior lights if:
•the ignition is turned to the 3 (RUN) position, or
•the remote transmitter lock control is pressed, or
•after 25 seconds of illumination.
The inside lights will not turn off if:
•they have been turned on with the dimmer control, or
•any door is open.
Battery saver
The battery saver will shut off the interior lamps 30 minutes after the
ignition has been turned to the 1 (LOCK) position.
•If the dome lamps were turned on using the panel dimmer control, the
battery saver will shut off them off 30 minutes after the ignition has
been turned to the 1 (LOCK) position.
•If the courtesy lamps were turned on because one of the vehicle doors
was opened, the battery saver will shut off them off 10 minutes after
the ignition has been turned to the 1 (LOCK) position.
•The battery saver will shut off the headlamps and foglamps 10
minutes after the ignition has been turned to the 1 (LOCK) position.
Illuminated exit
•When all vehicle doors and the liftgate are closed, and the key is
removed from the ignition, the interior dome lamps (and the exterior
mirror puddle lamps, if equipped) will illuminate.
The lights will turn off if all the doors and the liftgate remain closed and
•25 seconds elapse, or
•the key is inserted in the ignition.
REVIEW COPY
2005 Freestyle(219), Owners Guide (post-2002-fmt)(own2002),
Market:USA_English(fus)
Locks and Security
97
Page 209 of 288

GETTING ROADSIDE ASSISTANCE
To fully assist you should you have a vehicle concern, Ford Motor
Company offers a complimentary roadside assistance program. This
program is separate from the New Vehicle Limited Warranty. The service
is available:
•24–hours, seven days a week
•for the New Vehicle Limited Warranty period of three years or 36,000
miles (60,000 km), whichever occurs first on Ford and Mercury
vehicles, and four years or 50,000 miles (80,000 km) on Lincoln
vehicles.
Roadside assistance will cover:
•a flat tire change with a good spare (except Ford GT which has a tire
inflation kit)
•battery jump start
•lock-out assistance (key replacement cost is the customer’s
responsibility)
•fuel delivery (2.0 gallons [7.5L], maximum two occurrences within 12
month period)
•towing of your disabled vehicle to the nearest Ford Motor Company
dealership, or your selling dealer if within 35 miles (56.3 km) of the
nearest Ford Motor Company dealership (one tow per disablement).
Even non-warranty related tows, like accidents, are covered (some
exclusions apply, such as impound towing or repossession).
Canadian customers refer to your Owner Information Guide for
information on:
•coverage period
•exact fuel amounts
•towing of your disabled vehicle
•emergency travel expense reimbursement
•travel planning benefits
USING ROADSIDE ASSISTANCE
Complete the roadside assistance identification card and place it in your
wallet for quick reference. In the United States, this card is found in the
Owner Guide portfolio in the glove compartment. In Canada, the card is
found in theOwner Information Guidein the glove compartment.
U.S. Ford or Mercury vehicle customers who require roadside assistance,
call 1–800–241–3673; Lincoln vehicle customers call 1–800–521–4140.
REVIEW COPY
2005 Freestyle(219), Owners Guide (post-2002-fmt)(own2002),
Market:USA_English(fus)
Roadside Emergencies
Roadside Emergencies
209
Page 240 of 288

SERVICE RECOMMENDATIONS
To help you service your vehicle:
•We highlight do-it-yourself items in the engine compartment for easy
location.
•We provide a scheduled maintenance guide which makes tracking
routine service easy.
If your vehicle requires professional service, your dealership can provide
the necessary parts and service. Check yourWarranty Guide/Owner
Information Guideto find out which parts and services are covered.
Use only recommended fuels, lubricants, fluids and service parts
conforming to specifications. Motorcraft parts are designed and built to
provide the best performance in your vehicle.
PRECAUTIONS WHEN SERVICING YOUR VEHICLE
•Do not work on a hot engine.
•Make sure that nothing gets caught in moving parts.
•Do not work on a vehicle with the engine running in an enclosed
space, unless you are sure you have enough ventilation.
•Keep all open flames and other burning (cigarettes) material away
from the battery and all fuel related parts.
Working with the engine off
1. Set the parking brake and shift to P (Park).
2. Turn off the engine and remove the key.
3. Block the wheels.
Working with the engine on
1. Set the parking brake and ensure the gearshift is securely latched in P
(Park).
2. Block the wheels to prevent the vehicle from moving unexpectedly.
Note:Do not start your engine with the air cleaner removed and do not
remove it while the engine is running.
REVIEW COPY
2005 Freestyle(219), Owners Guide (post-2002-fmt)(own2002),
Market:USA_English(fus)
Maintenance and Specifications
Maintenance and Specifications
240