Page 1 of 312
Introduction 4
Instrument Cluster 12Warning and control lights 12
Gauges 16
Entertainment Systems 20AM/FM stereo 20
AM/FM stereo with CD 22
AM/FM stereo cassette with CD 25
AM/FM stereo with in-dash six CD 28
Climate Controls 33Heater only 33
Manual heating and air conditioning 34
Automatic temperature control 36
Lights 39Headlamps 39
Turn signal control 44
Bulb replacement 45
Driver Controls 54Windshield wiper/washer control 54
Steering wheel adjustment 55
Moon roof 56
Power windows 57
Mirrors 59
Speed control 62
Message center 66
Locks and Security 79Keys 79
Locks 79Table of Contents
1
2005 F250/350/450/550 (f23)
Owners Guide (post-2002-fmt)
USA_English (fus)Table of Contents
Page 10 of 312
These are some of the symbols you may see on your vehicle.
Vehicle Symbol Glossary
Safety Alert See Owner’s Guide
Fasten Safety Belt Air Bag-Front
Air Bag-Side Child Seat
Child Seat Installation
Warning Child Seat Lower
Anchor
Child Seat Tether
Anchor Brake System
Anti-Lock Brake System Brake Fluid -
Non-Petroleum Based
Powertrain Malfunction Speed Control
Master Lighting Switch Hazard Warning Flasher
Fog Lamps-Front Fuse Compartment
Fuel Pump Reset Windshield Wash/Wipe
Windshield
Defrost/Demist Rear Window
Defrost/Demist
2005 F250/350/450/550 (f23)
Owners Guide (post-2002-fmt)
USA_English (fus)Introduction
10
Page 11 of 312
Vehicle Symbol Glossary
Power Windows
Front/Rear Power Window Lockout
Child Safety Door
Lock/Unlock Interior Luggage
Compartment Release
Symbol
Panic Alarm Engine Oil
Engine Coolant Engine Coolant
Temperature
Do Not Open When Hot Battery
Avoid Smoking, Flames,
or Sparks Battery Acid
Explosive Gas Fan Warning
Power Steering Fluid Maintain Correct Fluid
Level MAX
MIN
Emission System Engine Air Filter
Passenger Compartment
Air Filter Jack
Check fuel cap Low tire warning
2005 F250/350/450/550 (f23)
Owners Guide (post-2002-fmt)
USA_English (fus) Introduction
11
Page 34 of 312
To aid in side window defogging/demisting in cold weather:
1. Select .
2. Adjust the temperature control to maintain comfort.
3. Set the fan speed to the highest setting.
4. Direct the outer instrument panel vents toward the side windows.
To increase airflow to the outer instrument panel vents, close the vents
located in the middle of the instrument panel.
Do not place objects on top of the instrument panel as these
objects may become projectiles in a collision or sudden stop.
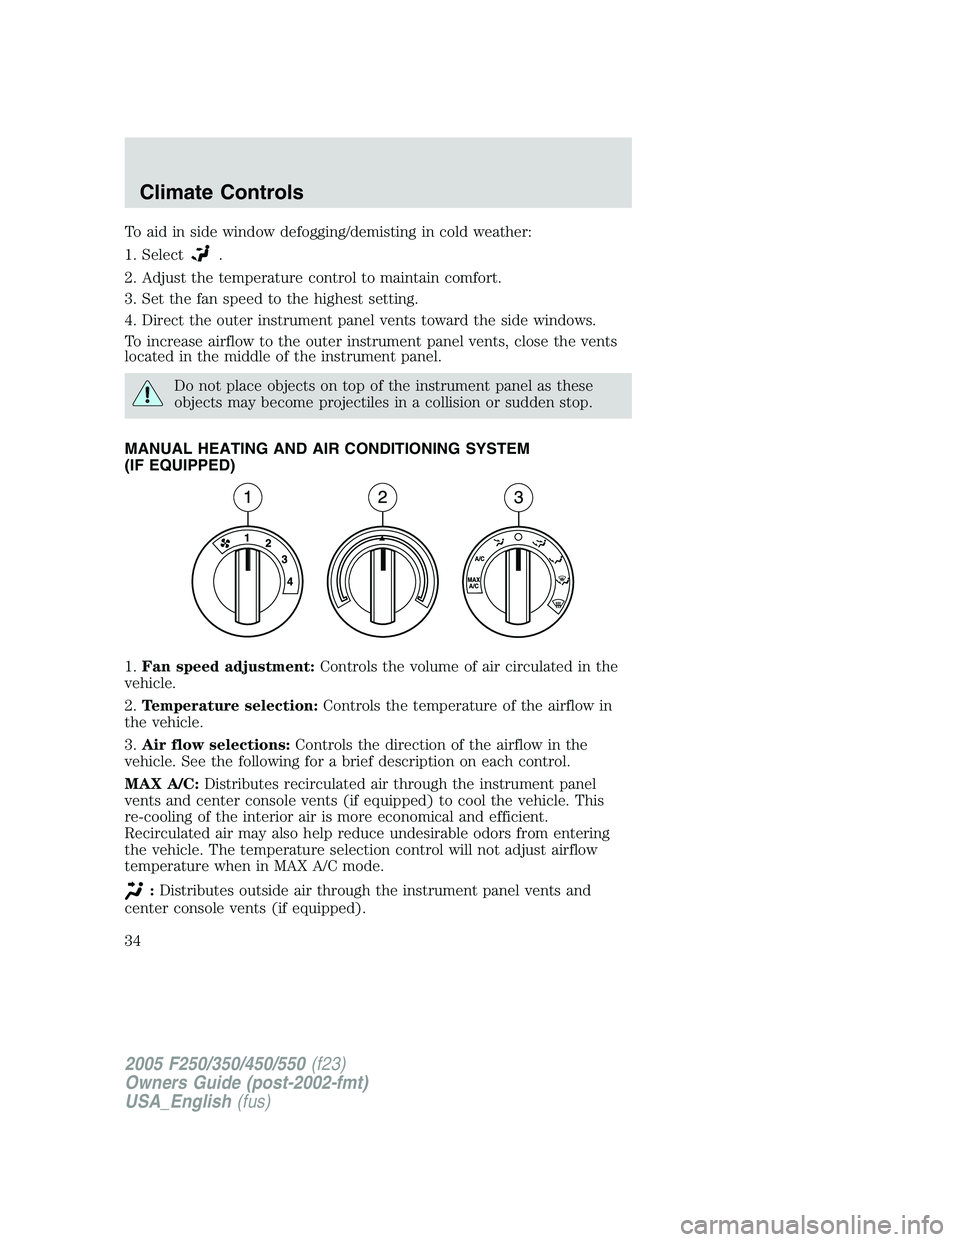
MANUAL HEATING AND AIR CONDITIONING SYSTEM
(IF EQUIPPED)
1. Fan speed adjustment: Controls the volume of air circulated in the
vehicle.
2. Temperature selection: Controls the temperature of the airflow in
the vehicle.
3. Air flow selections: Controls the direction of the airflow in the
vehicle. See the following for a brief description on each control.
MAX A/C: Distributes recirculated air through the instrument panel
vents and center console vents (if equipped) to cool the vehicle. This
re-cooling of the interior air is more economical and efficient.
Recirculated air may also help reduce undesirable odors from entering
the vehicle. The temperature selection control will not adjust airflow
temperature when in MAX A/C mode.
: Distributes outside air through the instrument panel vents and
center console vents (if equipped).
2005 F250/350/450/550 (f23)
Owners Guide (post-2002-fmt)
USA_English (fus)Climate Controls
34
Page 35 of 312
: Distributes outside air through the instrument panel vents, floor
vents and center console vents (if equipped).
O (OFF): Outside air is shut out and the climate system is turned off.
: Distributes outside air through the floor vents.
: Distributes outside air through the windshield defroster vents,
floor vents and demister vents.
: Distributes outside air through the windshield defroster vents and
demister vents.
Operating tips
• To reduce fog build up on the windshield during humid weather, place
the air flow selector in the position.
• To reduce humidity build up inside the vehicle, do not drive with the
air flow selector in the O (OFF) position.
• Do not put objects under the front seats that will interfere with the
airflow to the rear seats.
• Remove any snow, ice or leaves from the air intake area at the base of
the windshield.
• To improve the A/C cool down, drive with the windows slightly open
for 2–3 minutes after start up or until the vehicle has been “aired out.”
For maximum cooling performance (MAX A/C) in MAX A/C mode:
• Move the temperature control to the coolest setting.
• Set the fan to the highest speed initially, then adjust in order to
maintain comfort.
To aid in side window defogging and demisting in cold weather:
1. Select .
2. Select A/C.
3. Set the temperature control to maintain comfort.
4. Set the fan speed to highest setting.
5. Direct the outer instrument panel vents towards the side windows.
Do not place objects on top of the instrument panel as these
objects may become projectiles in a collision or sudden stop.
2005 F250/350/450/550 (f23)
Owners Guide (post-2002-fmt)
USA_English (fus) Climate Controls
35
Page 38 of 312
• Remove any snow, ice or leaves from the air intake area at the base of
the windshield.
• To improve the A/C cool down, drive with the windows slightly open
for 2–3 minutes after start up or until the vehicle has been “aired out.”
For maximum cooling performance in AUTO mode:
• Press AUTO control and set to desired temperature.
For maximum cooling performance using manual override modes:
• Press (panel), A/C, with recirculated air. Set the temperature to
60°F (16°C) and the fan to the highest setting.
To aid in side window defogging and demisting in cold weather:
1. Select .
2. Select A/C.
3. Set the temperature control to maintain comfort.
4. Set the fan speed to highest setting.
5. Direct the outer instrument panel vents towards the side windows. To
increase airflow to the outer instrument panel vents, close the vents
located in the middle of the instrument panel.
To increase airflow to the outer instrument panel vents, close the vents
located in the middle of the instrument panel.
Do not place objects on top of the instrument panel as these
objects may become projectiles in a collision or sudden stop.
2005 F250/350/450/550 (f23)
Owners Guide (post-2002-fmt)
USA_English (fus)Climate Controls
38
Page 54 of 312
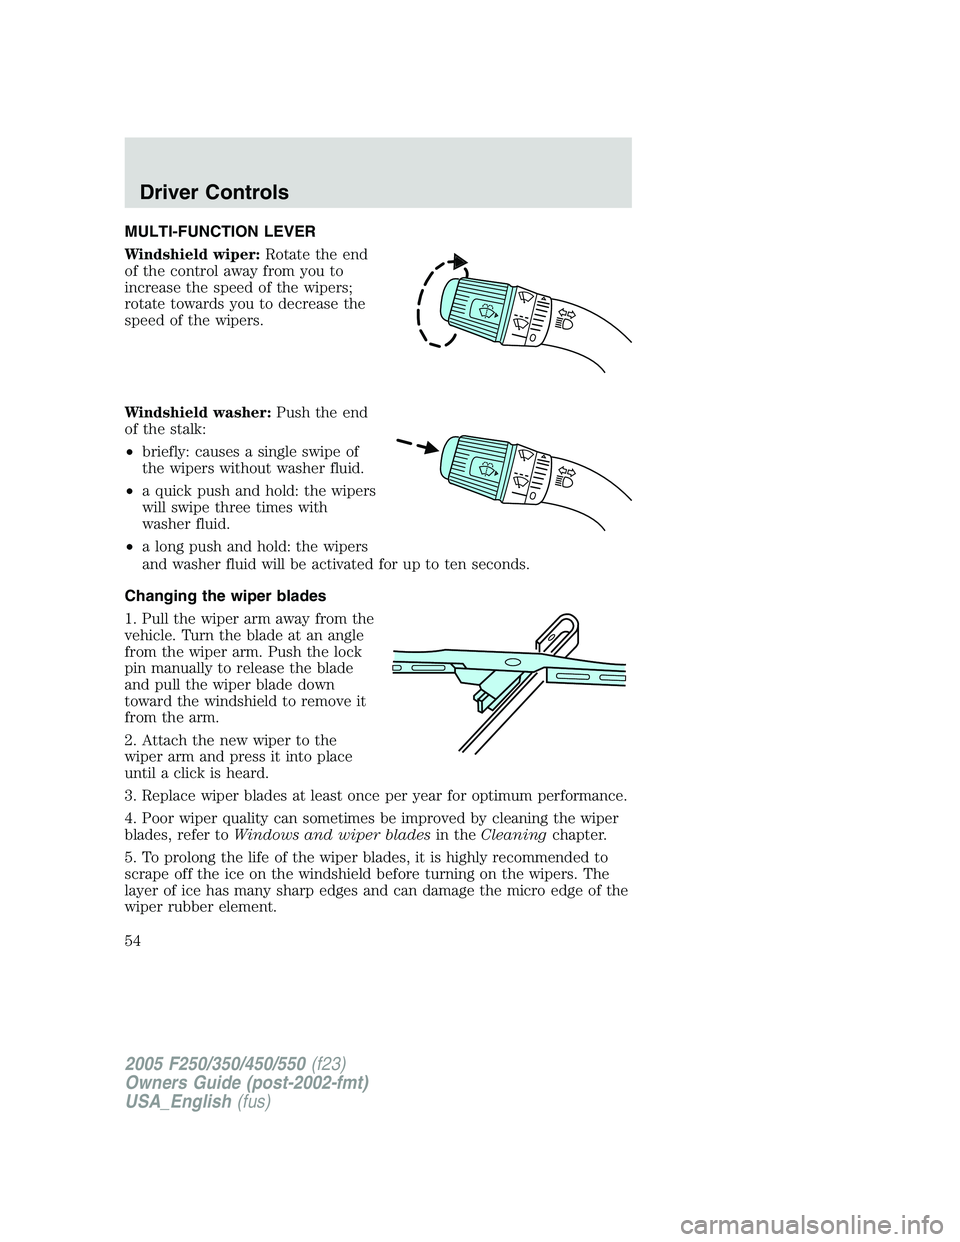
MULTI-FUNCTION LEVER
Windshield wiper: Rotate the end
of the control away from you to
increase the speed of the wipers;
rotate towards you to decrease the
speed of the wipers.
Windshield washer: Push the end
of the stalk:
• briefly: causes a single swipe of
the wipers without washer fluid.
• a quick push and hold: the wipers
will swipe three times with
washer fluid.
• a long push and hold: the wipers
and washer fluid will be activated for up to ten seconds.
Changing the wiper blades
1. Pull the wiper arm away from the
vehicle. Turn the blade at an angle
from the wiper arm. Push the lock
pin manually to release the blade
and pull the wiper blade down
toward the windshield to remove it
from the arm.
2. Attach the new wiper to the
wiper arm and press it into place
until a click is heard.
3. Replace wiper blades at least once per year for optimum performance.
4. Poor wiper quality can sometimes be improved by cleaning the wiper
blades, refer to Windows and wiper blades in the Cleaning chapter.
5. To prolong the life of the wiper blades, it is highly recommended to
scrape off the ice on the windshield before turning on the wipers. The
layer of ice has many sharp edges and can damage the micro edge of the
wiper rubber element.
2005 F250/350/450/550 (f23)
Owners Guide (post-2002-fmt)
USA_English (fus)Driver Controls
Driver Controls
54
Page 57 of 312
To vent the moon roof: Press and hold the control. The moon
roof must be in the closed position in order to move it into the
vent position. To close, press and hold the AUTO control until the glass
panel stops moving.
The moon roof has a built-in sliding shade that can be manually opened
or closed when the glass panel is shut. To close the shade, pull it toward
the front of the vehicle.
When closing the moon roof, you should verify that it is free of
obstructions and ensure that children and/or pets are not in the
proximity of the moon roof opening.
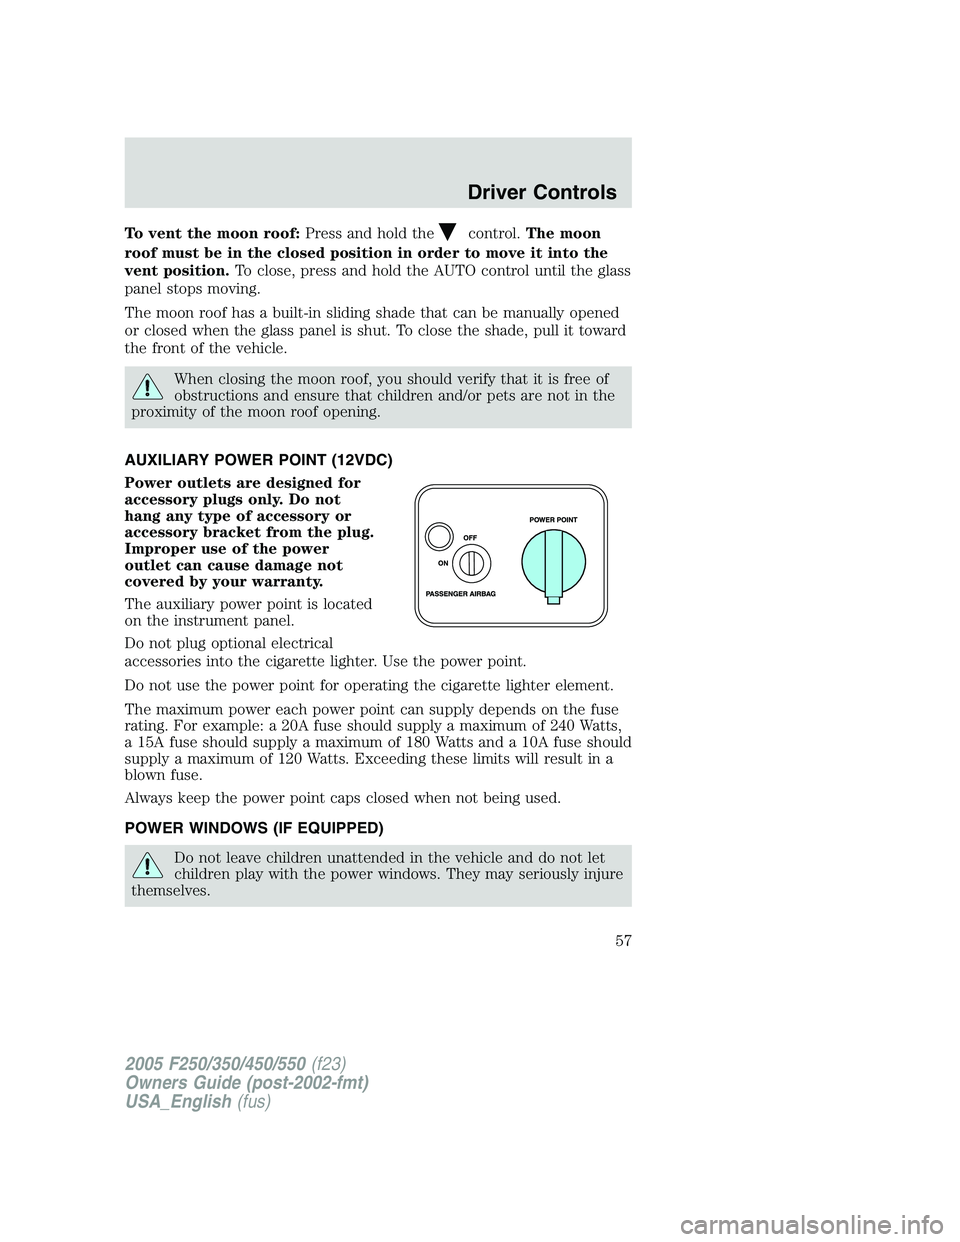
AUXILIARY POWER POINT (12VDC)
Power outlets are designed for
accessory plugs only. Do not
hang any type of accessory or
accessory bracket from the plug.
Improper use of the power
outlet can cause damage not
covered by your warranty.
The auxiliary power point is located
on the instrument panel.
Do not plug optional electrical
accessories into the cigarette lighter. Use the power point.
Do not use the power point for operating the cigarette lighter element.
The maximum power each power point can supply depends on the fuse
rating. For example: a 20A fuse should supply a maximum of 240 Watts,
a 15A fuse should supply a maximum of 180 Watts and a 10A fuse should
supply a maximum of 120 Watts. Exceeding these limits will result in a
blown fuse.
Always keep the power point caps closed when not being used.
POWER WINDOWS (IF EQUIPPED)
Do not leave children unattended in the vehicle and do not let
children play with the power windows. They may seriously injure
themselves.
2005 F250/350/450/550 (f23)
Owners Guide (post-2002-fmt)
USA_English (fus) Driver Controls
57