Page 9 of 320
Vehicle Symbol Glossary
Power Windows
Front/Rear
Power Window Lockout
Child Safety Door
Lock/UnlockInterior Luggage
Compartment Release
Symbol
Panic AlarmEngine Oil
Engine CoolantEngine Coolant
Temperature
Do Not Open When HotBattery
Avoid Smoking, Flames,
or SparksBattery Acid
Explosive GasFan Warning
Power Steering FluidMaintain Correct Fluid
LevelMAX
MIN
Emission SystemEngine Air Filter
Passenger Compartment
Air FilterJack
Check fuel capLow tire warning
REVIEW COPY
2005 Explorer(exp), Owners Guide (post-2002-fmt)(own2002),
Market:USA_English(fus)
Introduction
9
Page 14 of 320

Four wheel drive high (if
equipped):Illuminates when
four-wheel drive high is engaged.
Speed control:Illuminates when
the speed control is activated. Turns
off when the speed control system
is deactivated.
Turn signal:Illuminates when the
left or right turn signal or the
hazard lights are turned on. If the
indicators stay on or flash faster, check for a burned out bulb.
High beams:Illuminates when the
high beam headlamps are turned on.
Key-in-ignition warning chime:Sounds when the key is left in the
ignition in the OFF/LOCK or ACCESSORY position and the driver’s door
is opened.
Headlamps on warning chime:Sounds when the headlamps or parking
lamps are on, the ignition is off (the key is not in the ignition) and the
driver’s door is opened.
Turn signal warning chime:Sounds when the turn signal lever has
been activated to signal a turn and not turned off after the vehicle is
driven more than 1/2 mile (0.8 km).4x4
HIGH
REVIEW COPY
2005 Explorer(exp), Owners Guide (post-2002-fmt)(own2002),
Market:USA_English(fus)
Instrument Cluster
14
Page 56 of 320
5. Locate the vertical adjuster for
each headlamp. Adjust the aim by
turning the adjuster control either
clockwise (to adjust down) or
counterclockwise (to adjust up).
Note:Usea4mmsocket or box
wrench to turn the vertical adjuster
control.
6. Horizontal aiming is not required
for this vehicle and is
non-adjustable.
TURN SIGNAL CONTROL
•Push down to activate the left
turn signal.
•Push up to activate the right turn
signal.
INTERIOR LAMPS
Dome/reading lamps
The dome lamp lights when:
•any door is opened.
•the instrument panel dimmer
switch is rotated up until the
courtesy lamps come on.
•any of the remote entry controls
are pressed and the ignition is
OFF.
The reading portion, the two outer lights, can only be toggled on and off
at the lamp.
INT2OFFOFFINT1
REVIEW COPY
2005 Explorer(exp), Owners Guide (post-2002-fmt)(own2002),
Market:USA_English(fus)
Lights
56
Page 69 of 320

One touch down
Allows the driver’s window to open
fully without holding the control
down. Press completely down on
AUTO and release quickly. Press
again to stop.
Window lock
The window lock feature allows only
the driver to operate the power
windows.
To lock out all the window controls
except for the driver’s press the left
side of the control. Press the right
side to restore the window controls.
Accessory delay
With accessory delay, the window switches, audio system and moon roof
may be used for up to ten minutes after the ignition switch is turned to
the OFF position or until any door is opened.
POWER SIDE VIEW MIRRORS
The ignition must be in the ACC or ON position to adjust the power side
view mirrors.
To adjust your mirrors:
1. Rotate the control clockwise to
adjust the right mirror and rotate
the control counterclockwise to
adjust the left mirror.
2. Move the control in the direction
you wish to tilt the mirror.
3. Return to the center position to
lock mirrors in place.
REVIEW COPY
2005 Explorer(exp), Owners Guide (post-2002-fmt)(own2002),
Market:USA_English(fus)
Driver Controls
69
Page 77 of 320

Do not let children play with the moon roof or leave children
unattended in the vehicle. They may seriously hurt themselves.
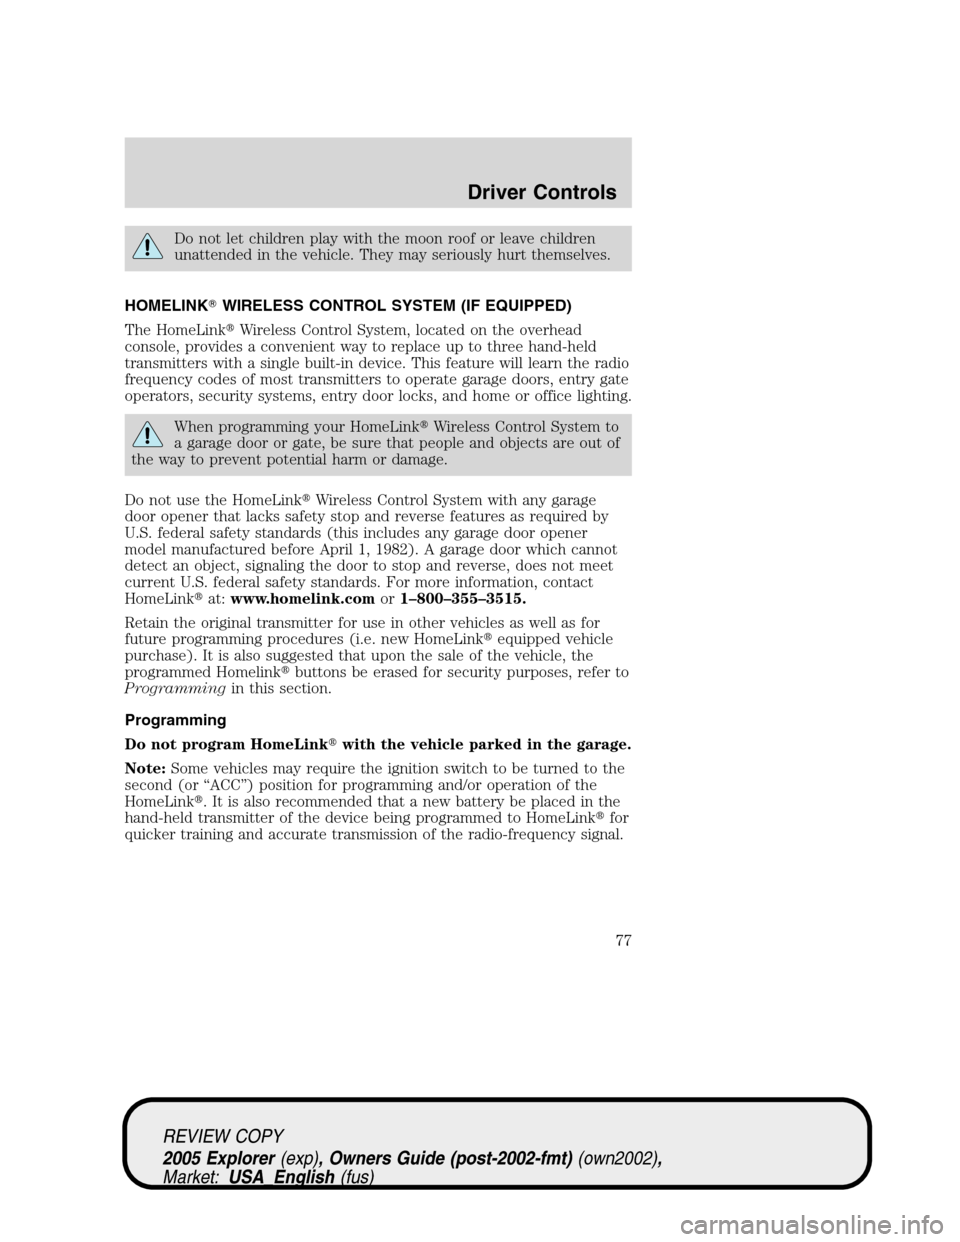
HOMELINK�WIRELESS CONTROL SYSTEM (IF EQUIPPED)
The HomeLink�Wireless Control System, located on the overhead
console, provides a convenient way to replace up to three hand-held
transmitters with a single built-in device. This feature will learn the radio
frequency codes of most transmitters to operate garage doors, entry gate
operators, security systems, entry door locks, and home or office lighting.
When programming your HomeLink�Wireless Control System to
a garage door or gate, be sure that people and objects are out of
the way to prevent potential harm or damage.
Do not use the HomeLink�Wireless Control System with any garage
door opener that lacks safety stop and reverse features as required by
U.S. federal safety standards (this includes any garage door opener
model manufactured before April 1, 1982). A garage door which cannot
detect an object, signaling the door to stop and reverse, does not meet
current U.S. federal safety standards. For more information, contact
HomeLink�at:www.homelink.comor1–800–355–3515.
Retain the original transmitter for use in other vehicles as well as for
future programming procedures (i.e. new HomeLink�equipped vehicle
purchase). It is also suggested that upon the sale of the vehicle, the
programmed Homelink�buttons be erased for security purposes, refer to
Programmingin this section.
Programming
Do not program HomeLink�with the vehicle parked in the garage.
Note:Some vehicles may require the ignition switch to be turned to the
second (or “ACC”) position for programming and/or operation of the
HomeLink�. It is also recommended that a new battery be placed in the
hand-held transmitter of the device being programmed to HomeLink�for
quicker training and accurate transmission of the radio-frequency signal.
REVIEW COPY
2005 Explorer(exp), Owners Guide (post-2002-fmt)(own2002),
Market:USA_English(fus)
Driver Controls
77
Page 80 of 320

Operating the HomeLink�Wireless Control System
To operate, simply press and release
the appropriate HomeLink�button.
Activation will now occur for the
trained product (garage door, gate
operator, security system, entry
door lock, or home or office lighting
etc.). For convenience, the
hand-held transmitter of the device
may also be used at any time. In the
event that there are still
programming difficulties, contact
HomeLink�atwww.homelink.comor1–800–355–3515.
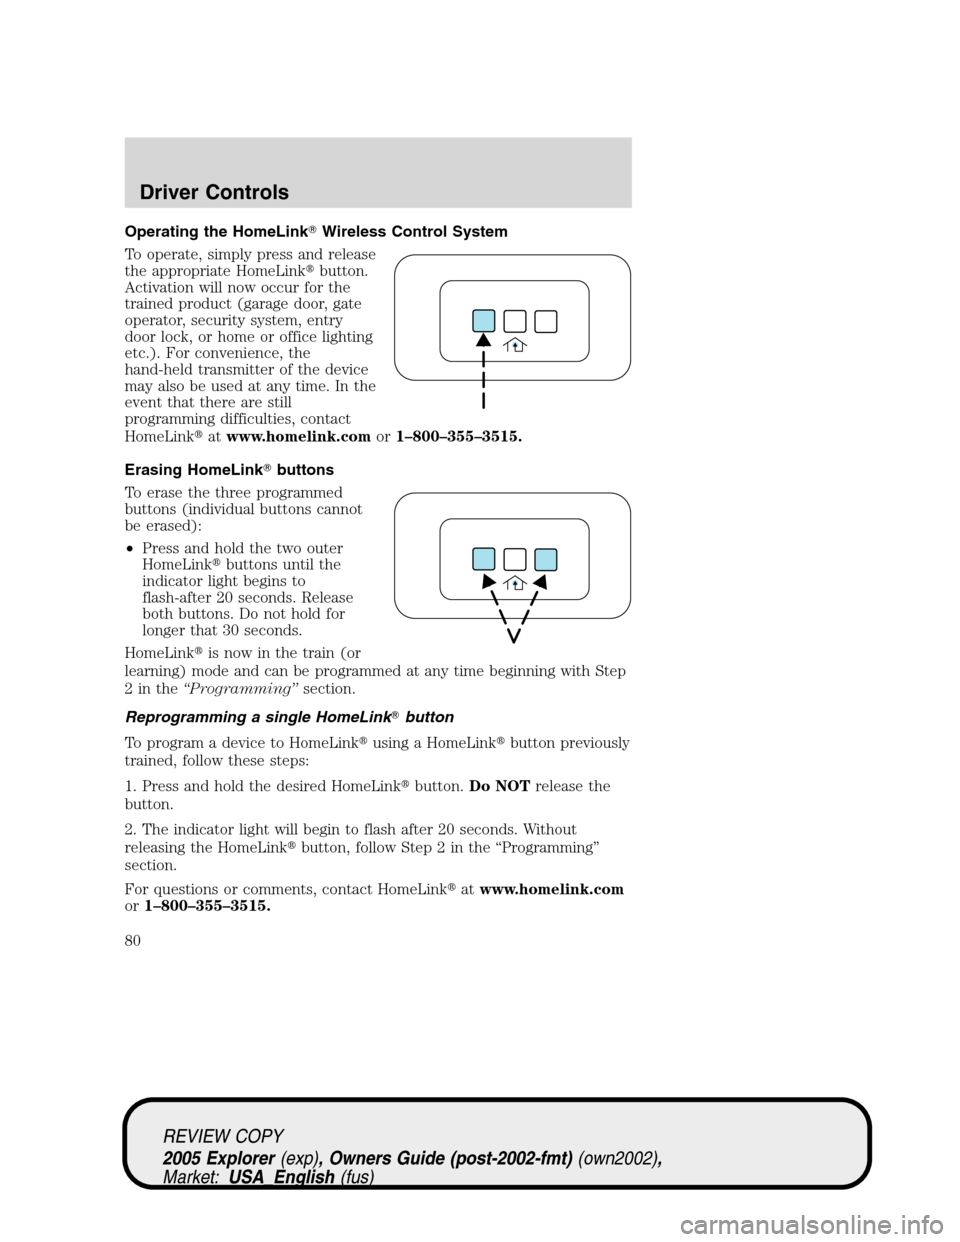
Erasing HomeLink�buttons
To erase the three programmed
buttons (individual buttons cannot
be erased):
•Press and hold the two outer
HomeLink�buttons until the
indicator light begins to
flash-after 20 seconds. Release
both buttons. Do not hold for
longer that 30 seconds.
HomeLink�is now in the train (or
learning) mode and can be programmed at any time beginning with Step
2inthe“Programming”section.
Reprogramming a single HomeLink�button
To program a device to HomeLink�using a HomeLink�button previously
trained, follow these steps:
1. Press and hold the desired HomeLink�button.Do NOTrelease the
button.
2. The indicator light will begin to flash after 20 seconds. Without
releasing the HomeLink�button, follow Step 2 in the “Programming”
section.
For questions or comments, contact HomeLink�atwww.homelink.com
or1–800–355–3515.
REVIEW COPY
2005 Explorer(exp), Owners Guide (post-2002-fmt)(own2002),
Market:USA_English(fus)
Driver Controls
80
Page 95 of 320

•Compass
•Outside temperature
•Engine sensor
Contact your dealer as soon as possible if these messages occur on a
regular basis.
POSITIVE RETENTION FLOOR MAT
Position the driver floor mat so that
the eyelet is over the pointed end of
the retention post and rotate
forward to lock in. Make sure that
the mat does not interfere with the
operation of the accelerator or the
brake pedal. To remove the floor
mat, reverse the installation
procedure.
REAR LIFTGATE
The liftgate area is only intended for cargo, not passengers. You can open
and close the liftgate from outside the vehicle. It cannot be opened from
inside the cargo area.
•To open the liftgate window,
press the control on the remote
entry key fob or, with the liftgate
unlocked, push the control button
on theright sideunder the
license plate lamp shield.
•To open the liftgate, unlock the
liftgate (with the power door
locks, the remote entry or the
keyless entry pad) and pull the
middlelever under the license
plate lamp shield.
To lock the liftgate and the liftgate window, use the power door locks or
press the door lock switch on the left side of the cargo area. To manually
lock or unlock the liftgate, move the button located below the window
down or up.
REVIEW COPY
2005 Explorer(exp), Owners Guide (post-2002-fmt)(own2002),
Market:USA_English(fus)
Driver Controls
95
Page 99 of 320

KEYS
One key operates all the locks and starts the vehicle. Always carry a
spare key with you in case of an emergency.
Your keys are programmed to your vehicle; using a non-programmed key
will not permit your vehicle to start. If you lose your dealer supplied
keys, replacement keys are available through your authorized dealer.
Refer to theSecuriLock�passive anti-theft systemsection later in this
chapter for more information.
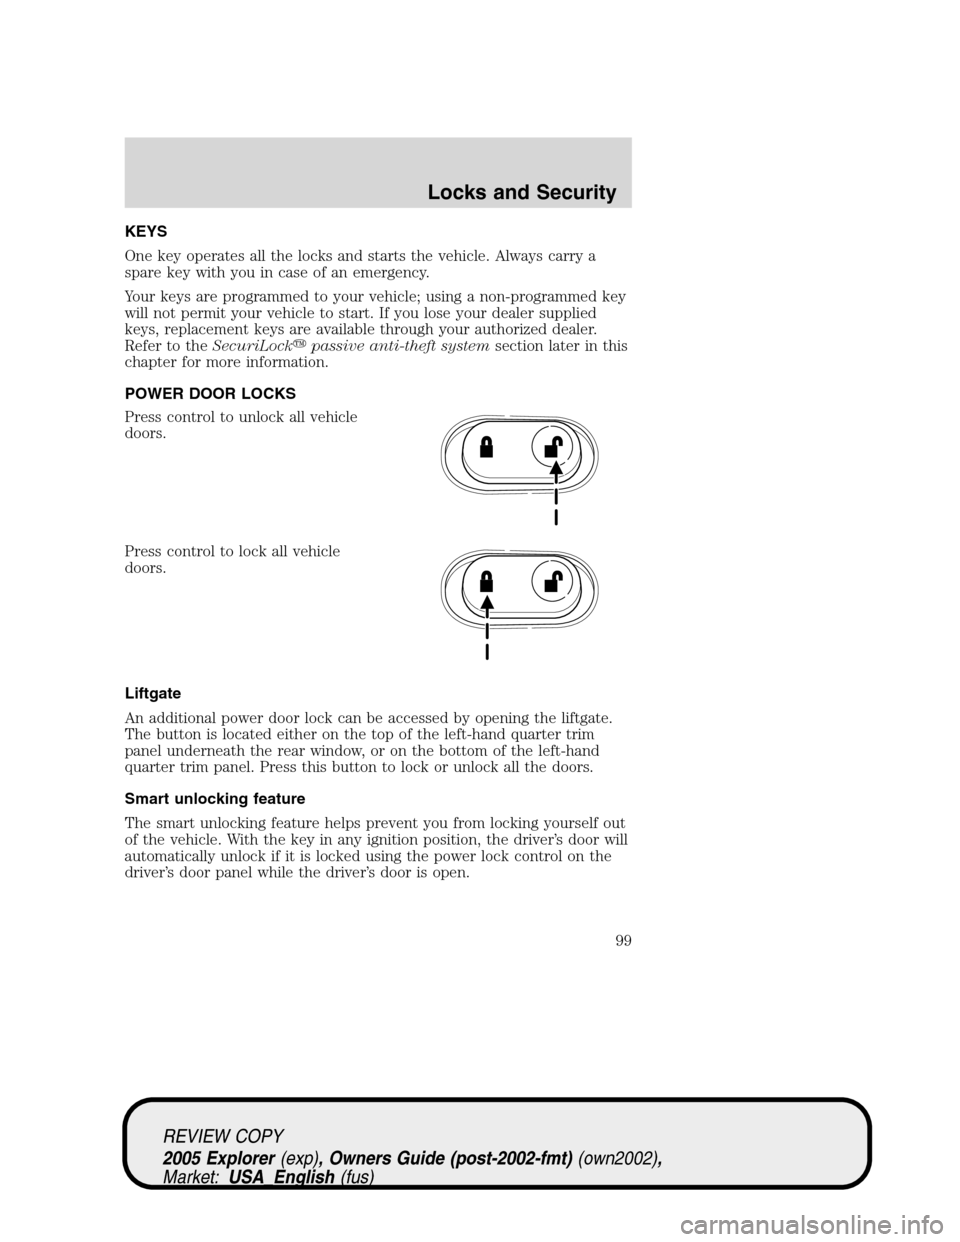
POWER DOOR LOCKS
Press control to unlock all vehicle
doors.
Press control to lock all vehicle
doors.
Liftgate
An additional power door lock can be accessed by opening the liftgate.
The button is located either on the top of the left-hand quarter trim
panel underneath the rear window, or on the bottom of the left-hand
quarter trim panel. Press this button to lock or unlock all the doors.
Smart unlocking feature
The smart unlocking feature helps prevent you from locking yourself out
of the vehicle. With the key in any ignition position, the driver’s door will
automatically unlock if it is locked using the power lock control on the
driver’s door panel while the driver’s door is open.
REVIEW COPY
2005 Explorer(exp), Owners Guide (post-2002-fmt)(own2002),
Market:USA_English(fus)
Locks and Security
Locks and Security
99