Page 1 of 368
Introduction 4
Instrument Cluster 10
Warning and control lights 10
Gauges 14
Entertainment Systems 18
AM/FM stereo cassette with CD 18
AM/FM stereo with in-dash six CD 33
Rear seat controls 38
Rear seat entertainment system 43
Navigation system 56
Climate Controls 92
Manual heating and air conditioning 92
Electronic automatic temperature control 96
Rear passenger climate control 100
Rear window defroster 101
Lights 102
Headlamps 102
Turn signal control 105
Bulb replacement 106
Driver Controls 114
Windshield wiper/washer control 114
Power windows 120
Mirrors 121
Speed control 123
Message center 134
Locks and Security 148
Keys 148
Locks 148
Anti-theft system 149
Table of Contents
1
REVIEW COPY
2005 Expedition(exd), Owners Guide (post-2002-fmt)(own2002),
Market:USA_English(fus)
Table of Contents
Page 10 of 368
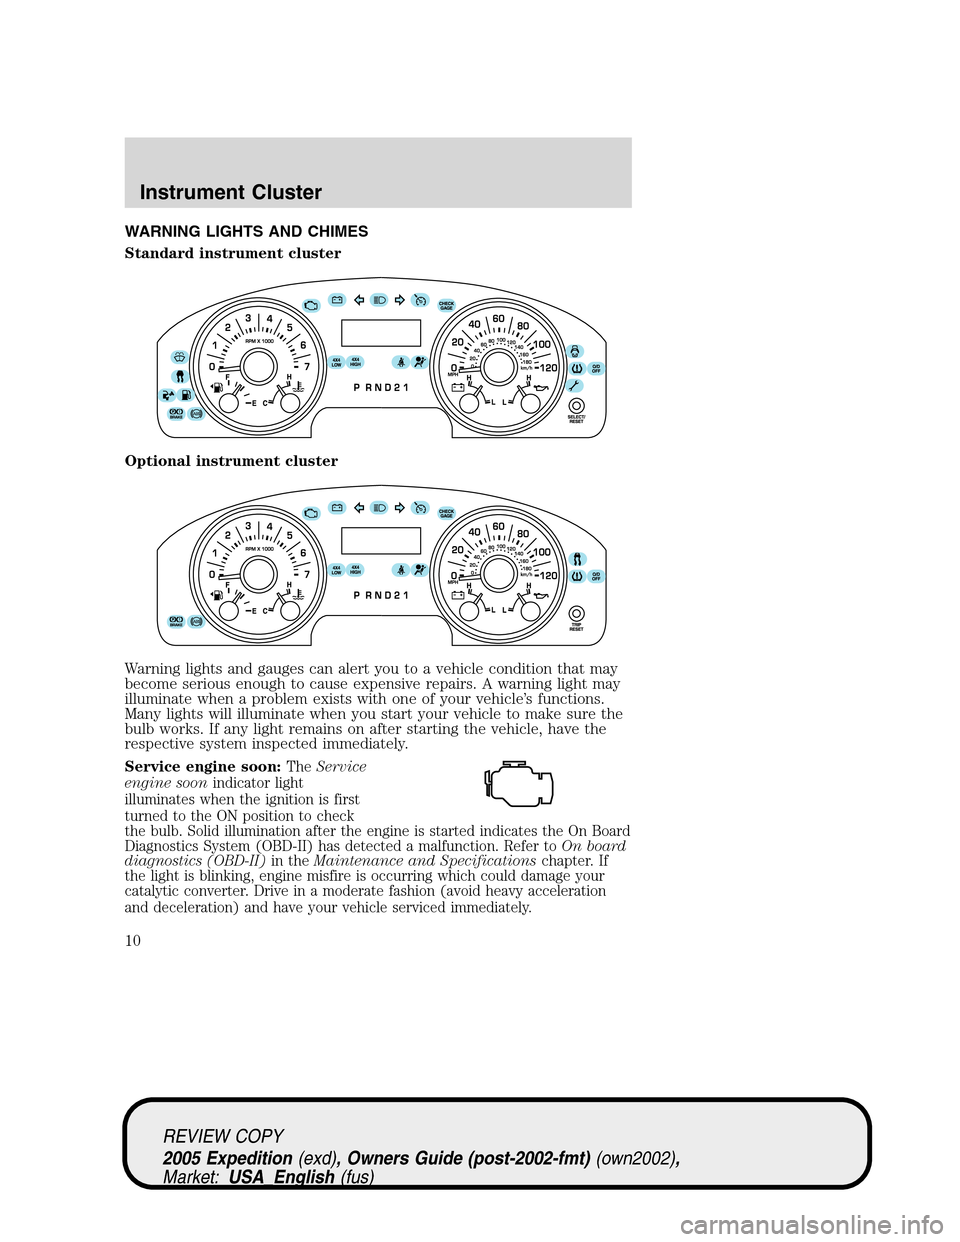
WARNING LIGHTS AND CHIMES
Standard instrument cluster
Optional instrument cluster
Warning lights and gauges can alert you to a vehicle condition that may
become serious enough to cause expensive repairs. A warning light may
illuminate when a problem exists with one of your vehicle’s functions.
Many lights will illuminate when you start your vehicle to make sure the
bulb works. If any light remains on after starting the vehicle, have the
respective system inspected immediately.
Service engine soon:
TheService
engine soonindicator light
illuminates when the ignition is first
turned to the ON position to check
the bulb. Solid illumination after the engine is started indicates the On Board
Diagnostics System (OBD-II) has detected a malfunction. Refer toOn board
diagnostics (OBD-II)in theMaintenance and Specificationschapter. If
the light is blinking, engine misfire is occurring which could damage your
catalytic converter. Drive in a moderate fashion (avoid heavy acceleration
and deceleration) and have your vehicle serviced immediately.
REVIEW COPY
2005 Expedition(exd), Owners Guide (post-2002-fmt)(own2002),
Market:USA_English(fus)
Instrument Cluster
Instrument Cluster
10
Page 12 of 368
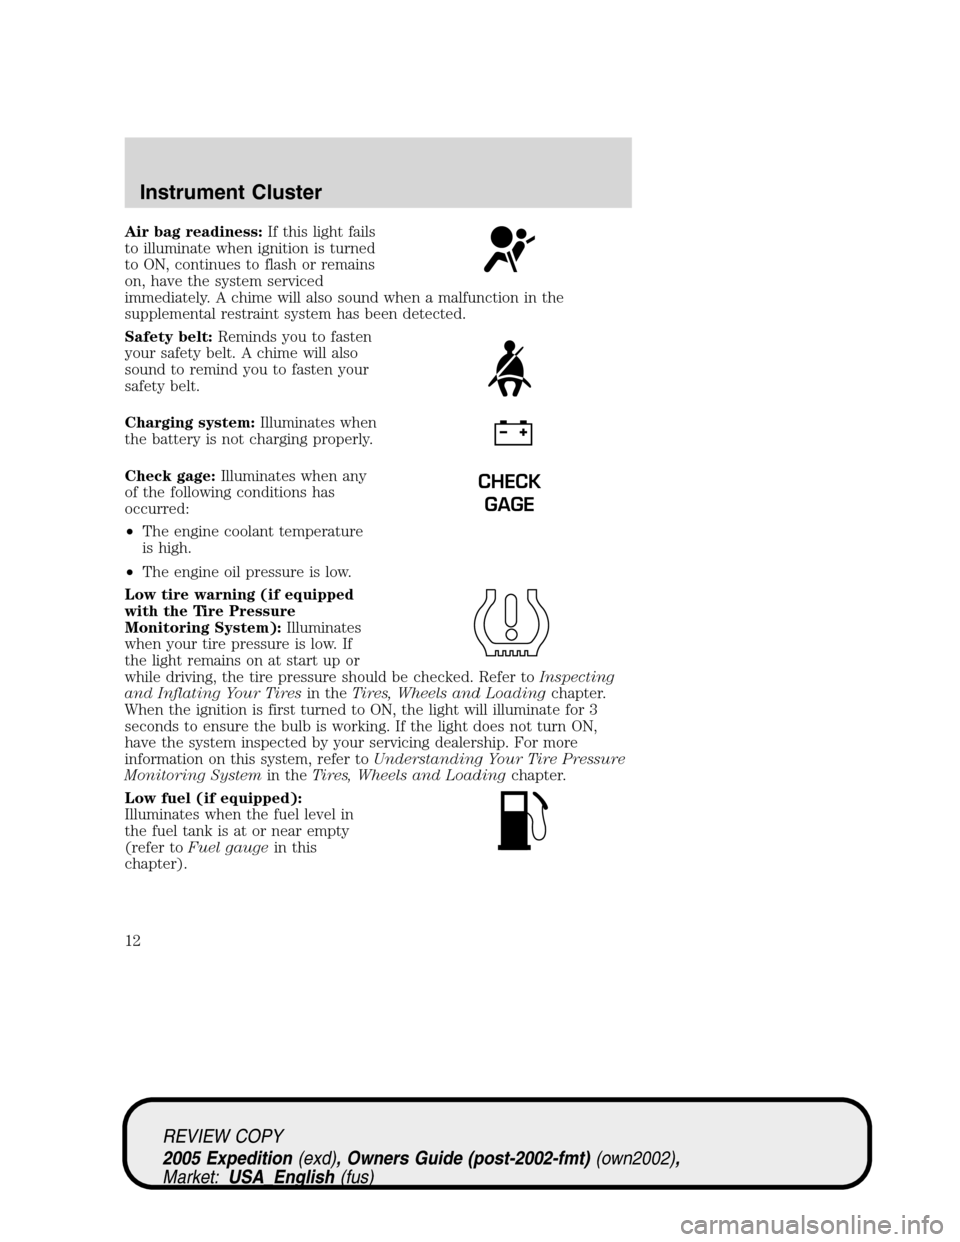
Air bag readiness:If this light fails
to illuminate when ignition is turned
to ON, continues to flash or remains
on, have the system serviced
immediately. A chime will also sound when a malfunction in the
supplemental restraint system has been detected.
Safety belt:Reminds you to fasten
your safety belt. A chime will also
sound to remind you to fasten your
safety belt.
Charging system:Illuminates when
the battery is not charging properly.
Check gage:Illuminates when any
of the following conditions has
occurred:
•The engine coolant temperature
is high.
•The engine oil pressure is low.
Low tire warning (if equipped
with the Tire Pressure
Monitoring System):Illuminates
when your tire pressure is low. If
the light remains on at start up or
while driving, the tire pressure should be checked. Refer toInspecting
and Inflating Your Tiresin theTires, Wheels and Loadingchapter.
When the ignition is first turned to ON, the light will illuminate for 3
seconds to ensure the bulb is working. If the light does not turn ON,
have the system inspected by your servicing dealership. For more
information on this system, refer toUnderstanding Your Tire Pressure
Monitoring Systemin theTires, Wheels and Loadingchapter.
Low fuel (if equipped):
Illuminates when the fuel level in
the fuel tank is at or near empty
(refer toFuel gaugein this
chapter).
CHECK
GAGE
REVIEW COPY
2005 Expedition(exd), Owners Guide (post-2002-fmt)(own2002),
Market:USA_English(fus)
Instrument Cluster
12
Page 14 of 368
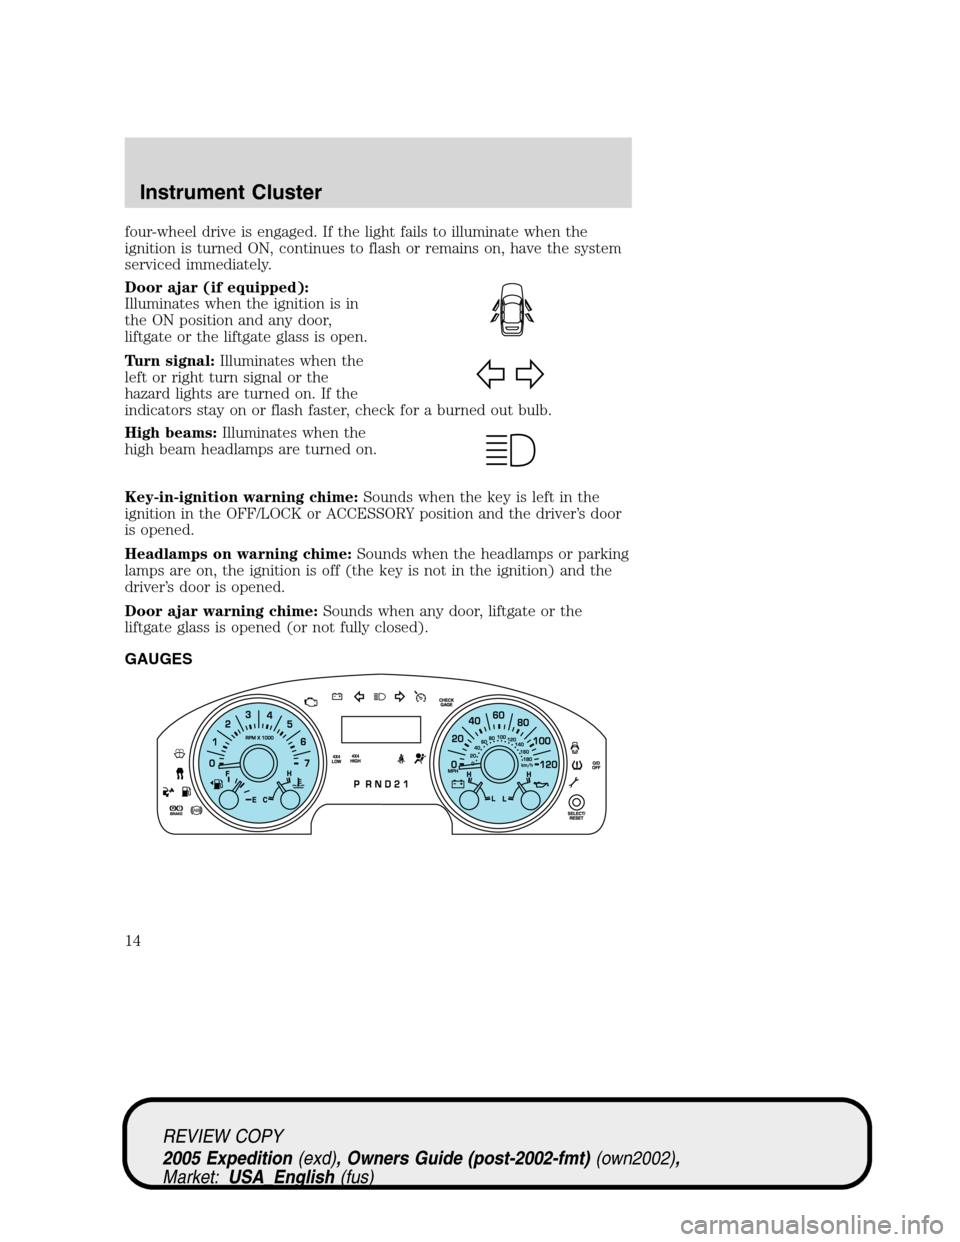
four-wheel drive is engaged. If the light fails to illuminate when the
ignition is turned ON, continues to flash or remains on, have the system
serviced immediately.
Door ajar (if equipped):
Illuminates when the ignition is in
the ON position and any door,
liftgate or the liftgate glass is open.
Turn signal:Illuminates when the
left or right turn signal or the
hazard lights are turned on. If the
indicators stay on or flash faster, check for a burned out bulb.
High beams:Illuminates when the
high beam headlamps are turned on.
Key-in-ignition warning chime:Sounds when the key is left in the
ignition in the OFF/LOCK or ACCESSORY position and the driver’s door
is opened.
Headlamps on warning chime:Sounds when the headlamps or parking
lamps are on, the ignition is off (the key is not in the ignition) and the
driver’s door is opened.
Door ajar warning chime:Sounds when any door, liftgate or the
liftgate glass is opened (or not fully closed).
GAUGES
REVIEW COPY
2005 Expedition(exd), Owners Guide (post-2002-fmt)(own2002),
Market:USA_English(fus)
Instrument Cluster
14
Page 106 of 368
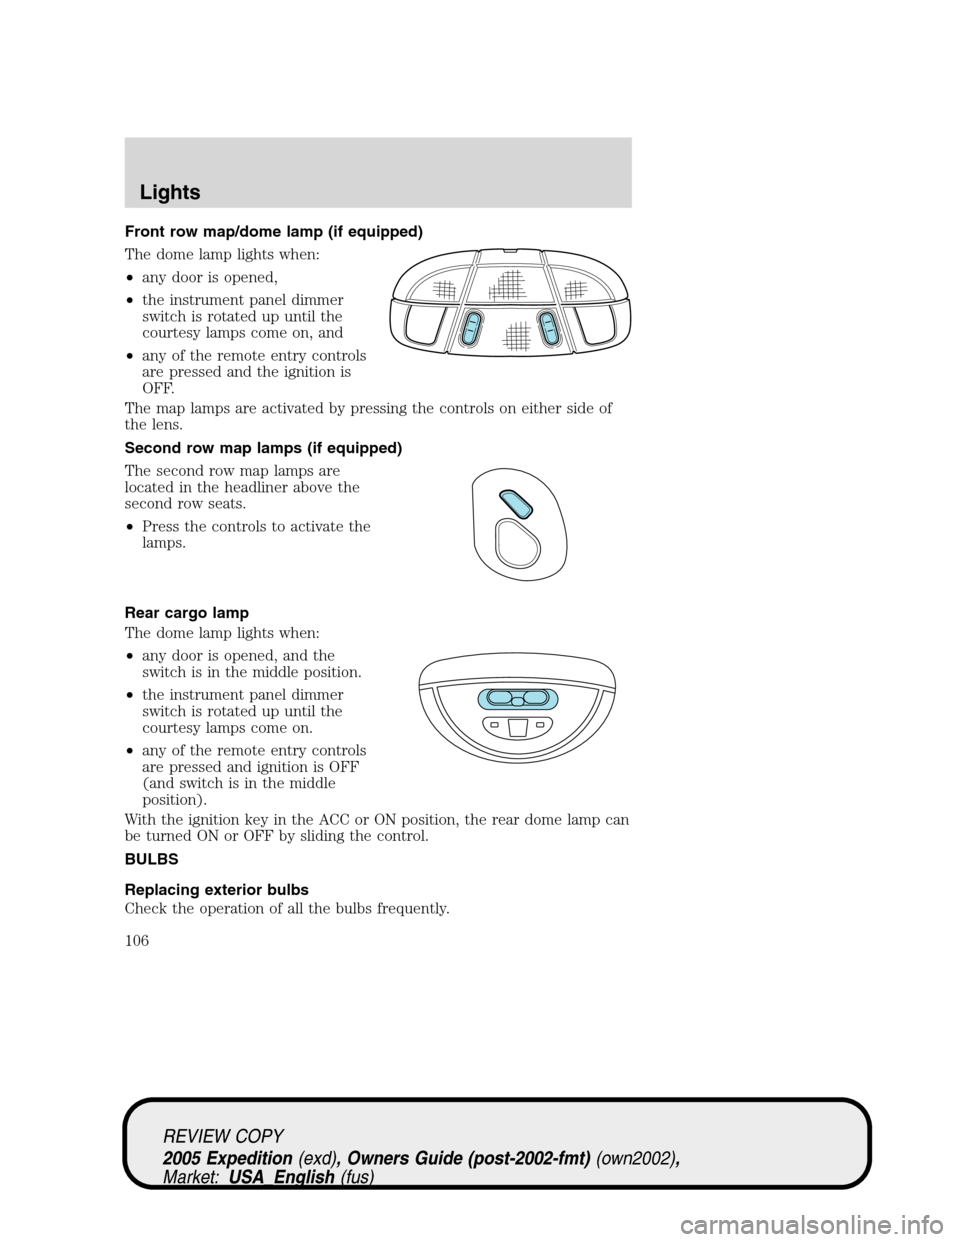
Front row map/dome lamp (if equipped)
The dome lamp lights when:
•any door is opened,
•the instrument panel dimmer
switch is rotated up until the
courtesy lamps come on, and
•any of the remote entry controls
are pressed and the ignition is
OFF.
The map lamps are activated by pressing the controls on either side of
the lens.
Second row map lamps (if equipped)
The second row map lamps are
located in the headliner above the
second row seats.
•Press the controls to activate the
lamps.
Rear cargo lamp
The dome lamp lights when:
•any door is opened, and the
switch is in the middle position.
•the instrument panel dimmer
switch is rotated up until the
courtesy lamps come on.
•any of the remote entry controls
are pressed and ignition is OFF
(and switch is in the middle
position).
With the ignition key in the ACC or ON position, the rear dome lamp can
be turned ON or OFF by sliding the control.
BULBS
Replacing exterior bulbs
Check the operation of all the bulbs frequently.
REVIEW COPY
2005 Expedition(exd), Owners Guide (post-2002-fmt)(own2002),
Market:USA_English(fus)
Lights
106
Page 107 of 368
Using the right bulbs
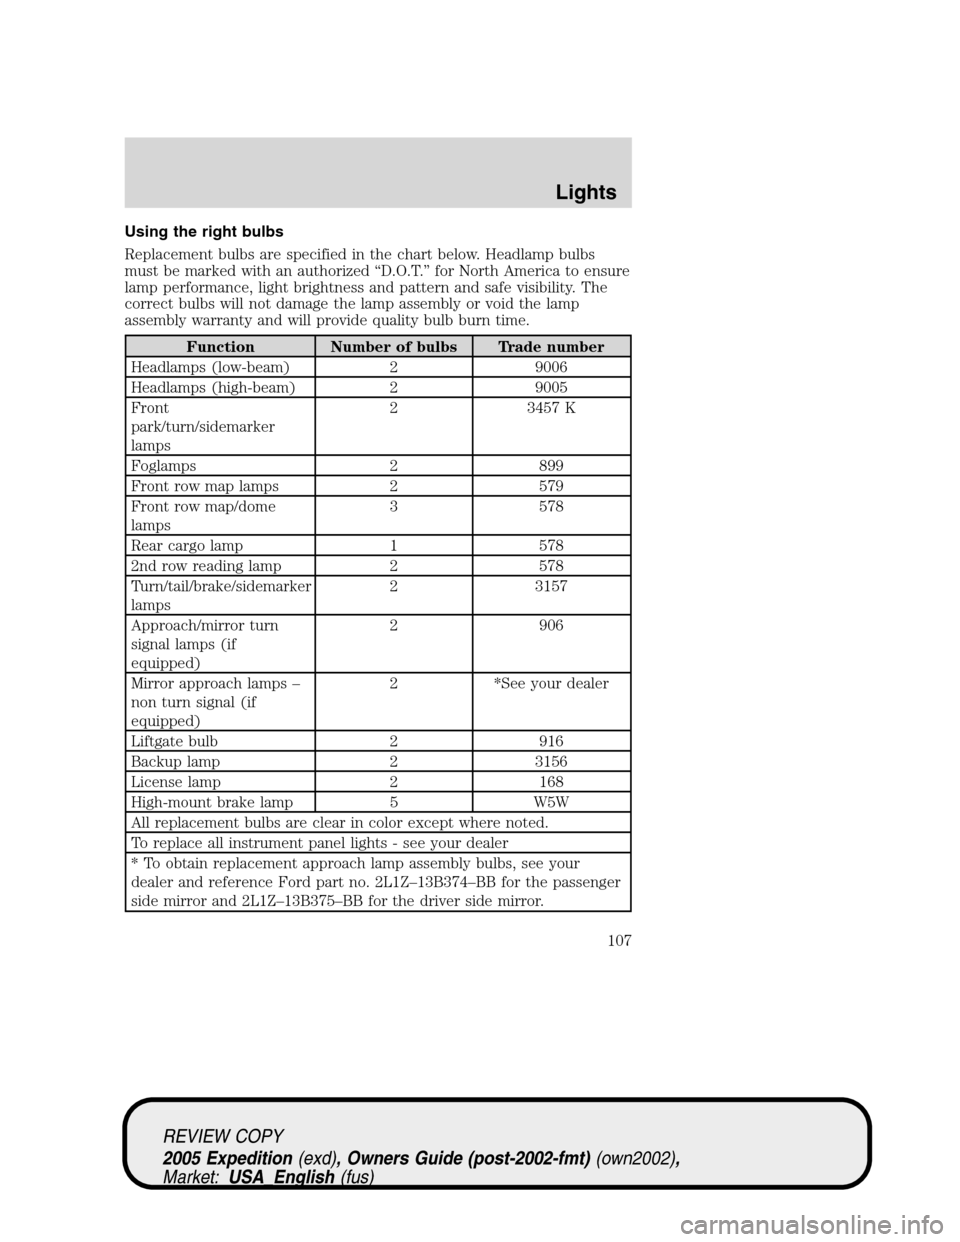
Replacement bulbs are specified in the chart below. Headlamp bulbs
must be marked with an authorized “D.O.T.” for North America to ensure
lamp performance, light brightness and pattern and safe visibility. The
correct bulbs will not damage the lamp assembly or void the lamp
assembly warranty and will provide quality bulb burn time.
Function Number of bulbs Trade number
Headlamps (low-beam) 2 9006
Headlamps (high-beam) 2 9005
Front
park/turn/sidemarker
lamps2 3457 K
Foglamps 2 899
Front row map lamps 2 579
Front row map/dome
lamps3 578
Rear cargo lamp 1 578
2nd row reading lamp 2 578
Turn/tail/brake/sidemarker
lamps2 3157
Approach/mirror turn
signal lamps (if
equipped)2 906
Mirror approach lamps –
non turn signal (if
equipped)2 *See your dealer
Liftgate bulb 2 916
Backup lamp 2 3156
License lamp 2 168
High-mount brake lamp 5 W5W
All replacement bulbs are clear in color except where noted.
To replace all instrument panel lights - see your dealer
* To obtain replacement approach lamp assembly bulbs, see your
dealer and reference Ford part no. 2L1Z–13B374–BB for the passenger
side mirror and 2L1Z–13B375–BB for the driver side mirror.
REVIEW COPY
2005 Expedition(exd), Owners Guide (post-2002-fmt)(own2002),
Market:USA_English(fus)
Lights
107
Page 108 of 368
Replacing the interior bulbs
Check the operation of all bulbs frequently.
Map lamps
To change the map lamp bulbs:
1. Use a small screwdriver to
remove the map lamp lens.
2. To remove the old bulb, twist
1�4
turn and pull it out.
3. Twist in a new bulb.
4. Align and press the map lamp
lens back on and test the lamp operation.
Replacing headlamp bulbs
1. Make sure that the headlamp control is in the OFF position.
2. Open the hood.
3. At the back of the headlamp,
remove the two headlamp assembly
retainer bolts.
4. Loosen the vertical bolt on the
backside of the headlamp assembly.
Do not remove it.
5. Slide headlamp assembly forward
and off of guide ribs to expose the
back of the bulb and wiring connector.
6. Pull off the bulb covers.
REVIEW COPY
2005 Expedition(exd), Owners Guide (post-2002-fmt)(own2002),
Market:USA_English(fus)
Lights
108
Page 109 of 368
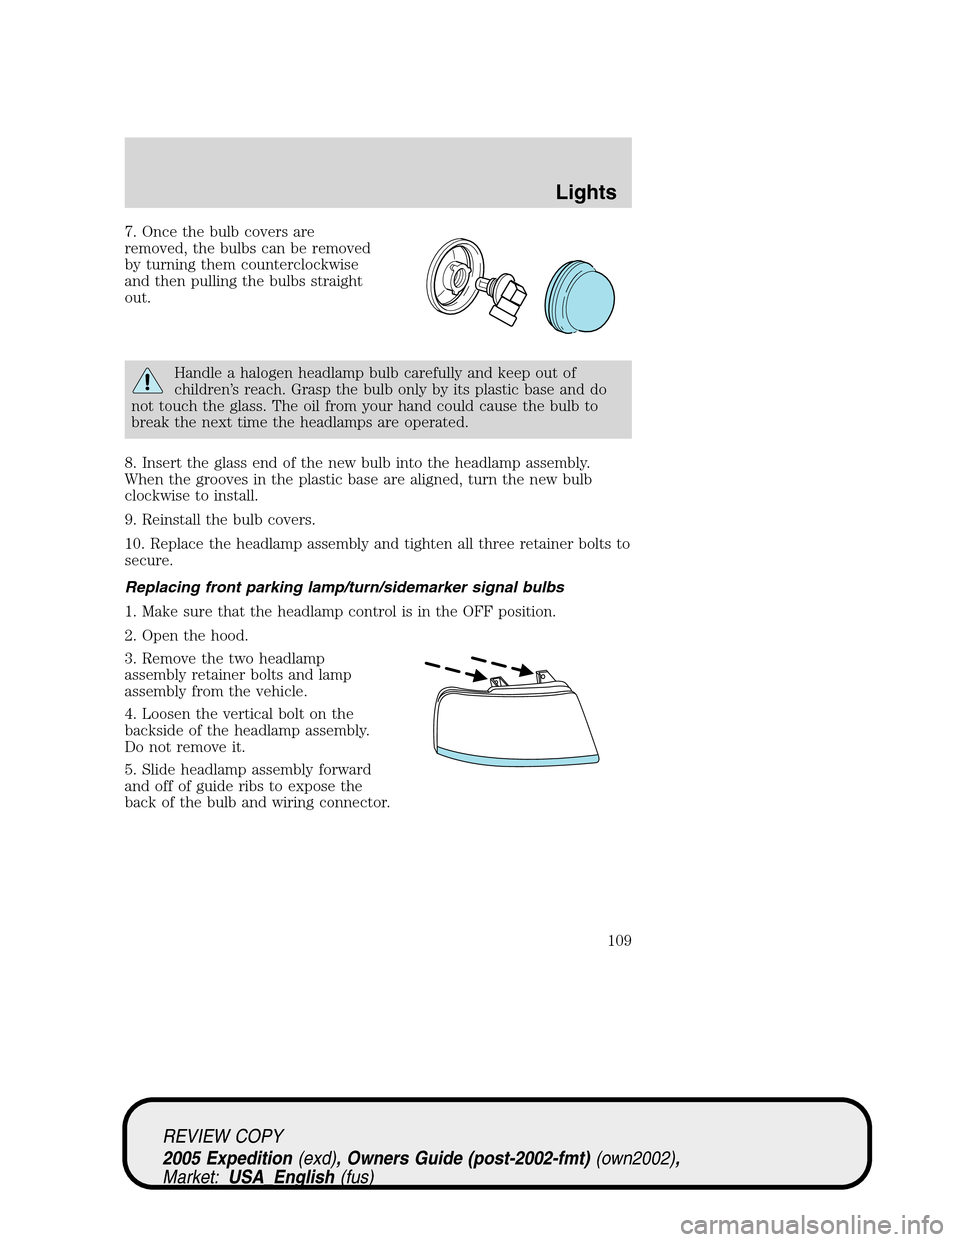
7. Once the bulb covers are
removed, the bulbs can be removed
by turning them counterclockwise
and then pulling the bulbs straight
out.
Handle a halogen headlamp bulb carefully and keep out of
children’s reach. Grasp the bulb only by its plastic base and do
not touch the glass. The oil from your hand could cause the bulb to
break the next time the headlamps are operated.
8. Insert the glass end of the new bulb into the headlamp assembly.
When the grooves in the plastic base are aligned, turn the new bulb
clockwise to install.
9. Reinstall the bulb covers.
10. Replace the headlamp assembly and tighten all three retainer bolts to
secure.
Replacing front parking lamp/turn/sidemarker signal bulbs
1. Make sure that the headlamp control is in the OFF position.
2. Open the hood.
3. Remove the two headlamp
assembly retainer bolts and lamp
assembly from the vehicle.
4. Loosen the vertical bolt on the
backside of the headlamp assembly.
Do not remove it.
5. Slide headlamp assembly forward
and off of guide ribs to expose the
back of the bulb and wiring connector.
REVIEW COPY
2005 Expedition(exd), Owners Guide (post-2002-fmt)(own2002),
Market:USA_English(fus)
Lights
109