Page 267 of 396

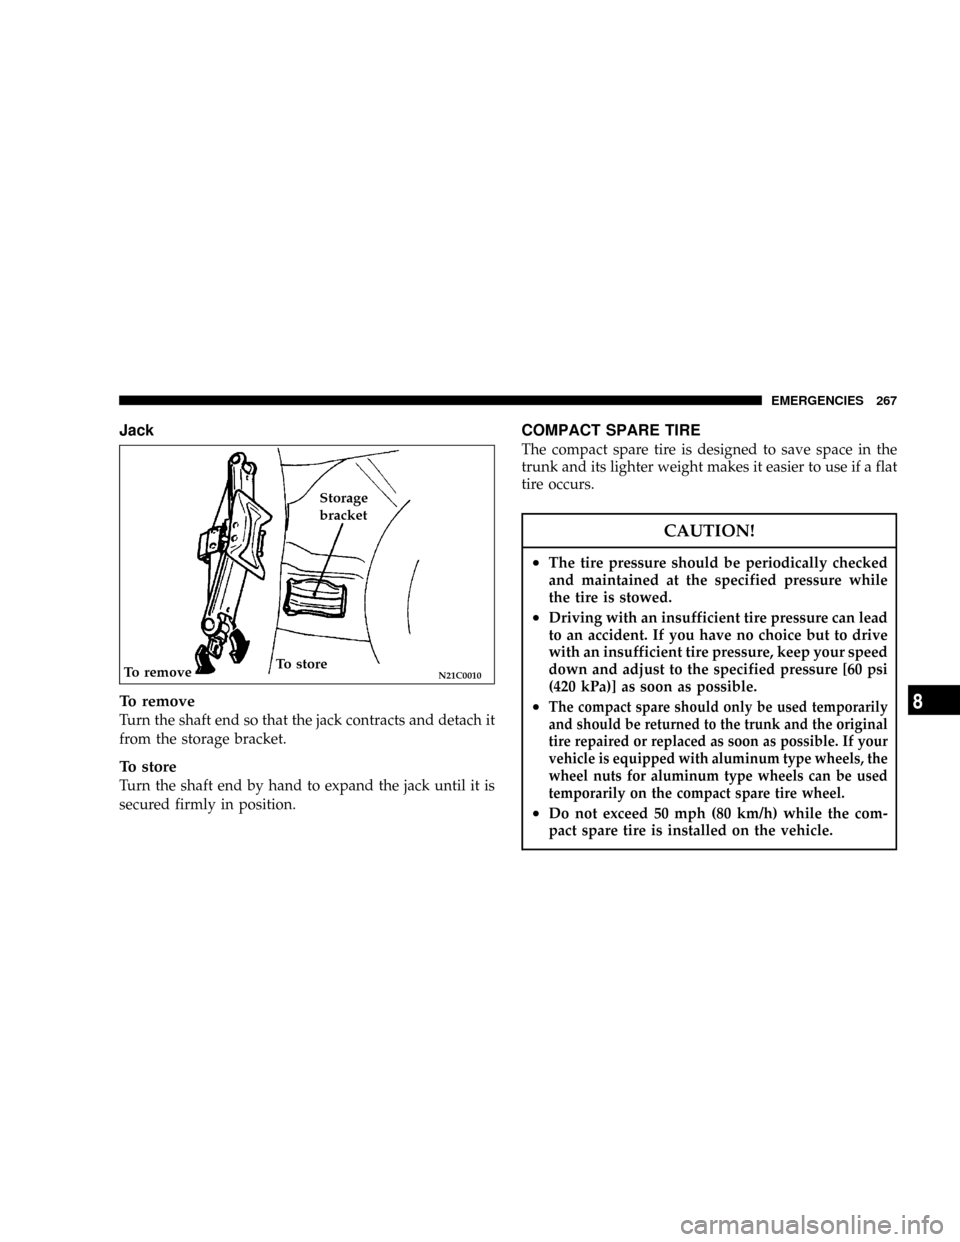
Jack
To remove
Turn the shaft end so that the jack contracts and detach it
from the storage bracket.
To store
Turn the shaft end by hand to expand the jack until it is
secured firmly in position.
COMPACT SPARE TIRE
The compact spare tire is designed to save space in the
trunk and its lighter weight makes it easier to use if a flat
tire occurs.
CAUTION!
²The tire pressure should be periodically checked
and maintained at the specified pressure while
the tire is stowed.
²Driving with an insufficient tire pressure can lead
to an accident. If you have no choice but to drive
with an insufficient tire pressure, keep your speed
down and adjust to the specified pressure [60 psi
(420 kPa)] as soon as possible.
²The compact spare should only be used temporarily
and should be returned to the trunk and the
original
tire repaired or replaced as soon as possible. If your
vehicle is equipped with aluminum type wheels, the
wheel nuts for aluminum type wheels can be used
temporarily on the compact spare tire wheel.
²Do not exceed 50 mph (80 km/h) while the com-
pact spare tire is installed on the vehicle.
N21C0010To removeTo storeStorage
bracket
EMERGENCIES 267
8
Page 273 of 396
7. Remove the wheel nut wrench and bar from the tool
bag (located inside the trunk).8. Insert the bar (E) into the wheel nut wrench (F). Then
attach the end of the bar to the jack end, as shown in the
illustration.
Slowly rotate the wheel nut wrench until the tire is
slightly raised off the ground surface.
N22A1830N22A0010
EMERGENCIES 273
8
Page 294 of 396
DescriptionWattage or
Candela
PowerANSI Trade
No. or
Bulb type
5 - High-mounted stop light 18w 921
6 - Stop and tail light 32/2cp 2057
7 - Rear turn signal and tail
light32/2cp 2057
8 - Rear side marker light 5W W5W
9 - License plate light 3cp 168
10 - Back up light 32cp 1156
Inside
DescriptionWattage or
Candela Power
Dome Light 10W
Reading light 4W
Rear personal light 8W
Trunk light 5W
N10B2830
294 EMERGENCIES
Page 301 of 396
Rear combination lights
1. Turn the trim cover clip (A) counterclockwise and
remove the trim cover clip. Partially remove the trim
cover in the trunk.2. Remove the light case mounting nuts. Disconnect the
connector.
N20I0170
N20I0160
EMERGENCIES 301
8
Page 305 of 396
4. When mounting the light unit, align the pin (C) on the
light unit with the hole in the body.
Trunk light
Pull both clips away from the center as shown and
remove the light unit. Then remove the bulb by pulling
out.
N11H0170
N10O0230
Clips
EMERGENCIES 305
8
Page 332 of 396

HOOD LOCK RELEASE MECHANISM AND
SAFETY CATCH
The door hinges, trunk hinges, hood lock release mecha-
nism and hood safety catch should be inspected, cleaned,
and lubricated as required to maintain ease of operation
and to provide protection against rust and wear. Apply
Multipurpose Grease NLGI Grade 2 sparingly to all
sliding contact areas of the hood latch and release lever.
Work lubricant into the hood lock mechanism until all
frictional surfaces are covered.
Also, apply a film of the same lubricant to the pivot
contact areas of the safety catch.
EXHAUST SYSTEM
WARNING!
Carbon monoxide gas found in the vehicle's exhaust
is poisonous. Inhalation of exhaust fumes can cause
unconsciousness or death.
The best protection against carbon monoxide entry into
the vehicle interior is a properly maintained engineexhaust system.
Whenever a change is noticed in the sound of the exhaust
system; when exhaust fumes can be detected inside the
vehicle; or when the underside or rear of the vehicle is
damaged, have a competent technician inspect the com-
plete exhaust system and adjacent body areas for broken,
damaged, deteriorated, or mispositioned parts.
In addition inspect the exhaust system each time the
vehicle is raised for lubrication or oil change. Replace as
required.
Open seams or loose connections could permit danger-
ous exhaust fumes to seep into the trunk and passenger
compartments.
Do this service when performing underbody service.
Check for any of the following conditions:
1. Check for holes or exhaust gas leakage caused by
corrosion or damage.
2. Check the joints and connections for looseness or
exhaust gas leakage.
3. Check the rubber hangers and brackets for damage.
332 MAINTENANCE
Page 396 of 396

Tire chains.......................... 348
Tread wear indicators.................. 346
Tools................................ 266
Towing.............................. 284
Trailering........................... 205
Trailer Towing......................... 205
Transaxle
Automatic transaxle................... 155
Autostick........................... 165
Manual transaxle..................... 168
Transmission
Automatic transmission................ 160
Transmitter, Garage Door Opener........... 134
Transporting Pets....................... 103
Trip odometer......................... 108
Trip odometer reset button................ 108
Trunklid .............................. 35
Turbocharger boost gauge................ 108
Turn signal indicators.................109,114
Lever.............................. 124
Uniform Tire Quality Grades.............. 387
Universal Transmitter.................... 134Vanity mirror.......................... 211
Vehicle Identification Number............... 5
Vehicle labeling........................ 372
Vehicle Weights........................ 375
Ventilators............................ 237
Warnings and Cautions.................... 5
Warranty Information.................... 382
Washer fluid level indicator............... 109
Washer
Windshield.......................130,333
Washing.............................. 255
Waxing.............................. 257
Wheel covers.......................... 268
Whip antenna......................... 221
Windshield washers..................130,333
Windshield wiper blades................. 333
Windshield wipers...................... 128
396 INDEX