Page 301 of 480
transmission operating temperature exceeds acceptable
limits. This is done to prevent transmission damage due
to overheating.
PARKING BRAKE
When the parking brake is applied with the ignition
switch on, the brake light in the instrument cluster will
turn on.
NOTE: This light only shows that the parking brake is
applied. It does not show the degree of brake application.
Before leaving the vehicle, make sure that the parking
brake is fully applied and place the gear selector in the
Park position. To release the parking brake, pull out on
the parking brake release located on the left side of the
instrument panel. When parking on a hill, it is important to set the parking
brake before placing the gear selector in Park, otherwise
the load on the transmission locking mechanism may
make it difficult to move the selector out of park. As an Parking Brake Release STARTING AND OPERATING 301
5
Page 302 of 480

added precaution, turn the front wheels toward the curb
on a downhill grade and away from the curb on a uphill
grade.
The parking brake should always be applied when the
driver is not in the vehicle.
WARNING!Leaving children in a vehicle unattended is danger-
ous for a number of reasons. A child or others could
be injured. Children should be warned not to touch
the parking brake, brake pedal or the gear selector
lever. Don ’ t leave the keys in the ignition. A child
could operate power windows, other controls, or
move the vehicle. WARNING!Be sure the parking brake is fully disengaged before
driving: failure to do so can lead to brake failure, and
an accident.
BRAKE SYSTEM
In the event power assist is lost for any reason (for
example, repeated brake applications with the engine
off), the brakes will still function. The effort required to
brake the vehicle will be much greater than that required
with the power system operating.
Your vehicle is equipped with dual hydraulic
brake systems. If either of the two hydraulic
systems lose normal capability, the remaining
system will still function. There will be some
loss of overall braking effectiveness. This may be evident302 STARTING AND OPERATING
Page 305 of 480

WARNING!• Anti-lock system (ABS) cannot prevent the natu-
ral laws of physics from acting on the vehicle, nor
can it increase braking or steering efficiency be-
yond that afforded by the condition of the vehicle
brakes and tires or the traction afforded.
• The ABS cannot prevent accidents, including
those resulting from excessive speed in turns,
following another vehicle too closely, or hydro-
planing. Only a safe, attentive, and skillful driver
can prevent accidents.
• The capabilities of an ABS equipped vehicle must
never be exploited in a reckless or dangerous
manner which could jeopardize the user ’ s safety
or the safety of others. All vehicle wheels and tires must be the same size and
type and tires must be properly inflated to produce
accurate signals for the computer.
POWER STEERING
The standard power steering system will give you good
vehicle response and increased ease of maneuverability
in tight spaces. The system will provide mechanical
steering capability if power assist is lost.
If for some reason, the power assist is interrupted, it will
still be possible to steer your vehicle. Under these condi-
tions you will observe a substantial increase in steering
effort, especially at very low vehicle speeds and during
parking maneuvers.
NOTE: Increased noise levels at the end of the steering
wheel travel are considered normal and does not indicate
that there is a problem with the power steering system. STARTING AND OPERATING 305
5
Page 347 of 480
Jacking Instructions — Fold-in-Floor Seating
Preparations For Jacking
Park the vehicle on a firm level surface, avoid ice or
slippery areas, set the parking brake and place the gear
selector in PARK. Turn OFF the ignition.
WARNING!Do not attempt to change a tire on the side of the
vehicle close to moving traffic. Pull far enough off
the road to avoid the danger of being hit when
operating the jack or changing the wheel. • Turn on the Hazard Warning Flasher.
• Block both the front and rear
of the wheel diagonally oppo-
site the jacking position. For
example, if changing the right
front tire, block the left rear
wheel.
• Passengers should not remain in the vehicle when the
vehicle is being jacked. WHAT TO DO IN EMERGENCIES 347
6
Page 359 of 480

CAUTION!For vehicles equipped with fold-in-floor seating, the
Winch Mechanism is designed specifically to stow a
COMPACT Spare Tire ONLY. Do not attempt to use
the Winch to stow the Full Size ’ Flat ’ Tire, or any
other Full Size Tire. Vehicle damage may result.
Jacking Instructions — Non Fold-in-Floor Seating
Preparations For Jacking
Park the vehicle on a firm level surface, avoid ice or
slippery areas, set the parking brake and place the gear
selector in PARK. Turn OFF the ignition. WARNING!Do not attempt to change a tire on the side of the
vehicle close to moving traffic. Pull far enough off
the road to avoid the danger of being hit when
operating the jack or changing the wheel.
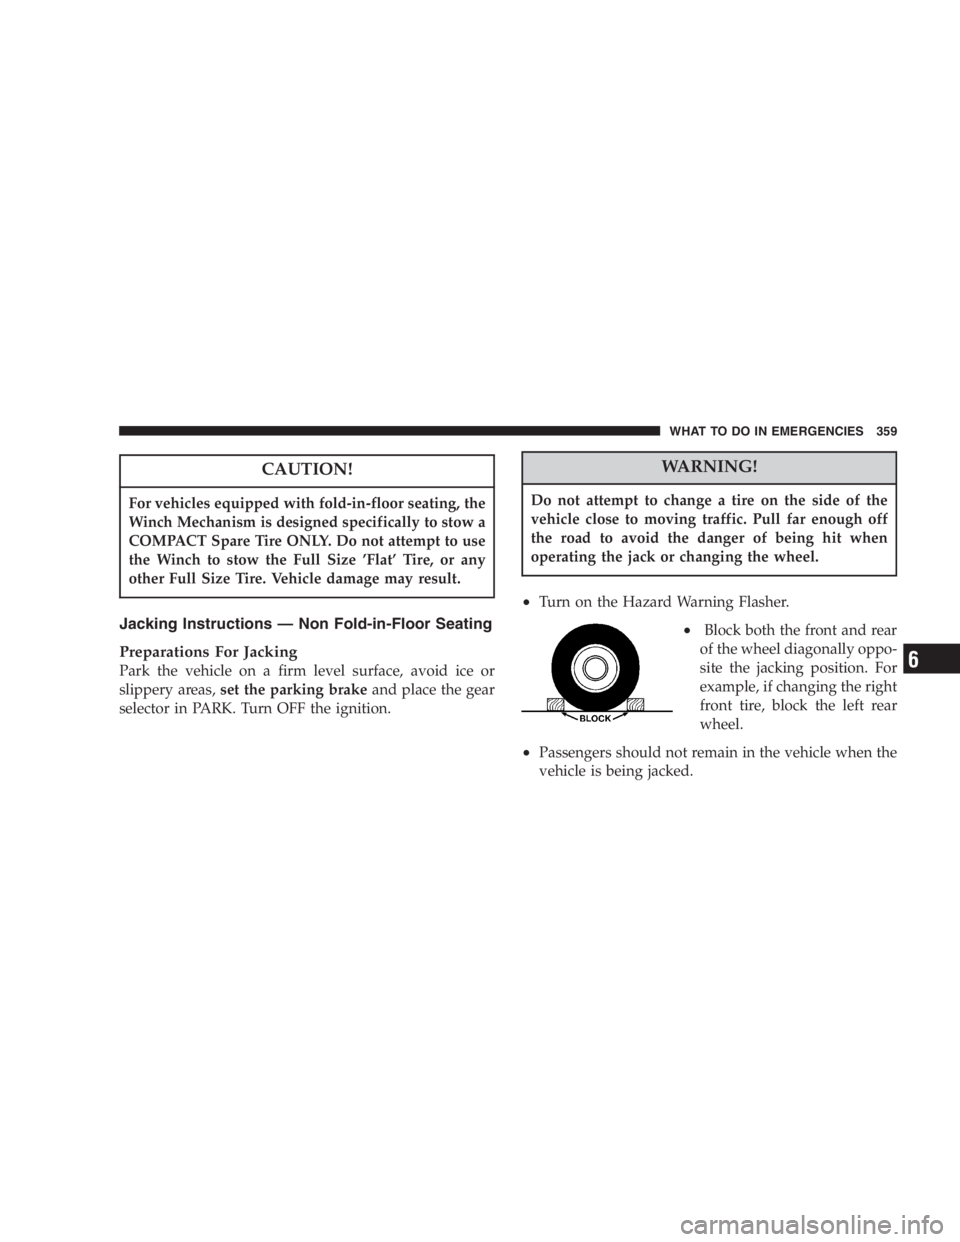
• Turn on the Hazard Warning Flasher.
• Block both the front and rear
of the wheel diagonally oppo-
site the jacking position. For
example, if changing the right
front tire, block the left rear
wheel.
• Passengers should not remain in the vehicle when the
vehicle is being jacked. WHAT TO DO IN EMERGENCIES 359
6
Page 366 of 480

WARNING!• Do not attempt to push or tow your vehicle to get it
started. Vehicles equipped with an automatic transmis-
sion cannot be started this way. Unburned fuel could
enter the catalytic converter and once the engine has
started, ignite and damage the converter and vehicle. If
the vehicle has a discharged battery, booster cables may
be used to obtain a start from another vehicle. This type
of start can be dangerous if done improperly, so follow
this procedure carefully.
• Battery fluid is a corrosive acid solution; do not allow
battery fluid to contact eyes, skin or clothing. Don ’ t lean
over battery when attaching clamps or allow the clamps
to touch each other. If acid splashes in eyes or on skin,
flush contaminated area immediately with large quan-
tities of water.
• A battery generates hydrogen gas which is flammable
and explosive. Keep flame or spark away from the vent
holes. Do not use a booster battery or any other booster
source with an output that exceeds 12 volts. 1. Wear eye protection and remove any metal jewelry
such as watch bands or bracelets that might make an
inadvertent electrical contact.
2. When boost is provided by a battery in another
vehicle, park that vehicle within booster cable reach and
without letting the vehicles touch. Set the parking brake,
place the automatic transmission in PARK and turn the
ignition switch to the OFF position for both vehicles.
3. Turn off the heater, radio and all unnecessary electrical
loads.
4. Connect one end of a jumper cable to the positive
terminal of the discharged battery. Connect the other end
of the same cable to the positive terminal of the booster
battery.366 WHAT TO DO IN EMERGENCIES
Page 404 of 480

Procedure For Checking Fluid Level
The fluid level in the automatic transmission should be
checked whenever the vehicle is serviced. Operation with
an improper fluid level will greatly reduce the life of the
transmission and of the fluid.
To properly check the automatic transmission fluid level,
the following procedure must be used:
1. The vehicle must be on level ground.
2. The engine should be running at curb idle speed for a
minimum of 60 seconds.
3. Fully apply parking brake.
4. Place the gear selector momentarily in each gear
position ending with the lever in P (PARK). Wipe the area
around the dipstick clean to eliminate the possibility of
dirt entering the transmission. 5. Remove the dipstick and determine if the fluid is hot
or warm. Hot fluid is approximately 180 ° F (82 ° C), which
is the normal operating temperature after the vehicle has
been driven at least 15 miles (24 km). The fluid cannot be
comfortably held between the finger tips. Cold is when
the fluid is below 80 ° F (27 ° C).
6. Wipe the dipstick clean and reinsert until seated.
Remove dipstick and note reading.
a. If the fluid is hot, the reading should be in the
crosshatched area marked “ HOT ” (between the upper
two holes in the dipstick).
b. If the fluid is cold, the fluid level should be between
the lower two holes in the area marked “ COLD ” .
If the fluid level indicates low, add sufficient fluid to
bring to the proper level.404 MAINTAINING YOUR VEHICLE
Page 459 of 480

Interlock System ....................... 298
Reset Mode .......................... 299
Selection Of Lubricant ................ 403,423
Shifting ............................. 299
Special Additives ...................... 405
Automatic Transmission ................... 402
Adding Fluid ......................... 404
Fluid and Filter Changes ................. 405
Fluid Change ......................... 405
Fluid Level Check ...................... 404
Fluid Type ........................ 403,423
Ball Joints ............................. 390
Battery ............................... 387
Gas Caution .......................... 387
Jump Starting ......................... 365
Keyless Transmitter Replacement ............ 26
Saving Feature (Protection) ............... 137
Bearings .............................. 406 Belts, Drive ............................ 383
Body Mechanism Lubrication ............... 391
B-Pillar Location ........................ 312
Brake Fluid ............................ 423
Brake, Parking .......................... 301
Brake System ........................ 302,399
Anti-Lock ........................... 303
Fluid Check .......................... 401
Hoses .............................. 400
Warning Light ........................ 197
Brakes ............................. 302,399
Brake/Transmission Interlock ............... 298
Break-In Recommendations, New Vehicle ........ 82
Bulb Replacement ....................... 416
Bulbs, Light ............................ 415
Calibration, Compass ..................... 152
Capacities, Fluid ........................ 421 INDEX 459
10