2005 CHEVROLET UPLANDER park assist
[x] Cancel search: park assistPage 141 of 460

HomeLink®Wireless Control
System Operation
Do not use the HomeLink®Transmitter with any garage
door opener that does not have the “stop and reverse”
feature. This includes any garage door opener model
manufactured before April 1, 1982. If you have a newer
garage door opener with rolling codes, please be
sure to follow Steps 6 through 8 to complete the
programming of your HomeLink
®Transmitter.
Read the instructions completely before attempting to
program the HomeLink
®Transmitter. Because of
the steps involved, it may be helpful to have another
person available to assist you in programming the
transmitter.Keep the original transmitter for use in other vehicles as
well as for future HomeLink
®programming. It is also
recommended that upon the sale of the vehicle,
the programmed HomeLink
®buttons should be erased
for security purposes. Refer to “Erasing HomeLink®
Buttons” or, for assistance, contact HomeLink®on the
Internet at: www.homelink.com or by calling
1-800-355-3515.
Be sure that people and objects are clear of the garage
door or gate operator you are programming. When
programming a garage door, it is advised to park outside
of the garage.
It is recommended that a new battery be installed in
your hand-held transmitter for quicker and more
accurate transmission of the radio frequency.
2-47
Page 153 of 460

Instrument Panel Overview...............................3-4
Hazard Warning Flashers................................3-6
Other Warning Devices...................................3-6
Horn.............................................................3-6
Tilt Wheel.....................................................3-6
Turn Signal/Multifunction Lever.........................3-7
Turn and Lane-Change Signals........................3-7
Headlamp High/Low-Beam Changer..................3-8
Flash-to-Pass.................................................3-8
Windshield Wipers..........................................3-9
Windshield Washer.........................................3-9
Cruise Control..............................................3-10
Exterior Lamps.............................................3-14
Wiper Activated Headlamps............................3-15
Headlamps on Reminder................................3-15
Daytime Running Lamps (DRL)/
Automatic Headlamp System.......................3-16
Instrument Panel Brightness...........................3-17
Interior Lamps Control...................................3-17
Dome Lamp.................................................3-18
Entry Lighting...............................................3-18
Delayed Lighting...........................................3-18
Exit Lighting.................................................3-19
Front Reading Lamps....................................3-19
Rear Reading Lamps....................................3-19Cargo Lamp.................................................3-19
Battery Run-Down Protection..........................3-20
Overhead Console Switchbank.......................3-20
Ultrasonic Rear Parking Assist (URPA)............3-21
Accessory Power Outlets...............................3-23
Power Outlet 115 Volt Alternating Current........3-24
Climate Controls............................................3-25
Climate Control System.................................3-25
Outlet Adjustment.........................................3-28
Rear Climate Control System.........................3-28
Warning Lights, Gages, and Indicators............3-31
Instrument Panel Cluster................................3-32
Speedometer and Odometer...........................3-33
Trip Odometer..............................................3-33
Tachometer.................................................3-33
Safety Belt Reminder Light.............................3-33
Passenger Safety Belt Reminder Light.............3-34
Airbag Readiness Light..................................3-34
Passenger Airbag Status Indicator...................3-35
Charging System Light..................................3-37
Brake System Warning Light..........................3-37
Anti-Lock Brake System Warning Light.............3-38
Traction Control System (TCS)
Warning Light...........................................3-39
Section 3 Instrument Panel
3-1
Page 172 of 460

Battery Run-Down Protection
Your vehicle has a feature to help prevent you from
draining the battery, in case you accidentally leave the
interior lamps on. If you leave any interior lamps on
while the ignition is in lock or off, they will automatically
turn off after 10 minutes. The lamps will not come
back on again until you do one of the following:
Turn the ignition to RUN or ACCESSORY
Open a closed door, or close and reopen a door.
Turn the interior lamps on if they are in the door or
override position.
Turn the interior lamps to the door or override
position and then to on again if the interior
lamp control is in the on position.
If your vehicle has less than 15 miles (25 km) on the
odometer, the battery saver will turn off the lamps after
only three minutes.
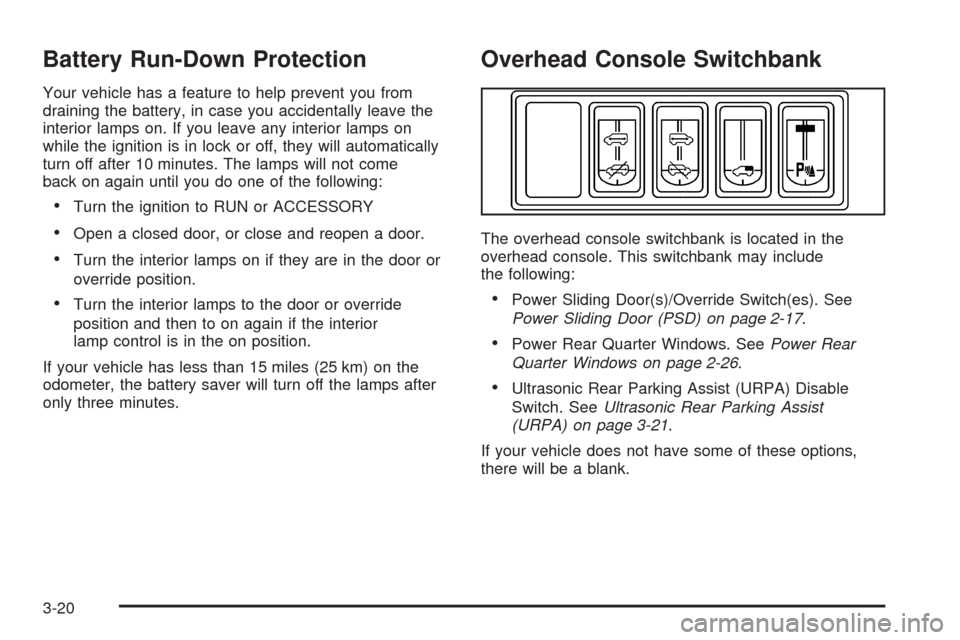
Overhead Console Switchbank
The overhead console switchbank is located in the
overhead console. This switchbank may include
the following:
Power Sliding Door(s)/Override Switch(es). See
Power Sliding Door (PSD) on page 2-17.
Power Rear Quarter Windows. SeePower Rear
Quarter Windows on page 2-26.
Ultrasonic Rear Parking Assist (URPA) Disable
Switch. SeeUltrasonic Rear Parking Assist
(URPA) on page 3-21.
If your vehicle does not have some of these options,
there will be a blank.
3-20
Page 173 of 460

Ultrasonic Rear Parking
Assist (URPA)
If your vehicle is equipped with the Ultrasonic Rear
Parking Assist (URPA) system, it is designed to help you
park, while the vehicle is in REVERSE (R). It operates
only at very low speeds, less than 3 mph (5 km/h).
URPA can help make parking easier and to help you
avoid colliding with objects such as parked vehicles. The
URPA system can detect objects up to 5 feet (1.5 m)
behind the vehicle, and tell you how close these objects
are from your rear bumper.
Your vehicle’s URPA operates when the shift lever is
moved into REVERSE (R) and the vehicle speed is less
than 3 mph (5 km/h). Four ultrasonic sensors located
at the rear bumper are used to detect the distance to the
object. The URPA display is located inside the vehicle,
near the rear window. It has three color-coded lights
used to provide distance and system information to the
driver.
{CAUTION:
Even with the Ultrasonic Rear Park Assist
system, the driver must check carefully before
backing up. The system does not operate
above typical backing speeds of 3 mph
(5 km/h) while parking. And, the system does
not detect objects that are more than 5 feet
(1.5 meters) behind the vehicle.
So, unless you check carefully behind you
before and when you back up, you could strike
children, pedestrians, bicyclists or pets behind
you, and they could be injured or killed.
Whether or not you are using rear park assist,
always check carefully behind your vehicle
before you back up and then watch closely as
you do.
3-21
Page 225 of 460

Press the menu button until REMOTE START appears
on the DIC display. Press the set/reset button to
scroll through the following choices:
OFF:The remote start feature will be disabled.
ON (default):The remote start feature will be enabled.
Choose one of the available settings and press the
menu button while it is displayed on the DIC to select it
and move on to the next feature.
REAR PARK CHIME
If your vehicle has the Ultrasonic Rear Parking Assist
(URPA) system, this feature allows the URPA system’s
chime to be turned OFF or ON. SeeUltrasonic Rear
Parking Assist (URPA) on page 3-21for more
information.
Press the option button until REAR PARK CHIME
appears on the DIC display. Press the set/reset button
to scroll through the following choices:
OFF:The URPA system’s chime will be disabled.
ON (default):The URPA system’s chime will be
enabled.
Choose one of the available settings and press the
menu button while it is displayed on the DIC to select it
and move on to the next feature.
Personalization Menu Items
The following are personalization features that allow you
to program setting for up to two drivers:
PERSONALIZE KEY
If you are using a key that has already been
personalized to be recognized as key 1 or 2, this screen
will not display. This feature allows you to personalize
a key to be recognized as key 1 or 2. A personalized key
allows you to program personalization features to a
preferred setting to correspond to key 1 or 2.
Press the menu button until PERSONALIZE KEY
appears on the DIC display. Press the set/reset button
to scroll through the following choices:
NO (default):The key will not be personalized.
YES:The key will be personalized.
Choose one of the available settings and press the
menu button while it is displayed on the DIC to select it
and move on to the next feature.
3-73
Page 384 of 460

Changing a Flat Tire
If a tire goes �at, avoid further tire and wheel damage
by driving slowly to a level place. Turn on your vehicle’s
hazard warning �ashers. SeeHazard Warning Flashers
on page 3-6for more information.
{CAUTION:
Changing a tire can be dangerous. The vehicle
can slip off the jack and roll over or fall on you
or other people. You and they could be badly
injured or even killed. Find a level place to
change your tire. To help prevent the vehicle
from moving:
1. Set the parking brake �rmly.
2. Put the shift lever in PARK (P).
3. Turn off the engine and do not restart
while the vehicle is raised.
4. Do not allow passengers to remain in the
vehicle.
To be even more certain the vehicle will not
move, you should put blocks at the front and
rear of the tire farthest away from the one
being changed. That would be the tire, on the
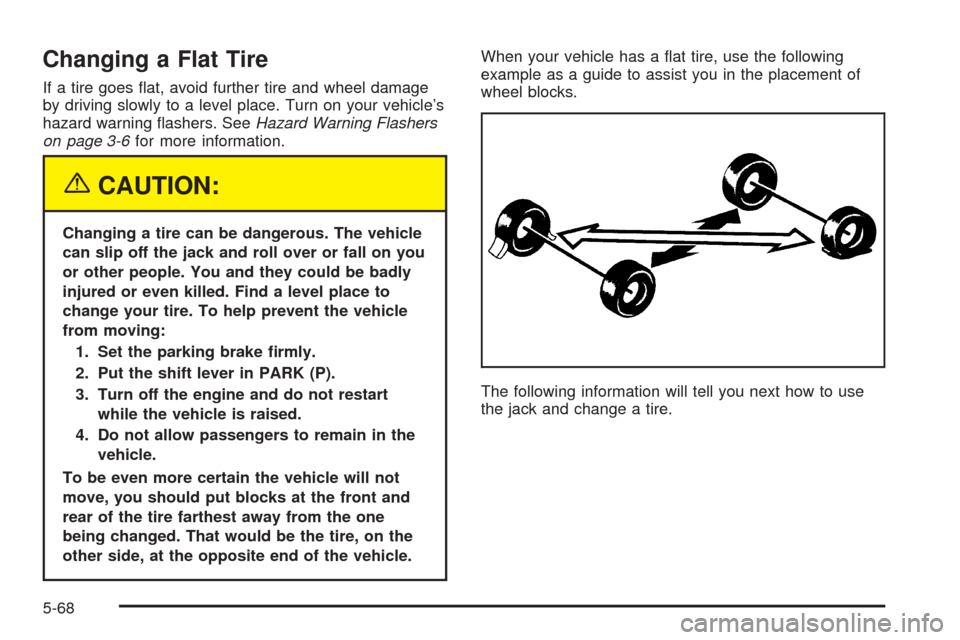
other side, at the opposite end of the vehicle.When your vehicle has a �at tire, use the following
example as a guide to assist you in the placement of
wheel blocks.
The following information will tell you next how to use
the jack and change a tire.
5-68
Page 445 of 460

Reporting Safety Defects to the
Canadian Government
If you live in Canada, and you believe that your vehicle
has a safety defect, you should immediately notify
Transport Canada, in addition to notifying General
Motors of Canada Limited. You may call them at
1-800-333-0510 or write to:
Transport Canada
Place de Ville Tower C
330 Sparks Street
Ottawa, Ontario K1A 0N5
Reporting Safety Defects to General
Motors
In addition to notifying NHTSA (or Transport Canada) in
a situation like this, we certainly hope you will notify
General Motors. Please call the Chevrolet Customer
Assistance Center at 1-800-222-1020, or write:
Chevrolet Motor Division
Chevrolet Customer Assistance Center
P.O. Box 33170
Detroit, MI 48232-5170In Canada, please call us at 1-800-263-3777 (English)
or 1-800-263-7854 (French). Or, write:
General Motors of Canada Limited
Customer Communication Centre, 163-005
1908 Colonel Sam Drive
Oshawa, Ontario L1H 8P7
Service Publications Ordering
Information
Service Manuals
Service Manuals have the diagnosis and repair
information on engines, transmission, axle suspension,
brakes, electrical, steering, body, etc.
Transmission, Transaxle, Transfer
Case Unit Repair Manual
This manual provides information on unit repair service
procedures, adjustments, and speci�cations for GM
transmissions, transaxles, and transfer cases.
7-11
Page 455 of 460

N
New Vehicle Break-In......................................2-31
Normal Maintenance Replacement Parts............6-13
O
Odometer......................................................3-33
Odometer, Trip...............................................3-33
Off-Road Recovery..........................................4-15
Oil
Engine.......................................................5-13
Pressure Light.............................................3-42
Oil, Engine Oil Life System..............................5-16
Older Children, Restraints................................1-42
Online Owner Center........................................ 7-3
OnStar
®System, see OnStar®Manual...............2-44
Other Warning Devices...................................... 3-6
Outlet Adjustment............................................3-28
Outside
Convex Mirror.............................................2-44
Heated Mirrors............................................2-44
Power Mirrors.............................................2-43
Overhead Console..................................2-51, 2-53
Overhead Console Switchbank..........................3-20
Overheated Engine Protection Operating Mode.....5-27
Owner Checks and Services.............................. 6-8
Owners, Canadian............................................... ii
P
Park Aid........................................................3-21
Park (P)
Shifting Into................................................2-39
Shifting Out of............................................2-40
Parking
Assist........................................................3-21
Brake........................................................2-38
Over Things That Burn.................................2-41
Passenger Airbag Status Indicator.....................3-35
Passenger Sensing System..............................1-80
Passing.........................................................4-15
PASS-Key
®III ................................................2-29
PASS-Key®III Operation..................................2-30
Power
Accessory Outlets........................................3-23
Door Locks.................................................2-12
Electrical System.........................................5-95
Outlet 115 Volt Alternating Current.................3-24
Rear Quarter Windows.................................2-26
Retained Accessory (RAP)............................2-32
Six-Way Seats.............................................. 1-4
Sliding Door................................................2-17
Steering Fluid.............................................5-34
Windows....................................................2-25
Pretensioners, Safety Belt................................1-41
Programmable Automatic Door Unlock...............2-14
9