2005 CHEVROLET SUBURBAN center console
[x] Cancel search: center consolePage 92 of 536
Mirrors...........................................................2-41
Manual Rearview Mirror.................................2-41
Automatic Dimming Rearview Mirror with
OnStar
®, Compass and Temperature
Display....................................................2-41
Automatic Dimming Rearview Mirror with
Compass and Temperature Display..............2-43
Outside Manual Mirrors..................................2-46
Outside Camper-Type Mirrors.........................2-46
Outside Power Mirrors...................................2-47
Outside Power Camper-Type Mirror.................2-47
Outside Power Foldaway Mirrors.....................2-48
Outside Automatic Dimming Mirror..................2-48
Outside Curb View Assist Mirrors....................2-49
Outside Convex Mirror...................................2-49
Outside Heated Mirrors..................................2-49OnStar
®System.............................................2-50
HomeLink®Wireless Control System...............2-52
HomeLink®Wireless Control System
Operation.................................................2-53
Storage Areas................................................2-56
Glove Box...................................................2-56
Cupholder(s)................................................2-56
Front Storage Area.......................................2-56
Center Console Storage Area.........................2-57
Luggage Carrier...........................................2-57
Rear Storage Area........................................2-58
Convenience Net..........................................2-58
Cargo Cover................................................2-59
Sunroof.........................................................2-60
Vehicle Personalization...................................2-61
Memory Seat...............................................2-61
Section 2 Features and Controls
2-2
Page 146 of 536
Reprogramming a Single HomeLink®
Button
To program a device to HomeLink®using a HomeLink®
button previously trained, follow these steps:
1. Press and hold the desired HomeLink
®button.
Do not release the button.
2. The indicator light will begin to �ash after
20 seconds. While still holding the HomeLink
®
button, proceed with Step 2 under “Programming
HomeLink®” shown earlier in this section.
Resetting Defaults
To reset HomeLink®to default settings do the following:
1. Hold down the two outside buttons for about
20 seconds until the indicator light begins to �ash.
2. Continue to hold both buttons until the HomeLink
®
indicator light turns off.
3. Release both buttons.
For questions or comments, contact HomeLink
®
at 1-800-355-3515, or on the Internet at
www.homelink.com.
Storage Areas
Glove Box
Open the glove box by pulling the bottom of the handle
upward.
Cupholder(s)
Your vehicle may have cupholders located in the front
and rear �oor console or in the fold down armrest, and in
the quarter trim.
Front Storage Area
Your vehicle may be equipped with a center armrest
storage compartment in the front bench seat.
To open it, fold down the armrest and press the latch
handle located at the front of the armrest. Then, let the
lid pop up and swing open.
The storage compartment may have a cassette/compact
disc holder.
2-56
Page 147 of 536
Center Console Storage Area
Your vehicle may have a console compartment with
cupholders between the bucket seats.
To open it, press the button and swing the console
lid open.
The rear of the console has a cupholder that swings
down for the rear seat passenger to use.
Luggage Carrier
If you have the luggage carrier, you can load things on
top of your vehicle.
The luggage carrier has slats and siderails attached to
the roof and crossrails which can be moved back
and forth to help secure cargo. Tie the load to the
siderails or siderail supports.
Notice:Loading cargo on the luggage carrier that
weighs more than 200 lbs (91 kg) or hangs over
the rear or sides of the vehicle may damage your
vehicle. Load cargo so that it rests on the slats
as far forward as possible and against the side rails,
making sure to fasten it securely.
Don’t exceed the maximum vehicle capacity when
loading your vehicle. For more information on vehicle
capacity and loading, seeLoading Your Vehicle
on page 4-52.To prevent damage or loss of cargo as you’re leaving,
check now and then to make sure the luggage and
cargo are still securely fastened.
Be sure the cargo is properly loaded.
If small heavy objects are placed on the roof, place
the load in the area over the rear wheels (behind
the rear side door on extended models). If you
need to, cut a piece of 3/8 inch plywood to �t inside
the crossrails and siderails to spread the load.
If plywood is used, tie it to the siderail supports.
Tie the load to the crossrails or the siderail supports.
Use the crossrails only to keep the load from sliding.
To move the crossrails, pull out on the latch release
handle at each end. Slide the crossrail to the desired
position balancing the force side to side. Push the
release handle back into the latched position and
slide the crossrail back and forth slightly to be sure
the latch snaps securely into place.
If you need to carry long items, move the crossrails
as far apart as they will go. Tie the load to the
crossrails and the siderails or siderail supports. Also
tie the load to the bumpers. Do not tie the load so
tightly that the crossrails or siderails are damaged.
After moving a crossrail, be sure it is securely locked
into the siderail.
2-57
Page 157 of 536

A. Dome Lamp Override Button. SeeDome Lamp
Override on page 3-19.
B. Headlamp Controls. SeeHeadlamps on page 3-14.
C. Air Outlets. SeeOutlet Adjustment on page 3-30.
D. Automatic Transfer Case Buttons. SeeFour-Wheel
Drive on page 2-28.
E. Turn Signal/Multifunction Lever. SeeTurn
Signal/Multifunction Lever on page 3-7.
F. Instrument Panel Cluster. SeeInstrument Panel
Cluster on page 3-37.
G. Gearshift Lever. SeeAutomatic Transmission
Operation on page 2-24.
H. Tow/Haul Selector Button (If Equipped).
SeeTow/Haul Mode on page 2-27.
I. Audio System. SeeAudio System(s) on page 3-78.
J. Dual Climate Control System. SeeDual Climate
Control System on page 3-22.Dual Automatic
Climate Control System on page 3-25.
K. Instrument Panel Fuse Block. SeeInstrument Panel
Fuse Block on page 5-108.L. Hood Release. SeeHood Release on page 5-11.
M. Steering Wheel Control Buttons (If Equipped).
SeeDriver Information Center (DIC) on page 3-56
andAudio Steering Wheel Controls on page 3-135.
N. Center Instrument Panel Utility Block. SeeCenter
Instrument Panel Fuse Block on page 5-110.
O. Tilt Wheel Lever. SeeTilt Wheel on page 3-6.
P. Parking Brake Release. SeeParking Brake on
page 2-35.
Q. Cigarette Lighter. SeeAshtrays and Cigarette
Lighter on page 3-21. Accessory Power Outlets.
SeeAccessory Power Outlets on page 3-20.
R. Storage Area (If Equipped). SeeCenter Console
Storage Area on page 2-57.
S. Ashtray. SeeAshtrays and Cigarette Lighter on
page 3-21.
T. StabiliTrak
®or Traction Assist System (TAS)
Button (If Equipped). SeeStabiliTrak®System
on page 4-11orTraction Assist System (TAS) on
page 4-9.
U. Glovebox. SeeGlove Box on page 2-57.
3-5
Page 173 of 536
Ashtrays and Cigarette Lighter
The front ashtray is located near the center of the
instrument panel or on the front console, if equipped.
Pull on the ashtray door to open it.
Notice:If you put papers, pins, or other �ammable
items in the ashtray, hot cigarettes or other
smoking materials could ignite them and possibly
damage your vehicle. Never put �ammable items in
the ashtray.
To remove the front ashtray pull the ashtray up.
To use the cigarette lighter, push it in all the way, and
let go. When it’s ready, it will pop back out by itself.
Notice:Holding a cigarette lighter in while it
is heating will not allow the lighter to back away
from the heating element when it is hot. Damage
from overheating may occur to the lighter or heating
element, or a fuse could be blown. Do not hold a
cigarette lighter in while it is heating.
Climate Controls
Climate Control System
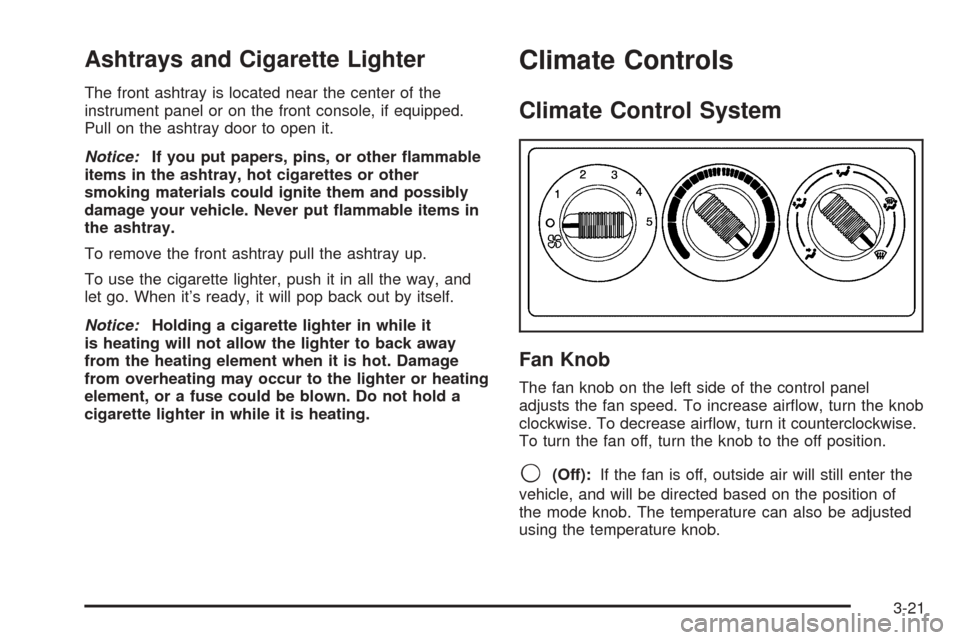
Fan Knob
The fan knob on the left side of the control panel
adjusts the fan speed. To increase air�ow, turn the knob
clockwise. To decrease air�ow, turn it counterclockwise.
To turn the fan off, turn the knob to the off position.
9(Off):If the fan is off, outside air will still enter the
vehicle, and will be directed based on the position of
the mode knob. The temperature can also be adjusted
using the temperature knob.
3-21
Page 175 of 536
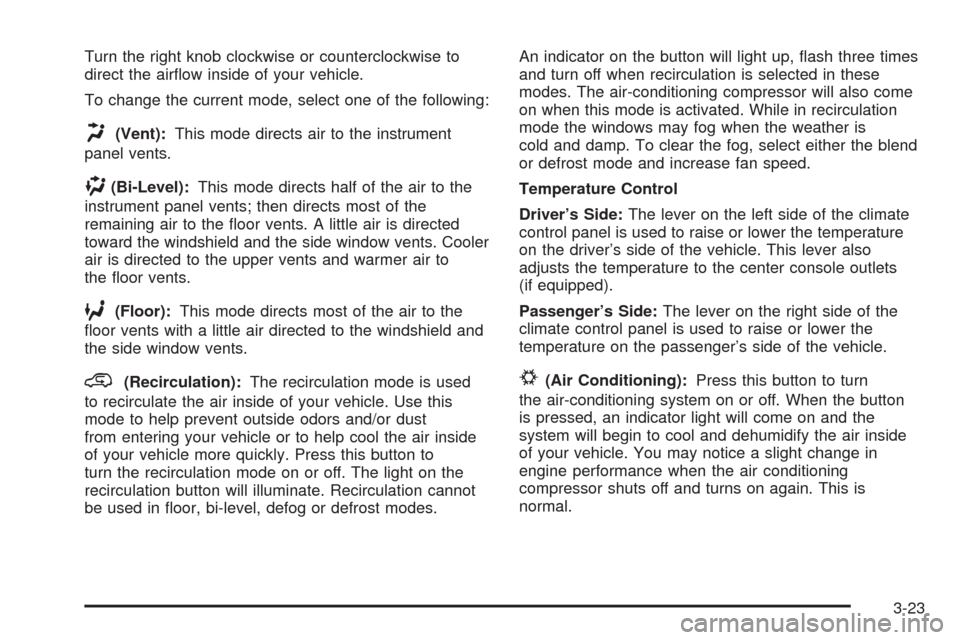
Turn the right knob clockwise or counterclockwise to
direct the air�ow inside of your vehicle.
To change the current mode, select one of the following:
H(Vent):This mode directs air to the instrument
panel vents.
)(Bi-Level):This mode directs half of the air to the
instrument panel vents; then directs most of the
remaining air to the �oor vents. A little air is directed
toward the windshield and the side window vents. Cooler
air is directed to the upper vents and warmer air to
the �oor vents.
6(Floor):This mode directs most of the air to the
�oor vents with a little air directed to the windshield and
the side window vents.
@(Recirculation):The recirculation mode is used
to recirculate the air inside of your vehicle. Use this
mode to help prevent outside odors and/or dust
from entering your vehicle or to help cool the air inside
of your vehicle more quickly. Press this button to
turn the recirculation mode on or off. The light on the
recirculation button will illuminate. Recirculation cannot
be used in �oor, bi-level, defog or defrost modes.An indicator on the button will light up, �ash three times
and turn off when recirculation is selected in these
modes. The air-conditioning compressor will also come
on when this mode is activated. While in recirculation
mode the windows may fog when the weather is
cold and damp. To clear the fog, select either the blend
or defrost mode and increase fan speed.
Temperature Control
Driver’s Side:The lever on the left side of the climate
control panel is used to raise or lower the temperature
on the driver’s side of the vehicle. This lever also
adjusts the temperature to the center console outlets
(if equipped).
Passenger’s Side:The lever on the right side of the
climate control panel is used to raise or lower the
temperature on the passenger’s side of the vehicle.#(Air Conditioning):Press this button to turn
the air-conditioning system on or off. When the button
is pressed, an indicator light will come on and the
system will begin to cool and dehumidify the air inside
of your vehicle. You may notice a slight change in
engine performance when the air conditioning
compressor shuts off and turns on again. This is
normal.
3-23
Page 182 of 536
Outlet Adjustment
Use the air outlets located in the center and on the side
of your instrument panel to direct the air�ow.
Operation Tips
Keep the hood and front air inlets free of ice, snow,
or any other obstruction (such as leaves). The
heater and defroster will work far better, reducing
the chance of fogging the inside of your windows.
When you enter a vehicle in cold weather, turn the
fan knob all the way to the right for a few moments
before driving. This helps clear the intake ducts
of snow and moisture, and reduces the chance of
fogging the inside of your window.
Keep the air path under the front seats clear of
objects. This helps air to circulate throughout
your vehicle.
Adding outside equipment to the front of your
vehicle, such as hood-air de�ectors, may affect the
performance of the heating and air conditioning
system. Check with your dealer before adding
equipment to the outside of your vehicle.
Rear Air Conditioning System
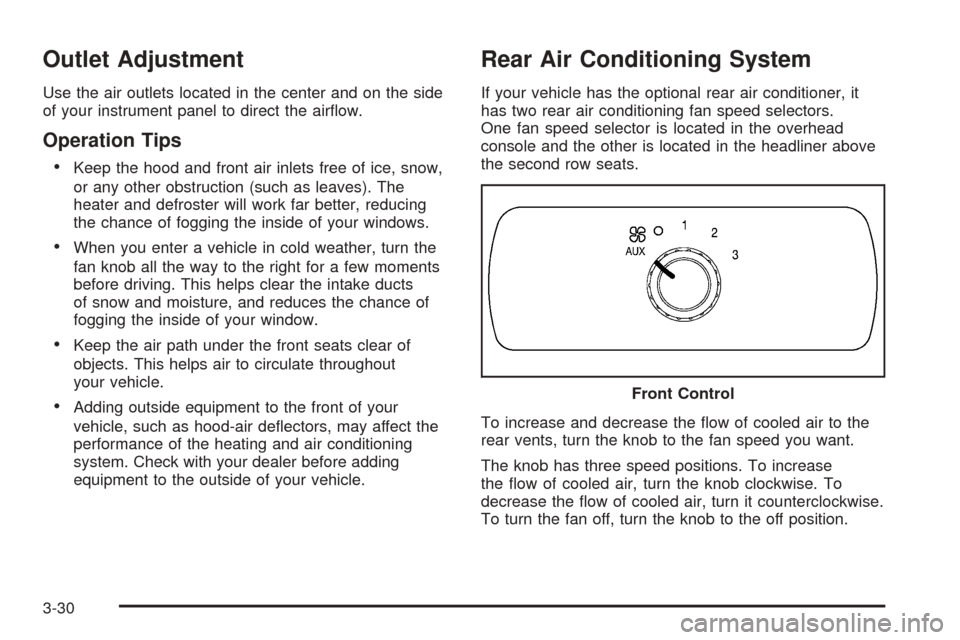
If your vehicle has the optional rear air conditioner, it
has two rear air conditioning fan speed selectors.
One fan speed selector is located in the overhead
console and the other is located in the headliner above
the second row seats.
To increase and decrease the �ow of cooled air to the
rear vents, turn the knob to the fan speed you want.
The knob has three speed positions. To increase
the �ow of cooled air, turn the knob clockwise. To
decrease the �ow of cooled air, turn it counterclockwise.
To turn the fan off, turn the knob to the off position.Front Control
3-30
Page 186 of 536

Rear Air Conditioning and Heating
System and Electronic Climate
Controls
With this system, the front or rear passengers can
control the air temperature, air�ow and fan speed for
the rear seat passengers. The climate control has
an overhead control near the driver and a control on the
back of the center console.
Driver Overhead Control
To control the rear climate control from the front seat
position, use the driver overhead control. The rear
console control must be on.AUX:Turn the knob, located on the left side of the
control panel, to this position to allow the rear seat
passengers to have control over the rear climate control
system. See “Rear Passenger Console Control” later
for more information.
9(Off):Turn the knob, located on the left side of the
control panel, to this position to turn the rear climate
control system off.
9(Fan):To adjust the air�ow speed, turn the fan
knob located on the left side of the control panel to the
desired setting. Choose AUTO if you want the system
to automatically choose the fan speed to maintain
a selected temperature. See “Auto Mode” later in this
section for more information on using this feature.
°F (°C):To adjust the air temperature, turn the
temperature knob on the center of the control panel. For
cooler or warmer air, turn the knob counterclockwise
toward 66°F (19°C) or clockwise toward 82°F (27°C).
To regulate the air�ow direction, adjust the right knob on
the control panel. Turn the knob clockwise for �oor
vent air�ow or counterclockwise for headliner vent
air�ow. Generally, the upper vents are used for air
conditioning and the �oor vents for heating. The knob
can be set to any blend setting. Choose AUTO if
you want the system to automatically regulate the
air�ow. See “Auto Mode” later in this section for more
information on using this feature. Front Controls - United States shown,
Canada similar
3-34