2005 CHEVROLET SUBURBAN warning
[x] Cancel search: warningPage 407 of 536
How to Add Coolant to the Coolant
Surge Tank
If you have not found a problem yet, check to see if
coolant is visible in the surge tank. If coolant is visible
but the coolant level is not at or above the FULL COLD
mark, add a 50/50 mixture of clean, drinkable water
and DEX-COOL
®coolant at the coolant surge tank, but
be sure the cooling system, including the coolant
surge tank pressure cap, is cool before you do it. See
Engine Coolant on page 5-26for more information.
If no coolant is visible in the surge tank, add coolant as
follows:
{CAUTION:
Steam and scalding liquids from a hot cooling
system can blow out and burn you badly. They
are under pressure, and if you turn the coolant
surge tank pressure cap — even a little — they
can come out at high speed.
CAUTION: (Continued)
CAUTION: (Continued)
Never turn the cap when the cooling system,
including the coolant surge tank pressure cap,
is hot. Wait for the cooling system and coolant
surge tank pressure cap to cool if you ever
have to turn the pressure cap.
{CAUTION:
Adding only plain water to your cooling
system can be dangerous. Plain water, or
some other liquid such as alcohol, can boil
before the proper coolant mixture will. Your
vehicle’s coolant warning system is set for the
proper coolant mixture. With plain water or the
wrong mixture, your engine could get too hot
but you would not get the overheat warning.
Your engine could catch �re and you or others
could be burned. Use a 50/50 mixture of clean,
drinkable water and DEX-COOL
®coolant.
5-33
Page 414 of 536
Brake Wear
Your vehicle has four-wheel disc brakes.
Disc brake pads have built-in wear indicators that make
a high-pitched warning sound when the brake pads
are worn and new pads are needed. The sound
may come and go or be heard all the time your vehicle
is moving, except when you are pushing on the
brake pedal �rmly.
{CAUTION:
The brake wear warning sound means that
soon your brakes will not work well. That
could lead to an accident. When you hear the
brake wear warning sound, have your vehicle
serviced.
Notice:Continuing to drive with worn-out brake
pads could result in costly brake repair.Some driving conditions or climates may cause a brake
squeal when the brakes are �rst applied or lightly
applied. This does not mean something is wrong with
your brakes.
Properly torqued wheel nuts are necessary to help
prevent brake pulsation. When tires are rotated, inspect
brake pads for wear and evenly tighten wheel nuts in
the proper sequence to GM torque speci�cations.
Brake linings should always be replaced as complete
axle sets.
Brake Pedal Travel
See your dealer if the brake pedal does not return to
normal height, or if there is a rapid increase in
pedal travel. This could be a sign of brake trouble.
Brake Adjustment
Every time you make a brake stop, your disc brakes
adjust for wear.
5-40
Page 415 of 536
Replacing Brake System Parts
The braking system on a vehicle is complex. Its many
parts have to be of top quality and work well together if
the vehicle is to have really good braking. Your
vehicle was designed and tested with top-quality GM
brake parts. When you replace parts of your braking
system — for example, when your brake linings
wear down and you need new ones put in — be sure
you get new approved GM replacement parts. If you do
not, your brakes may no longer work properly. For
example, if someone puts in brake linings that are wrong
for your vehicle, the balance between your front and
rear brakes can change — for the worse. The braking
performance you have come to expect can change
in many other ways if someone puts in the wrong
replacement brake parts.
Battery
Your vehicle has a maintenance free battery. When it is
time for a new battery, get one that has the replacement
number shown on the original battery’s label. We
recommend an ACDelco
®replacement battery. See
Engine Compartment Overview on page 5-12for battery
location.Warning:Battery posts, terminals, and related
accessories contain lead and lead compounds,
chemicals known to the State of California to cause
cancer and reproductive harm. Wash hands after
handling.
Vehicle Storage
If you are not going to drive your vehicle for 25 days
or more, remove the black, negative (−) cable from
the battery. This will help keep your battery from
running down.
{CAUTION:
Batteries have acid that can burn you and gas
that can explode. You can be badly hurt if you
are not careful. SeeJump Starting on
page 5-42for tips on working around a battery
without getting hurt.
5-41
Page 441 of 536
A Tire and Loading Information label is attached to the
vehicle’s center pillar (B-pillar), below the driver’s
door lock post (striker). This label lists your vehicle’s
original equipment tires and their recommended cold tire
in�ation pressures. The recommended cold tire
in�ation pressure, shown on the label, is the minimum
amount of air pressure needed to support your vehicle’s
maximum load carrying capacity.
For additional information regarding how much weight
your vehicle can carry, and an example of the tire
and loading information label, seeLoading Your Vehicle
on page 4-52.
When to Check
Check your tires once a month or more. Do not forget to
check the spare tire. For additional information
regarding the spare tire, seeSpare Tire on page 5-97.
How to Check
Use a good quality pocket-type gage to check tire
pressure. You cannot tell if your tires are properly in�ated
simply by looking at them. Radial tires may look properly
in�ated even when they’re underin�ated. Check the tire’s
in�ation pressure when the tires are cold. Cold means
your vehicle has been sitting for at least three hours or
driven no more than 1 mile (1.6 km).Remove the valve cap from the tire valve stem. Press
the tire gage �rmly onto the valve to get a pressure
measurement. If the cold tire in�ation pressure matches
the recommended pressure on the Tire and Loading
Information label, no further adjustment is necessary.
If the in�ation pressure is low, add air until you reach the
recommended amount.
If you over�ll the tire, release air by pushing on the
metal stem in the center of the tire valve. Recheck the
tire pressure with the tire gage.
Be sure to put the valve caps back on the valve stems.
They help prevent leaks by keeping out dirt and moisture.
Tire Pressure Monitor System
The Tire Pressure Monitor (TPM) system uses radio
and sensor technology to check tire pressure levels. If
your vehicle has this feature, sensors are mounted
on each tire and wheel assembly, except the spare tire.
The TPM sensors transmit tire pressure readings to
a receiver located in the vehicle.
When a low tire pressure condition is detected, the TPM
system will display the CHECK TIRE PRESSURE
warning message on the Driver Information
Center (DIC); and at the same time illuminate the low
tire pressure warning symbol. For additional information
and details about the DIC operation and displays see
DIC Operation and Displays on page 3-57andDIC
Warnings and Messages on page 3-60.
5-67
Page 442 of 536
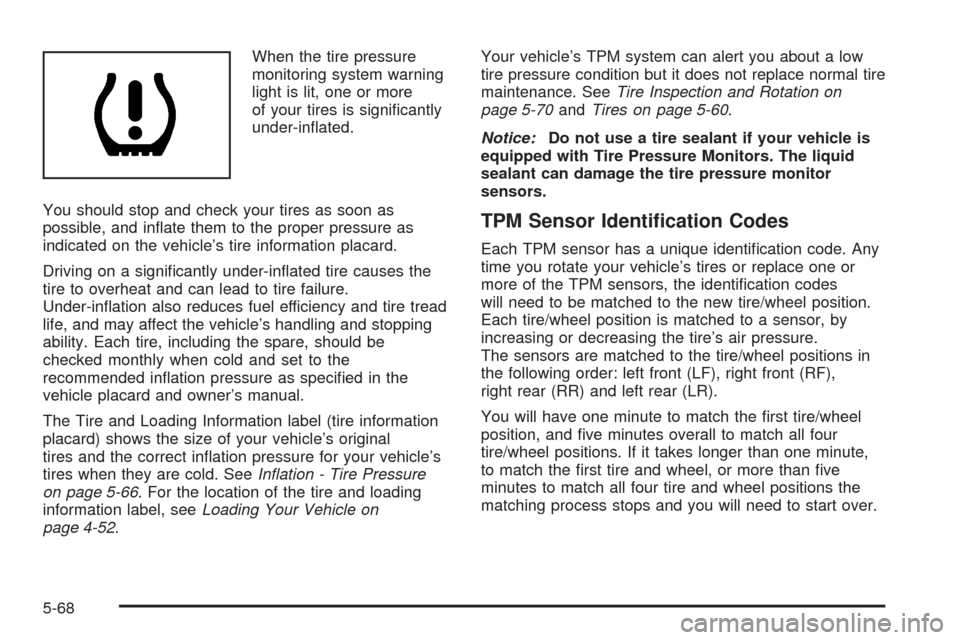
When the tire pressure
monitoring system warning
light is lit, one or more
of your tires is signi�cantly
under-in�ated.
You should stop and check your tires as soon as
possible, and in�ate them to the proper pressure as
indicated on the vehicle’s tire information placard.
Driving on a signi�cantly under-in�ated tire causes the
tire to overheat and can lead to tire failure.
Under-in�ation also reduces fuel efficiency and tire tread
life, and may affect the vehicle’s handling and stopping
ability. Each tire, including the spare, should be
checked monthly when cold and set to the
recommended in�ation pressure as speci�ed in the
vehicle placard and owner’s manual.
The Tire and Loading Information label (tire information
placard) shows the size of your vehicle’s original
tires and the correct in�ation pressure for your vehicle’s
tires when they are cold. SeeIn�ation - Tire Pressure
on page 5-66. For the location of the tire and loading
information label, seeLoading Your Vehicle on
page 4-52.Your vehicle’s TPM system can alert you about a low
tire pressure condition but it does not replace normal tire
maintenance. SeeTire Inspection and Rotation on
page 5-70andTires on page 5-60.
Notice:Do not use a tire sealant if your vehicle is
equipped with Tire Pressure Monitors. The liquid
sealant can damage the tire pressure monitor
sensors.
TPM Sensor Identi�cation Codes
Each TPM sensor has a unique identi�cation code. Any
time you rotate your vehicle’s tires or replace one or
more of the TPM sensors, the identi�cation codes
will need to be matched to the new tire/wheel position.
Each tire/wheel position is matched to a sensor, by
increasing or decreasing the tire’s air pressure.
The sensors are matched to the tire/wheel positions in
the following order: left front (LF), right front (RF),
right rear (RR) and left rear (LR).
You will have one minute to match the �rst tire/wheel
position, and �ve minutes overall to match all four
tire/wheel positions. If it takes longer than one minute,
to match the �rst tire and wheel, or more than �ve
minutes to match all four tire and wheel positions the
matching process stops and you will need to start over.
5-68
Page 443 of 536

The TPM sensor matching process is outlined below:
1. Set the Parking brake.
2. Turn the ignition switch to RUN with the engine off.
3. Turn the exterior lamp switch from Off to On four
times within 3 seconds. A double horn chirp will
sound and the TPM low tire warning light will begin
to �ash. The double horn chirp and �ashing
TPM warning light indicate that the TPM matching
process has started. The TPM warning light
should continue �ashing throughout the matching
procedure. The SERVICE TIRE MONITOR
message will be displayed on the Driver Information
Center (DIC).
4. Start with the left (driver’s side) front tire.
5. Remove the valve cap from the valve cap stem.
Activate the TPM sensor by increasing or
decreasing the tire’s air pressure for 10 seconds,
then stop and listen for a single horn chirp.
The single horn chirp should sound within
15 seconds, con�rming that the sensor identi�cation
code has been matched to this tire and wheel
position. If you do not hear the con�rming single
horn chirp, you will need to start over with step
number one. To let air-pressure out of a tire you can
use the pointy end of the valve cap, a pencil-style
air pressure gage or a key.6. Proceed to the right (passenger’s side) front tire,
and repeat the procedure in Step 5.
7. Proceed to the right (passenger’s side) rear tire,
and repeat the procedure in Step 5.
8. Proceed to the left (driver’s side) rear tire, and
repeat the procedure in Step 5.
9. After hearing the con�rming horn chirp for the left
rear tire, check to see if the TPM warning light is
still �ashing. If yes, turn the ignition switch to LOCK.
10. Set all four tires to the recommended air pressure
level as indicated on the Tire and Loading
Information label.
11. Put the valve caps back on the valve stems
The spare tire does not have a TPM sensor. If you
replace one of the road tires with the spare, the CHECK
TIRE PRESSURE message will be displayed on the
DIC screen. This message should go off once you
re-install the road tire containing the TPM sensor. The
SERVICE TIRE MONITOR message is displayed
when the TPM system is malfunctioning. One or more
missing or inoperable TPM sensors will cause the
service tire monitor message to be displayed. See your
dealer for service.
5-69
Page 446 of 536
Buying New Tires
To �nd out what kind and size of tires you need, look at
the Certi�cation/Tire label or the Tire and Loading
Information label. SeeLoading Your Vehicle on
page 4-52for more information about these labels and
where they can be found on your vehicle.
The tires installed on your vehicle when it was new
had a Tire Performance Criteria Speci�cations
(TPC Spec) number on each tire’s sidewall. When you
get new tires, GM recommends that you get tires
with that same TPC Spec number. That way your
vehicle will continue to have tires that are designed to
give proper endurance, handling, speed rating, load
range, traction, ride, tire pressure monitoring system
performance and other things during normal service on
your vehicle. If your tires have an all-season tread
design, the TPC number will be followed by an “MS”
(for mud and snow).
Whenever you replace your tires with those not having
a TPC Spec number, make sure they are the same
size, load range, speed rating and construction
type (bias, bias-belted or radial) as your original tires.
If you replace your vehicle’s tires with those not having a
TPC Spec number, the tire pressure monitoring
system may give an inaccurate low pressure warning.Non-TPC Spec tires may give a low pressure warning
that is higher or lower than the proper warning level you
would get with TPC Spec numbered tires.
{CAUTION:
Mixing tires could cause you to lose control
while driving. If you mix tires of different sizes
or types (radial and bias-belted tires), the
vehicle may not handle properly, and you
could have a crash. Using tires of different
sizes may also cause damage to your vehicle.
Be sure to use the same size and type tires on
all wheels.
Your vehicle may be equipped with a different
size spare than the road tires (those originally
installed on your vehicle). When new, your
vehicle included a spare tire and wheel
assembly with a similar overall diameter as
your vehicle’s road tires and wheels, so it is all
right to drive on it. Because this spare was
developed for use on your vehicle, it will not
affect vehicle handling.
5-72
Page 448 of 536
Traction – AA, A, B, C
The traction grades, from highest to lowest, are AA, A,
B, and C. Those grades represent the tire’s ability
to stop on wet pavement as measured under controlled
conditions on speci�ed government test surfaces of
asphalt and concrete. A tire marked C may have poor
traction performance. Warning: The traction grade
assigned to this tire is based on straight-ahead braking
traction tests, and does not include acceleration,
cornering, hydroplaning, or peak traction characteristics.
Temperature – A, B, C
The temperature grades are A (the highest), B, and C,
representing the tire’s resistance to the generation
of heat and its ability to dissipate heat when tested
under controlled conditions on a speci�ed indoor
laboratory test wheel. Sustained high temperature can
cause the material of the tire to degenerate and
reduce tire life, and excessive temperature can lead to
sudden tire failure. The grade C corresponds to a
level of performance which all passenger car tires must
meet under the Federal Motor Vehicle Safety Standard
No. 109. Grades B and A represent higher levels of
performance on the laboratory test wheel than the
minimum required by law.Warning: The temperature grade for this tire is
established for a tire that is properly in�ated and not
overloaded. Excessive speed, underin�ation, or
excessive loading, either separately or in combination,
can cause heat buildup and possible tire failure.
Wheel Alignment and Tire Balance
The wheels on your vehicle were aligned and balanced
carefully at the factory to give you the longest tire life
and best overall performance.
If you notice unusual tire wear or your vehicle pulling
one way or the other, the alignment may need to
be reset. If you notice your vehicle vibrating when driving
on a smooth road, your wheels may need to be
rebalanced.
Wheel Replacement
Replace any wheel that is bent, cracked or badly rusted
or corroded. If wheel nuts keep coming loose, the
wheel, wheel bolts and wheel nuts should be replaced.
If the wheel leaks air, replace it (except some
aluminum wheels, which can sometimes be repaired).
See your dealer if any of these conditions exist.
Your dealer will know the kind of wheel you need.
5-74