2005 CHEVROLET SUBURBAN light
[x] Cancel search: lightPage 124 of 536
Shifting Out of Four Wheel-Low
To shift from Four-Wheel Low to All-Wheel Drive,
your vehicle must be stopped or moving less than
3 mph (5 km/h) with the transmission in NEUTRAL (N)
and the ignition in RUN. Press and release the all-wheel
drive button. You must wait for the All-Wheel Drive
indicator light to stop �ashing and remain illuminated
before shifting your transmission into gear.
If the All-Wheel Drive button is pressed when your
vehicle is in gear and/or moving, the All-Wheel Drive
indicator light will �ash for 30 seconds but will not
complete the shift unless your vehicle is moving less
than 3 mph (5 km/h) and the transmission is in
NEUTRAL (N).
Shifting Into NEUTRAL
To shift the transfer case to NEUTRAL, do the following:
1. Make sure the vehicle is parked so that it will
not roll.
2. Set the parking brake.
3. Start the vehicle or turn the ignition to RUN.
4. Put the transmission in NEUTRAL (N).
5. Shift the transfer case to All-Wheel Drive.6. Simultaneously press and hold the StabiliTrak
®
and four-wheel low buttons for 10 seconds. The
red NEUTRAL light will come on when the transfer
case shift to NEUTRAL is complete.
7. If the engine is running, verify that the transmission
is in NEUTRAL (N) by shifting the transmission to
REVERSE (R) for one second, then shift the
transmission to DRIVE (D) for one second.
8. Place the transmission shift lever in PARK (P).
9. Turn the ignition to LOCK.
Shifting Out of NEUTRAL
To shift out of NEUTRAL do the following:
1. Set the parking brake and apply the regular
brake pedal.
2. Shift the transmission to NEUTRAL (N) and turn the
ignition to RUN with the engine off.
3. Press the button for the desired transfer case shift
position (All-Wheel Drive or Four-Wheel Low).
4. After the transfer case has shifted out of NEUTRAL
the NEUTRAL light will go out.
5. Release the parking brake.
6. Start the engine and shift the transmission to the
desired position.
2-34
Page 125 of 536
Parking Brake
To set the parking brake, hold the regular brake pedal
down with your right foot. Push down the parking
brake pedal with your left foot.
A chime will activate and the warning light will �ash when
the parking brake is applied and the vehicle is moving at
least 3 mph (5 km/h) for at least three seconds.
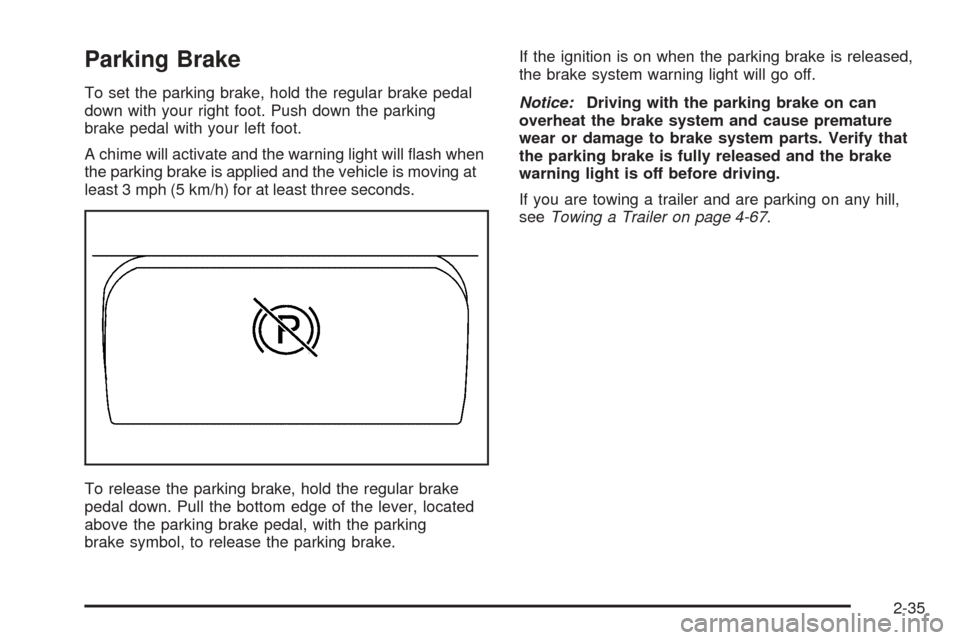
To release the parking brake, hold the regular brake
pedal down. Pull the bottom edge of the lever, located
above the parking brake pedal, with the parking
brake symbol, to release the parking brake.If the ignition is on when the parking brake is released,
the brake system warning light will go off.
Notice:Driving with the parking brake on can
overheat the brake system and cause premature
wear or damage to brake system parts. Verify that
the parking brake is fully released and the brake
warning light is off before driving.
If you are towing a trailer and are parking on any hill,
seeTowing a Trailer on page 4-67.
2-35
Page 131 of 536
Follow the proper steps to be sure your vehicle will
not move. SeeShifting Into Park (P) on page 2-36.
If you are pulling a trailer, seeTowing a Trailer
on page 4-67.
Mirrors
Manual Rearview Mirror
Pull the tab under the mirror toward you to reduce glare
from headlamps behind you after dark. Push the tab
away from you for normal daytime operation.
Automatic Dimming Rearview Mirror
with OnStar
®, Compass and
Temperature Display
Your vehicle may have this feature. When on, the
automatic dimming mirror dims to the proper level to
minimize glare from lights behind you after dark.
The mirror has a dual display in the upper right corner
of the mirror face that shows the compass reading
and the outside temperature.Control buttons for the OnStar
®system are at the bottom
of the mirror. SeeOnStar®System on page 2-50for more
information about the services OnStar®provides.
P(On/Off):This is the on/off button.
Temperature and Compass Display
Press the on/off button, located to the far left, brie�y to
turn the compass/temperature display on or off.
If the display reads CAL, the compass needs to be
calibrated. For more information, see “Compass
Calibration” following.
To adjust between Fahrenheit and Celsius, do the
following:
1. Press and hold the on/off button for approximately
four seconds until either a �ashing F or C appears.
2. Press the button again to change the display to the
desired unit of measurement. After approximately
four seconds of inactivity, the new unit will be
locked in and the compass/temperature display
will return.
If an abnormal temperature reading is displayed for an
extended period of time, please see your GM dealer.
Under certain circumstances, a delay in updating
the temperature is normal.
2-41
Page 132 of 536
Automatic Dimming Mirror Operation
The automatic dimming mirror function is turned
on automatically each time the ignition is started.
To operate the automatic dimming mirror, do the
following:
1. Make sure the green indicator light, located to the
left of the on/off button, is lit. If it is not, press and
hold the on/off button for approximately six seconds
until the green light comes on, indicating that the
mirror is in automatic dimming mode.
2. Turn off the automatic dimming mirror function
by pressing and holding the on/off button for
approximately six seconds, until the green indicator
light turns off.
Compass Variance
The mirror is set in zone eight upon leaving the
factory. It will be necessary to adjust the compass to
compensate for compass variance if the vehicle is
outside of zone eight. Under certain circumstances, as
during a long distance cross-country trip, it will be
necessary to adjust for compass variance. Compass
variance is the difference between earth’s magnetic
north and true geographic north. If not adjusted
to account for compass variance, the compass could
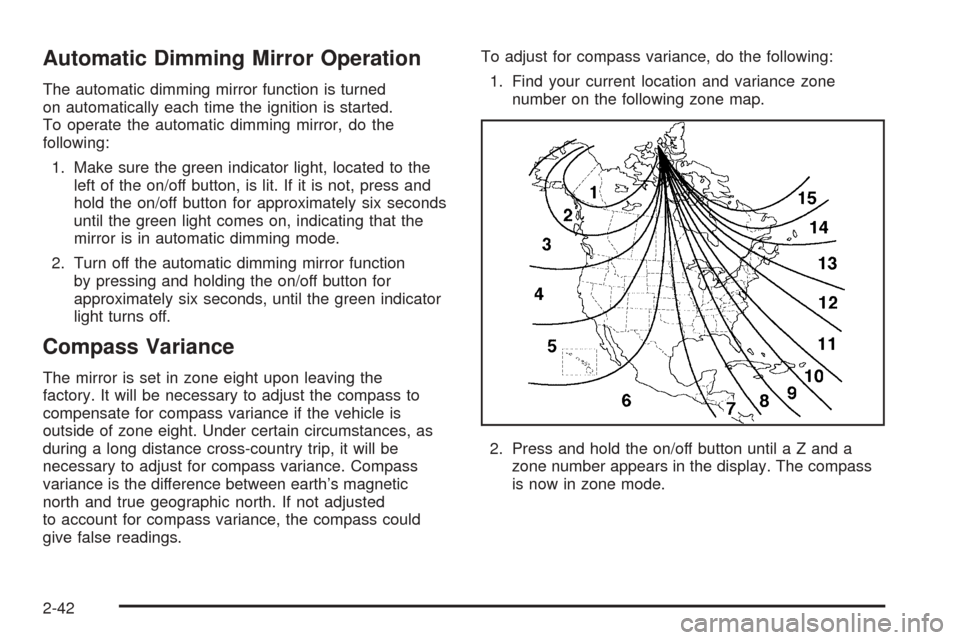
give false readings.To adjust for compass variance, do the following:
1. Find your current location and variance zone
number on the following zone map.
2. Press and hold the on/off button until a Z and a
zone number appears in the display. The compass
is now in zone mode.
2-42
Page 133 of 536
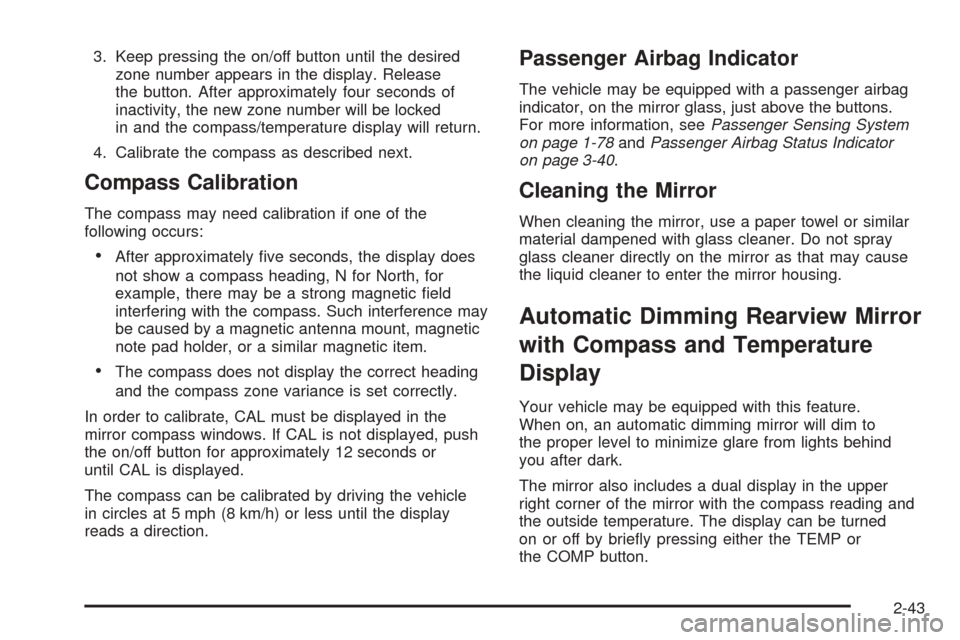
3. Keep pressing the on/off button until the desired
zone number appears in the display. Release
the button. After approximately four seconds of
inactivity, the new zone number will be locked
in and the compass/temperature display will return.
4. Calibrate the compass as described next.
Compass Calibration
The compass may need calibration if one of the
following occurs:
After approximately �ve seconds, the display does
not show a compass heading, N for North, for
example, there may be a strong magnetic �eld
interfering with the compass. Such interference may
be caused by a magnetic antenna mount, magnetic
note pad holder, or a similar magnetic item.
The compass does not display the correct heading
and the compass zone variance is set correctly.
In order to calibrate, CAL must be displayed in the
mirror compass windows. If CAL is not displayed, push
the on/off button for approximately 12 seconds or
until CAL is displayed.
The compass can be calibrated by driving the vehicle
in circles at 5 mph (8 km/h) or less until the display
reads a direction.
Passenger Airbag Indicator
The vehicle may be equipped with a passenger airbag
indicator, on the mirror glass, just above the buttons.
For more information, seePassenger Sensing System
on page 1-78andPassenger Airbag Status Indicator
on page 3-40.
Cleaning the Mirror
When cleaning the mirror, use a paper towel or similar
material dampened with glass cleaner. Do not spray
glass cleaner directly on the mirror as that may cause
the liquid cleaner to enter the mirror housing.
Automatic Dimming Rearview Mirror
with Compass and Temperature
Display
Your vehicle may be equipped with this feature.
When on, an automatic dimming mirror will dim to
the proper level to minimize glare from lights behind
you after dark.
The mirror also includes a dual display in the upper
right corner of the mirror with the compass reading and
the outside temperature. The display can be turned
on or off by brie�y pressing either the TEMP or
the COMP button.
2-43
Page 134 of 536
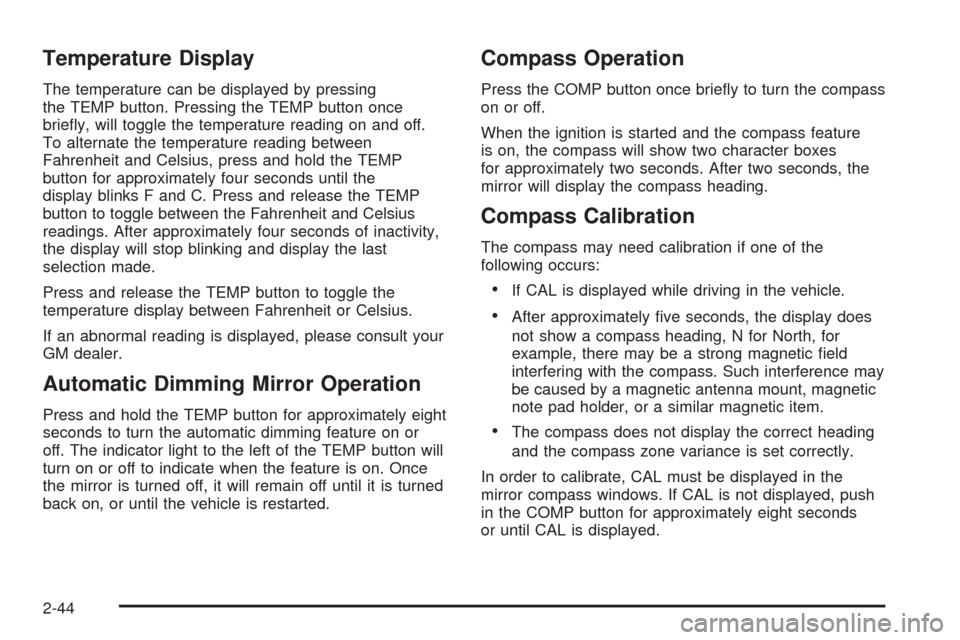
Temperature Display
The temperature can be displayed by pressing
the TEMP button. Pressing the TEMP button once
brie�y, will toggle the temperature reading on and off.
To alternate the temperature reading between
Fahrenheit and Celsius, press and hold the TEMP
button for approximately four seconds until the
display blinks F and C. Press and release the TEMP
button to toggle between the Fahrenheit and Celsius
readings. After approximately four seconds of inactivity,
the display will stop blinking and display the last
selection made.
Press and release the TEMP button to toggle the
temperature display between Fahrenheit or Celsius.
If an abnormal reading is displayed, please consult your
GM dealer.
Automatic Dimming Mirror Operation
Press and hold the TEMP button for approximately eight
seconds to turn the automatic dimming feature on or
off. The indicator light to the left of the TEMP button will
turn on or off to indicate when the feature is on. Once
the mirror is turned off, it will remain off until it is turned
back on, or until the vehicle is restarted.
Compass Operation
Press the COMP button once brie�y to turn the compass
on or off.
When the ignition is started and the compass feature
is on, the compass will show two character boxes
for approximately two seconds. After two seconds, the
mirror will display the compass heading.
Compass Calibration
The compass may need calibration if one of the
following occurs:
If CAL is displayed while driving in the vehicle.
After approximately �ve seconds, the display does
not show a compass heading, N for North, for
example, there may be a strong magnetic �eld
interfering with the compass. Such interference may
be caused by a magnetic antenna mount, magnetic
note pad holder, or a similar magnetic item.
The compass does not display the correct heading
and the compass zone variance is set correctly.
In order to calibrate, CAL must be displayed in the
mirror compass windows. If CAL is not displayed, push
in the COMP button for approximately eight seconds
or until CAL is displayed.
2-44
Page 142 of 536
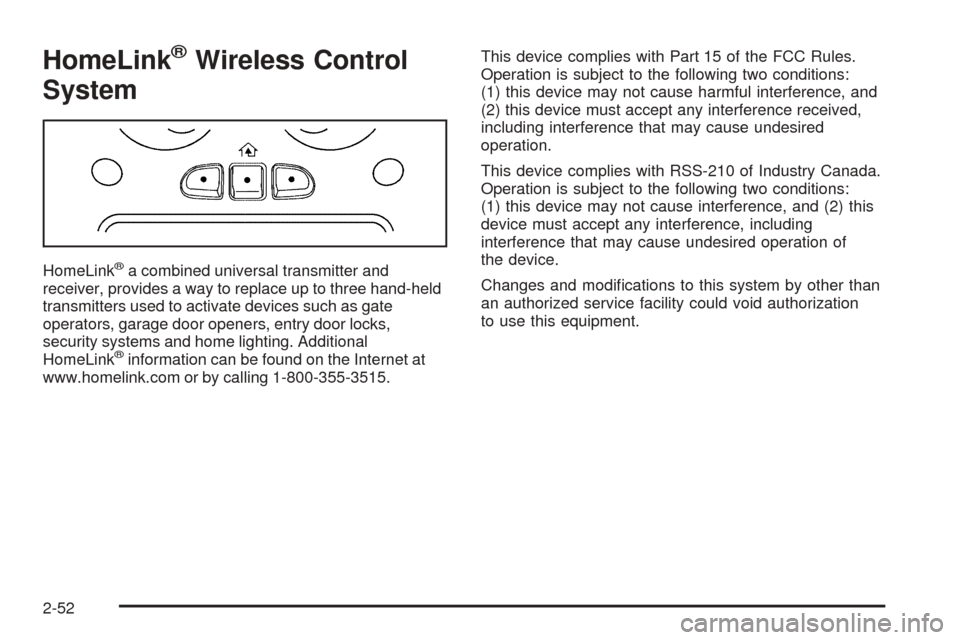
HomeLink®Wireless Control
System
HomeLink®a combined universal transmitter and
receiver, provides a way to replace up to three hand-held
transmitters used to activate devices such as gate
operators, garage door openers, entry door locks,
security systems and home lighting. Additional
HomeLink
®information can be found on the Internet at
www.homelink.com or by calling 1-800-355-3515.This device complies with Part 15 of the FCC Rules.
Operation is subject to the following two conditions:
(1) this device may not cause harmful interference, and
(2) this device must accept any interference received,
including interference that may cause undesired
operation.
This device complies with RSS-210 of Industry Canada.
Operation is subject to the following two conditions:
(1) this device may not cause interference, and (2) this
device must accept any interference, including
interference that may cause undesired operation of
the device.
Changes and modi�cations to this system by other than
an authorized service facility could void authorization
to use this equipment.
2-52
Page 143 of 536
HomeLink®Wireless Control
System Operation
Do not use the HomeLink®Transmitter with any garage
door opener that does not have the “stop and reverse”
feature. This includes any garage door opener model
manufactured before April 1, 1982. If you have a newer
garage door opener with rolling codes, please be
sure to follow Steps 6 through 8 to complete the
programming of your HomeLink
®Transmitter.
Read the instructions completely before attempting to
program the HomeLink
®Transmitter. Because of
the steps involved, it may be helpful to have another
person available to assist you in programming the
transmitter.
Keep the original transmitter for use in other vehicles as
well as for future HomeLink
®programming. It is also
recommended that upon the sale of the vehicle,
the programmed HomeLink
®buttons should be erased
for security purposes. Refer to “Erasing HomeLink®
Buttons” or, for assistance, contact HomeLink®on
the Internet at: www.homelink.com or by calling
1-800-355-3515.Be sure that people and objects are clear of the garage
door or gate operator you are programming. When
programming a garage door, it is advised to park outside
of the garage.
It is recommended that a new battery be installed in
your hand-held transmitter for quicker and more
accurate transmission of the radio frequency.
Programming HomeLink®
Your vehicle’s engine should be turned off while
programming the transmitter. Follow these steps to
program up to three channels:
1. Press and hold down the two outside buttons,
releasing only when the indicator light begins to
�ash, after 20 seconds. Do not hold down the
buttons for longer than 30 seconds and do not
repeat this step to program a second and/or third
transmitter to the remaining two HomeLink
®buttons.
2. Position the end of your hand-held transmitter about
1 to 3 inches (3 to 8 cm) away from the HomeLink
®
buttons while keeping the indicator light in view.
2-53