2005 CHEVROLET SILVERADO clock
[x] Cancel search: clockPage 179 of 580

Using Cruise Control on Hills
How well your cruise control will work on hills depends
upon your speed, load and the steepness of the
hills. When going up steep hills, you may want to step
on the accelerator pedal to maintain your speed.
When going downhill, you may have to brake or shift to
a lower gear to keep your speed down. Of course,
applying the brake takes you out of cruise control. Many
drivers �nd this to be too much trouble and don’t use
cruise control on steep hills.
Ending Cruise Control
There are four ways to turn off the cruise control:
Step lightly on the brake pedal,
move the cruise control switch to off, or
shift the transmission to NEUTRAL (N).
If the accelerator pedal is held for 60 seconds or
longer, cruise control will turn off.
Erasing Speed Memory
When you turn off the cruise control or the ignition, your
cruise control set speed memory is erased.
Headlamps
The control on the driver’s side of your instrument panel
operates the headlamps.
Turn the control clockwise to operate the lamps.
The headlamp control has four positions:
9(Off):Turning the control to this position turns off
the Daytime Running Lamps (DRL) and the automatic
headlamps.
3-13
Page 186 of 580

Ashtray(s) and Cigarette Lighter
Your vehicle may be equipped with a front ashtray
located near the center of the instrument panel.
Pull on the door to open it.
Notice:If you put papers, pins, or other �ammable
items in the ashtray, hot cigarettes or other
smoking materials could ignite them and possibly
damage your vehicle. Never put �ammable items in
the ashtray.
To remove the front ashtray, pull the ashtray toward
you. To replace the ashtray, place the ashtray on
the slides at the side of its location in the instrument
panel. To use the cigarette lighter, push it in all the
way, and let go. When it’s ready, it will pop back out
by itself.
Notice:Holding a cigarette lighter in while it is
heating will not allow the lighter to back away from
the heating element when it is hot. Damage from
overheating may occur to the lighter or heating
element, or a fuse could be blown. Do not hold a
cigarette lighter in while it is heating.
Climate Controls
Climate Control System
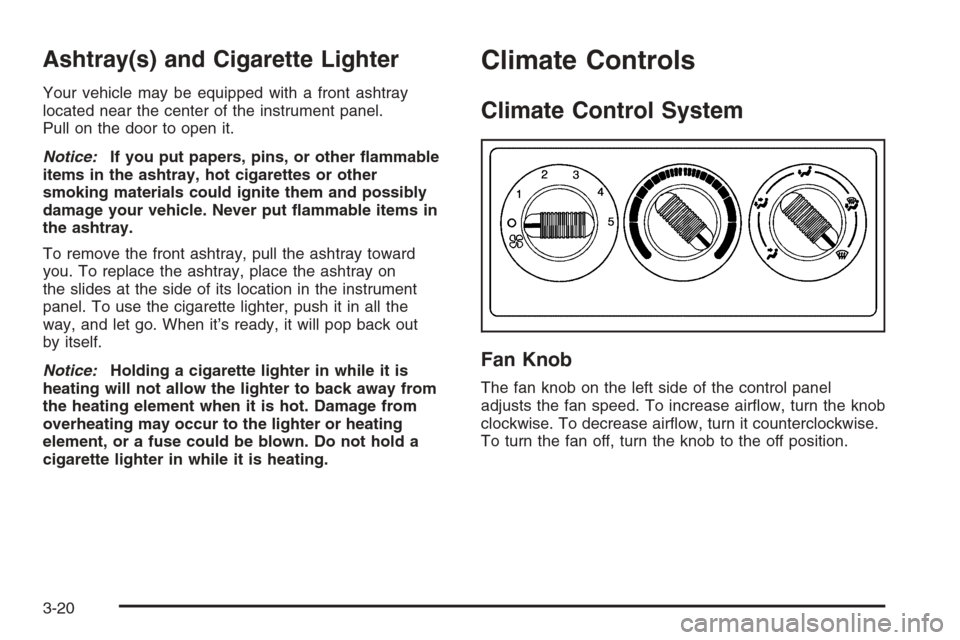
Fan Knob
The fan knob on the left side of the control panel
adjusts the fan speed. To increase air�ow, turn the knob
clockwise. To decrease air�ow, turn it counterclockwise.
To turn the fan off, turn the knob to the off position.
3-20
Page 187 of 580

9(Off):If the fan is off, outside air will still enter the
vehicle, and will be directed based on the position of
the mode knob. The temperature can also be adjusted
using the temperature knob.
Temperature Knob
The middle knob on the control panel lets you select
the temperature of the air �owing into the passenger
area. Turn the knob clockwise toward the red area for
warmer air. Turn the knob counterclockwise toward
the blue area for cooler air.
Mode Knob
The right knob on the control panel allows you to
choose the direction of air delivery.
H(Vent):This setting directs the air through the
instrument panel outlets.
)(Bi-Level):Air is delivered through the �oor outlets
as well as the instrument panel outlets. The �ow can
be divided between vent and �oor outlets depending
upon where the knob is placed between the settings.
6(Floor):This setting directs most of the air through
the �oor outlets, and the rest of the air is divided
between the windshield defroster outlets and the side
window defroster outlets.
W(Defog):Air�ow is delivered through the �oor
outlets, the windshield defroster outlets and the side
window defroster outlets. The air �ow can be divided
between �oor and defrost depending upon where
the knob is placed between the settings.
1(Defrost):This setting directs most air through
the windshield defroster outlets, side window defroster
outlets and some through the �oor outlets.
3-21
Page 188 of 580

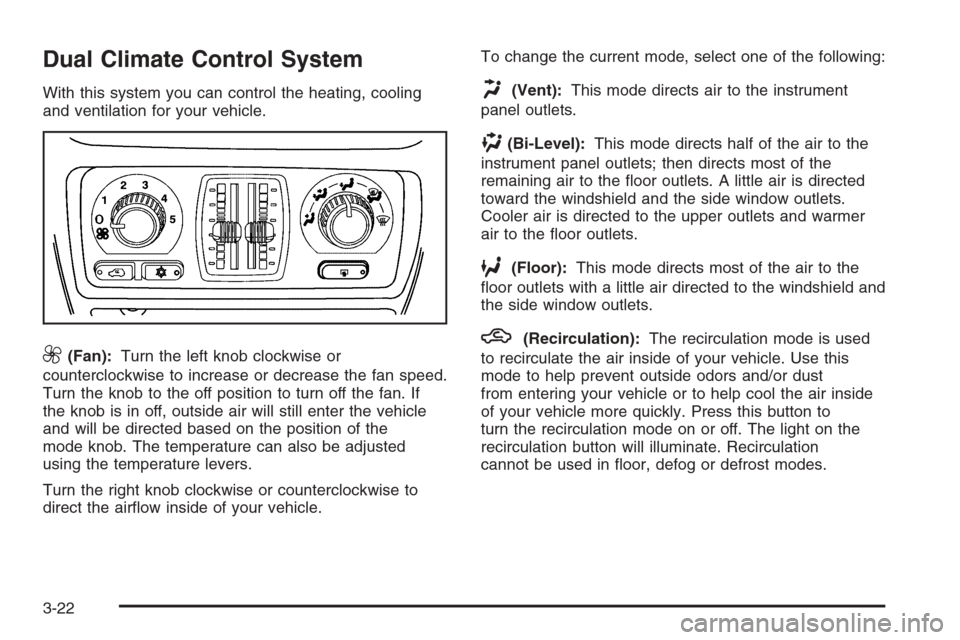
Dual Climate Control System
With this system you can control the heating, cooling
and ventilation for your vehicle.
9(Fan):Turn the left knob clockwise or
counterclockwise to increase or decrease the fan speed.
Turn the knob to the off position to turn off the fan. If
the knob is in off, outside air will still enter the vehicle
and will be directed based on the position of the
mode knob. The temperature can also be adjusted
using the temperature levers.
Turn the right knob clockwise or counterclockwise to
direct the air�ow inside of your vehicle.To change the current mode, select one of the following:
H(Vent):This mode directs air to the instrument
panel outlets.
)(Bi-Level):This mode directs half of the air to the
instrument panel outlets; then directs most of the
remaining air to the �oor outlets. A little air is directed
toward the windshield and the side window outlets.
Cooler air is directed to the upper outlets and warmer
air to the �oor outlets.
6(Floor):This mode directs most of the air to the
�oor outlets with a little air directed to the windshield and
the side window outlets.
h(Recirculation):The recirculation mode is used
to recirculate the air inside of your vehicle. Use this
mode to help prevent outside odors and/or dust
from entering your vehicle or to help cool the air inside
of your vehicle more quickly. Press this button to
turn the recirculation mode on or off. The light on the
recirculation button will illuminate. Recirculation
cannot be used in �oor, defog or defrost modes.
3-22
Page 191 of 580

Driver’s Side Temperature Knob
The driver’s side knob is used to adjust the temperature
of the air coming through the system on the driver’s
side. The temperature can be adjusted even if the
system is turned off. This is possible since outside air
will always �ow through the system as the vehicle
is moving forward unless it is set to recirculation mode.
See “Recirculation” later in this section.
Turn the knob counterclockwise or clockwise to lower or
increase the cabin temperature. The display will show
the temperature setting decreasing or increasing and
an arrow pointing to the driver will be displayed
under and to the left of the temperature setting.
Passenger’s Side Temperature Knob
The passenger’s side knob can be used to change the
temperature of the air coming through the system
on the passenger’s side of the vehicle. The temperature
can be adjusted even if the system is turned off. This
is possible since outside air will always �ow through the
system as the vehicle is moving forward unless it is
set to recirculation mode. See “Recirculation” later in
this section.
Turn the knob counterclockwise or clockwise to lower or
increase the cabin temperature. The display will show
the temperature setting decreasing or increasing and an
arrow pointing to the passenger will be displayed
under and to the right of the temperature setting.
The passenger’s temperature setting can be set to
match the driver’s temperature setting by pressing and
holding the AUTO button for four seconds. Both the
driver and passenger arrows will be displayed.
3-25
Page 235 of 580

Audio System(s)
Notice:Before adding any sound equipment to
your vehicle, such as an audio system, CD player,
CB radio, mobile telephone, or two-way radio, make
sure that it can be added by checking with your
dealer. Also, check federal rules covering mobile
radio and telephone units. If sound equipment can
be added, it is very important to do it properly.
Added sound equipment may interfere with
the operation of your vehicle’s engine, radio, or
other systems, and even damage them. Your
vehicle’s systems may interfere with the operation
of sound equipment that has been added.
Notice:The chime signals related to seat belts,
parking brake, and other functions of your vehicle
operate through the GM radio/entertainment
system. If that equipment is replaced or additional
equipment is added to your vehicle, the chimes
may not work. Make sure that replacement or
additional equipment is compatible with your
vehicle before installing it.Figure out which audio system is in your vehicle, �nd
out what your audio system can do, and how to operate
all of its controls.
Your vehicle may have a feature called Retained
Accessory Power (RAP). With RAP, the audio system
can be played even after the ignition is turned off.
SeeRetained Accessory Power (RAP) on page 2-23
for more information.
Setting the Time for Radios without
Radio Data Systems (RDS)
Press and hold HR until the correct hour appears on the
display. Press and hold MIN until the correct minute
appears on the display. There is an initial two-second
delay before the clock goes into time-set mode.
Display the time with the ignition off, by pressing RCL,
HR, or MIN.
3-69
Page 260 of 580

Cassette Tape Messages
CHK TAPE (Check Tape):If this message appears on
the display, the tape will not play due to one of the
following errors:
The tape is tight and the player cannot turn the
tape hubs. Remove the tape. Hold the tape with
the open end down and try to turn the right
hub counterclockwise with a pencil. Turn the tape
over and repeat. If the hubs do not turn easily,
the tape may be damaged and should not be used
in the player. Try a new tape to make sure your
player is working properly.
The tape is broken. Try a new tape.
The tape is wrapped around the tape head. Attempt
to get the cassette out. Try a new tape.
CLEAN:If this message appears on the display, the
cassette tape player needs to be cleaned. It will still play
tapes, but it should be cleaned as soon as possible to
prevent damage to the tapes and player. SeeCare
of the Cassette Tape Player on page 3-125.If the cassette tape is not playing correctly, for any other
reason, try a known good cassette.
If any error occurs repeatedly or if an error cannot be
corrected, contact your GM dealer. If the radio displays
an error message, write it down and provide it to
your GM dealer when reporting the problem.
CD Adapter Kits
It is possible to use a portable CD player with the
cassette tape player after activating the bypass feature
on your tape player.
To activate the bypass feature, perform the
following steps:
1. Turn the ignition on.
2. Turn the radio off.
3. Press and hold the TAPE DISC button for
�ve seconds. READY will appear on the display
and the tape symbol on the display will �ash,
indicating the feature is active.
4. Insert the adapter into the cassette tape slot. It will
power up the radio and begin playing.
The override feature will remain active until the eject
button is pressed.
3-94
Page 307 of 580

Try to adjust your speed so you can “drive” through the
curve. Maintain a reasonable, steady speed. Wait to
accelerate until you are out of the curve, and then
accelerate gently into the straightaway.
Steering in Emergencies
There are times when steering can be more effective
than braking. For example, you come over a hill and �nd
a truck stopped in your lane, or a car suddenly pulls
out from nowhere, or a child darts out from between
parked cars and stops right in front of you. You
can avoid these problems by braking — if you can stop
in time. But sometimes you cannot; there is not room.
That is the time for evasive action — steering around the
problem.
Your vehicle can perform very well in emergencies like
these. First apply your brakes.
SeeBraking on page 4-6. It is better to remove as much
speed as you can from a possible collision. Then
steer around the problem, to the left or right depending
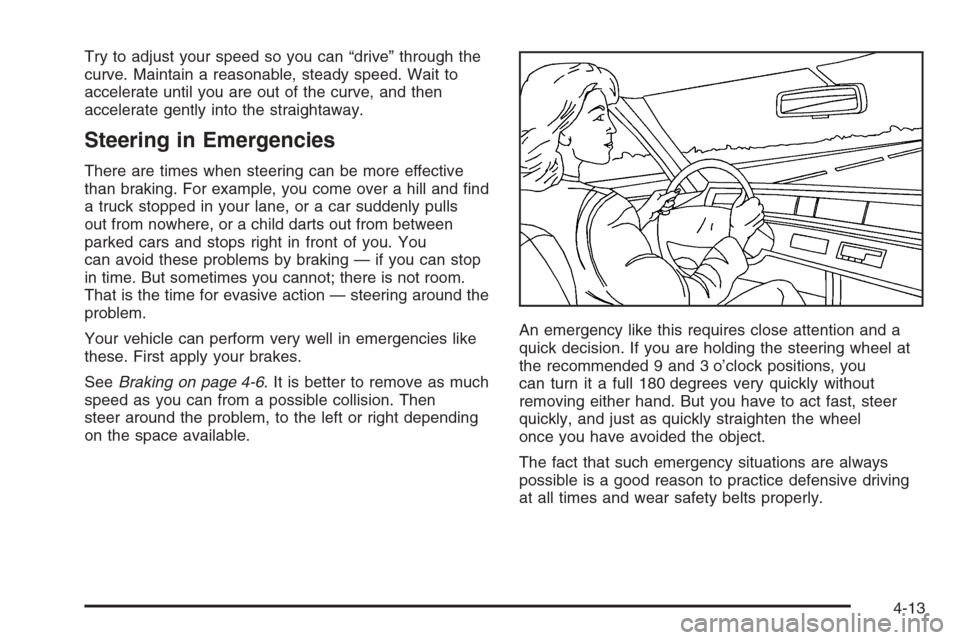
on the space available.An emergency like this requires close attention and a
quick decision. If you are holding the steering wheel at
the recommended 9 and 3 o’clock positions, you
can turn it a full 180 degrees very quickly without
removing either hand. But you have to act fast, steer
quickly, and just as quickly straighten the wheel
once you have avoided the object.
The fact that such emergency situations are always
possible is a good reason to practice defensive driving
at all times and wear safety belts properly.
4-13