2005 CHEVROLET SILVERADO AUX
[x] Cancel search: AUXPage 167 of 580

Instrument Panel Overview...............................3-4
Hazard Warning Flashers................................3-6
Other Warning Devices...................................3-6
Horn .............................................................3-6
Tilt Wheel.....................................................3-6
Turn Signal/Multifunction Lever.........................3-7
Turn and Lane-Change Signals........................3-7
Headlamp High/Low-Beam Changer..................3-8
Flash-to-Pass.................................................3-9
Windshield Wipers..........................................3-9
Windshield Washer.......................................3-10
Cruise Control..............................................3-10
Headlamps..................................................3-13
Headlamps on Reminder................................3-14
Daytime Running Lamps (DRL).......................3-14
Automatic Headlamp System..........................3-15
Fog Lamps ..................................................3-16
Auxiliary Roof Mounted Lamp.........................3-17
Instrument Panel Brightness...........................3-17
Dome Lamps ...............................................3-17
Dome Lamp Override....................................3-18
Entry Lighting...............................................3-18
Exit Lighting.................................................3-18Front Reading Lamps....................................3-18
Cargo Lamp.................................................3-19
Accessory Power Outlet(s).............................3-19
Ashtray(s) and Cigarette Lighter......................3-20
Climate Controls............................................3-20
Climate Control System.................................3-20
Dual Climate Control System..........................3-22
Dual Automatic Climate Control System...........3-24
Outlet Adjustment.........................................3-30
Warning Lights, Gages, and Indicators............3-31
Instrument Panel Cluster................................3-32
Speedometer and Odometer...........................3-33
Trip Odometer..............................................3-33
Tachometer.................................................3-33
Safety Belt Reminder Light.............................3-33
Airbag Readiness Light..................................3-34
Airbag Off Light............................................3-34
Passenger Airbag Status Indicator...................3-36
Battery Warning Light....................................3-38
Voltmeter Gage............................................3-39
Up-Shift Light (Manual Transmission)...............3-39
Brake System Warning Light..........................3-40
Section 3 Instrument Panel
3-1
Page 171 of 580

The main components of your instrument panel are the following:
A. Dome Lamp Button. SeeDome Lamps on page 3-17.
B. Headlamp Controls. SeeHeadlamps on page 3-13.
C. Air Outlets. SeeOutlet Adjustment on page 3-30.
D. Automatic Transfer Case/Electronic Transfer Case/
Traction Assist System (TAS). SeeFour-Wheel Drive
on page 2-37andTraction Assist System (TAS)
on page 4-8.
E. Multifunction Lever. SeeTurn Signal/Multifunction
Lever on page 3-7.
F. Instrument Panel Cluster. SeeInstrument Panel
Cluster on page 3-32.
G. Gearshift Lever (Automatic Transmission).
SeeAutomatic Transmission Operation on page 2-26
orManual Transmission Operation on page 2-32
for manual transmissions.
H. Tow/Haul Selector and Overdrive Disable
(Allison Transmission
®Only) Button (If Equipped).
SeeTow/Haul Mode on page 2-30.
I. Audio System. SeeAudio System(s) on page 3-69.
J. Climate Control System. SeeClimate Control
System on page 3-20,Dual Climate Control System
on page 3-22andDual Automatic Climate Control
System on page 3-24.
K. Instrument Panel Fuse Block.Instrument Panel Fuse
Block on page 5-124.
L. Cargo Lamp Button. SeeCargo Lamp on page 3-19.M. Hood Release. SeeHood Release on page 5-13.
N. Steering Wheel Control Buttons (If Equipped).
SeeDriver Information Center (DIC) on page 3-50
orAudio Steering Wheel Controls on page 3-124.
O. Center Instrument Panel Block. SeeCenter
Instrument Panel Fuse Block on page 5-126.
P. Parking Brake Release. SeeParking Brake on
page 2-51.
Q. Tilt Wheel Lever. SeeTilt Wheel on page 3-6.
R. Lighter and Accessory Power Outlet. SeeAccessory
Power Outlet(s) on page 3-19, andAshtray(s) and
Cigarette Lighter on page 3-20.
S. Storage Area. SeeFront Storage Area on page 2-75.
T. Ashtray. SeeAshtray(s) and Cigarette Lighter on
page 3-20.
U. Manual Selectable Ride Control (If Equipped).
SeeManual Selectable Ride on page 4-11.
V. 4-Wheel Steer Button (If Equipped).
SeeQUADRASTEER™ on page 4-14.
W. Passenger Airbag Off Switch (If Equipped).
SeeAirbag Off Switch on page 1-70.
X. Auxiliary Roof Mounted Lamp Button (If Equipped).
SeeAuxiliary Roof Mounted Lamp on page 3-17.
Y. Glove Box. SeeGlove Box on page 2-75.
3-5
Page 183 of 580
The fog lamps will be cancelled after the ignition is
turned off. If you still want to use the fog lamps after
you restart the vehicle, you will need to press the
fog lamp button again.
Some localities have laws that require the headlamps
to be on along with the fog lamps.
Auxiliary Roof Mounted Lamp
If your vehicle has this feature, this button includes
wiring provisions for a dealer or a quali�ed service
center to install an auxiliary roof lamp.
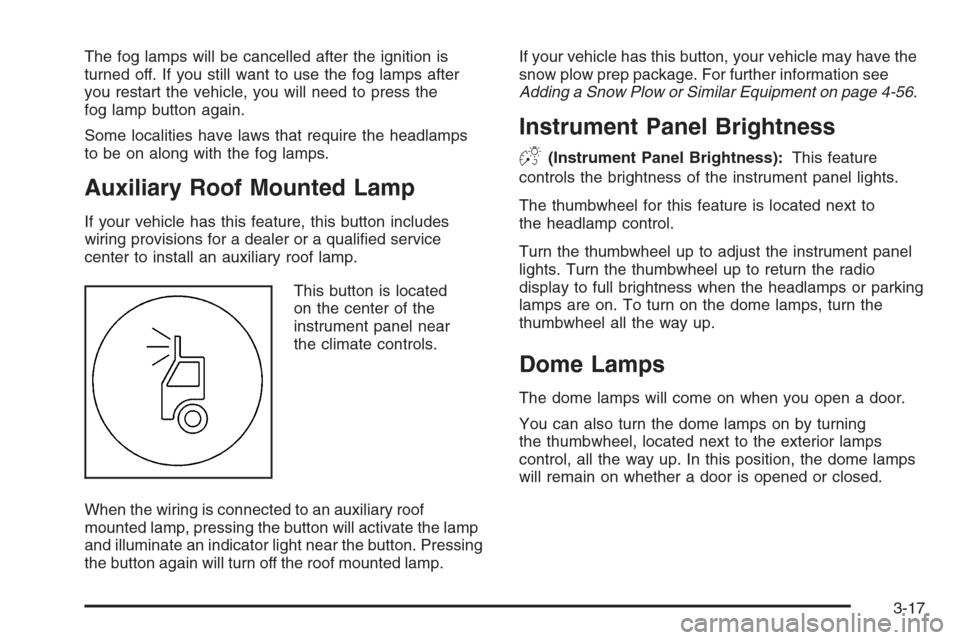
This button is located
on the center of the
instrument panel near
the climate controls.
When the wiring is connected to an auxiliary roof
mounted lamp, pressing the button will activate the lamp
and illuminate an indicator light near the button. Pressing
the button again will turn off the roof mounted lamp.If your vehicle has this button, your vehicle may have the
snow plow prep package. For further information see
Adding a Snow Plow or Similar Equipment on page 4-56.
Instrument Panel Brightness
D(Instrument Panel Brightness):This feature
controls the brightness of the instrument panel lights.
The thumbwheel for this feature is located next to
the headlamp control.
Turn the thumbwheel up to adjust the instrument panel
lights. Turn the thumbwheel up to return the radio
display to full brightness when the headlamps or parking
lamps are on. To turn on the dome lamps, turn the
thumbwheel all the way up.
Dome Lamps
The dome lamps will come on when you open a door.
You can also turn the dome lamps on by turning
the thumbwheel, located next to the exterior lamps
control, all the way up. In this position, the dome lamps
will remain on whether a door is opened or closed.
3-17
Page 185 of 580
Cargo Lamp
The cargo lamp button is
located on the left side of
the instrument panel.
Press the button to turn
the cargo lamp on.
Press the button again
to turn it off.
An indicator light on the instrument panel cluster will
illuminate when the cargo lamp is turned on, and
the ignition key is turned to RUN.
Accessory Power Outlet(s)
With accessory power outlets you can plug in auxiliary
electrical equipment such as a cellular telephone or
CB radio.
Your vehicle may have two accessory power outlets,
or may have one accessory power outlet located
near the cigarette lighter, if equipped. The cigarette
lighter is designed to �t only in the receptacle to the
right of the accessory power outlet.To use the outlet, lift the cover. When not using it,
always close the cover.
Certain power accessory plugs may not be compatible
to the accessory power outlet and could result in
blown vehicle or adapter fuses. If you experience a
problem, see your dealer for additional information on
the accessory power plugs.
Notice:Adding any electrical equipment to your
vehicle may damage it or keep other components
from working as they should. The repairs would not
be covered by your warranty. Do not use equipment
exceeding maximum amperage rating. Check
with your dealer before adding electrical equipment.
When adding electrical equipment, be sure to follow
the proper installation instructions included with
the equipment.
Notice:Improper use of the power outlet can cause
damage not covered by your warranty. Do not
hang any type of accessory or accessory bracket
from the plug because the power outlets are
designed for accessory power plugs only.
3-19
Page 209 of 580
At approximately 265°F (130°C), the driver information
center will display a TRANSMISSION HOT message
and the transmission will enter a transmission protection
mode. When the transmission enters the protection
mode, you may notice a change in the transmission
shifting patterns. The transmission will return to normal
shifting patterns when the transmission �uid temperature
falls below 260°F (127°C).
SeeDriver Information Center (DIC) on page 3-50for
further information.
If your vehicle has an Allison transmission, and the �uid
reaches temperatures of approximately 275°F (135°C)
or greater, the driver information center will display
a TRANS HOT IDLE ENGINE warning message and
a chime will sound until the temperature falls below
265°F (129°C). Pull the vehicle off the roadway when
it is safe to do so. Set the parking brake, place the
transmission in PARK (P) and allow the engine to
idle until the transmission temperature falls below
265°F (129°C). If the transmission continues to operate
above 265°F (130°C), contact your nearest dealer or
the GM Roadside Assistance Center. SeeRoadside
Assistance Program on page 7-6.Notice:If you drive your vehicle with the
transmission temperature gage above normal
operating range, you can damage the transmission.
This could lead to costly repairs that would not
be covered by your warranty. Do not drive your
vehicle while the transmission temperature gage
reading is above normal. See your dealer for service.
The following situations can cause the transmission to
operate at higher temperatures:
Towing a trailer
Hot outside air temperatures
Vehicle overloading
Hauling a large or heavy load
Low transmission �uid level
High transmission �uid level
Restricted air �ow to the radiator and the auxiliary
transmission oil cooler (if equipped).
A temporary solution to hotter transmission operating
temperatures may be to let the transmission cool down.
If the transmission is operated at higher temperatures
on a frequent basis, seeScheduled Maintenance
(Gasoline Engine) on page 6-4for the proper
transmission maintenance intervals.
3-43
Page 228 of 580
TRANS (Transmission) HOT IDLE
ENGINE
If the transmission �uid in the vehicle gets hot, this
message will appear on the DIC along with a continuous
chime. Driving with the transmission �uid temperature
high can cause damage to the vehicle. Stop the vehicle
and let it idle to allow the transmission to cool. This
message will clear and the chime will stop when the �uid
temperature reaches a safe level. SeeTransmission
Temperature Gage on page 3-42.
Notice:If you drive your vehicle while the
transmission �uid is overheating and the
transmission temperature warning is displayed
on the instrument panel cluster and/or DIC, you
can damage the transmission. This could lead
to costly repairs that would not be covered by your
warranty. Do not drive your vehicle with overheated
transmission �uid or while the transmission
temperature warning is displayed.
TRANSMISSION HOT
If the transmission �uid temperature becomes high,
this message will appear on the DIC display.
When the transmission enters the protection mode,
you may notice a change in the transmission shifting
patterns. When the transmission �uid temperature
returns to normal, the display will turn off and the
transmission shifting patterns will return to normal.Notice:If you drive your vehicle while the
transmission �uid is overheating and the
transmission temperature warning is displayed on
the instrument panel cluster and/or DIC, you
can damage the transmission. This could lead to
costly repairs that would not be covered by
your warranty. Do not drive your vehicle with
overheated transmission �uid or while the
transmission temperature warning is displayed.
The following situations can cause the transmission to
operate at higher temperatures:
Towing a trailer
Hot outside air temperatures
Hauling a large or heavy load
Over-loading
Low transmission �uid level
High transmission �uid level
Restricted air �ow to the radiator and the auxiliary
transmission oil cooler
A temporary solution to hotter transmission operating
temperatures may be to let the transmission cool down.
If the transmission is operated at higher temperatures
on a frequent basis, seeScheduled Maintenance
(Gasoline Engine) on page 6-4for the proper
transmission maintenance intervals. Also see
Transmission Temperature Gage on page 3-42for
more information.
3-62
Page 248 of 580

3 REV (Reverse):Press and hold this pushbutton to
quickly reverse within a track. Press and hold this
pushbutton for less than two seconds to reverse at
six times the normal playing speed. Press and hold it for
more than two seconds to reverse at 17 times the
normal playing speed. Release this pushbutton to play
the passage. ET and the elapsed time of the track
will appear on the display.
4 FWD (Forward):Press and hold this pushbutton to
quickly advance within a track. Press and hold this
pushbutton for less than two seconds to advance at
six times the normal playing speed. Press and hold it for
more than two seconds to advance at 17 times the
normal playing speed. Release this pushbutton to play
the passage. ET and the elapsed time of the track
will appear on the display.
6 RDM (Random):Press this pushbutton to hear the
tracks in random, rather than sequential, order. RDM ON
will appear on the display. RDM T and the track
number will appear on the display when each track
starts to play. Press this pushbutton again to turn
off random play. RDM OFF will appear on the display.
©SEEK¨:Press the left arrow to go to the start
of the current or to the previous track. Press the
right arrow to go to the start of the next track. If either
arrow is held or pressed more than once, the player will
continue moving backward or forward through the CD.
©SCAN¨:Press and hold either the SCAN or the
TYPE arrows for more than two seconds until SCAN
appears on the display and you hear a beep. The radio
will go to the next track, play for 10 seconds, then go
on to the next track. Press either the SCAN or the TYPE
arrows again, to stop scanning.
INFO (Information):Press this knob to see how long
the current track has been playing. ET and the elapsed
time will appear on the display. To change the default
on the display, track or elapsed time, press the
knob until you see the display you want, then hold
the knob for two seconds. The radio will produce
one beep and the selected display will now be the
default.
BAND:Press this button to listen to the radio when a
CD is playing. The inactive CD will remain safely
inside the radio for future listening.
CD AUX (Auxiliary):Press this button to play a CD
when listening to the radio. The inactive CD will remain
safely inside the radio for future listening.
Z(Eject):Press this button to stop and eject a CD
when it is playing or to eject a CD when it is not playing.
Eject may be activated with either the ignition or radio
off. CDs may be loaded with the radio and ignition off if
this button is pressed �rst.
3-82
Page 273 of 580
To insert multiple CDs, do the following:
1. Turn the ignition on.
2. Press and hold the LOAD button for two seconds.
You will hear a beep and the indicator light, located
to the right of the slot, will begin to �ash and
MULTI LOAD # will appear on the display.
3. Once the light stops �ashing and turns green,
INSERT CD # will appear on the display, load
a CD. Insert the CD part way into the slot, label side
up. The player will pull the CD in.
Once the CD is loaded, the indicator light will begin
�ashing again. Once the light stops �ashing and
turns green, you can load another CD. The CD
player takes up to six CDs. Do not try to load more
than six.
To load more than one CD but less than six, complete
Steps 1 through 3. When �nished loading CDs,
press the LOAD button to cancel the loading function.
The radio will begin to play the last CD loaded.
If more than one CD has been loaded, a number for
each CD will appear on the display.Playing a Speci�c Loaded CD
For every CD loaded, a number will appear on the
display. To play a speci�c CD, �rst press the CD AUX
button, then press the numbered pushbutton that
corresponds to the CD. A small bar will appear under
the CD number that is playing and the track number will
appear on the display.
If an error appears on the display, see “CD Messages”
later in this section.
CD
Z(Eject):Press this button to eject CD(s).
To eject the CD that is currently playing, press and
release this button.
To eject multiple CDs, do the following:
1. Press and hold the CD eject button for two seconds.
You will hear a beep and the indicator light, located
to the right of the slot, will begin to �ash and
EJECT ALL will appear on the display.
2. Once the light stops �ashing, REMOVE CD # will
appear on the display. The CD will eject and can
be removed.
Once the CD is removed, the indicator light will
begin �ashing again and another CD will eject.
To stop ejecting the CDs, press the LOAD or the
eject button.
3-107