2005 CHEVROLET SILVERADO lock
[x] Cancel search: lockPage 187 of 580

9(Off):If the fan is off, outside air will still enter the
vehicle, and will be directed based on the position of
the mode knob. The temperature can also be adjusted
using the temperature knob.
Temperature Knob
The middle knob on the control panel lets you select
the temperature of the air �owing into the passenger
area. Turn the knob clockwise toward the red area for
warmer air. Turn the knob counterclockwise toward
the blue area for cooler air.
Mode Knob
The right knob on the control panel allows you to
choose the direction of air delivery.
H(Vent):This setting directs the air through the
instrument panel outlets.
)(Bi-Level):Air is delivered through the �oor outlets
as well as the instrument panel outlets. The �ow can
be divided between vent and �oor outlets depending
upon where the knob is placed between the settings.
6(Floor):This setting directs most of the air through
the �oor outlets, and the rest of the air is divided
between the windshield defroster outlets and the side
window defroster outlets.
W(Defog):Air�ow is delivered through the �oor
outlets, the windshield defroster outlets and the side
window defroster outlets. The air �ow can be divided
between �oor and defrost depending upon where
the knob is placed between the settings.
1(Defrost):This setting directs most air through
the windshield defroster outlets, side window defroster
outlets and some through the �oor outlets.
3-21
Page 188 of 580
Dual Climate Control System
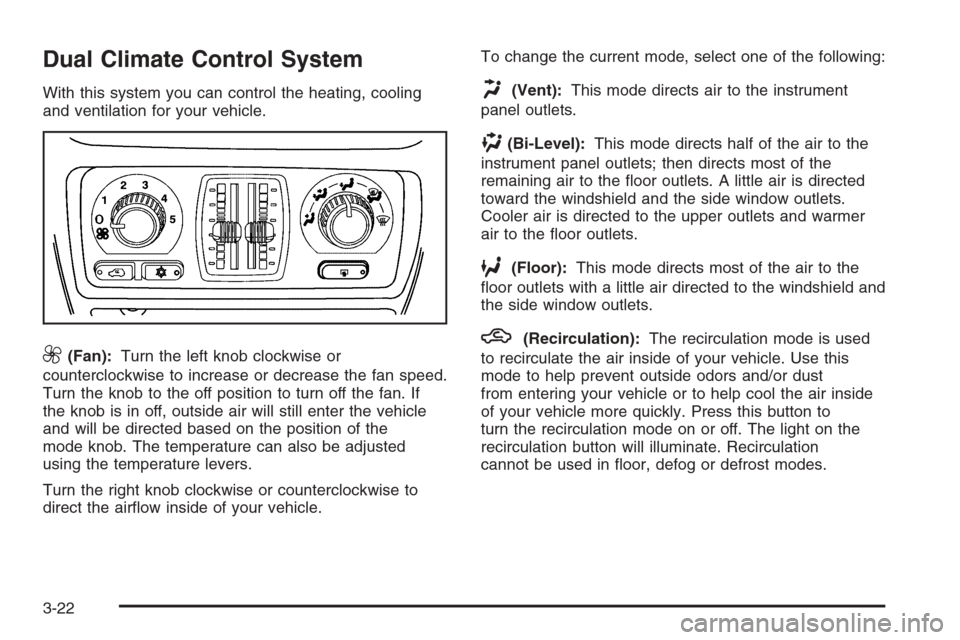
With this system you can control the heating, cooling
and ventilation for your vehicle.
9(Fan):Turn the left knob clockwise or
counterclockwise to increase or decrease the fan speed.
Turn the knob to the off position to turn off the fan. If
the knob is in off, outside air will still enter the vehicle
and will be directed based on the position of the
mode knob. The temperature can also be adjusted
using the temperature levers.
Turn the right knob clockwise or counterclockwise to
direct the air�ow inside of your vehicle.To change the current mode, select one of the following:
H(Vent):This mode directs air to the instrument
panel outlets.
)(Bi-Level):This mode directs half of the air to the
instrument panel outlets; then directs most of the
remaining air to the �oor outlets. A little air is directed
toward the windshield and the side window outlets.
Cooler air is directed to the upper outlets and warmer
air to the �oor outlets.
6(Floor):This mode directs most of the air to the
�oor outlets with a little air directed to the windshield and
the side window outlets.
h(Recirculation):The recirculation mode is used
to recirculate the air inside of your vehicle. Use this
mode to help prevent outside odors and/or dust
from entering your vehicle or to help cool the air inside
of your vehicle more quickly. Press this button to
turn the recirculation mode on or off. The light on the
recirculation button will illuminate. Recirculation
cannot be used in �oor, defog or defrost modes.
3-22
Page 191 of 580

Driver’s Side Temperature Knob
The driver’s side knob is used to adjust the temperature
of the air coming through the system on the driver’s
side. The temperature can be adjusted even if the
system is turned off. This is possible since outside air
will always �ow through the system as the vehicle
is moving forward unless it is set to recirculation mode.
See “Recirculation” later in this section.
Turn the knob counterclockwise or clockwise to lower or
increase the cabin temperature. The display will show
the temperature setting decreasing or increasing and
an arrow pointing to the driver will be displayed
under and to the left of the temperature setting.
Passenger’s Side Temperature Knob
The passenger’s side knob can be used to change the
temperature of the air coming through the system
on the passenger’s side of the vehicle. The temperature
can be adjusted even if the system is turned off. This
is possible since outside air will always �ow through the
system as the vehicle is moving forward unless it is
set to recirculation mode. See “Recirculation” later in
this section.
Turn the knob counterclockwise or clockwise to lower or
increase the cabin temperature. The display will show
the temperature setting decreasing or increasing and an
arrow pointing to the passenger will be displayed
under and to the right of the temperature setting.
The passenger’s temperature setting can be set to
match the driver’s temperature setting by pressing and
holding the AUTO button for four seconds. Both the
driver and passenger arrows will be displayed.
3-25
Page 207 of 580
Anti-Lock Brake System
Warning Light
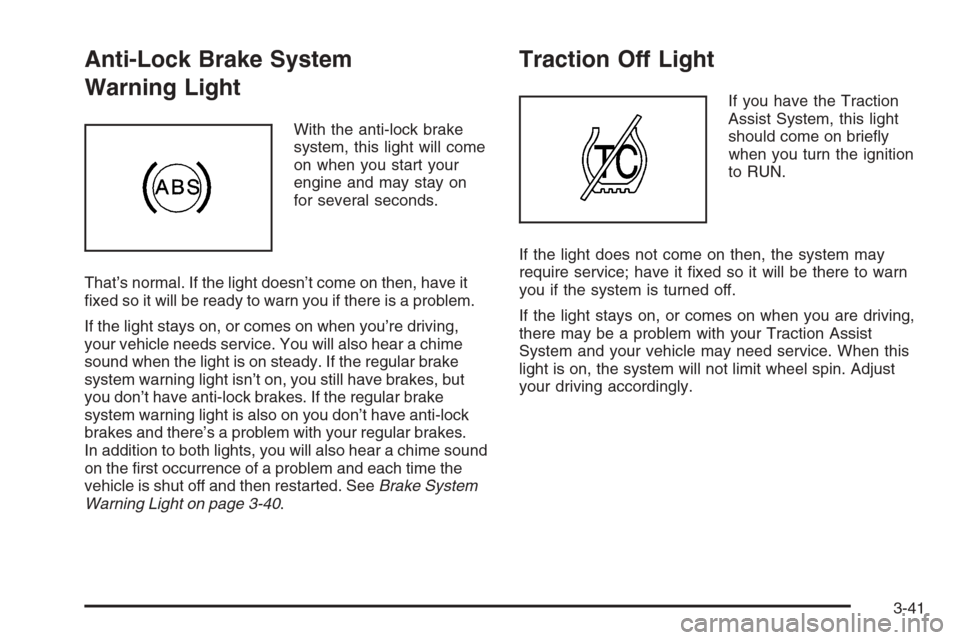
With the anti-lock brake
system, this light will come
on when you start your
engine and may stay on
for several seconds.
That’s normal. If the light doesn’t come on then, have it
�xed so it will be ready to warn you if there is a problem.
If the light stays on, or comes on when you’re driving,
your vehicle needs service. You will also hear a chime
sound when the light is on steady. If the regular brake
system warning light isn’t on, you still have brakes, but
you don’t have anti-lock brakes. If the regular brake
system warning light is also on you don’t have anti-lock
brakes and there’s a problem with your regular brakes.
In addition to both lights, you will also hear a chime sound
on the �rst occurrence of a problem and each time the
vehicle is shut off and then restarted. SeeBrake System
Warning Light on page 3-40.
Traction Off Light
If you have the Traction
Assist System, this light
should come on brie�y
when you turn the ignition
to RUN.
If the light does not come on then, the system may
require service; have it �xed so it will be there to warn
you if the system is turned off.
If the light stays on, or comes on when you are driving,
there may be a problem with your Traction Assist
System and your vehicle may need service. When this
light is on, the system will not limit wheel spin. Adjust
your driving accordingly.
3-41
Page 229 of 580
TURN SIGNAL ON
If a turn signal is left on for 3/4 of a mile (1.2 km),
this message will appear on the display and you will
hear a chime. Move the turn signal/multifunction lever to
the off position. Pressing any of the four DIC buttons,
if equipped, will acknowledge the message and
clear it from the DIC display. If your vehicle is not
equipped with the four DIC buttons, pressing the trip
odometer reset stem will acknowledge the message
and clear it from the DIC display.
DIC Vehicle Customization
Your vehicle may have customization capabilities that
allow you to program some features to one setting
based on your preference. All of the customizable
options listed may not be available on your vehicle.
Only the options available will be displayed on
your Driver Information Center (DIC).
The default settings for the customization features were
set when your vehicle left the factory, but may have
been changed from their default state since then.
To change feature preferences, make sure the ignition
is on and the vehicle is in PARK (P). Press the
customization button to scroll through the available
customizable options.
After pressing the customization button, VEHICLE
SETTINGS will momentarily display before going to a
customization option.
Lock Doors
(Automatic Transmission only)
If you have an automatic transmission vehicle, press the
customization button until LOCK DOORS appears in
the display. To select your preference for automatic
locking, press the select button while LOCK DOORS is
displayed on the DIC. Pressing the select button will
scroll through the following choices:
LOCK DOORS: IN GEAR (default):The doors will lock
when the vehicle is shifted out of PARK (P).
LOCK DOORS: WITH SPEED:The doors will lock
when the vehicle speed is above 8 mph (13 km/h) for
three seconds.
Choose one of the available options and press the
customization button while it is displayed on the DIC to
select it and move on to the next feature. For more
information on automatic door locks, seeProgrammable
Automatic Door Locks on page 2-11.
3-63
Page 230 of 580
Unlock Doors
(Automatic Transmission only)
If you have an automatic transmission vehicle, press the
customization button until UNLOCK DOORS appears
in the display. To select your preference for automatic
unlocking, press the select button while UNLOCK
DOORS is displayed on the DIC. Pressing the select
button will scroll through the following choices:
UNLOCK DOORS: IN PARK (default):All of the doors
will unlock when the vehicle is shifted into PARK (P).
UNLOCK DRIVER: IN PARK:The driver’s door will be
unlocked when the vehicle is shifted into PARK (P).
UNLOCK DOORS: KEY OUT:All of the doors
will unlock when the key is taken out of the ignition.
UNLOCK DOORS: MANUALLY:The doors will not be
unlocked automatically.
Choose one of the available options and press the
customization button while it is displayed on the DIC to
select it and move on to the next feature. For more
information on automatic door locks, seeProgrammable
Automatic Door Locks on page 2-11.
Door Lock Delay (Crew Cab only)
If your DIC does not have this feature, you still may
be able to program the delayed locking feature.
SeeDelayed Locking on page 2-10for more information.
When locking the doors with the power lock switch or
the keyless entry transmitter and a door is open,
the delayed locking feature will delay locking the doors
until �ve seconds after the last door is closed.
Press the customization button until DOOR LOCK
DELAY appears in the display. To select your
preference for delayed locking, press the select button
while DOOR LOCK DELAY is displayed on the DIC.
Pressing the select button will scroll through the
following choices:
DOOR LOCK DELAY: OFF (default):The doors will
lock immediately when pressing the power lock switch or
the lock button on the keyless entry transmitter.
DOOR LOCK DELAY: ON:The doors will not lock until
�ve seconds after the last door is closed. You will
hear three chimes to signal that the delayed locking
feature is in use. You can temporarily override delayed
locking by pressing the lock button on the door or
keyless entry transmitter a second time.
Choose one of the available options and press the
customization button while it is displayed on the DIC
to select it and move on to the next feature.
This feature will not operate if the key is in the ignition.
3-64
Page 231 of 580
Lock Feedback
Press the customization button until LOCK FEEDBACK
appears in the display. To select your preference for
the feedback you receive when locking the vehicle with
the remote keyless entry transmitter, press the select
button while LOCK FEEDBACK is displayed on the DIC.
Pressing the select button will scroll through the
following choices:
LOCK FEEDBACK: BOTH (default):The parking
lamps will �ash each time you press the button with the
lock symbol on the remote keyless entry transmitter
and the horn will chirp the second time you press the
lock button.
LOCK FEEDBACK: LAMPS:The parking lamps will
�ash each time you press the button with the lock
symbol on the remote keyless entry transmitter.
LOCK FEEDBACK: HORN:The horn will chirp the
second time you press the button with the lock symbol
on the remote keyless entry transmitter.
LOCK FEEDBACK: OFF:There will be no feedback
when locking the vehicle.
Choose one of the available options and press the
customization button while it is displayed on the DIC
to select it and move on to the next feature.
Unlock Feedback
Press the customization button until UNLOCK
FEEDBACK appears in the display. To select your
preference for the feedback you will receive when
unlocking the vehicle with the remote keyless entry
transmitter, press the select button while UNLOCK
FEEDBACK is displayed on the DIC. Pressing the select
button will scroll through the following choices:
UNLOCK FEEDBACK: LAMPS (default):The parking
lamps will �ash each time you press the button with
the unlock symbol on the remote keyless entry
transmitter.
UNLOCK FEEDBACK: HORN:The horn will chirp the
second time you press the button with the unlock
symbol on the remote keyless entry transmitter.
UNLOCK FEEDBACK: BOTH:The parking lamps will
�ash each time you press the button with the unlock
symbol on the remote keyless entry transmitter and the
horn will chirp the second time you press the unlock
button.
UNLOCK FEEDBACK: OFF:There will be no feedback
when unlocking the vehicle.
Choose one of the available options and press the
customization button while it is displayed on the DIC
to select it and move on to the next feature.
3-65
Page 232 of 580
Headlamp Delay
Press the customization button until HEADLAMP
DELAY appears in the display. To select your
preference for how long the headlamps will stay on
when you turn off the vehicle, press the select button
while HEADLAMP DELAY is displayed on the DIC.
Pressing the select button will scroll through the
following choices:
HEADLAMP DELAY: 10 SEC (Seconds) (default)
HEADLAMP DELAY: 20 SEC
HEADLAMP DELAY: 40 SEC
HEADLAMP DELAY: 1 MIN (Minute)
HEADLAMP DELAY: 2 MIN
HEADLAMP DELAY: 3 MIN
HEADLAMP DELAY: OFF
The amount of time you choose will be the amount of
time that the headlamps stay on after you turn off
the vehicle. If you choose off, the headlamps will turn
off as soon as you turn off the vehicle.
Choose one of the available options and press the
customization button while it is displayed on the DIC
to select it and move on to the next feature.
Perimeter Lights
Press the customization button until PERIMETER
LIGHTS appears in the display. To select your
preference for perimeter lighting, press the select button
while PERIMETER LIGHTS is displayed on the DIC.
Pressing the select button will scroll through the
following choices:
PERIMETER LIGHTS: ON (default):The headlamps
and back-up lamps will come on for 40 seconds, if
it is dark enough outside, when you unlock the vehicle
with the remote keyless entry transmitter.
PERIMETER LIGHTS: OFF:The perimeter lights will
not come on when you unlock the vehicle with the
remote keyless entry transmitter.
Choose one of the available options and press the
customization button while it is displayed on the DIC
to select it and move on to the next feature.
Easy Exit Seat
Press the customization button until EASY EXIT SEAT
appears in the display. To select your preference for
seat position exit, press the select button while
EASY EXIT SEAT is displayed on the DIC. Pressing the
select button will scroll through the following choices:
EASY EXIT SEAT: OFF (default):No seat exit
recall will occur.
3-66