2005 CHEVROLET MALIBU change time
[x] Cancel search: change timePage 266 of 434
Steering
Electric Power Steering
If the engine stalls while you are driving, the power
steering assist system will continue to operate until you
are able to stop your vehicle. If you lose power
steering assist because the electric power steering
system is not functioning, you can steer, but it will take
more effort.
If you turn the steering wheel in either direction several
times until it stops, or hold the steering wheel in the
stopped position for an extended amount of time, you
may notice a reduced amount of power steering
assist. The normal amount of power steering assist
should return shortly after a few normal steering
movements.
The electric power steering system does not require
regular maintenance. If you suspect steering system
problems, contact your dealer for service repairs.
SeeDIC Warnings and Messages on page 3-52and
Service Vehicle Soon Light on page 3-45.
Steering Tips
Driving on Curves
It is important to take curves at a reasonable speed.
A lot of the “driver lost control” accidents mentioned on
the news happen on curves. Here is why:
Experienced driver or beginner, each of us is subject to
the same laws of physics when driving on curves.
The traction of the tires against the road surface makes
it possible for the vehicle to change its path when
you turn the front wheels. If there is no traction, inertia
will keep the vehicle going in the same direction. If
you have ever tried to steer a vehicle on wet ice, you
will understand this.
The traction you can get in a curve depends on the
condition of your tires and the road surface, the angle at
which the curve is banked, and your speed. While
you are in a curve, speed is the one factor you
can control.
Suppose you are steering through a sharp curve.
Then you suddenly apply the brakes. Both control
systems — steering and braking — have to do their work
where the tires meet the road. Unless you have
four-wheel anti-lock brakes, adding the hard braking can
demand too much of those places. You can lose control.
4-10
Page 270 of 434
Check your mirrors, glance over your shoulder, and
start your left lane change signal before moving out
of the right lane to pass. When you are far
enough ahead of the passed vehicle to see its front
in your inside mirror, activate your right lane
change signal and move back into the right lane.
Remember that your right outside mirror is convex.
The vehicle you just passed may seem to be
farther away from you than it really is.
Try not to pass more than one vehicle at a time on
two-lane roads. Reconsider before passing the
next vehicle.
Do not overtake a slowly moving vehicle too rapidly.
Even though the brake lamps are not �ashing, it
may be slowing down or starting to turn.
If you are being passed, make it easy for the
following driver to get ahead of you. Perhaps
you can ease a little to the right.
Loss of Control
Let us review what driving experts say about what
happens when the three control systems — brakes,
steering, and acceleration — do not have enough
friction where the tires meet the road to do what the driver
has asked.
In any emergency, do not give up. Keep trying to steer
and constantly seek an escape route or area of less
danger.
Skidding
In a skid, a driver can lose control of the vehicle.
Defensive drivers avoid most skids by taking reasonable
care suited to existing conditions, and by not overdriving
those conditions. But skids are always possible.
The three types of skids correspond to your vehicle’s
three control systems. In the braking skid, your wheels
are not rolling. In the steering or cornering skid, too much
speed or steering in a curve causes tires to slip and lose
cornering force. And in the acceleration skid, too much
throttle causes the driving wheels to spin.
A cornering skid and an acceleration skid are best
handled by easing your foot off the accelerator pedal.
4-14
Page 294 of 434
Towing a Trailer
{CAUTION:
If you do not use the correct equipment and
drive properly, you can lose control when you
pull a trailer. For example, if the trailer is too
heavy, the brakes may not work well — or even
at all. You and your passengers could be
seriously injured. You may also damage your
vehicle; the resulting repairs would not be
covered by your warranty. Pull a trailer only if
you have followed all the steps in this section.
Ask your dealer for advice and information
about towing a trailer with your vehicle.Your vehicle can tow a trailer if it is equipped with a
3.5L V6 engine and the proper trailer towing equipment.
To identify what the vehicle trailering capacity is for
your vehicle, you should read the information in “Weight
of the Trailer” that appears later in this section. But
trailering is different than just driving your vehicle
by itself. Trailering means changes in handling, durability
and fuel economy. Successful, safe trailering takes
correct equipment, and it has to be used properly.
That’s the reason for this part. In it are many time-tested,
important trailering tips and safety rules. Many of
these are important for your safety and that of your
passengers. So please read this section carefully before
you pull a trailer.
Load-pulling components such as the engine, transaxle,
wheel assemblies and tires are forced to work harder
against the drag of the added weight. The engine
is required to operate at relatively higher speeds and
under greater loads, generating extra heat. What’s more,
the trailer adds considerably to wind resistance,
increasing the pulling requirements.
4-38
Page 318 of 434
Notice:Use only engine oil identi�ed as meeting
GM Standard GM6094M and showing the American
Petroleum Institute Certi�ed For Gasoline Engines
starburst symbol. Failure to use the recommended
oil can result in engine damage not covered by
your warranty.
GM Goodwrench
®oil meets all the requirements for
your vehicle.
If you are in an area of extreme cold, where the
temperature falls below−20°F (−29°C), it is
recommended that you use either an SAE 5W-30
synthetic oil or an SAE 0W-30 oil. Both will provide
easier cold starting and better protection for your engine
at extremely low temperatures.
Engine Oil Additives
Do not add anything to your oil. The recommended oils
with the starburst symbol that meet GM Standard
GM6094M are all you will need for good performance
and engine protection.
Engine Oil Life System
When to Change Engine Oil
Your vehicle has a computer system that lets you know
when to change the engine oil and �lter. This is
based on engine revolutions and engine temperature,
and not on mileage. Based on driving conditions,
the mileage at which an oil change will be indicated can
vary considerably. For the oil life system to work
properly, you must reset the system every time the oil is
changed.
When the system has calculated that oil life has been
diminished, it will indicate that an oil change is
necessary. A Change Oil Soon message will come on.
Change your oil as soon as possible within the next
600 miles (1 000 km). It is possible that, if you are
driving under the best conditions, the oil life system may
not indicate that an oil change is necessary for over a
year. However, your engine oil and �lter must be
changed at least once a year and at this time the system
must be reset. Your dealer has GM-trained service
people who will perform this work using genuine GM
parts and reset the system. It is also important to check
your oil regularly and keep it at the proper level.
If the system is ever reset accidentally, you must change
your oil at 3,000 miles (5 000 km) since your last oil
change. Remember to reset the oil life system whenever
the oil is changed.
5-18
Page 319 of 434
How to Reset the Engine Oil Life
System
The Engine Oil Life System calculates when to change
your engine oil and �lter based on vehicle use.
Anytime your oil is changed, reset the system so it can
calculate when the next oil change is required. If a
situation occurs where you change your oil prior to a
Change Oil Soon message being turned on, reset
the system.
After changing the engine oil, reset the system by
performing the following steps:
1. Display OIL LIFE RESET on the DIC.
2. Press and hold the ENTER button for at least
one second. An ACKNOWLEDGED display
message will appear for three seconds or until the
next button is pressed. This will tell you the
system has been reset.
3. Turn the key to OFF.
If the Change Oil Soon message comes back on when
you start your vehicle, the engine oil life system has
not reset. Repeat the procedure.
What to Do with Used Oil
Used engine oil contains certain elements that may be
unhealthy for your skin and could even cause cancer.
Do not let used oil stay on your skin for very long. Clean
your skin and nails with soap and water, or a good
hand cleaner. Wash or properly dispose of clothing or
rags containing used engine oil. See the manufacturer’s
warnings about the use and disposal of oil products.
Used oil can be a threat to the environment. If you
change your own oil, be sure to drain all the oil from the
�lter before disposal. Never dispose of oil by putting it
in the trash, pouring it on the ground, into sewers, or into
streams or bodies of water. Instead, recycle it by
taking it to a place that collects used oil. If you have a
problem properly disposing of your used oil, ask
your dealer, a service station or a local recycling center
for help.
5-19
Page 335 of 434
Replacing Brake System Parts
The braking system on a vehicle is complex. Its many
parts have to be of top quality and work well together if
the vehicle is to have really good braking. Your
vehicle was designed and tested with top-quality GM
brake parts. When you replace parts of your braking
system — for example, when your brake linings
wear down and you need new ones put in — be sure
you get new approved GM replacement parts. If you do
not, your brakes may no longer work properly. For
example, if someone puts in brake linings that are wrong
for your vehicle, the balance between your front and
rear brakes can change — for the worse. The braking
performance you have come to expect can change
in many other ways if someone puts in the wrong
replacement brake parts.
Battery
Your vehicle has a maintenance free battery. When it is
time for a new battery, get one that has the replacement
number shown on the original battery’s label. We
recommend an ACDelco
®replacement battery. See
Engine Compartment Overview on page 5-12for battery
location.
Warning:Battery posts, terminals, and related
accessories contain lead and lead compounds,
chemicals known to the State of California to cause
cancer and reproductive harm. Wash hands after
handling.
5-35
Page 355 of 434
Do not include the compact spare tire in your tire
rotation.
After the tires have been rotated, adjust the front and
rear in�ation pressures as shown on the Tire and
Loading Information label.
Make certain that all wheel nuts are properly tightened.
See “Wheel Nut Torque” underCapacities and
Speci�cations on page 5-91.
{CAUTION:
Rust or dirt on a wheel, or on the parts to
which it is fastened, can make wheel nuts
become loose after a time. The wheel could
come off and cause an accident. When you
change a wheel, remove any rust or dirt from
places where the wheel attaches to the vehicle.
In an emergency, you can use a cloth or a
paper towel to do this; but be sure to use a
scraper or wire brush later, if needed, to get all
the rust or dirt off. SeeChanging a Flat Tire on
page 5-62.
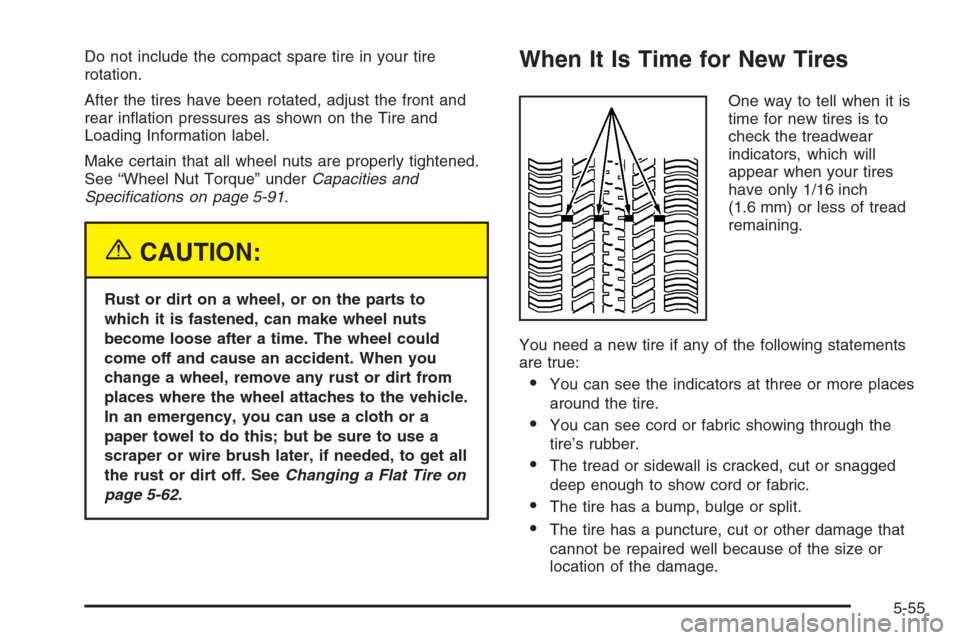
When It Is Time for New Tires
One way to tell when it is
time for new tires is to
check the treadwear
indicators, which will
appear when your tires
have only 1/16 inch
(1.6 mm) or less of tread
remaining.
You need a new tire if any of the following statements
are true:
You can see the indicators at three or more places
around the tire.
You can see cord or fabric showing through the
tire’s rubber.
The tread or sidewall is cracked, cut or snagged
deep enough to show cord or fabric.
The tire has a bump, bulge or split.
The tire has a puncture, cut or other damage that
cannot be repaired well because of the size or
location of the damage.
5-55
Page 367 of 434
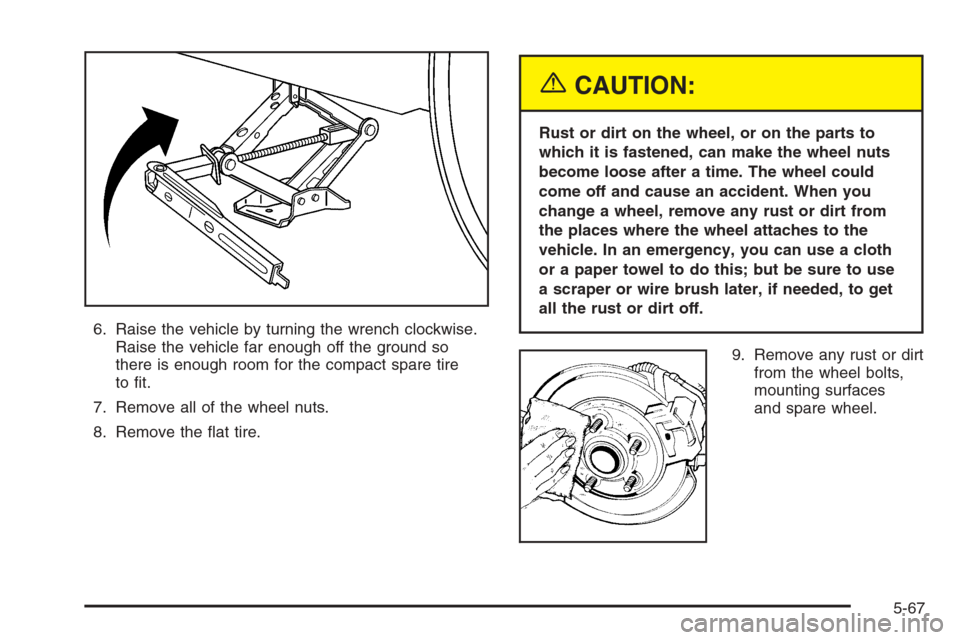
6. Raise the vehicle by turning the wrench clockwise.
Raise the vehicle far enough off the ground so
there is enough room for the compact spare tire
to �t.
7. Remove all of the wheel nuts.
8. Remove the �at tire.
{CAUTION:
Rust or dirt on the wheel, or on the parts to
which it is fastened, can make the wheel nuts
become loose after a time. The wheel could
come off and cause an accident. When you
change a wheel, remove any rust or dirt from
the places where the wheel attaches to the
vehicle. In an emergency, you can use a cloth
or a paper towel to do this; but be sure to use
a scraper or wire brush later, if needed, to get
all the rust or dirt off.
9. Remove any rust or dirt
from the wheel bolts,
mounting surfaces
and spare wheel.
5-67