2005 CHEVROLET MALIBU washer fluid
[x] Cancel search: washer fluidPage 187 of 434
ENG (Engine) PWR (Power) REDUCED:This
message informs you that the vehicle has reduced
engine power to avoid damaging the engine.
ICE POSSIBLE:This message appears when the
outside air temperature is cold enough to create icy road
conditions.
KEY FOB BATT (Battery) LOW:This message is
displayed if the remote keyless entry transmitter battery
is low. You should replace the battery in the transmitter.
See “Battery Replacement” underRemote Keyless
Entry System Operation on page 2-5.
LOW COOLANT:This message is displayed when
there is a low level of engine coolant. Have the cooling
system serviced by your GM dealer as soon as
possible.
LOW FUEL:This message is displayed when your
vehicle is low on fuel. You should re�ll the fuel tank as
soon as possible. You will also see a low fuel warning
light on the instrument panel cluster. SeeFuel on
page 5-5andFilling the Tank on page 5-8.LOW WASHER FLUID:This message is displayed
when your vehicle is low on windshield washer �uid. You
should re�ll the windshield washer �uid reservoir as
soon as possible. See “Adding Washer Fluid” under
Windshield Washer Fluid on page 5-30.
POWER STEERING:This message is displayed if a
problem has been detected with the electric power
steering. Have your vehicle serviced by your GM dealer
immediately.
PUSH PARK PEDAL:This message is displayed if the
parking brake is left engaged. SeeParking Brake on
page 2-29for more information.
SERVICE AIR BAG:There is a problem with the airbag
system when this message appears. Let only a
quali�ed technician work on your vehicle. Have your
vehicle serviced by your GM dealer immediately.
TRUNK OR GATE AJAR:This message is displayed
when the trunk lid or liftgate of your vehicle is not closed
completely. You should make sure that the trunk lid or
liftgate is closed completely.
3-57
Page 277 of 434
The exit ramp can be curved, sometimes quite sharply.
The exit speed is usually posted. Reduce your speed
according to your speedometer, not to your sense
of motion. After driving for any distance at higher
speeds, you may tend to think you are going slower
than you actually are.
Before Leaving on a Long Trip
Make sure you are ready. Try to be well rested. If you
must start when you are not fresh — such as after
a day’s work — do not plan to make too many miles that
�rst part of the journey. Wear comfortable clothing
and shoes you can easily drive in.
Is your vehicle ready for a long trip? If you keep it
serviced and maintained, it is ready to go. If it needs
service, have it done before starting out. Of course, you
will �nd experienced and able service experts in GM
dealerships all across North America. They will be ready
and willing to help if you need it.Here are some things you can check before a trip:
Windshield Washer Fluid:Is the reservoir full?
Are all windows clean inside and outside?
Wiper Blades:Are they in good shape?
Fuel, Engine Oil, Other Fluids:Have you checked
all levels?
Lamps:Are they all working? Are the lenses clean?
Tires:They are vitally important to a safe,
trouble-free trip. Is the tread good enough for
long-distance driving? Are the tires all in�ated to the
recommended pressure?
Weather Forecasts:What is the weather outlook
along your route? Should you delay your trip a
short time to avoid a major storm system?
Maps:Do you have up-to-date maps?
4-21
Page 301 of 434
Service............................................................5-3
Doing Your Own Service Work.........................5-4
Adding Equipment to the Outside of Your
Vehicle......................................................5-5
Fuel................................................................5-5
Gasoline Octane............................................5-5
Gasoline Speci�cations....................................5-5
California Fuel...............................................5-6
Additives.......................................................5-6
Fuels in Foreign Countries...............................5-7
Filling the Tank..............................................5-8
Filling a Portable Fuel Container.....................5-10
Checking Things Under the Hood....................5-10
Hood Release..............................................5-11
Engine Compartment Overview.......................5-12
Engine Oil...................................................5-15
Engine Oil Life System..................................5-18
Engine Air Cleaner/Filter................................5-20
Automatic Transaxle Fluid..............................5-21
Engine Coolant.............................................5-22
Coolant Surge Tank Pressure Cap..................5-24
Engine Overheating.......................................5-24
Cooling System............................................5-26
Windshield Washer Fluid................................5-30
Brakes........................................................5-32
Battery........................................................5-35
Jump Starting...............................................5-36Bulb Replacement..........................................5-41
Halogen Bulbs..............................................5-41
Headlamps..................................................5-41
Taillamps, Turn Signal, Stoplamps and
Back-up Lamps.........................................5-43
Replacement Bulbs.......................................5-45
Windshield Wiper Blade Replacement..............5-45
Tires..............................................................5-47
Tire Sidewall Labelling...................................5-48
Tire Terminology and De�nitions.....................5-50
In�ation - Tire Pressure.................................5-53
Tire Inspection and Rotation...........................5-54
When It Is Time for New Tires.......................5-55
Buying New Tires.........................................5-56
Uniform Tire Quality Grading..........................5-57
Wheel Alignment and Tire Balance..................5-58
Wheel Replacement......................................5-58
Tire Chains..................................................5-60
If a Tire Goes Flat........................................5-61
Changing a Flat Tire.....................................5-62
Removing the Spare Tire and Tools................5-63
Removing the Flat Tire and Installing the
Spare Tire................................................5-65
Storing a Flat or Spare Tire and Tools............5-70
Compact Spare Tire......................................5-73
Section 5 Service and Appearance Care
5-1
Page 313 of 434
A. Engine Air Cleaner/Filter. SeeEngine Air
Cleaner/Filter on page 5-20.
B. Engine Oil Dipstick. See “Checking Engine Oil”
underEngine Oil on page 5-15.
C. Engine Oil Fill Cap. See “When to Add Engine Oil”
underEngine Oil on page 5-15.
D. Engine Coolant Surge Tank. SeeCooling System on
page 5-26.E. Brake Fluid Reservoir. See “Brake Fluid” under
Brakes on page 5-32.
F. Battery. SeeBattery on page 5-35.
G. Engine Compartment Fuse Block. SeeEngine
Compartment Fuse Block on page 5-86.
H. Windshield Washer Fluid Reservoir. See “Adding
Washer Fluid” underWindshield Washer Fluid
on page 5-30.
5-13
Page 315 of 434
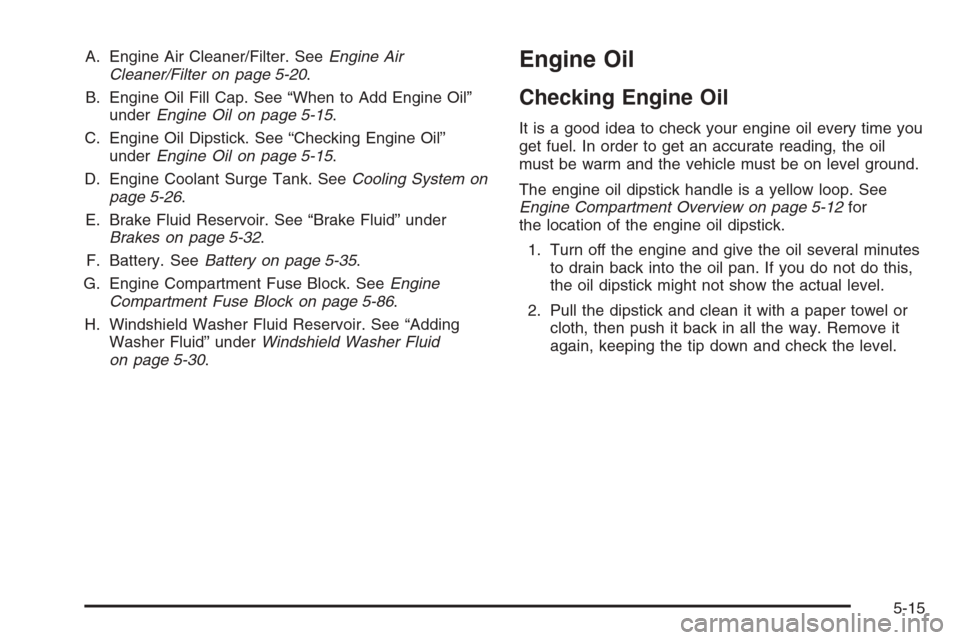
A. Engine Air Cleaner/Filter. SeeEngine Air
Cleaner/Filter on page 5-20.
B. Engine Oil Fill Cap. See “When to Add Engine Oil”
underEngine Oil on page 5-15.
C. Engine Oil Dipstick. See “Checking Engine Oil”
underEngine Oil on page 5-15.
D. Engine Coolant Surge Tank. SeeCooling System on
page 5-26.
E. Brake Fluid Reservoir. See “Brake Fluid” under
Brakes on page 5-32.
F. Battery. SeeBattery on page 5-35.
G. Engine Compartment Fuse Block. SeeEngine
Compartment Fuse Block on page 5-86.
H. Windshield Washer Fluid Reservoir. See “Adding
Washer Fluid” underWindshield Washer Fluid
on page 5-30.Engine Oil
Checking Engine Oil
It is a good idea to check your engine oil every time you
get fuel. In order to get an accurate reading, the oil
must be warm and the vehicle must be on level ground.
The engine oil dipstick handle is a yellow loop. See
Engine Compartment Overview on page 5-12for
the location of the engine oil dipstick.
1. Turn off the engine and give the oil several minutes
to drain back into the oil pan. If you do not do this,
the oil dipstick might not show the actual level.
2. Pull the dipstick and clean it with a paper towel or
cloth, then push it back in all the way. Remove it
again, keeping the tip down and check the level.
5-15
Page 330 of 434
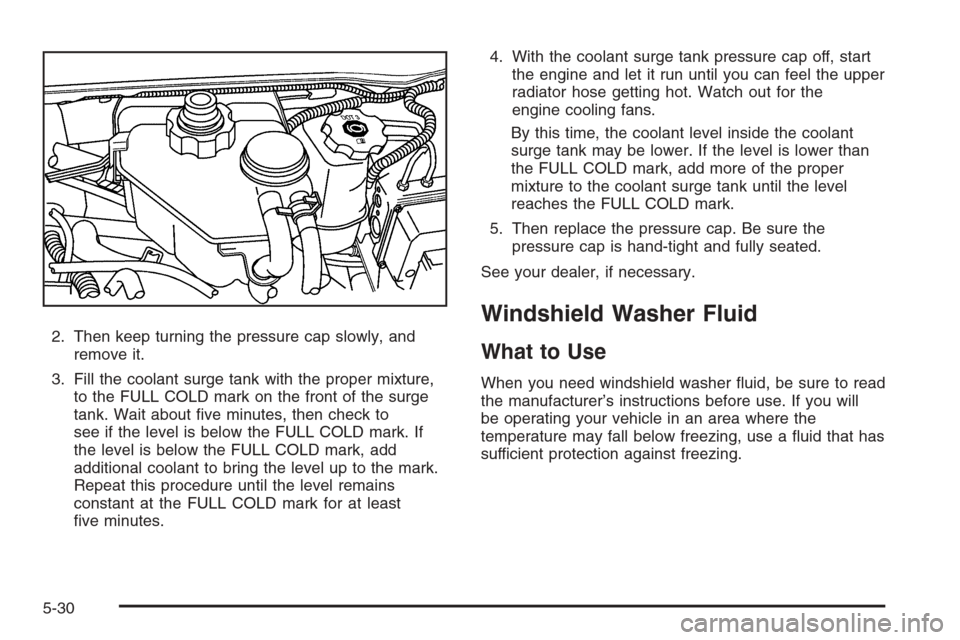
2. Then keep turning the pressure cap slowly, and
remove it.
3. Fill the coolant surge tank with the proper mixture,
to the FULL COLD mark on the front of the surge
tank. Wait about �ve minutes, then check to
see if the level is below the FULL COLD mark. If
the level is below the FULL COLD mark, add
additional coolant to bring the level up to the mark.
Repeat this procedure until the level remains
constant at the FULL COLD mark for at least
�ve minutes.4. With the coolant surge tank pressure cap off, start
the engine and let it run until you can feel the upper
radiator hose getting hot. Watch out for the
engine cooling fans.
By this time, the coolant level inside the coolant
surge tank may be lower. If the level is lower than
the FULL COLD mark, add more of the proper
mixture to the coolant surge tank until the level
reaches the FULL COLD mark.
5. Then replace the pressure cap. Be sure the
pressure cap is hand-tight and fully seated.
See your dealer, if necessary.
Windshield Washer Fluid
What to Use
When you need windshield washer �uid, be sure to read
the manufacturer’s instructions before use. If you will
be operating your vehicle in an area where the
temperature may fall below freezing, use a �uid that has
sufficient protection against freezing.
5-30
Page 331 of 434
Adding Washer Fluid
When the windshield washer �uid reservoir is low, a
LOW WASHER FLUID message will be displayed on the
Driver Information Center (DIC). SeeDIC Warnings
and Messages on page 3-52for more information.
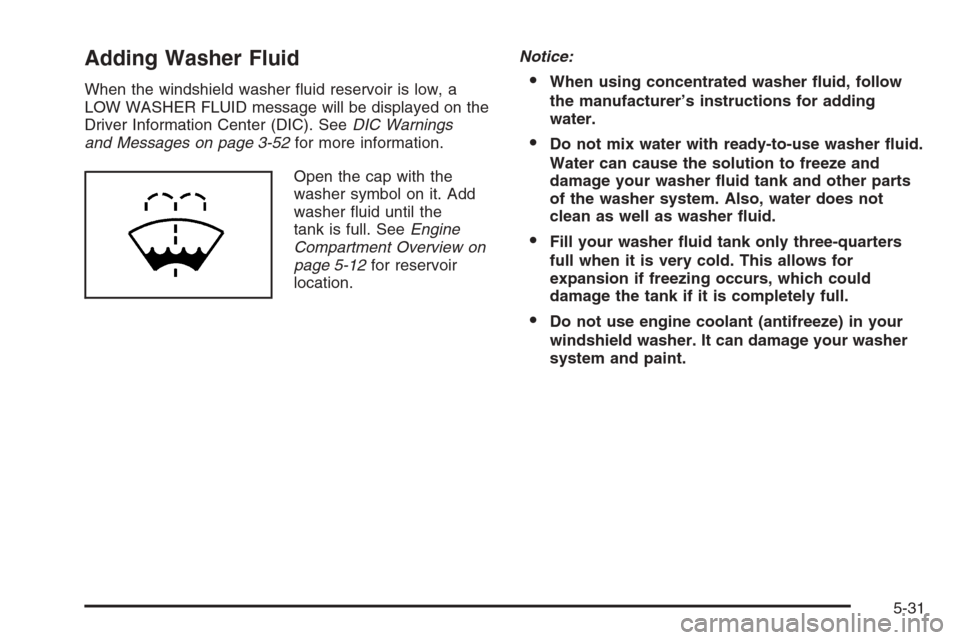
Open the cap with the
washer symbol on it. Add
washer �uid until the
tank is full. SeeEngine
Compartment Overview on
page 5-12for reservoir
location.Notice:When using concentrated washer �uid, follow
the manufacturer’s instructions for adding
water.
Do not mix water with ready-to-use washer �uid.
Water can cause the solution to freeze and
damage your washer �uid tank and other parts
of the washer system. Also, water does not
clean as well as washer �uid.
Fill your washer �uid tank only three-quarters
full when it is very cold. This allows for
expansion if freezing occurs, which could
damage the tank if it is completely full.
Do not use engine coolant (antifreeze) in your
windshield washer. It can damage your washer
system and paint.
5-31
Page 401 of 434
Engine Coolant Level Check
Check the engine coolant level and add DEX-COOL®
coolant mixture if necessary. SeeEngine Coolant
on page 5-22for further details.
Windshield Washer Fluid Level Check
Check the windshield washer �uid level in the windshield
washer �uid reservoir and add the proper �uid if
necessary.
At Least Once a Month
Tire In�ation Check
Visually inspect your vehicle’s tires and make sure they
are in�ated to the correct pressures. Do not forget to
check the spare tire. SeeTires on page 5-47for further
details. Check to make sure the spare tire is stored
securely. SeeChanging a Flat Tire on page 5-62.
Tire Wear Inspection
Tire rotation may be required for high mileage highway
drivers prior to the Engine Oil Life System service
noti�cation. Check the tires for wear and, if necessary,
rotate the tires. SeeTire Inspection and Rotation on
page 5-54.
At Least Once a Year
Starter Switch Check
{CAUTION:
When you are doing this inspection, the
vehicle could move suddenly. If the vehicle
moves, you or others could be injured.
1. Before you start, be sure you have enough room
around the vehicle.
2. Firmly apply both the parking brake and the regular
brake. SeeParking Brake on page 2-29.
Do not use the accelerator pedal, and be ready to
turn off the engine immediately if it starts.
3. Try to start the engine in each gear. The vehicle
should start only in PARK (P) or NEUTRAL (N). If
the vehicle starts in any other position, contact your
GM Goodwrench
®dealer for service.
6-9