2005 CHEVROLET MALIBU ECO mode
[x] Cancel search: ECO modePage 101 of 434
How the System Alarm is Activated
If the system is armed, it can be activated by either:
Opening the driver’s door or liftgate (MAXX model).
This will cause a ten second pre-alarm chirp
followed by a thirty second full alarm of horn and
lights.
Opening any other door. This will immediately
cause a full alarm of horn and lights for
thirty seconds.
When an alarm event has �nished, the system will
re-arm itself automatically.
How to Turn Off the System Alarm
To turn off the system alarm, do one of the following:
Press the lock button on the remote keyless
entry transmitter. The system will then re-arm itself.
Press the unlock button on the remote keyless entry
transmitter. This will also disarm the system.
Insert the key in the driver’s door key lock cylinder
and turn it counterclockwise. This will also disarm
the system.
Insert the key in the ignition and turn it on. This will
also disarm the system.
How to Detect a Tamper Condition
If you hear three chirps when you press the unlock or
lock buttons on the remote keyless entry transmitter,
it means that the content theft security system
alarm was triggered previously.
PASS-Key®III+
The PASS-Key®III+ system operates on a radio
frequency subject to Federal Communications
Commission (FCC) Rules and with Industry Canada.
This device complies with Part 15 of the FCC Rules.
Operation is subject to the following two conditions:
1. This device may not cause harmful interference.
2. This device must accept any interference received,
including interference that may cause undesired
operation.
This device complies with RSS-210 of Industry Canada.
Operation is subject to the following two conditions:
1. This device may not cause interference.
2. This device must accept any interference received,
including interference that may cause undesired
operation of the device.
Changes or modi�cations to this system by other than
an authorized service facility could void authorization to
use this equipment.
PASS-Key
®III+ uses a radio frequency transponder in
the key that matches a decoder in your vehicle.
2-19
Page 110 of 434
DRIVE (D):This position is for normal driving. If you
need more power for passing, and you are:
Going less than 35 mph (56 km/h), push your
accelerator pedal about halfway down.
Going about 35 mph (56 km/h) or more, push the
accelerator all the way down.
Shifting down to the next gear provides more engine
braking but lower fuel economy.
Notice:If your vehicle seems to start up rather
slowly or not shift gears when you go faster, and
you continue to drive your vehicle that way, you
could damage the transaxle. Have your vehicle
serviced right away. You can drive in LOW (L2) when
you are driving less than 35 mph (56 km/h) and
DRIVE (D) for higher speeds until then.
LOW (L):This position gives you access to FOURTH,
THIRD, SECOND and FIRST gears. This provides
more engine braking but lower fuel economy than
DRIVE (D). You can use it on very steep hills, or in deep
snow or mud. If the electronic range select is put in
LOW (L), the transaxle will not shift into lower gears until
the vehicle is going slow enough.
Electronic Range Select Mode
This feature allows you to select lower driving gears
when the shift lever is in LOW (L). The button for
this mode is located on the left side of the shift
lever knob.
When the shift lever is �rst moved into the LOW (L)
position, the display in the instrument panel shows L3.
Press the (−) end of the button on the shift lever
once for L2 and once more for L1. Press the (+) end of
the button once each to return to L2, L3 and L4. The
shift lever must be moved back to DRIVE (D) to turn off
the electronic range select mode.
2-28
Page 123 of 434
HomeLink®Wireless Control
System Operation
Do not use the HomeLink®Transmitter with any garage
door opener that does not have the “stop and reverse”
feature. This includes any garage door opener model
manufactured before April 1, 1982. If you have a newer
garage door opener with rolling codes, please be
sure to follow Steps 6 through 8 to complete the
programming of your HomeLink
®Transmitter.
Read the instructions completely before attempting to
program the HomeLink
®Transmitter. Because of the
steps involved, it may be helpful to have another person
available to assist you in programming the transmitter.
Keep the original transmitter for use in other vehicles as
well as for future HomeLink
®programming. It is also
recommended that upon the sale of the vehicle,
the programmed HomeLink
®buttons should be erased
for security purposes. Refer to “Erasing HomeLink®
Buttons” or, for assistance, contact HomeLink®on the
Internet at: www.homelink.com or by calling
1-800-355-3515.
Be sure that people and objects are clear of the garage
door or gate operator you are programming. When
programming a garage door, it is advised to park outside
of the garage.It is recommended that a new battery be installed in
your hand-held transmitter for quicker and more
accurate transmission of the radio frequency.
Programming HomeLink®
Your vehicle’s engine should be turned off while
programming the transmitter. Follow these steps to
program up to three channels:
1. Press and hold down the two outside buttons,
releasing only when the indicator light begins to
�ash, after 20 seconds. Do not hold down the
buttons for longer than 30 seconds and do not
repeat this step to program a second and/or third
transmitter to the remaining two HomeLink
®buttons.
2. Position the end of your hand-held transmitter about
1 to 3 inches (3 to 8 cm) away from the HomeLink
®
buttons while keeping the indicator light in view.
3. Simultaneously press and hold both the desired
button on HomeLink
®and the hand-held transmitter
button. Do not release the buttons until Step 4
has been completed.
Some entry gates and garage door openers may
require you to substitute Step 3 with the procedure
noted in “Gate Operator and Canadian
Programming” later in this section.
2-41
Page 125 of 434
Gate Operator and Canadian
Programming
Canadian radio-frequency laws require transmitter
signals to “time out” or quit after several seconds of
transmission. This may not be long enough for
HomeLink
®to pick up the signal during programming.
Similarly, some U.S. gate operators are manufactured to
“time out” in the same manner.
If you live in Canada, or you are having difficulty
programming a gate operator by using the
“Programming HomeLink
®” procedures (regardless of
where you live), replace Step 3 under “Programming
HomeLink
®” with the following:
Continue to press and hold the HomeLink
®button while
you press and release every two seconds (cycle)
your hand-held transmitter until the frequency signal has
been successfully accepted by HomeLink
®. The
indicator light will �ash slowly at �rst and then rapidly.
Proceed with Step 4 under “Programming HomeLink
®”
to complete.
Using HomeLink®
Press and hold the appropriate HomeLink®button for at
least half of a second. The indicator light will come
on while the signal is being transmitted.
Erasing HomeLink®Buttons
To erase programming from the three buttons do the
following:
1. Press and hold down the two outside buttons until
the indicator light begins to �ash, after 20 seconds.
Do not hold the two outside buttons for longer
than 30 seconds.
2. Release both buttons.
HomeLink
®is now in the train (learning) mode and can
be programmed at any time beginning with Step 2
under “Programming HomeLink
®” shown earlier in
this section.
Individual buttons cannot be erased, but they can be
reprogrammed. See “Reprogramming a Single
HomeLink
®Button” following this section.
Reprogramming a Single HomeLink®
Button
To program a device to HomeLink®using a HomeLink®
button previously trained, follow these steps:
1. Press and hold the desired HomeLink
®button. Do
not release the button.
2. The indicator light will begin to �ash after
20 seconds. While still holding the HomeLink
®
button, proceed with Step 2 under “Programming
HomeLink®” shown earlier in this section.
2-43
Page 154 of 434
Temperature Control:Turn the center knob clockwise
or counterclockwise to increase or decrease the
temperature inside your vehicle.
When it’s cold outside 0°F (−18°C) or lower, use the
engine coolant heater, if equipped, to provide warmer air
faster to your vehicle. An engine coolant heater warms
the coolant that the engine uses to provide heat to
warm the inside of your vehicle. For more information,
seeEngine Coolant Heater on page 2-24.
#(Air Conditioning):Press this button to turn the air
conditioning system on or off. When the air conditioning
button is pressed, an indicator light will come on to
let you know that air conditioning is activated.
On hot days, open the windows to let hot inside air
escape; then close them. This helps to reduce the
time it takes for your vehicle to cool down. It also
helps the system to operate more efficiently.For quick cool down on hot days, do the following:
1. Select the vent mode.
2. Select the highest fan speed.
3. Select air conditioning.
4. Select the recirculation mode.
5. Select the coolest temperature.
Using these settings together for long periods of time
may cause the air inside of your vehicle to become too
dry. To prevent this from happening, after the air in
your vehicle has cooled, turn the recirculation mode off.
The air-conditioning system removes moisture from
the air, so you may sometimes notice a small amount
of water dripping underneath your vehicle while idling
or after turning off the engine. This is normal.
3-24
Page 181 of 434
Driver Information Center (DIC)
The Driver Information Center (DIC) provides the
following:
A way to personalize your vehicle
Trip information
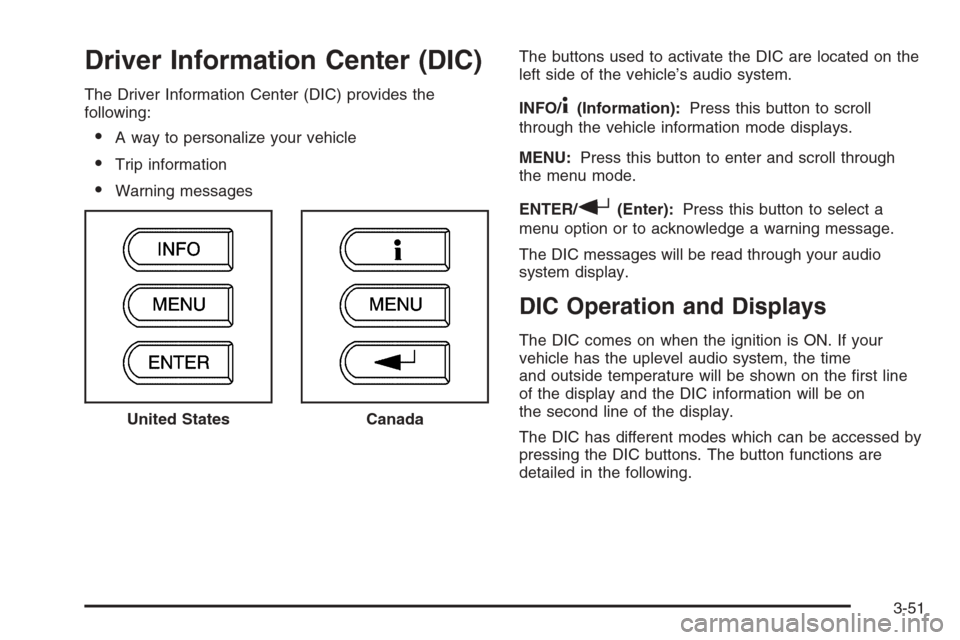
Warning messagesThe buttons used to activate the DIC are located on the
left side of the vehicle’s audio system.
INFO/
4(Information):Press this button to scroll
through the vehicle information mode displays.
MENU:Press this button to enter and scroll through
the menu mode.
ENTER/
r(Enter):Press this button to select a
menu option or to acknowledge a warning message.
The DIC messages will be read through your audio
system display.
DIC Operation and Displays
The DIC comes on when the ignition is ON. If your
vehicle has the uplevel audio system, the time
and outside temperature will be shown on the �rst line
of the display and the DIC information will be on
the second line of the display.
The DIC has different modes which can be accessed by
pressing the DIC buttons. The button functions are
detailed in the following. United States
Canada
3-51
Page 182 of 434
Information Mode (INFO Button)
Use the INFO button to scroll through the vehicle
information mode displays in the following order:
TRIP Odometer A
TRIP Odometer B
FUEL RANGE (Fuel Range Until Empty)
ECON (Average Fuel Economy)
AV SPEED (Average Vehicle Speed)
OIL LIFE (Engine Oil Life System)
TRIP A or TRIP B:Press the INFO button until
TRIP A or TRIP B is displayed. This shows the
current distance traveled since the last reset for
each trip odometer in either miles or kilometers.
Both odometers can be used at the same time.
Each trip odometer can be reset to zero separately
by pressing and holding the ENTER button for a
few seconds while the desired trip odometer is
displayed.
FUEL RANGE:Press the INFO button until FUEL
RANGE displays. This shows the remaining distance
you can drive without refueling. It is based on fuel
economy and the fuel remaining in the tank.The fuel economy data used to determine fuel range is
an average of recent driving conditions. As your driving
conditions change, this data is gradually updated. Fuel
range cannot be reset.
ECON (Economy):Press the INFO button until ECON
appears in the display. Average fuel economy is how
many miles per gallon or liters per 100 kilometers
your vehicle is getting based on current and past driving
conditions.
Press and hold the ENTER button while ECON is
displayed to reset the average fuel economy. Average
fuel economy will then be calculated starting from
that point. If the average fuel economy is not reset,
it will be continually updated each time you drive.
AV (Average) SPEED:Press the INFO button until AV
SPEED appears in the display. This is the vehicle’s
average speed in miles per hour or kilometers per hour.
Press and hold the ENTER button while AV SPEED
is displayed to reset the average vehicle speed.
OIL LIFE:Press the INFO button until OIL LIFE appears
in the display. The engine oil life system shows an
estimate of the oil’s remaining useful life. It will show
100% when the system is reset after an oil change. It will
alert you to change your oil on a schedule consistent with
your driving conditions.
3-52
Page 183 of 434
In addition to the engine oil life system monitoring the
oil life, additional maintenance is recommended in the
Maintenance Schedule in this manual. SeeEngine Oil
on page 5-15andScheduled Maintenance on page 6-4.
Always reset the engine oil life system after an oil
change. See “How to Reset the Engine Oil Life System”
underEngine Oil Life System on page 5-18.
Personalization
The following options can be accessed in order by
pressing the MENU button anytime while the vehicle
is in on. Press this button to scroll through each option.
All of the personalization options may not be available
on your vehicle. Only the options available will be
displayed on your DIC.
Oil Life Reset
Units Selection (English/Metric)
Remote Start Capability
Horn Chirp During Remote Keyless Entry Locking
Horn Chirp During Remote Keyless Entry Unlocking
Exterior Light Flash During Remote Keyless
Entry Locking or Unlocking
Delayed Locking
Automatic Vehicle Unlocking: Speci�c Doors
Automatic Vehicle Unlocking: When Key is Off or
When Shift To Park
Exterior Perimeter Lighting During Remote Keyless
Entry Unlock
Security System Passive or Remote Keyless Entry
Arming
Select Language: (English, French, Spanish or
German)
When the desired option is reached, use the ENTER
button to toggle between the modes of that option.
To make a selection, press the MENU button again.
If no selection is made within ten seconds, the display
will revert back to the previous information displayed.
The MENU mode is exited when the INFO button is
pressed, a ten second time period has elapsed, the
ignition is turned to off or the end of the MENU list is
reached.
The following display messages may appear on your
vehicle’s audio display by pressing the MENU button:
OIL LIFE RESET:When this option is displayed, you
can reset the engine oil life system. To reset the system
to 100%, press and hold the ENTER button for at least
one second. An ACKNOWLEDGED display message
will appear for three seconds or until the next button is
pressed. This will tell you the system has been reset.
SeeEngine Oil Life System on page 5-18for more
information.
3-53