2005 CHEVROLET KODIAK engine
[x] Cancel search: enginePage 99 of 374

Four-Wheel Drive
If your vehicle has four-wheel drive, you can send your
engine’s driving power to all four wheels for extra
traction. To get the most satisfaction out of four-wheel
drive, you must be familiar with its operation. Read the
part that follows before using four-wheel drive.
You should use two-wheel drive high for most normal
driving conditions.
Notice:Driving on clean, dry pavement in
four-wheel drive for an extended period of time may
cause premature wear on your vehicle’s powertrain.
Do not drive on clean, dry pavement in four-wheel
drive for extended periods of time.
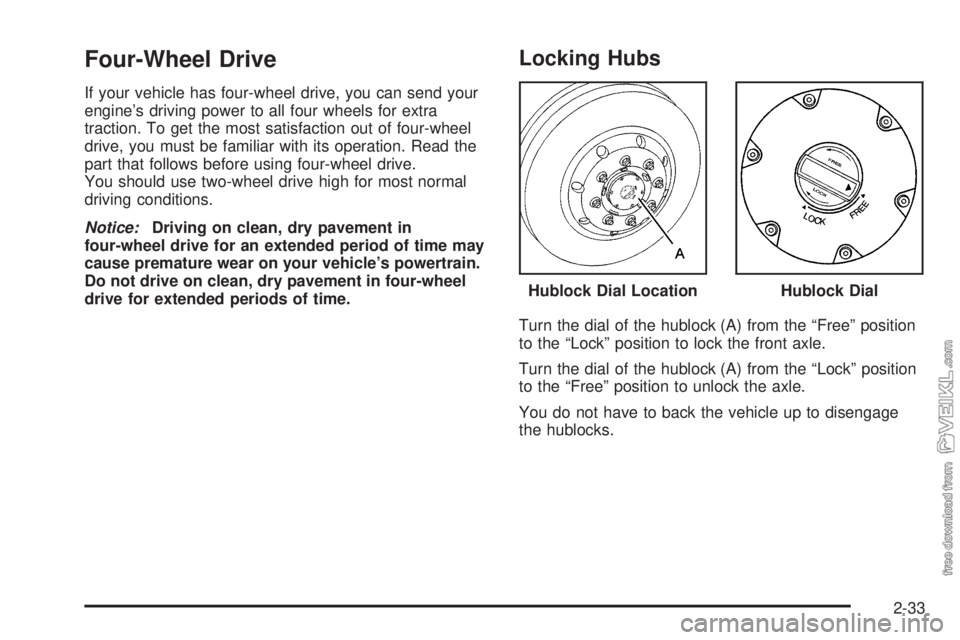
Locking Hubs
Turn the dial of the hublock (A) from the “Free” position
to the “Lock” position to lock the front axle.
Turn the dial of the hublock (A) from the “Lock” position
to the “Free” position to unlock the axle.
You do not have to back the vehicle up to disengage
the hublocks.Hublock Dial Location
Hublock Dial
2-33
Page 102 of 374

Shifting Into Four-Wheel Low
To shift to Four-Wheel Low, the vehicle’s engine must
be running and the vehicle must be stopped or
moving less than 3 mph (5 km/h) with the transmission
in NEUTRAL (N). The preferred method for shifting
into Four-Wheel Low is to have your vehicle moving
1 or 2 mph (1.6 to 3.2 km/h). Turn the knob to
Four-Wheel Low. You must wait for the Four-Wheel Low
indicator light to stop flashing and remain illuminated
before shifting your transmission into gear.
Notice:Shifting the transmission into gear before
the Four-Wheel Low indicator light has stopped
�ashing could damage the transfer case. To help
avoid damaging your vehicle, always wait for
the Four-Wheel Low indicator light to stop �ashing
before shifting the transmission into gear.
If you turn the knob to Four-Wheel Low when your
vehicle is in gear and/or moving, the Four-Wheel Low
indicator light will flash for 30 seconds and not
complete the shift unless your vehicle is moving
less than 3 mph (4.8 km/h) and the transmission is in
NEUTRAL (N). After 30 seconds, the transfer case
will return to the setting last chosen. If your vehicle is in
gear and moving less than 3 mph (4.8 km/h), the
transfer case will shift to Four-Wheel High.
Shifting Out of Four-Wheel Low
To shift from four-wheel low to Four-Wheel High or
Two-Wheel High, your vehicle must be stopped
or moving less than 3 mph (5 km/h) with the
transmission in NEUTRAL (N) and the engine running.
The preferred method for shifting out of Four-Wheel
Low is to have your vehicle moving 1 or 2 mph
(1.6 to 3.2 km/h). Turn the knob to Four-Wheel High or
Two-Wheel High. You must wait for the Four-Wheel
High or Two-Wheel High indicator light to stop flashing
and remain illuminated before shifting your transmission
into gear.
Notice:Shifting the transmission into gear before
the Four-Wheel High or Two-Wheel High indicator
light has stopped �ashing could damage the transfer
case. To help avoid damaging your vehicle, always
wait for the Four-Wheel High or Two-Wheel High
indicator light to stop �ashing before shifting
the transmission into gear.
If the knob is turned to Four-Wheel High or two-wheel
high when your vehicle is in gear and/or moving,
the Four-Wheel High or Two-Wheel high indicator light
will flash for 30 seconds. It will not complete the
shift unless your vehicle is moving less than 3 mph
(5 km/h) with the transmission in NEUTRAL (N).
2-36
Page 103 of 374

Shifting Into NEUTRAL
Before shifting the transfer case to NEUTRAL, first
make sure the vehicle is parked so that it will not roll.
1. Set the parking brake.
2. Start the vehicle.
3. Put the transmission in NEUTRAL (N).
4. Shift the transfer case to Two-Wheel High.
5. Turn the transfer case knob all of the way past
Four-Wheel Low and hold it there for a minimum
of 10 seconds. The neutral indicator light will
come on.
6. Shift the transmission to REVERSE (R) for
one second, then shift the transmission to
DRIVE (D) for one second.
7. Turn the ignition to OFF.
8. Place the transmission shift lever in PARK. (P).
9. Turn the ignition to LOCK.
Shifting Out of NEUTRAL
To shift the transfer case out of NEUTRAL, do the
following:
1. Set the parking brake and apply the regular
brake pedal.
2. Turn the ignition to RUN with the engine off.
3. Put the transmission in NEUTRAL (N).
4. Turn the transfer case knob to the desired shift
position (Two-Wheel High, Four-Wheel High,
Four-Wheel Low).
5. After the transfer case has shifted out of NEUTRAL,
the indicator light will go out.
6. Release the parking brake.
7. Start the engine and shift the transmission lever to
the desired position.
Excessively shifting the transfer case into or out of the
different modes may cause the transfer case to enter the
shift protection mode. This will protect the transfer case
from possible damage and will only allow the transfer
case to respond to one shift per 10 seconds. The transfer
case may stay in this mode for up to three minutes.
2-37
Page 104 of 374

Parking
{CAUTION:
If you do not park your vehicle properly, it can
roll. If you have left the engine running, it can
move very quickly. You or others could be
injured. To be sure your vehicle will not move,
even when you are on level ground, follow the
steps below.
Two-Speed Rear Axle
1. With the engine running, shift the two-speed rear
axle into low. To be sure it is in low, you will need
to move the vehicle in gear just a little.
2. Hold the regular brake pedal down with your
right foot.
3. Apply the parking brake.
4. Shift the transmission to NEUTRAL for manual
transmission or PARK (P) for automatic
transmission.
Hydraulic Brakes
(Parking Brake Operation)
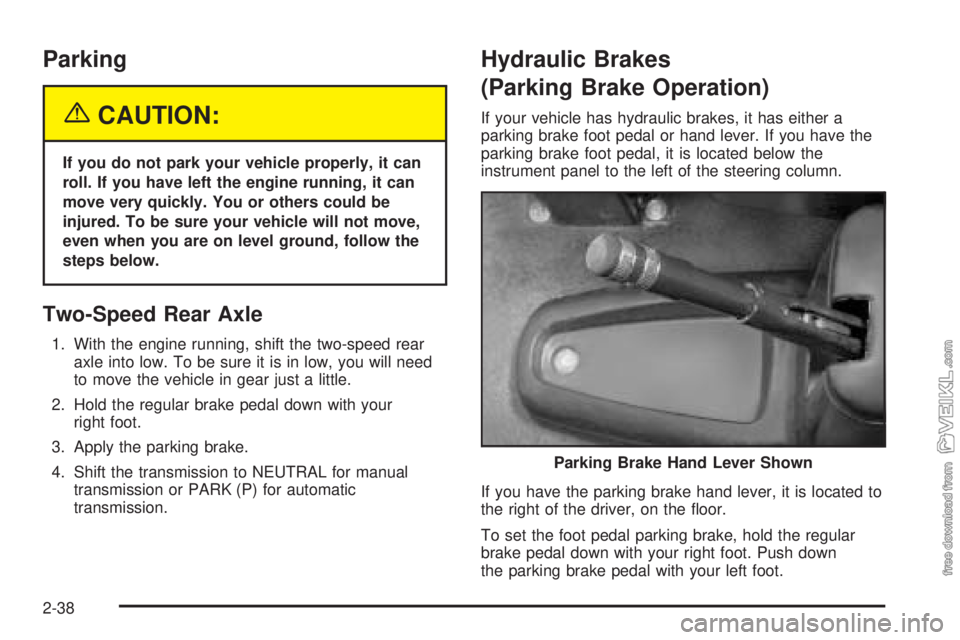
If your vehicle has hydraulic brakes, it has either a
parking brake foot pedal or hand lever. If you have the
parking brake foot pedal, it is located below the
instrument panel to the left of the steering column.
If you have the parking brake hand lever, it is located to
the right of the driver, on the floor.
To set the foot pedal parking brake, hold the regular
brake pedal down with your right foot. Push down
the parking brake pedal with your left foot.Parking Brake Hand Lever Shown
2-38
Page 109 of 374

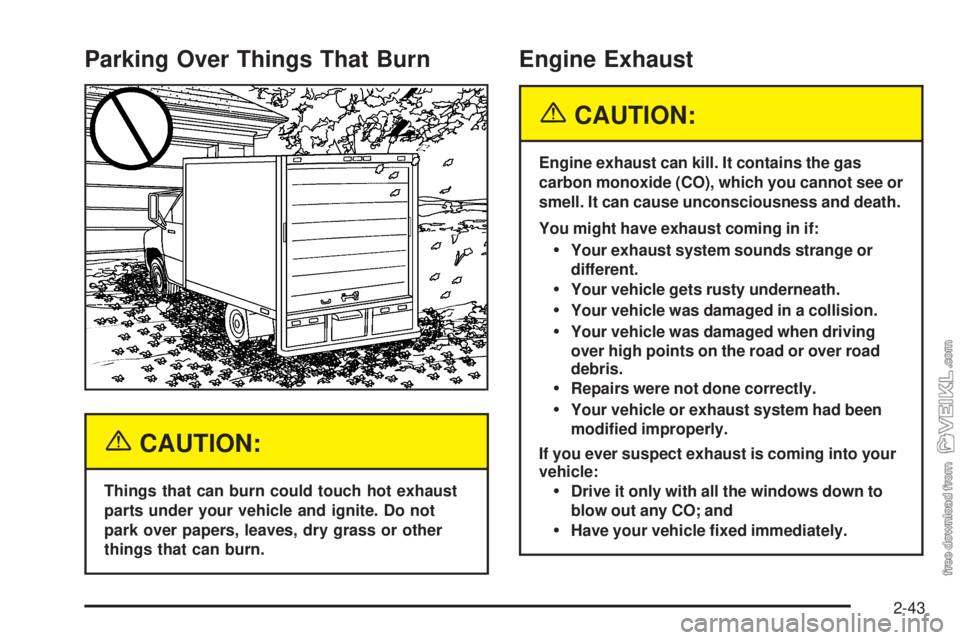
Parking Over Things That Burn
{CAUTION:
Things that can burn could touch hot exhaust
parts under your vehicle and ignite. Do not
park over papers, leaves, dry grass or other
things that can burn.
Engine Exhaust
{CAUTION:
Engine exhaust can kill. It contains the gas
carbon monoxide (CO), which you cannot see or
smell. It can cause unconsciousness and death.
You might have exhaust coming in if:
Your exhaust system sounds strange or
different.
Your vehicle gets rusty underneath.
Your vehicle was damaged in a collision.
Your vehicle was damaged when driving
over high points on the road or over road
debris.
Repairs were not done correctly.
Your vehicle or exhaust system had been
modi�ed improperly.
If you ever suspect exhaust is coming into your
vehicle:
Drive it only with all the windows down to
blow out any CO; and
Have your vehicle �xed immediately.
2-43
Page 110 of 374

Running the Engine While Parked
It is better not to park with the engine running. But if you
ever have to, here are some things to know.
{CAUTION:
Idling the engine with the climate control
system off could allow dangerous exhaust into
your vehicle. See the earlier caution under
Engine Exhaust on page 2-43.
Also, idling in a closed-in place can let deadly
carbon monoxide (CO) into your vehicle even if
the climate control fan is at the highest setting.
One place this can happen is a garage.
Exhaust — with CO — can come in easily.
NEVER park in a garage with the engine
running.
Another closed-in place can be a blizzard.
SeeWinter Driving on page 4-26.
{CAUTION:
It can be dangerous to get out of your vehicle
if the automatic transmission shift lever is not
fully in PARK (P) with the parking brake �rmly
set. Your vehicle can roll. Do not leave your
vehicle when the engine is running unless you
have to. If you have left the engine running,
the vehicle can move suddenly. You or others
could be injured. To be sure your vehicle will
not move, even when it is on fairly level
ground, always set the parking brake and
move the automatic transmission shift lever
to PARK (P), or the manual transmission
shift lever to NEUTRAL.
Follow the proper steps to be sure your vehicle
will not move.
2-44
Page 115 of 374

Instrument Panel Overview...............................3-4
Hazard Warning Flashers................................3-6
Other Warning Devices...................................3-6
Horn.............................................................3-6
Tilt Wheel.....................................................3-7
Turn Signal/Multifunction Lever.........................3-7
Turn and Lane-Change Signals........................3-8
Headlamp High/Low-Beam Changer..................3-8
Windshield Wipers..........................................3-9
Windshield Washer.......................................3-10
Cruise Control..............................................3-10
Exterior Lamps.............................................3-14
Headlamps on Reminder................................3-15
Daytime Running Lamps (DRL).......................3-15
Marker Lamps..............................................3-16
Instrument Panel Brightness...........................3-16
Dome Lamps...............................................3-16
Entry Lighting...............................................3-17
Reading Lamps............................................3-17
Instrument Panel Switchbank..........................3-18
Accessory Power Outlets...............................3-19
Ashtrays and Cigarette Lighter........................3-20
Climate Controls............................................3-20
Climate Control System.................................3-20
Outlet Adjustment.........................................3-23
Rear Heating System....................................3-24Warning Lights, Gages, and Indicators............3-24
Instrument Panel Cluster................................3-25
Speedometer and Odometer...........................3-26
Trip Odometer..............................................3-26
Tachometer.................................................3-26
Engine Speed Limiter....................................3-26
Safety Belt Reminder Light.............................3-27
Safety Belt Reminder Tone............................3-27
Airbag Readiness Light..................................3-27
Airbag Off Light............................................3-28
Charging System Light..................................3-30
Voltmeter Gage............................................3-30
Service Transmission Warning Light................3-31
Range Inhibit Warning Indicator......................3-31
Brake System Warning Light..........................3-31
Anti-Lock Brake System Warning Light.............3-34
Trailer Anti-Lock Brake System Warning Light.....3-34
Engine Coolant Temperature Gage..................3-35
Low Coolant Warning Light............................3-35
Wait to Start Indicator (Diesel Engine).............3-36
Malfunction Indicator Lamp.............................3-36
Oil Pressure Gage........................................3-37
Low Oil Level Light.......................................3-38
Change Engine Oil Light................................3-38
Engine Overspeed Warning Light....................3-39
Engine Shutdown Warning Light.....................3-39
Section 3 Instrument Panel
3-1
Page 116 of 374

Transmission Temperature Gage.....................3-39
Exhaust Brake Indicator Light.........................3-40
Differential Lock Indicator Light.......................3-40
Reduced Engine Power Light.........................3-41
Highbeam On Light.......................................3-41
Daytime Running Lamps (DRL) Indicator Light.....3-41
Low Washer Fluid Warning Light.....................3-42
Check Gages Warning Light...........................3-42
Fuel Gage...................................................3-42
Water in Fuel Warning Light...........................3-43
Air Filter Restriction Indicator..........................3-43
Air Pressure Gage........................................3-44
Hourmeter Gage...........................................3-44Audio System(s).............................................3-44
Setting the Time...........................................3-45
AM-FM Radio...............................................3-45
Radio with Cassette......................................3-48
Radio with CD..............................................3-53
Theft-Deterrent Feature (Non-RDS Radios).......3-57
Radio Reception...........................................3-57
Care of the Cassette Tape Player...................3-58
Care of Your CDs.........................................3-59
Care of the CD Player...................................3-59
Fixed Mast Antenna......................................3-59
Chime Level Adjustment................................3-59
Section 3 Instrument Panel
3-2