2005 CHEVROLET IMPALA towing
[x] Cancel search: towingPage 1 of 398

Seats and Restraint Systems........................... 1-1
Front Seats
............................................... 1-2
Rear Seats
............................................... 1-6
Safety Belts
.............................................. 1-8
Child Restraints
.......................................1-29
Airbag System
.........................................1-49
Restraint System Check
............................1-58
Features and Controls..................................... 2-1
Keys
........................................................ 2-2
Doors and Locks
....................................... 2-8
Windows
.................................................2-12
Theft-Deterrent Systems
............................2-14
Starting and Operating Your Vehicle
...........2-16
Mirrors
....................................................2-28
OnStar
®System
......................................2-30
HomeLink®Wireless Control System
...........2-32
Storage Areas
.........................................2-36
Sunroof
..................................................2-37
Vehicle Personalization
.............................2-38
Instrument Panel............................................. 3-1
Instrument Panel Overview
.......................... 3-4
Climate Controls
......................................3-21
Warning Lights, Gages, and Indicators
........3-26
Message Center
.......................................3-40Driver Information Center (DIC)
..................3-49
Trip Computer
.........................................3-51
Audio System(s)
.......................................3-52
Driving Your Vehicle....................................... 4-1
Your Driving, the Road, and Your Vehicle
........ 4-2
Towing
...................................................4-35
Service and Appearance Care.......................... 5-1
Service
..................................................... 5-3
Fuel
......................................................... 5-5
Checking Things Under the Hood
...............5-10
Headlamp Aiming
.....................................5-54
Bulb Replacement
....................................5-54
Windshield Wiper Blade Replacement
.........5-59
Tires
......................................................5-60
Appearance Care
.....................................5-89
Vehicle Identi�cation
.................................5-98
Electrical System
......................................5-99
Capacities and Speci�cations
...................5-106
Maintenance Schedule..................................... 6-1
Maintenance Schedule
................................ 6-2
Customer Assistance and Information.............. 7-1
Customer Assistance and Information
........... 7-2
Reporting Safety Defects
...........................7-10
Index................................................................ 1
2005 Chevrolet Impala Owner ManualM
Page 82 of 398

Starting and Operating Your
Vehicle
New Vehicle Break-In
Notice:Your vehicle does not need an elaborate
break-in. But it will perform better in the long run if
you follow these guidelines:
Do not drive at any one speed, fast or slow,
for the �rst 500 miles (805 km). Do not make
full-throttle starts.
Avoid making hard stops for the �rst 200 miles
(322 km) or so. During this time your new brake
linings are not yet broken in. Hard stops with new
linings can mean premature wear and earlier
replacement. Follow this breaking-in guideline
every time you get new brake linings.
Do not tow a trailer during break-in. SeeTowing a
Trailer on page 4-37for more information.
Ignition Positions
With the key in the ignition, you can turn the switch to
four positions.
The ignition switch is
located on the steering
column.
OFF:This position locks your steering column in a
vehicle with a manual transmission. It is a theft-deterrent
feature. You will only be able to remove your key
when the ignition is turned to OFF.
Notice:Using a tool to force the key from the
ignition switch could cause damage or break the
key. Use the correct key and turn the key only with
your hand. Make sure the key is all the way in.
If it is, turn the steering wheel left and right while
you turn the key hard. If none of this works,
then your vehicle needs service.
2-16
Page 86 of 398

Automatic Transaxle Operation
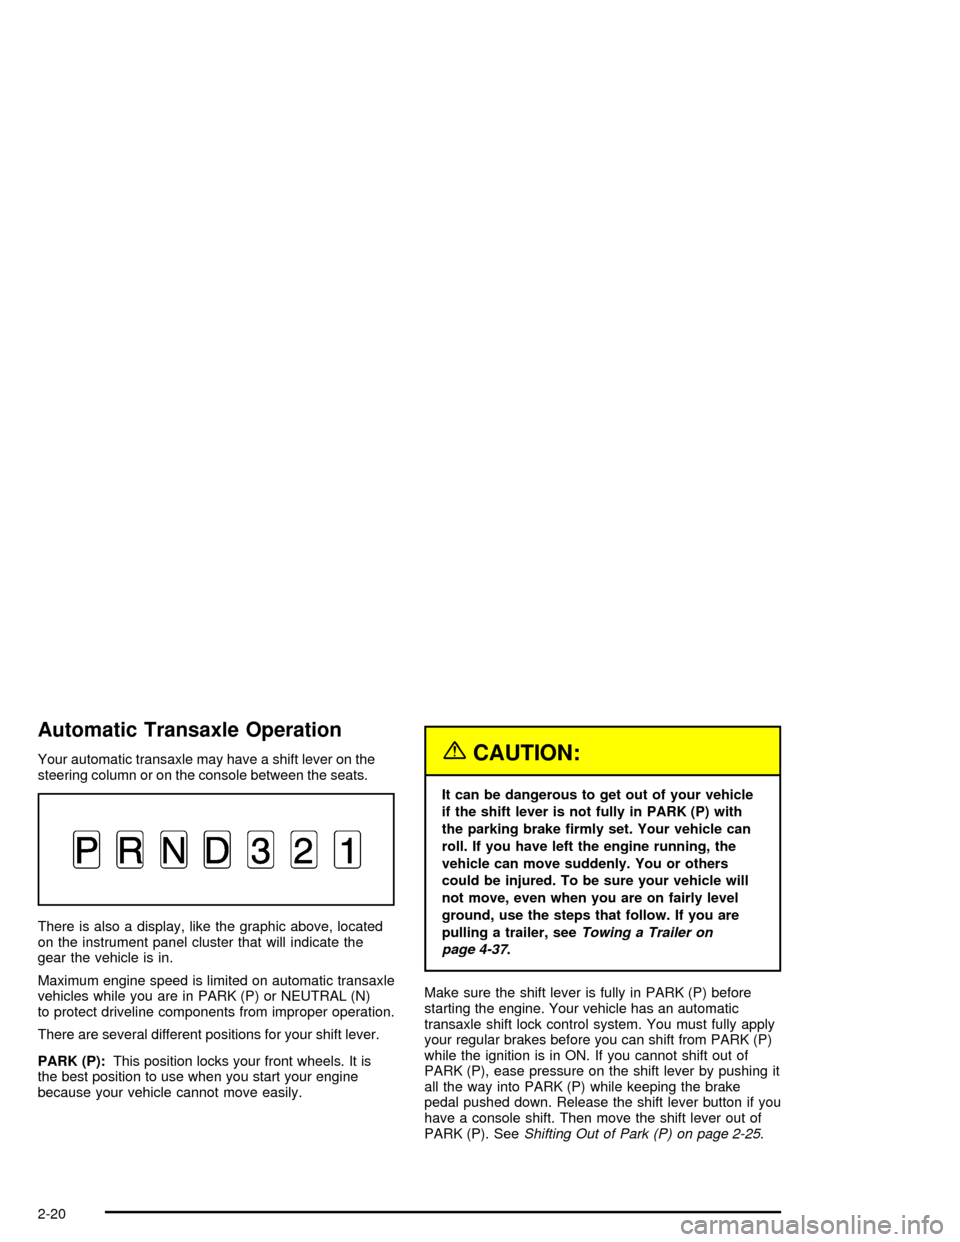
Your automatic transaxle may have a shift lever on the
steering column or on the console between the seats.
There is also a display, like the graphic above, located
on the instrument panel cluster that will indicate the
gear the vehicle is in.
Maximum engine speed is limited on automatic transaxle
vehicles while you are in PARK (P) or NEUTRAL (N)
to protect driveline components from improper operation.
There are several different positions for your shift lever.
PARK (P):This position locks your front wheels. It is
the best position to use when you start your engine
because your vehicle cannot move easily.{CAUTION:
It can be dangerous to get out of your vehicle
if the shift lever is not fully in PARK (P) with
the parking brake �rmly set. Your vehicle can
roll. If you have left the engine running, the
vehicle can move suddenly. You or others
could be injured. To be sure your vehicle will
not move, even when you are on fairly level
ground, use the steps that follow. If you are
pulling a trailer, seeTowing a Trailer on
page 4-37.
Make sure the shift lever is fully in PARK (P) before
starting the engine. Your vehicle has an automatic
transaxle shift lock control system. You must fully apply
your regular brakes before you can shift from PARK (P)
while the ignition is in ON. If you cannot shift out of
PARK (P), ease pressure on the shift lever by pushing it
all the way into PARK (P) while keeping the brake
pedal pushed down. Release the shift lever button if you
have a console shift. Then move the shift lever out of
PARK (P). SeeShifting Out of Park (P) on page 2-25.
2-20
Page 88 of 398

THIRD (3):This position is also used for normal driving,
but it offers more power and lower fuel economy than
AUTOMATIC OVERDRIVE (D).
Here are some times you might choose THIRD (3)
instead of AUTOMATIC OVERDRIVE (D):
When driving on hilly, winding roads
When towing a trailer, so there is less shifting
between gears
When going down a steep hill
When driving in non-highway scenarios (i.e. city
streets, etc.)
SECOND (2):This position gives you more power but
lower fuel economy than THIRD (3). You can use
SECOND (2) on hills. It can help control your speed as
you go down steep mountain roads, but then you
would also want to use your brakes off and on.
Notice:Driving in SECOND (2) for more than
25 miles (40 km) or at speeds over 55 mph (90 km/h)
may damage the transaxle. Also, shifting into
SECOND (2) at speeds above 65 mph (105 km/h) can
cause damage. Drive in THIRD (3) or AUTOMATIC
OVERDRIVE (D) instead of SECOND (2).FIRST (1):This position gives you even more power,
but lower fuel economy than SECOND (2). You can use
it on very steep hills, or in deep snow or mud. If the
shift lever is in FIRST (1), the transaxle will not shift into
�rst gear until the vehicle is going slowly enough.
Notice:Spinning the tires or holding the vehicle in
one place on a hill using only the accelerator
pedal may damage the transaxle. If you are stuck,
do not spin the tires. When stopping on a hill,
use the brakes to hold the vehicle in place.Parking Brake
The parking brake is
located to the left of the
brake pedal, near the
driver’s door.
To set the parking brake, hold the brake pedal down
with your right foot. Push down the parking brake pedal
with your left foot.
2-22
Page 89 of 398

To release the parking brake, hold the brake pedal
down with your right foot and push the parking brake
pedal with your left foot. When you lift your left foot,
the parking brake pedal will follow it to the released
position.
A warning chime will sound if the parking brake is set,
the ignition is on and the shift lever is not in PARK (P).
Notice:Driving with the parking brake on can
overheat the brake system and cause premature
wear or damage to brake system parts. Verify that
the parking brake is fully released and the brake
warning light is off before driving.
If you are towing a trailer and parking on any hill, see
Towing a Trailer on page 4-37. That section shows what
to do �rst to keep the trailer from moving.Shifting Into Park (P)
{CAUTION:
It is dangerous to get out of your vehicle if the
shift lever is not fully in PARK (P) with the
parking brake �rmly set. Your vehicle can roll.
Do not leave your vehicle when the engine is
running unless you have to. If you have left
the engine running, the vehicle can move
suddenly. You or others could be injured.
To be sure your vehicle will not move, even
when you are on fairly level ground, always set
your parking brake and move the shift lever to
PARK (P). SeeShifting Into Park (P) on
page 2-23. If you are pulling a trailer, see
Towing a Trailer on page 4-37.
2-23
Page 93 of 398

Running the Engine While Parked
It is better not to park with the engine running. But if you
ever have to, here are some things to know.
{CAUTION:
Idling the engine with the climate control
system off could allow dangerous exhaust into
your vehicle. See the earlier caution under
Engine Exhaust on page 2-26.
Also, idling in a closed-in place can let deadly
carbon monoxide (CO) into your vehicle even if
the climate control fan is at the highest setting.
One place this can happen is a garage.
Exhaust — with CO — can come in easily.
NEVER park in a garage with the engine
running.
Another closed-in place can be a blizzard.
SeeWinter Driving on page 4-25.
{CAUTION:
It can be dangerous to get out of your vehicle
if the shift lever is not fully in PARK (P) with
the parking brake �rmly set. Your vehicle can
roll. Do not leave your vehicle when the engine
is running unless you have to. If you have left
the engine running, the vehicle can move
suddenly. You or others could be injured.
To be sure your vehicle will not move, even
when you are on fairly level ground, always set
your parking brake and move the shift lever to
PARK (P).
Follow the proper steps to be sure your vehicle will not
move. SeeShifting Into Park (P) on page 2-23.
If you are parking on a hill and if you are pulling a
trailer, also seeTowing a Trailer on page 4-37.
2-27
Page 144 of 398

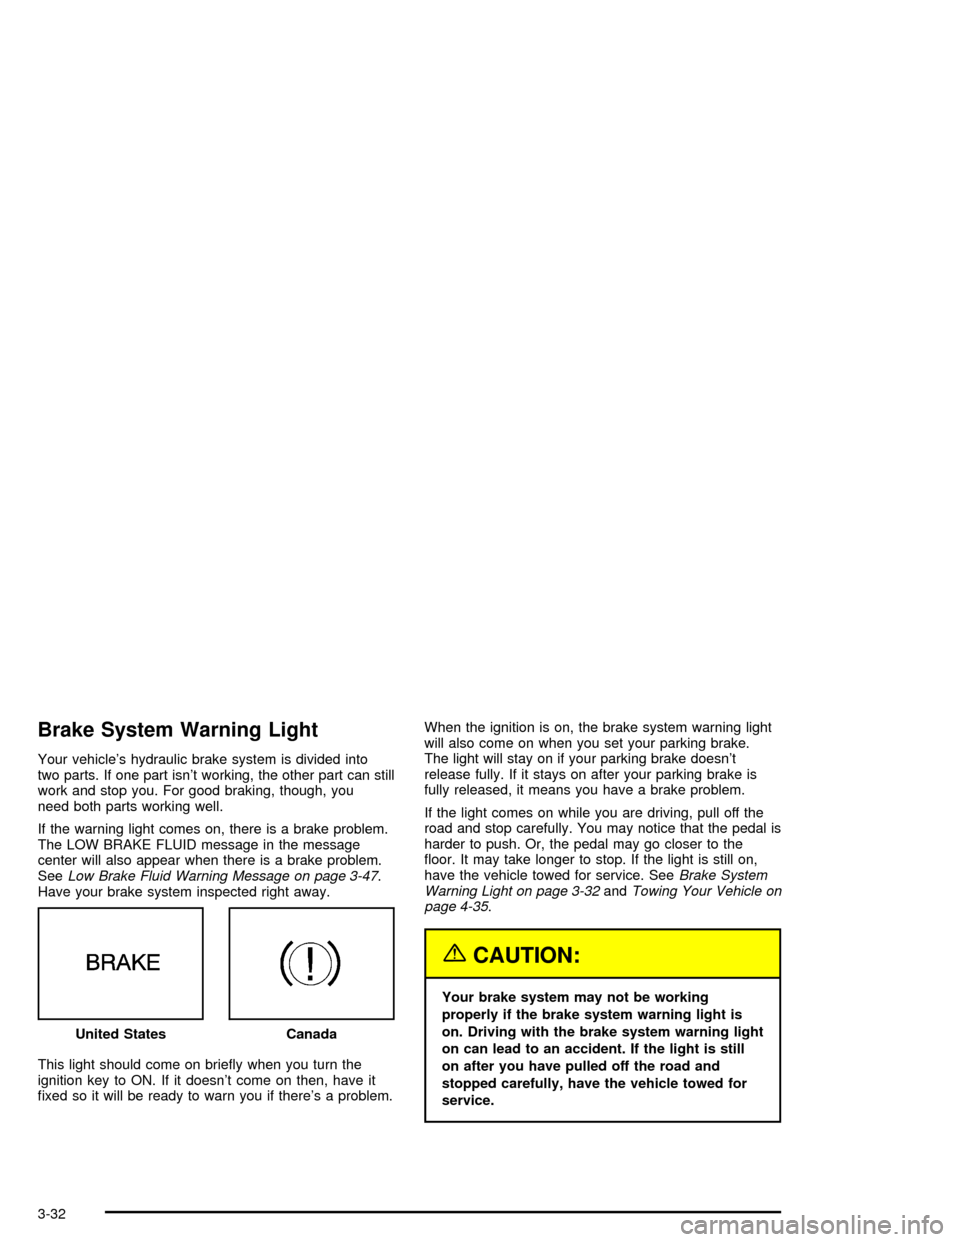
Brake System Warning Light
Your vehicle’s hydraulic brake system is divided into
two parts. If one part isn’t working, the other part can still
work and stop you. For good braking, though, you
need both parts working well.
If the warning light comes on, there is a brake problem.
The LOW BRAKE FLUID message in the message
center will also appear when there is a brake problem.
SeeLow Brake Fluid Warning Message on page 3-47.
Have your brake system inspected right away.
This light should come on brie�y when you turn the
ignition key to ON. If it doesn’t come on then, have it
�xed so it will be ready to warn you if there’s a problem.When the ignition is on, the brake system warning light
will also come on when you set your parking brake.
The light will stay on if your parking brake doesn’t
release fully. If it stays on after your parking brake is
fully released, it means you have a brake problem.
If the light comes on while you are driving, pull off the
road and stop carefully. You may notice that the pedal is
harder to push. Or, the pedal may go closer to the
�oor. It may take longer to stop. If the light is still on,
have the vehicle towed for service. SeeBrake System
Warning Light on page 3-32andTowing Your Vehicle on
page 4-35.
{CAUTION:
Your brake system may not be working
properly if the brake system warning light is
on. Driving with the brake system warning light
on can lead to an accident. If the light is still
on after you have pulled off the road and
stopped carefully, have the vehicle towed for
service. United States
Canada
3-32
Page 148 of 398

This system is called OBD II (On-Board
Diagnostics-Second Generation) and is intended to
assure that emissions are at acceptable levels for the
life of the vehicle, helping to produce a cleaner
environment. The CHECK ENGINE light comes on to
indicate that there is a problem and service is required.
Malfunctions often will be indicated by the system
before any problem is apparent. This may prevent more
serious damage to your vehicle. This system is also
designed to assist your service technician in correctly
diagnosing any malfunction.
Notice:If you keep driving your vehicle with this
light on, after awhile, your emission controls
may not work as well, your fuel economy may not
be as good, and your engine may not run as
smoothly. This could lead to costly repairs that may
not be covered by your warranty.
Notice:Modi�cations made to the engine,
transaxle, exhaust, intake, or fuel system of your
vehicle or the replacement of the original tires with
other than those of the same Tire Performance
Criteria (TPC) can affect your vehicle’s emission
controls and may cause this light to come on.
Modi�cations to these systems could lead to costly
repairs not covered by your warranty. This may
also result in a failure to pass a required Emission
Inspection/Maintenance test.This light should come on, as a check to show you it is
working, when the ignition is on and the engine is
not running. If the light does not come on, have it
repaired. This light will also come on during a
malfunction in one of two ways:
Light Flashing— A mis�re condition has been
detected. A mis�re increases vehicle emissions
and may damage the emission control system on
your vehicle. Diagnosis and service may be
required.
Light On Steady— An emission control system
malfunction has been detected on your vehicle.
Diagnosis and service may be required.
If the Light Is Flashing
The following may prevent more serious damage to
your vehicle:
Reducing vehicle speed
Avoiding hard accelerations
Avoiding steep uphill grades
If you are towing a trailer, reduce the amount of
cargo being hauled as soon as it is possible
3-36