2005 CHEVROLET EXPRESS PASSANGER turn signal
[x] Cancel search: turn signalPage 208 of 388

Driving in Rain and on Wet Roads
Rain and wet roads can mean driving trouble. On a wet
road, you cannot stop, accelerate, or turn as well
because your tire-to-road traction is not as good as on dry
roads. And, if your tires do not have much tread left, you
will get even less traction. It is always wise to go slower
and be cautious if rain starts to fall while you are driving.
The surface may get wet suddenly when your re�exes
are tuned for driving on dry pavement.The heavier the rain, the harder it is to see. Even if your
windshield wiper blades are in good shape, a heavy
rain can make it harder to see road signs and
traffic signals, pavement markings, the edge of the road,
and even people walking.
It is wise to keep your wiping equipment in good shape
and keep your windshield washer tank �lled with
washer �uid. Replace your windshield wiper inserts
when they show signs of streaking or missing areas on
the windshield, or when strips of rubber start to
separate from the inserts.
Driving too fast through large water puddles or even
going through some car washes can cause problems,
too. The water may affect your brakes. Try to avoid
puddles. But if you cannot, try to slow down before you
hit them.
4-18
Page 211 of 388

Here are ways to increase your safety in city driving:
Know the best way to get to where you are
going. Get a city map and plan your trip into
an unknown part of the city just as you would for a
cross-country trip.
Try to use the freeways that rim and crisscross
most large cities. You will save time and energy.
SeeFreeway Driving on page 4-21.
Treat a green light as a warning signal. A traffic
light is there because the corner is busy enough
to need it. When a light turns green, and just before
you start to move, check both ways for vehicles
that have not cleared the intersection or may
be running the red light.
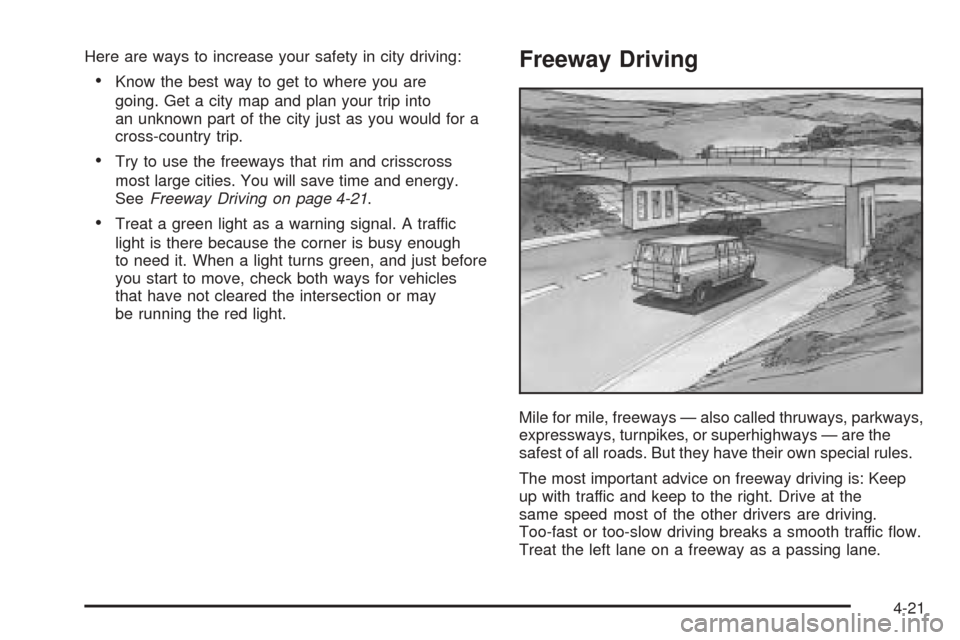
Freeway Driving
Mile for mile, freeways — also called thruways, parkways,
expressways, turnpikes, or superhighways — are the
safest of all roads. But they have their own special rules.
The most important advice on freeway driving is: Keep
up with traffic and keep to the right. Drive at the
same speed most of the other drivers are driving.
Too-fast or too-slow driving breaks a smooth traffic �ow.
Treat the left lane on a freeway as a passing lane.
4-21
Page 212 of 388

At the entrance, there is usually a ramp that leads to the
freeway. If you have a clear view of the freeway as you
drive along the entrance ramp, you should begin to check
traffic. Try to determine where you expect to blend with
the �ow. Try to merge into the gap at close to the
prevailing speed. Switch on your turn signal, check your
mirrors, and glance over your shoulder as often as
necessary. Try to blend smoothly with the traffic �ow.
Once you are on the freeway, adjust your speed to the
posted limit or to the prevailing rate if it is slower.
Stay in the right lane unless you want to pass.
Before changing lanes, check your mirrors. Then use
your turn signal.
Just before you leave the lane, glance quickly over your
shoulder to make sure there is not another vehicle in
your blind spot.
Once you are moving on the freeway, make certain you
allow a reasonable following distance. Expect to move
slightly slower at night.
When you want to leave the freeway, move to the
proper lane well in advance. If you miss your exit, do
not, under any circumstances, stop and back up. Drive
on to the next exit.
The exit ramp can be curved, sometimes quite sharply.
The exit speed is usually posted.Reduce your speed according to your speedometer, not
to your sense of motion. After driving for any distance
at higher speeds, you may tend to think you are
going slower than you actually are.
Before Leaving on a Long Trip
Make sure you are ready. Try to be well rested. If you
must start when you are not fresh — such as after
a day’s work — do not plan to make too many miles that
�rst part of the journey. Wear comfortable clothing
and shoes you can easily drive in.
Is your vehicle ready for a long trip? If you keep it
serviced and maintained, it is ready to go. If it needs
service, have it done before starting out. Of course, you
will �nd experienced and able service experts in GM
dealerships all across North America. They will be ready
and willing to help if you need it.
Here are some things you can check before a trip:
Windshield Washer Fluid:Is the reservoir full?
Are all windows clean inside and outside?
Wiper Blades:Are they in good shape?
Fuel, Engine Oil, Other Fluids:Have you checked
all levels?
Lamps:Are they all working? Are the lenses clean?
4-22
Page 239 of 388

Passing
You’ll need more passing distance up ahead when
you’re towing a trailer. And, because you’re a good deal
longer, you’ll need to go much farther beyond the
passed vehicle before you can return to your lane.
Backing Up
Hold the bottom of the steering wheel with one hand.
Then, to move the trailer to the left, just move that hand
to the left. To move the trailer to the right, move your
hand to the right. Always back up slowly and, if possible,
have someone guide you.
Making Turns
Notice:Making very sharp turns while trailering
could cause the trailer to come in contact with the
vehicle. Your vehicle could be damaged. Avoid
making very sharp turns while trailering.
When you’re turning with a trailer, make wider turns than
normal. Do this so your trailer won’t strike soft shoulders,
curbs, road signs, trees or other objects. Avoid jerky or
sudden maneuvers. Signal well in advance.
Turn Signals When Towing a Trailer
When you tow a trailer, your vehicle has to have extra
wiring and a heavy-duty turn signal �asher (included
in the optional trailering package).
The arrows on your instrument panel will �ash whenever
you signal a turn or lane change. Properly hooked up,
the trailer lamps will also �ash, telling other drivers
you’re about to turn, change lanes or stop.
When towing a trailer, the arrows on your instrument
panel will �ash for turns even if the bulbs on the trailer are
burned out. Thus, you may think drivers behind you are
seeing your signal when they are not. It’s important to
check occasionally to be sure the trailer bulbs are still
working.
Driving On Grades
Reduce speed and shift to a lower gearbeforeyou start
down a long or steep downgrade. If you don’t shift
down, you might have to use your brakes so much that
they would get hot and no longer work well.
You can tow in DRIVE (D). You may want to shift the
transmission to THIRD (3) or a lower gear under heavy
loads and/or hilly conditions.
4-49
Page 241 of 388

Maintenance When Trailer Towing
Your vehicle will need service more often when you’re
pulling a trailer. See the Maintenance Schedule for more
on this. Things that are especially important in trailer
operation are automatic transmission �uid (don’t over�ll),
engine oil, axle lubricant, belt, cooling system and brake
system. Each of these is covered in this manual, and the
Index will help you �nd them quickly. If you’re trailering,
it’s a good idea to review these sections before you start
your trip.
Check periodically to see that all hitch nuts and bolts
are tight.
Trailer Wiring Harness
The optional heavy-duty trailer wiring package includes
a seven-wire harness assembly at the rear of the
vehicle and a four-wire harness assembly under the left
hand side of the instrument panel. The seven-wire
harness assembly is taped together and located in a
frame pocket at the driver side rear left corner of
the frame. The seven-wire harness includes a 30-amp
feed wire. Both harnesses come without connectors and
should be wired by a quali�ed electrical technician.
The technician can use the following color code chart
when connecting the wiring harness to your trailer
and trailer brake controller.Seven-Wire Harness
Light Green: Back-up lamps
Brown: Parking lamps
Yellow: Left stoplamp and turn signal
Dark Green: Right stoplamp and turn signal
Dark Blue: Use for electric trailer brakes
Orange: Trailer accessory
White (heavy gage): Ground wire
Four-Wire Harness (Trailer Brake Controller)
Black: Ground
Red/White Stripe: Fused Battery
Dark Blue: Trailer Brake Feed
Light Blue: Fused Stoplamp/CHMSL
4-51
Page 243 of 388

Service............................................................5-3
Doing Your Own Service Work.........................5-4
Adding Equipment to the Outside of Your
Vehicle......................................................5-5
Fuel................................................................5-5
Gasoline Octane............................................5-5
Gasoline Speci�cations....................................5-5
California Fuel...............................................5-5
Additives.......................................................5-6
Fuels in Foreign Countries...............................5-6
Filling the Tank..............................................5-7
Filling a Portable Fuel Container.......................5-9
Checking Things Under the Hood....................5-10
Hood Release..............................................5-10
Engine Compartment Overview.......................5-12
Engine Oil...................................................5-13
Engine Oil Life System..................................5-16
Engine Air Cleaner/Filter................................5-18
Automatic Transmission Fluid.........................5-19
Engine Coolant.............................................5-22
Radiator Pressure Cap..................................5-24
Engine Overheating.......................................5-25
Cooling System............................................5-26
Engine Fan Noise.........................................5-32Power Steering Fluid.....................................5-32
Windshield Washer Fluid................................5-33
Brakes........................................................5-34
Battery........................................................5-38
Jump Starting...............................................5-39
All-Wheel Drive..............................................5-43
Rear Axle.......................................................5-44
Front Axle......................................................5-45
Noise Control System.....................................5-45
Tampering with Noise Control System
Prohibited.................................................5-45
Bulb Replacement..........................................5-47
Halogen Bulbs..............................................5-47
Headlamps..................................................5-47
Front Turn Signal, Sidemarker and Parking
Lamps.....................................................5-49
Center High-Mounted Stoplamp (CHMSL).........5-50
Taillamps, Turn Signal, Stoplamps and
Back-up Lamps.........................................5-50
Replacement Bulbs.......................................5-51
Windshield Wiper Blade Replacement..............5-52
Section 5 Service and Appearance Care
5-1
Page 291 of 388

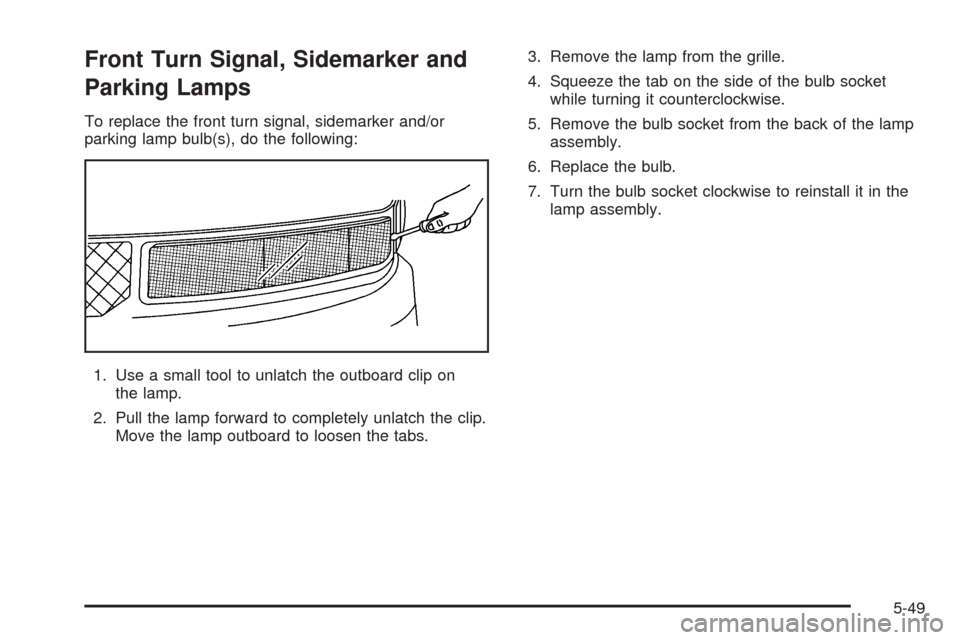
Front Turn Signal, Sidemarker and
Parking Lamps
To replace the front turn signal, sidemarker and/or
parking lamp bulb(s), do the following:
1. Use a small tool to unlatch the outboard clip on
the lamp.
2. Pull the lamp forward to completely unlatch the clip.
Move the lamp outboard to loosen the tabs.3. Remove the lamp from the grille.
4. Squeeze the tab on the side of the bulb socket
while turning it counterclockwise.
5. Remove the bulb socket from the back of the lamp
assembly.
6. Replace the bulb.
7. Turn the bulb socket clockwise to reinstall it in the
lamp assembly.
5-49
Page 292 of 388

Center High-Mounted Stoplamp
(CHMSL)
The center high-mounted stoplamp (CHMSL) is located
above the rear doors at the center of the vehicle.
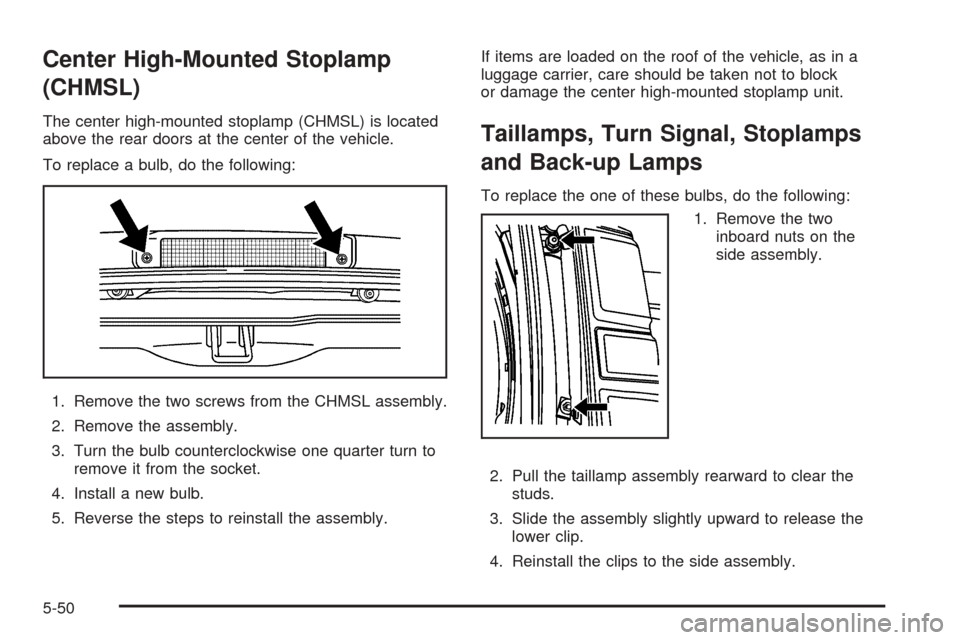
To replace a bulb, do the following:
1. Remove the two screws from the CHMSL assembly.
2. Remove the assembly.
3. Turn the bulb counterclockwise one quarter turn to
remove it from the socket.
4. Install a new bulb.
5. Reverse the steps to reinstall the assembly.If items are loaded on the roof of the vehicle, as in a
luggage carrier, care should be taken not to block
or damage the center high-mounted stoplamp unit.Taillamps, Turn Signal, Stoplamps
and Back-up Lamps
To replace the one of these bulbs, do the following:
1. Remove the two
inboard nuts on the
side assembly.
2. Pull the taillamp assembly rearward to clear the
studs.
3. Slide the assembly slightly upward to release the
lower clip.
4. Reinstall the clips to the side assembly.
5-50