2005 CHEVROLET COLORADO battery
[x] Cancel search: batteryPage 75 of 414
But the frontal airbags would not help you in many
types of collisions, including rollovers, rear impacts, and
many side impacts, primarily because an occupant’s
motion is not toward the airbag. Side impact airbags
would not help you in many types of collisions, including
frontal or near frontal collisions, rollovers, and rear
impacts, primarily because an occupant’s motion is
not toward those airbags. Airbags should never
be regarded as anything more than a supplement to
safety belts, and then only in moderate to severe frontal
or near-frontal collisions for the driver’s and right front
passenger’s frontal airbags, and only in moderate
to severe side collisions for side impact airbags.
What Will You See After an Airbag
In�ates?
After an airbag in�ates, it quickly de�ates, so quickly that
some people may not even realize the airbag in�ated.
Some components of the airbag module — the steering
wheel hub for the driver’s airbag, the instrument panel for
the right front passenger’s bag or the ceiling of your
vehicle near the side windows — will be hot for a short
time. The parts of the bag that come into contact with you
may be warm, but not too hot to touch. There will be
some smoke and dust coming from the vents in the
de�ated airbags. Airbag in�ation does not prevent the
driver from seeing or being able to steer the vehicle, nor
does it stop people from leaving the vehicle.
{CAUTION:
When an airbag in�ates, there is dust in the
air. This dust could cause breathing problems
for people with a history of asthma or other
breathing trouble. To avoid this, everyone in
the vehicle should get out as soon as it is safe
to do so. If you have breathing problems but
cannot get out of the vehicle after an airbag
in�ates, then get fresh air by opening a
window or a door. If you experience breathing
problems following an airbag deployment, you
should seek medical attention.
Your vehicle may have a feature that will automatically
unlock the doors, turn the interior lamps on and �ash
the hazard warning �ashers when the airbag in�ates
(if battery power is available). You can lock the
doors again by using the door lock. The interior lamps
and hazard warning �ashers will deactivate after
approximately 15 minutes.
1-69
Page 80 of 414

Servicing Your Airbag-Equipped
Vehicle
Airbags affect how your vehicle should be serviced.
There are parts of the airbag system in several places
around your vehicle. Your dealer and the service manual
have information about servicing your vehicle and the
airbag system. To purchase a service manual, see
Service Publications Ordering Information on page 7-11.
{CAUTION:
For up to 10 seconds after the ignition key is
turned off and the battery is disconnected, an
airbag can still in�ate during improper service.
You can be injured if you are close to an
airbag when it in�ates. Avoid wires wrapped
with yellow tape or yellow connectors. They
are probably part of the airbag system. Be sure
to follow proper service procedures, and make
sure the person performing work for you is
quali�ed to do so.
The airbag system does not need regular maintenance.
Adding Equipment to Your
Airbag-Equipped Vehicle
Q:Is there anything I might add to the front of the
vehicle that could keep the airbags from
working properly?
A:Yes. If you add things that change your vehicle’s
frame, bumper system, front end sheet metal or
height, they may keep the airbag system from
working properly. Also, the airbag system may not
work properly if you relocate any of the airbag
sensors. If you have any questions about this, you
should contact Customer Assistance before you
modify your vehicle. The phone numbers and
addresses for Customer Assistance are in Step Two
of theCustomer Satisfaction Procedure on
page 7-2.
1-74
Page 86 of 414
At times you may notice a decrease in range. This is
normal for any remote keyless entry system. If the
transmitter does not work or if you have to stand closer
to your vehicle for the transmitter to work, try this:
Check the distance. You may be too far from your
vehicle. You may need to stand closer during
rainy or snowy weather.
Check the location. Other vehicles or objects may
be blocking the signal. Take a few steps to the
left or right, hold the transmitter higher, and
try again.
Check to determine if battery replacement is
necessary. See “Battery Replacement” under
Remote Keyless Entry System Operation on
page 2-4.
If you are still having trouble, see your dealer or
a quali�ed technician for service.
Remote Keyless Entry System
Operation
If your vehicle has this feature you can lock and unlock
your doors and disarm or arm your theft-deterrent
system from about 3 feet (1 m) up to 30 feet (9 m) away
using the remote keyless entry transmitter. See
Content Theft-Deterrent on page 2-14for additional
information.
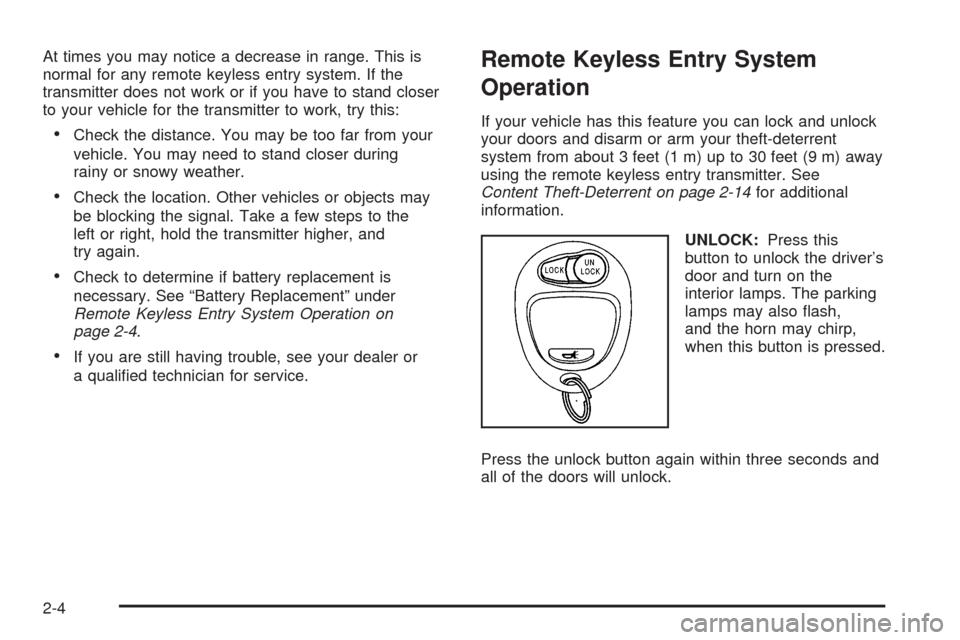
UNLOCK:Press this
button to unlock the driver’s
door and turn on the
interior lamps. The parking
lamps may also �ash,
and the horn may chirp,
when this button is pressed.
Press the unlock button again within three seconds and
all of the doors will unlock.
2-4
Page 88 of 414
Battery Replacement
Under normal use, the battery in your remote keyless
entry transmitter should last about two years.
You can tell the battery is weak if the transmitter will not
work at the normal range in any location. If you have
to get close to your vehicle before the transmitter works,
it is probably time to change the battery.
Notice:When replacing the battery, use care not to
touch any of the circuitry. Static from your body
transferred to these surfaces may damage the
transmitter.To replace the battery, do the following:
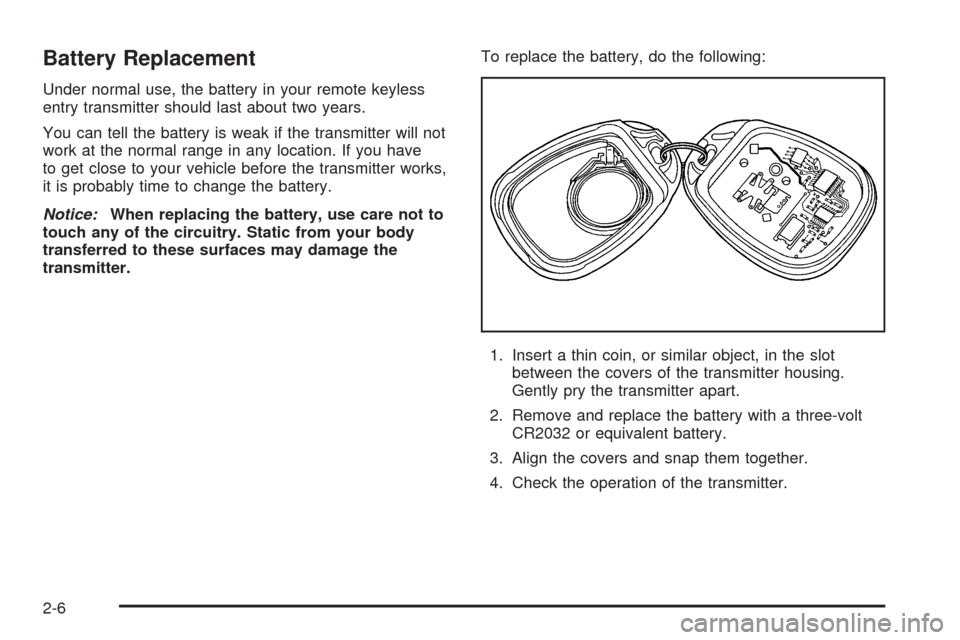
1. Insert a thin coin, or similar object, in the slot
between the covers of the transmitter housing.
Gently pry the transmitter apart.
2. Remove and replace the battery with a three-volt
CR2032 or equivalent battery.
3. Align the covers and snap them together.
4. Check the operation of the transmitter.
2-6
Page 97 of 414

If the lock button on the remote keyless entry transmitter
is pressed, but a door is open, the horn will chirp
six times. Close the open door and the system will be
activated.
If a locked door is not opened using the remote keyless
entry transmitter, or by OnStar
®, the alarm will go off.
The front turn signal lamps will �ash for two minutes,
and the horn will sound for two minutes, then will turn off
to save the battery power.
Remember, the theft-deterrent system will not activate if
you lock the doors with a key, the manual door lock,
or power door lock switch. The system can only
be activated using the remote keyless entry transmitter,
or by OnStar
®. SeeOnStar®System on page 2-39
for additional information. You should also remember
that you can start your vehicle with the correct ignition
key if the alarm has been set off.
Here is how to avoid setting off the alarm by accident:
If you do not want to activate the theft-deterrent
system, the vehicle should be locked with the
door key after the doors are closed.
Always unlock a door with the remote keyless entry
transmitter. Unlocking a door any other way will set
off the alarm.If you set off the alarm by accident, you can turn off the
alarm by pressing unlock on the remote keyless
entry transmitter. The alarm will not stop if you try to
unlock a door any other way.
Testing the Alarm
The alarm can be tested by following these steps:
1. From inside the vehicle, activate the system by
locking the doors with the remote keyless entry
transmitter.
2. Unlock the door with the manual door lock and
open the door. This should set off the alarm.
3. To turn the alarm off, press the unlock button on
the remote keyless entry transmitter or start the
engine.
If the alarm does not sound when it should but the
lights �ash, check to see if the horn works. The horn
fuse may be blown. To replace the fuse, seeFuses
and Circuit Breakers on page 5-99.
If the alarm does not sound or the headlamps do not
�ash, see your dealer for service.
2-15
Page 101 of 414
Starting Your Engine
1. With your foot off the accelerator pedal, turn the
ignition key to START. When the engine starts,
let go of the key. The idle speed will go down
as your engine gets warm.
Notice:Holding your key in START for longer
than 15 seconds at a time will cause your battery
to be drained much sooner. And the excessive
heat can damage your starter motor. Wait about
15 seconds between each try to help avoid draining
your battery or damaging your starter.
2. If the engine does not start within 10 seconds, push
the accelerator pedal all the way to the �oor, while
you hold the ignition key in START. When the
engine starts, let go of the key and let up on the
accelerator pedal. Wait about 15 seconds between
each try.
Depending on the outside temperature, the engine
starter may continue cranking the engine up to
approximately four seconds after you release the
ignition key. This is normal.When starting your engine in very cold weather
(below 0°F or 18°C), do this:
1. With your foot off the accelerator pedal, turn
the ignition key to START and hold it there up
to 15 seconds. When the engine starts, let go
of the key.
2. If your engine still will not start, or starts but then
stops, it could be �ooded with too much gasoline.
Try pushing your accelerator pedal all the way to the
�oor and holding it there as you hold the key in
START for about three seconds. When the engine
starts, let go of the key and accelerator. If the
vehicle starts brie�y but then stops again, do the
same thing, but this time keep the pedal down
for �ve or six seconds. This clears the extra
gasoline from the engine.
Notice:Your engine is designed to work with the
electronics in your vehicle. If you add electrical
parts or accessories, you could change the way the
engine operates. Before adding electrical equipment,
check with your dealer. If you do not, your engine
might not perform properly. Any resulting damage
would not be covered by your vehicle’s warranty.
2-19
Page 103 of 414
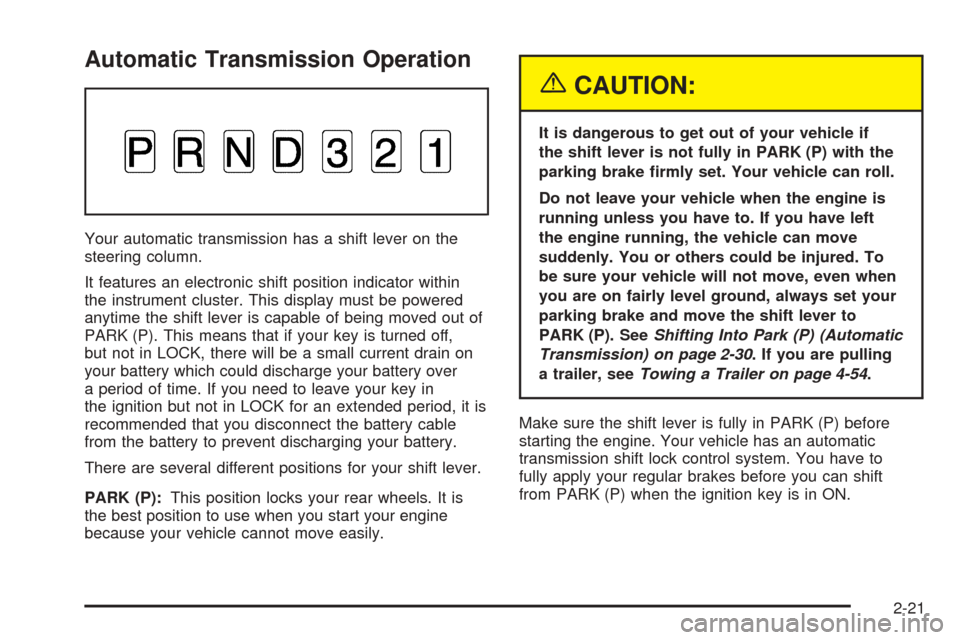
Automatic Transmission Operation
Your automatic transmission has a shift lever on the
steering column.
It features an electronic shift position indicator within
the instrument cluster. This display must be powered
anytime the shift lever is capable of being moved out of
PARK (P). This means that if your key is turned off,
but not in LOCK, there will be a small current drain on
your battery which could discharge your battery over
a period of time. If you need to leave your key in
the ignition but not in LOCK for an extended period, it is
recommended that you disconnect the battery cable
from the battery to prevent discharging your battery.
There are several different positions for your shift lever.
PARK (P):This position locks your rear wheels. It is
the best position to use when you start your engine
because your vehicle cannot move easily.
{CAUTION:
It is dangerous to get out of your vehicle if
the shift lever is not fully in PARK (P) with the
parking brake �rmly set. Your vehicle can roll.
Do not leave your vehicle when the engine is
running unless you have to. If you have left
the engine running, the vehicle can move
suddenly. You or others could be injured. To
be sure your vehicle will not move, even when
you are on fairly level ground, always set your
parking brake and move the shift lever to
PARK (P). SeeShifting Into Park (P) (Automatic
Transmission) on page 2-30. If you are pulling
a trailer, seeTowing a Trailer on page 4-54.
Make sure the shift lever is fully in PARK (P) before
starting the engine. Your vehicle has an automatic
transmission shift lock control system. You have to
fully apply your regular brakes before you can shift
from PARK (P) when the ignition key is in ON.
2-21
Page 127 of 414

Instrument Panel Overview...............................3-4
Hazard Warning Flashers................................3-6
Other Warning Devices...................................3-6
Horn.............................................................3-6
Tilt Wheel.....................................................3-6
Turn Signal/Multifunction Lever.........................3-7
Turn and Lane-Change Signals........................3-8
Headlamp High/Low-Beam Changer..................3-8
Flash-to-Pass.................................................3-9
Windshield Wipers..........................................3-9
Windshield Washer.......................................3-10
Cruise Control..............................................3-10
Exterior Lamps.............................................3-13
Headlamps on Reminder................................3-14
Daytime Running Lamps (DRL).......................3-14
Automatic Headlamp System..........................3-15
Fog Lamps..................................................3-16
Exterior Cargo Lamps....................................3-16
Interior Lamps..............................................3-16
Instrument Panel Brightness...........................3-17
Dome Lamp.................................................3-17
Dome Lamp Override....................................3-17
Exit Lighting.................................................3-17
Battery Run-Down Protection..........................3-17
Accessory Power Outlets...............................3-17
Ashtrays and Cigarette Lighter........................3-18Climate Controls............................................3-19
Climate Control System.................................3-19
Outlet Adjustment.........................................3-21
Warning Lights, Gages, and Indicators............3-22
Instrument Panel Cluster................................3-23
Speedometer and Odometer...........................3-24
Trip Odometer..............................................3-24
Tachometer.................................................3-24
Safety Belt Reminder Light.............................3-24
Airbag Readiness Light..................................3-25
Airbag Off Light............................................3-26
Battery Warning Light....................................3-27
Up-Shift Light (Manual Transmission)...............3-28
Brake System Warning Light..........................3-28
Anti-Lock Brake System Warning Light.............3-29
Engine Coolant Temperature Gage..................3-30
Malfunction Indicator Lamp.............................3-30
Oil Pressure Light.........................................3-33
Security Light...............................................3-34
Cruise Control Light......................................3-34
Highbeam On Light.......................................3-34
Daytime Running Lamps (DRL)
Indicator Light...........................................3-35
Fuel Gage...................................................3-35
Section 3 Instrument Panel
3-1