2005 CHEVROLET BLAZER brake
[x] Cancel search: brakePage 352 of 436
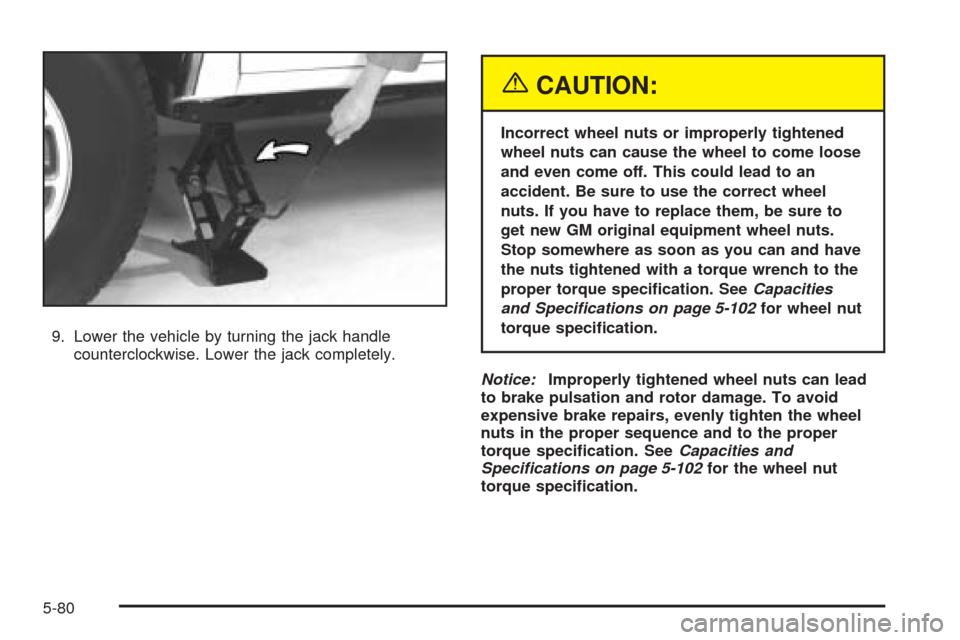
9. Lower the vehicle by turning the jack handle
counterclockwise. Lower the jack completely.
{CAUTION:
Incorrect wheel nuts or improperly tightened
wheel nuts can cause the wheel to come loose
and even come off. This could lead to an
accident. Be sure to use the correct wheel
nuts. If you have to replace them, be sure to
get new GM original equipment wheel nuts.
Stop somewhere as soon as you can and have
the nuts tightened with a torque wrench to the
proper torque speci�cation. SeeCapacities
and Specifications on page 5-102for wheel nut
torque speci�cation.
Notice:Improperly tightened wheel nuts can lead
to brake pulsation and rotor damage. To avoid
expensive brake repairs, evenly tighten the wheel
nuts in the proper sequence and to the proper
torque speci�cation. SeeCapacities and
Specifications on page 5-102for the wheel nut
torque speci�cation.
5-80
Page 371 of 436
Fuse Usage
6 Steering Wheel Radio Controls
7Headlamps Switch, Body Control
Module, Headlamp Relay
8Courtesy Lamps, Battery Run-Down
Protection
9Heating, Ventilation, Air Cooling
Control Head (Manual)
10 Turn Signal
11 Cluster, Engine Control Module
12 Interior Lights
13 Auxiliary Power
14 Power Locks Motor
154WD Switch, Engine Controls (VCM,
PCM, Transmission)
16 Supplemental In�atable Restraint
17 Front Wiper
18 Steering Wheel Radio Controls
19 Radio, Battery
20 Ampli�er
21Heating, Ventilation, Air Cooling
(Manual), Heating,Ventilation, Air
Cooling (Automatic), Heating,
Ventilation, Air Cooling Sensors
(Automatic)
22 Anti-Lock BrakesFuse Usage
23 Rear Wiper
24 Radio, Ignition
Engine Compartment Fuse Block
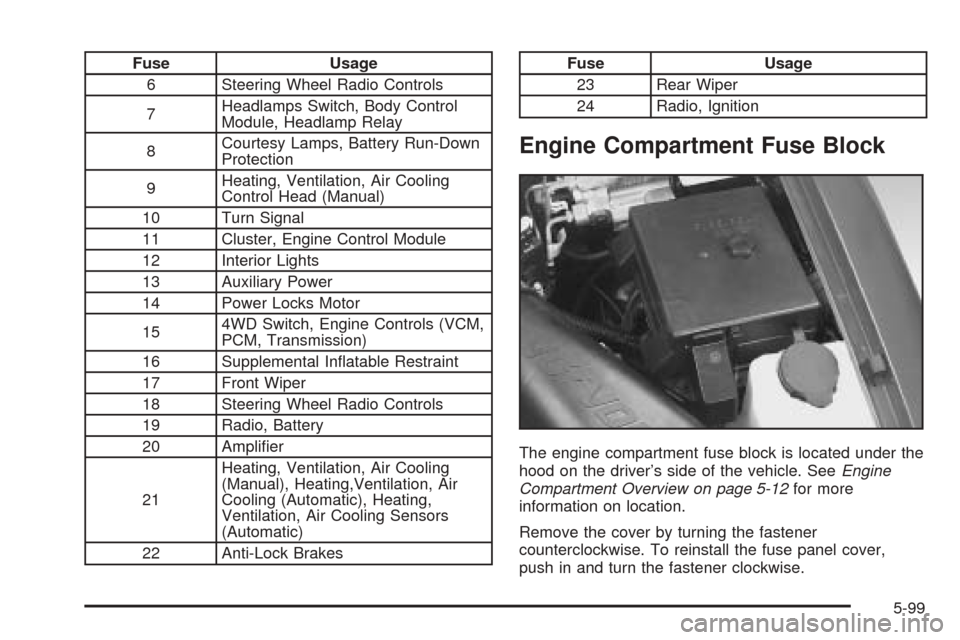
The engine compartment fuse block is located under the
hood on the driver’s side of the vehicle. SeeEngine
Compartment Overview on page 5-12for more
information on location.
Remove the cover by turning the fastener
counterclockwise. To reinstall the fuse panel cover,
push in and turn the fastener clockwise.
5-99
Page 372 of 436
Fuses Usage
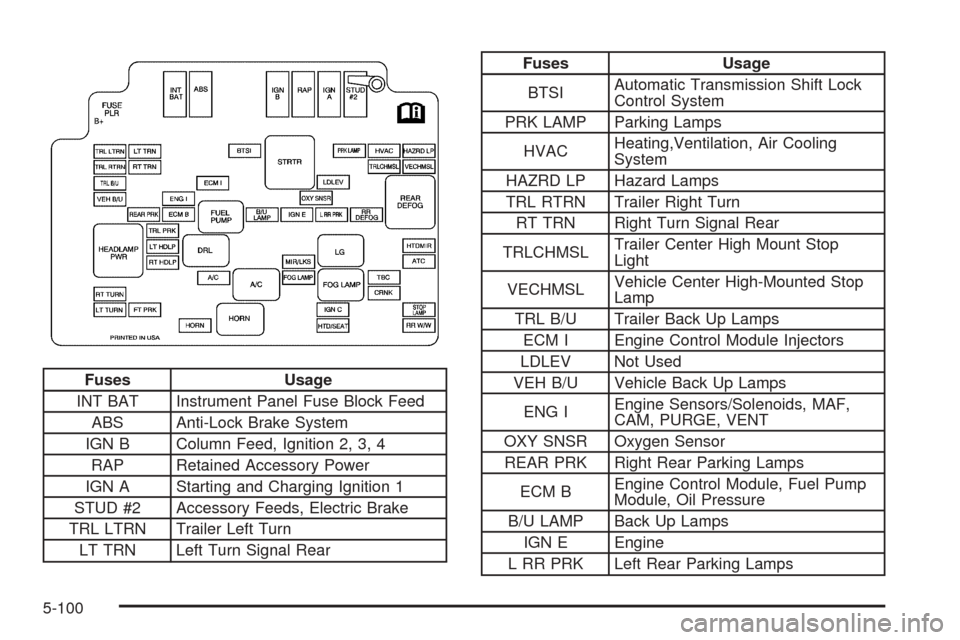
INT BAT Instrument Panel Fuse Block Feed
ABS Anti-Lock Brake System
IGN B Column Feed, Ignition 2, 3, 4
RAP Retained Accessory Power
IGN A Starting and Charging Ignition 1
STUD #2 Accessory Feeds, Electric Brake
TRL LTRN Trailer Left Turn
LT TRN Left Turn Signal Rear
Fuses Usage
BTSIAutomatic Transmission Shift Lock
Control System
PRK LAMP Parking Lamps
HVACHeating,Ventilation, Air Cooling
System
HAZRD LP Hazard Lamps
TRL RTRN Trailer Right Turn
RT TRN Right Turn Signal Rear
TRLCHMSLTrailer Center High Mount Stop
Light
VECHMSLVehicle Center High-Mounted Stop
Lamp
TRL B/U Trailer Back Up Lamps
ECM I Engine Control Module Injectors
LDLEV Not Used
VEH B/U Vehicle Back Up Lamps
ENG IEngine Sensors/Solenoids, MAF,
CAM, PURGE, VENT
OXY SNSR Oxygen Sensor
REAR PRK Right Rear Parking Lamps
ECM BEngine Control Module, Fuel Pump
Module, Oil Pressure
B/U LAMP Back Up Lamps
IGN E Engine
L RR PRK Left Rear Parking Lamps
5-100
Page 375 of 436
Maintenance Schedule......................................6-2
Introduction...................................................6-2
Maintenance Requirements..............................6-2
Your Vehicle and the Environment....................6-2
How This Section is Organized.........................6-3
Part A: Scheduled Maintenance Services...........6-4
Using Your Maintenance Schedule....................6-4
Selecting the Right Schedule...........................6-5
Short Trip/City Scheduled Maintenance..............6-6
Long Trip/Highway Scheduled Maintenance......6-17
Part B: Owner Checks and Services................6-25
At Each Fuel Fill..........................................6-25
At Least Once a Month.................................6-25
At Least Twice a Year...................................6-26At Least Once a Year...................................6-27
Part C: Periodic Maintenance Inspections.........6-30
Steering, Suspension and Front Drive Axle
Boot and Seal Inspection............................6-30
Exhaust System Inspection............................6-30
Fuel System Inspection..................................6-30
Engine Cooling System Inspection...................6-30
Throttle System Inspection.............................6-31
Transfer Case and Front Axle (Four-Wheel
Drive) Inspection.......................................6-31
Brake System Inspection................................6-31
Part D: Recommended Fluids and Lubricants. . . .6-32
Normal Maintenance Replacement Parts..........6-34
Part E: Maintenance Record...........................6-35
Section 6 Maintenance Schedule
6-1
Page 381 of 436
Footnotes
†The U.S. Environmental Protection Agency or the
California Air Resources Board has determined that the
failure to perform this maintenance item will not nullify
the emission warranty or limit recall liability prior to
the completion of the vehicle’s useful life. We, however,
urge that all recommended maintenance services be
performed at the indicated intervals and the
maintenance be recorded.
#Lubricate the front suspension, ball joints, steering
linkage, parking brake cable guides, propshaft splines,
universal joints and brake pedal springs.
+A good time to check your brakes is during tire
rotation. See Brake System Inspection on page 6-31.
**Drive axle service. See Part D: Recommended Fluids
and Lubricants on page 6-32for proper lubricant to use:
Check �uid level and add �uid as needed. If driving in
dusty areas or when towing a trailer, drain �uid and
re�ll every 15,000 miles (25 000 km).
If your vehicle has a locking differential, drain �uid
and re�ll at �rst engine oil change.
More frequent lubrication may be required for
heavy-duty or off-road use.
3,000 Miles (5 000 km)
❑Change engine oil and �lter (or every 3 months,
whichever occurs �rst).An Emission Control Service.
❑Lubricate chassis components (or every 3 months,
whichever occurs �rst).(See footnote #.)
❑Check rear/front axle �uid level and add �uid as
needed. Check constant velocity joints and axle seals
for leaking.(See footnote **.)
6,000 Miles (10 000 km)
❑Change engine oil and �lter (or every 3 months,
whichever occurs �rst).An Emission Control Service.
❑Lubricate chassis components (or every 3 months,
whichever occurs �rst).(See footnote #.)
❑Check rear/front axle �uid level and add �uid as
needed. Check constant velocity joints and axle seals
for leaking.(See footnote **.)
❑Rotate tires. SeeTire Inspection and Rotation on
page 5-64for proper rotation pattern and additional
information.(See footnote +.)
6-7
Page 392 of 436
Footnotes
†The U.S. Environmental Protection Agency or the
California Air Resources Board has determined that the
failure to perform this maintenance item will not nullify
the emission warranty or limit recall liability prior to
the completion of the vehicle’s useful life. We, however,
urge that all recommended maintenance services be
performed at the indicated intervals and the
maintenance be recorded.
#Lubricate the front suspension, ball joints, steering
linkage, parking brake cable guides, propshaft splines,
universal joints and brake pedal springs.
+A good time to check your brakes is during tire
rotation. See Brake System Inspection on page 6-31.
**Drive axle service. See Part D: Recommended Fluids
and Lubricants on page 6-32for proper lubricant to use.
Check �uid level and add �uid as needed.
If your vehicle has a locking differential, drain �uid
and re�ll at �rst engine oil change.
7,500 Miles (12 500 km)
❑Change engine oil and �lter (or every 12 months,
whichever occurs �rst).An Emission Control
Service.
❑Lubricate chassis components (or every 12 months,
whichever occurs �rst).(See footnote #.)❑Check rear/front axle �uid level and add �uid as
needed. Check constant velocity joints and axle seals
for leaking.(See footnote **.)
❑Rotate tires. SeeTire Inspection and Rotation on
page 5-64for proper rotation pattern and additional
information.(See footnote +.)
15,000 Miles (25 000 km)
❑Change engine oil and �lter (or every 12 months,
whichever occurs �rst).An Emission Control Service.
❑Lubricate chassis components (or every 12 months,
whichever occurs �rst).(See footnote #.)
❑Inspect engine air cleaner �lter. If necessary, replace
the �lter. If vehicle is driven in dusty/dirty conditions,
inspect �lter at every engine oil change. SeeEngine
Air Cleaner/Filter on page 5-18for more information.
An Emission Control Service. (See footnote †.)
❑Check rear/front axle �uid level and add �uid as
needed. Check constant velocity joints and axle seals
for leaking.(See footnote **.)
❑Change automatic transmission �uid and �lter if the
vehicle is mainly driven under one or more of these
conditions:
� In heavy city traffic where the outside
temperature regularly reaches 90°F (32°C) or
higher.
� In hilly or mountainous terrain.
6-18
Page 401 of 436
At Least Once a Year
Key Lock Cylinders Service
Lubricate the key lock cylinders with the lubricant
speci�ed in Part D.
Body Lubrication Service
Lubricate all hood hinges, hood latch assembly,
secondary latch, pivots, spring anchor, release pawl,
door hinges, fuel door hinge, endgate hinges, outer
tailgate handle pivot points, tailgate hinges, tailgate
mounted spare tire (if equipped), glove box and console
doors, moving seat hardware and folding seat
hardware. Part D tells you what to use. More frequent
lubrication may be required when exposed to a corrosive
environment.
Starter Switch Check
{CAUTION:
When you are doing this inspection, the
vehicle could move suddenly. If the vehicle
moves, you or others could be injured.
1. Before you start, be sure you have enough room
around the vehicle.
2. Firmly apply both the parking brake and the regular
brake. SeeParking Brake on page 2-36if
necessary.
Do not use the accelerator pedal, and be ready to
turn off the engine immediately if it starts.
3. On automatic transmission vehicles, try to start the
engine in each gear. The starter should work only
in PARK (P) or NEUTRAL (N). If the starter works in
any other position, your vehicle needs service.
On manual transmission vehicles, put the shift lever
in NEUTRAL (N), push the clutch down halfway and
try to start the engine. The starter should work only
when the clutch is pushed down all the way to the
�oor. If the starter works when the clutch is not
pushed all the way down, your vehicle needs service.
6-27
Page 402 of 436
Automatic Transmission Shift Lock
Control System Check
{CAUTION:
When you are doing this inspection, the
vehicle could move suddenly. If the vehicle
moves, you or others could be injured.
1. Before you start, be sure you have enough room
around the vehicle. It should be parked on a level
surface.
2. Firmly apply the parking brake, SeeParking Brake
on page 2-36if necessary.
Be ready to apply the regular brake immediately if
the vehicle begins to move.
3. With the engine off, turn the ignition to RUN, but do
not start the engine. Without applying the regular
brake, try to move the shift lever out of PARK (P)
with normal effort. If the shift lever moves out
of PARK (P), your vehicle needs service.
Ignition Transmission Lock Check
While parked, and with the parking brake set, try to turn
the ignition to LOCK in each shift lever position.
With an automatic transmission, the ignition should
turn to LOCK only when the shift lever is in
PARK (P).
With a manual transmission, the ignition should turn
to LOCK only when you press the key release
button.
On all vehicles, the key should come out only in LOCK.
6-28