2005 CHEVROLET ASTRO CARGO VAN maintenance schedule
[x] Cancel search: maintenance schedulePage 1 of 370

Seats and Restraint Systems........................... 1-1
Front Seats
............................................... 1-2
Rear Seats
............................................... 1-6
Safety Belts
.............................................1-14
Child Restraints
.......................................1-33
Airbag System
.........................................1-60
Restraint System Check
............................1-67
Features and Controls..................................... 2-1
Keys
........................................................ 2-2
Doors and Locks
....................................... 2-6
Windows
.................................................2-14
Theft-Deterrent Systems
............................2-15
Starting and Operating Your Vehicle
...........2-16
Mirrors
....................................................2-28
HomeLink
®Wireless Control System
...........2-29
Storage Areas
.........................................2-33
Instrument Panel............................................. 3-1
Instrument Panel Overview
.......................... 3-4
Climate Controls
......................................3-19
Warning Lights, Gages, and Indicators
........3-24
Driver Information Center (DIC)
..................3-38
Audio System(s)
.......................................3-40Driving Your Vehicle....................................... 4-1
Your Driving, the Road, and Your Vehicle
..... 4-2
Towing
...................................................4-34
Service and Appearance Care.......................... 5-1
Service
..................................................... 5-3
Fuel
......................................................... 5-5
Checking Things Under the Hood
...............5-10
All-Wheel Drive
........................................5-45
Rear Axle
...............................................5-46
Front Axle
...............................................5-47
Bulb Replacement
....................................5-48
Windshield Wiper Blade Replacement
.........5-54
Tires
......................................................5-55
Appearance Care
.....................................5-82
Vehicle Identi�cation
.................................5-91
Electrical System
......................................5-92
Capacities and Speci�cations
.....................5-99
Normal Maintenance Replacement Parts
....5-101
Maintenance Schedule..................................... 6-1
Maintenance Schedule
................................ 6-2
Customer Assistance and Information.............. 7-1
Customer Assistance and Information
........... 7-2
Reporting Safety Defects
...........................7-10
Index................................................................ 1
2005 Chevrolet Astro Owner ManualM
Page 146 of 370
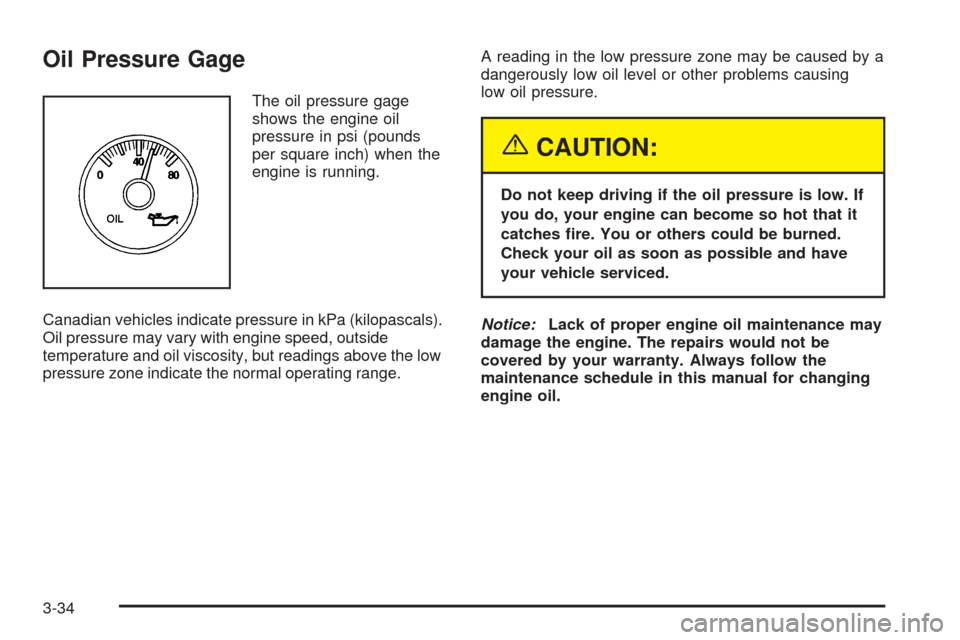
Oil Pressure Gage
The oil pressure gage
shows the engine oil
pressure in psi (pounds
per square inch) when the
engine is running.
Canadian vehicles indicate pressure in kPa (kilopascals).
Oil pressure may vary with engine speed, outside
temperature and oil viscosity, but readings above the low
pressure zone indicate the normal operating range.A reading in the low pressure zone may be caused by a
dangerously low oil level or other problems causing
low oil pressure.
{CAUTION:
Do not keep driving if the oil pressure is low. If
you do, your engine can become so hot that it
catches �re. You or others could be burned.
Check your oil as soon as possible and have
your vehicle serviced.
Notice:Lack of proper engine oil maintenance may
damage the engine. The repairs would not be
covered by your warranty. Always follow the
maintenance schedule in this manual for changing
engine oil.
3-34
Page 208 of 370
Maintenance When Trailer Towing
Your vehicle will need service more often when you’re
pulling a trailer. See the Maintenance Schedule for more
on this. Things that are especially important in trailer
operation are automatic transmission �uid (don’t over�ll),
engine oil, axle lubricant, belt, cooling system and brake
system. Each of these is covered in this manual, and the
Index will help you �nd them quickly. If you’re trailering,
it’s a good idea to review these sections before you start
your trip.
Check periodically to see that all hitch nuts and bolts
are tight.
Trailer Wiring Harness
If you have the optional trailering package, your vehicle
will have an eight-wire harness, including the center
high-mounted stoplamp battery feed wire. The harness is
stored on the passenger’s side of the vehicle near the
rear wheel well. This harness has a 30 amp battery feed
wire and no connector, and should be wired by a quali�ed
electrical technician. After choosing an aftermarket trailer
mating connector pair, have the technician attach one
connector to the eight-wire trailer harness and the other
connector to the wiring harness on the trailer.
Be sure the wiring harness on the trailer is taped or
strapped to the trailer’s frame rail and leave it loose
enough so the wiring doesn’t bend or break, but not so
loose that it drags on the ground. The eight-wire harnessmust be routed out of your vehicle between the rear door
and the �oor, with enough of the harness left on both
sides so that the trailer or the body won’t pull it.
If you do not have the optional trailering package, your
vehicle will still have a trailering harness. The harness
is located near the passenger’s side rear wheel
well. It consists of six wires that may be used by
after-market trailer hitch installers.
The technician can use the following color code chart
when connecting the wiring harness to your trailer.
Brown: Rear lamps
Yellow: Left stoplamp and turn signal
Dark Green: Right stoplamp and turn signal
White (Heavy Gage): Ground
Light Green: Back-up lamps
White (Light Gage): Center High-Mounted Stoplamp
Blue: Auxiliary circuit (eight-wire harness only)
Orange: Fused auxiliary (eight-wire harness only)
Store the harness in its original place. Wrap the
harness together and tie it neatly so it won’t
be damaged.
4-44
Page 224 of 370
If you are in an area of extreme cold, where the
temperature falls below−20°F (−29°C), it is
recommended that you use either an SAE 5W-30
synthetic oil or an SAE 0W-30 oil. Both will provide
easier cold starting and better protection for your engine
at extremely low temperatures.
Engine Oil Additives
Do not add anything to your oil. The recommended oils
with the starburst symbol that meet GM Standard
GM6094M are all you will need for good performance
and engine protection.
When to Change Engine Oil
If any one of these are true for you, use the short
trip/city maintenance schedule:
Most trips are less than 5 miles (8 km). This is
particularly important when outside temperatures
are below freezing.
Most trips include extensive idling, such as frequent
driving in stop-and-go traffic.
You frequently tow a trailer or use a carrier on top
of your vehicle.
The vehicle is used for delivery service, police, taxi,
or other commercial application.
Driving under these conditions causes engine oil to
break down sooner. If any one of these is true for your
vehicle, then you need to change your oil and �lter
every 3,000 miles (5 000 km) or 3 months — whichever
occurs �rst.
If none of them is true, use the long trip/highway
maintenance schedule. Change the oil and �lter every
7,500 miles (12 500 km) or 12 months — whichever
occurs �rst. Driving a vehicle with a fully warmed engine
under highway conditions will cause engine oil to
break down slower.
5-16
Page 231 of 370
Automatic Transmission Fluid
When to Check and Change
A good time to check your automatic transmission �uid
level is when the engine oil is changed.
Change both the �uid and �lter every 15,000 miles
(25,000 km) if the vehicle is mainly driven under one or
more of these conditions:
In heavy city traffic where the outside temperature
regularly reaches 90°F (32°C) or higher.
In hilly or mountainous terrain.
When doing frequent trailer towing.
Uses such as found in taxi, police or delivery
service.
If you do not use your vehicle under any of these
conditions, change the �uid and �lter every
50,000 miles (83 000 km).
SeePart A: Scheduled Maintenance Services on
page 6-4.
How to Check
Because this operation can be a little difficult, you may
choose to have this done at the dealership service
department.
If you do it yourself, be sure to follow all the instructions
here, or you could get a false reading on the dipstick.
Notice:Too much or too little �uid can damage
your transmission. Too much can mean that some
of the �uid could come out and fall on hot engine
part or exhaust system parts, starting a �re.
Too little �uid could cause the transmission to
overheat. Be sure to get an accurate reading if you
check your transmission �uid.
Wait at least 30 minutes before checking the
transmission �uid level if you have been driving:
When outside temperatures are above 90°F (32°C).
At high speed for quite a while.
In heavy traffic — especially in hot weather.
While pulling a trailer.
To get the right reading, the �uid should be at normal
operating temperature, which is 180°F to 200°F (82°C
to 93°C).
5-23
Page 233 of 370
3. Check both sides of the dipstick, and read the lower
level. The �uid level must be in the COLD area for
a cold check or in the HOT or cross-hatched
area for a hot check. Be sure to keep the dipstick
pointed down to get an accurate reading.
4. If the �uid level is in the acceptable range, push the
dipstick back in all the way; then �ip the handle
down to lock the dipstick in place.
How to Add Fluid
Refer to the Maintenance Schedule to determine
what kind of transmission �uid to use. SeePart D:
Recommended Fluids and Lubricants on page 6-29.
If the �uid level is low, add only enough of the proper
�uid to bring the level up to the HOT area for a hot
check.
1. Pull out the dipstick.
2. Using a funnel, add �uid down the transmission
dipstick tube only after checking the transmission
�uid while it is hot. A cold check is used only
as a reference.
It does not take much �uid, generally less than
one pint (0.5 L).Do not over�ll.Notice:Use of automatic transmission �uid labeled
other than DEXRON
®-III, Approved for the
H-Speci�cation, may damage your vehicle, and the
damages may not be covered by your warranty.
Always use automatic transmission �uid labeled
DEXRON
®-III, Approved for the H-Speci�cation.
3. After adding �uid, recheck the �uid level as
described under “How to Check,” earlier in
this section.
4. When the correct �uid level is obtained, push the
dipstick back in all the way; then �ip the handle
down to lock the dipstick in place.
Engine Coolant
The cooling system in your vehicle is �lled with
DEX-COOL®engine coolant. This coolant is designed
to remain in your vehicle for 5 years or 150,000 miles
(240 000 km), whichever occurs �rst, if you add
only DEX-COOL
®extended life coolant.
The following explains your cooling system and how to
add coolant when it is low. If you have a problem
with engine overheating, seeEngine Overheating on
page 5-28.
5-25
Page 245 of 370
Brakes
Brake Fluid
Your brake master cylinder
reservoir is �lled with
DOT-3 brake �uid. See
Engine Compartment
Overview on page 5-12for
the location of the
reservoir.
There are only two reasons why the brake �uid level in
the reservoir might go down. The �rst is that the
brake �uid goes down to an acceptable level during
normal brake lining wear. When new linings are put in,
the �uid level goes back up. The other reason is
that �uid is leaking out of the brake system. If it is, you
should have your brake system �xed, since a leak
means that sooner or later your brakes will not work
well, or will not work at all.So, it is not a good idea to top off your brake �uid.
Adding brake �uid will not correct a leak. If you add �uid
when your linings are worn, then you will have too
much �uid when you get new brake linings. You should
add or remove brake �uid, as necessary, only when
work is done on the brake hydraulic system.
{CAUTION:
If you have too much brake �uid, it can spill on
the engine. The �uid will burn if the engine is
hot enough. You or others could be burned,
and your vehicle could be damaged. Add brake
�uid only when work is done on the brake
hydraulic system. See “Checking Brake Fluid”
in this section.
Refer to the Maintenance Schedule to determine when
to check your brake �uid. SeePart C: Periodic
Maintenance Inspections on page 6-28.
5-37
Page 253 of 370
To disconnect the jumper cables from both vehicles, do
the following:
1. Disconnect the black negative (−) cable from the
vehicle that had the dead battery.
2. Disconnect the black negative (−) cable from the
vehicle with the good battery.
3. Disconnect the red positive (+) cable from the
vehicle with the good battery.
4. Disconnect the red positive (+) cable from the other
vehicle.
All-Wheel Drive
Lubricant checks in this section also apply to these
vehicles. However, there are two additional systems that
need lubrication.
Transfer Case
When to Check Lubricant
Refer to the Maintenance Schedule to determine how
often to check the lubricant. SeePart C: Periodic
Maintenance Inspections on page 6-28.
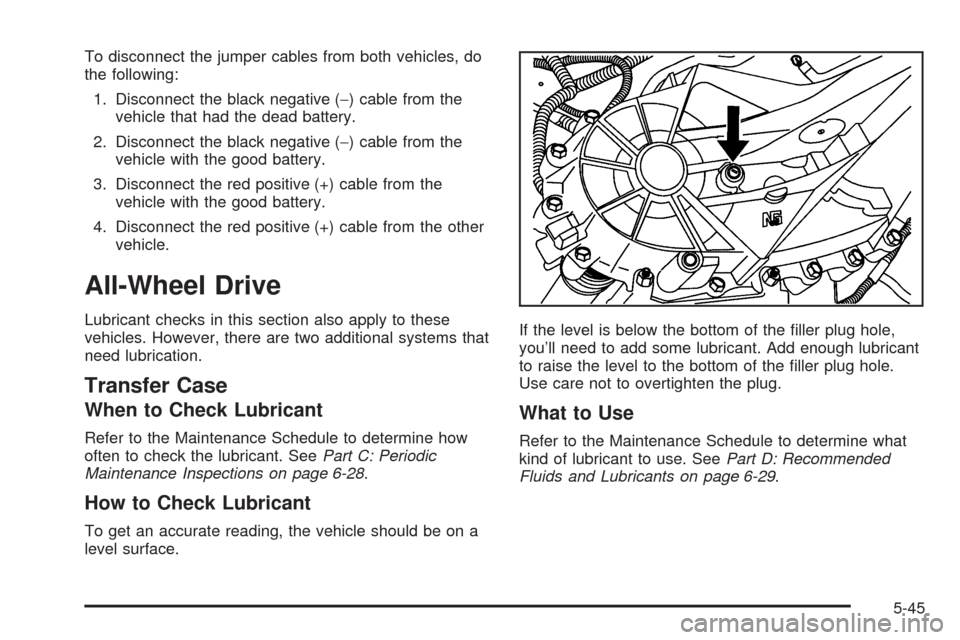
How to Check Lubricant
To get an accurate reading, the vehicle should be on a
level surface.If the level is below the bottom of the �ller plug hole,
you’ll need to add some lubricant. Add enough lubricant
to raise the level to the bottom of the �ller plug hole.
Use care not to overtighten the plug.
What to Use
Refer to the Maintenance Schedule to determine what
kind of lubricant to use. SeePart D: Recommended
Fluids and Lubricants on page 6-29.
5-45