Page 204 of 438
Removing Quick POI Icons
To remove POI icons from the map screen, do the
following:
1. Touch the map screen once.
2. Touch the POI OFF screen button. The current POI
icons will be removed from the map screen.
Setting a Destination Using Quick POI
This feature will allow you to choose a POI as your
destination. To set a destination using a POI, do
the following:
1. Touch the POI icon on the map screen that you
wish to set as a destination.
The selected icon will be surrounded by a blinking
box, and the name of the icon will be displayed.
You may also touch INFO to view the POI name,
address, city, and phone number, if available.2. Touch the ENT DEST screen button.
If a �nal destination has already been entered, you
can add the POI as a waypoint. SeeEdit Waypoint
on page 4-17for more information.
3. Touch Enter to start planning your route.
4. To start route guidance, touch Start or begin driving
the vehicle. Route guidance will automatically begin
after a short distance.
If you wish to cancel the route you have just set, do the
following:
1. Press the ROUTE hard key.
2. Touch the Route Preference screen button.
3. Touch the Cancel Route screen button.
4. Select YES to cancel or NO to continue.
4-10
Page 205 of 438
Guidance Appearance
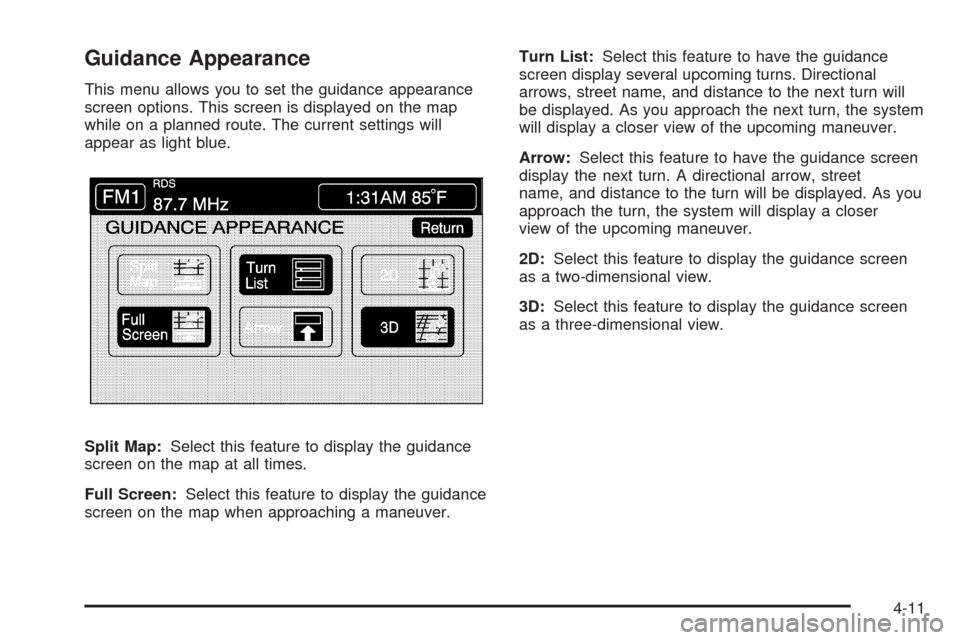
This menu allows you to set the guidance appearance
screen options. This screen is displayed on the map
while on a planned route. The current settings will
appear as light blue.
Split Map:Select this feature to display the guidance
screen on the map at all times.
Full Screen:Select this feature to display the guidance
screen on the map when approaching a maneuver.Turn List:Select this feature to have the guidance
screen display several upcoming turns. Directional
arrows, street name, and distance to the next turn will
be displayed. As you approach the next turn, the system
will display a closer view of the upcoming maneuver.
Arrow:Select this feature to have the guidance screen
display the next turn. A directional arrow, street
name, and distance to the turn will be displayed. As you
approach the turn, the system will display a closer
view of the upcoming maneuver.
2D:Select this feature to display the guidance screen
as a two-dimensional view.
3D:Select this feature to display the guidance screen
as a three-dimensional view.
4-11
Page 206 of 438
Map Appearance
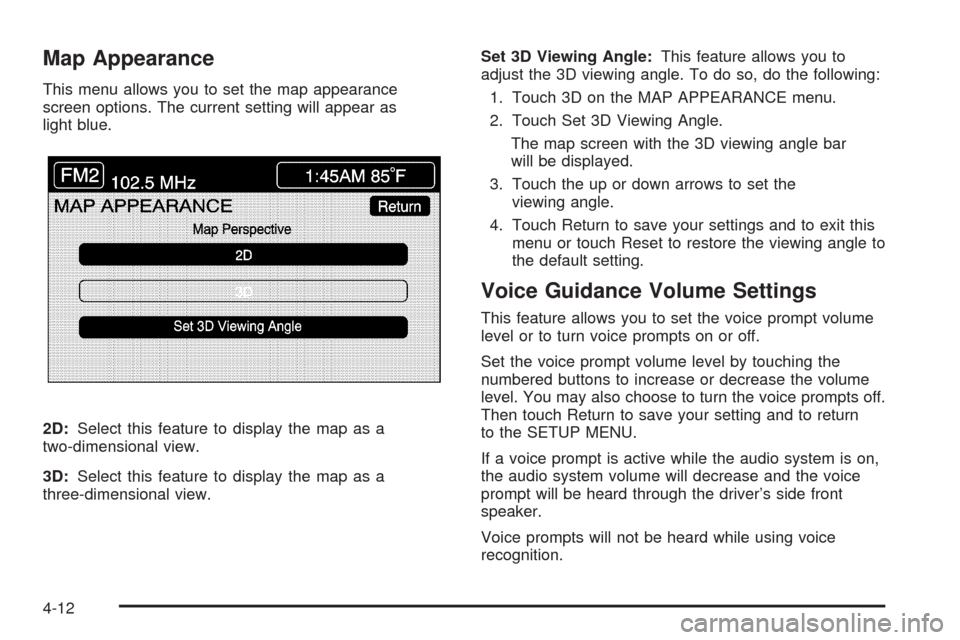
This menu allows you to set the map appearance
screen options. The current setting will appear as
light blue.
2D:Select this feature to display the map as a
two-dimensional view.
3D:Select this feature to display the map as a
three-dimensional view.Set 3D Viewing Angle:This feature allows you to
adjust the 3D viewing angle. To do so, do the following:
1. Touch 3D on the MAP APPEARANCE menu.
2. Touch Set 3D Viewing Angle.
The map screen with the 3D viewing angle bar
will be displayed.
3. Touch the up or down arrows to set the
viewing angle.
4. Touch Return to save your settings and to exit this
menu or touch Reset to restore the viewing angle to
the default setting.
Voice Guidance Volume Settings
This feature allows you to set the voice prompt volume
level or to turn voice prompts on or off.
Set the voice prompt volume level by touching the
numbered buttons to increase or decrease the volume
level. You may also choose to turn the voice prompts off.
Then touch Return to save your setting and to return
to the SETUP MENU.
If a voice prompt is active while the audio system is on,
the audio system volume will decrease and the voice
prompt will be heard through the driver’s side front
speaker.
Voice prompts will not be heard while using voice
recognition.
4-12
Page 207 of 438
Plan Route
To plan a route, press the ROUTE key. The PLAN
ROUTE menu will be displayed.
You may use one of several destination entry methods
to plan a route. SeeEnter Destination on page 4-21
for more information.
Edit Memory Point
This feature allows you to store, delete, and edit
memory points. Touch the Edit Memory Point screen
button from the PLAN ROUTE menu to access the EDIT
MEMORY POINT screen.
You can store memory points in four different categories,
personal, business, entertainment, and marked point.
Memory points are stored when you select either START
or MARK when setting a destination on the map or
when you are storing destinations in memory.
4-13
Page 208 of 438
A total of 60 locations can be stored. The last
10 destinations entered will be stored under Previous
Destination. In addition, one memory point can be stored
under the Home category.
If all 60 stored points are entered, the system will notify
you that there is no available storage left in memory
points. A memory point must be removed before storing
additional memory points.
Registering Memory Points
To store a memory point, do the following:
1. Select a category from the EDIT MEMORY
POINT menu.
2. Touch REGISTER.
3. Select a method for entering a destination. A map
will appear displaying the memory point’s location.
4. If available, touch INFO to view the address
information for the memory point.
5. Touch Enter to store the point.
Editing Memory Points
This feature allows you to edit the contents stored in
memory. The following options are available:
Icon Editing of a Memory Point
Each memory point is displayed with a default icon. To
edit an icon, do the following:
1. Select the category of the memory point.
2. Select the item you want to edit.
3. Touch the icon. The EDIT MEMORY POINT icon
screen will appear.
4. Touch the icon you would like to use. The system will
then return to the EDIT MEMORY POINT menu.
5. Touch Return to go back to the previous screen.
You will see the new memory point icon on the map.
When selecting an icon, you can choose from 18 different
icons, three of which are sound icons. The same icon
may be used for other memory points as well.
4-14
Page 209 of 438
Name Editing of a Memory Point
To modify the name of a stored memory point, do the
following:
1. Select the category of the memory point.
2. Select the item you want to edit.
3. Touch the NAME screen button and use the alpha
keypad to edit the name. Names may contain up to
15 alpha and/or numeric characters.
4. Touch Return to go to the previous screen.
Moving Memory Points
To move a memory point from one category to another,
do the following:
1. Select the category of the memory point.
2. Select the memory point you want to edit.
3. Touch CATEGORY. A list of categories will appear.
The current category for the item will be highlighted
and cannot be selected.
4. Touch the screen button for the category you want
the memory point placed in. A pop-up window will
appear displaying the change in category.
5. Touch Return to go back to the previous screen.
Adjusting a Memory Point
To relocate a memory point’s location, do the following:
1. Select the category of the memory point.
2. Select the memory point you want to edit.
3. Touch POSITION. A map screen with the position
of this memory point will appear.
4. Touch anywhere on the screen to activate the scroll
feature and relocate the memory point. SeeMaps
on page 4-33.
5. Touch Enter to save the memory point’s new
location.
6. Touch Return to go back to the previous screen.
Changing the Phone Number of a
Memory Point
To edit or add the phone number of a memory point, do
the following:
1. Select the category of the memory point.
2. Select the memory point you want to edit.
3. Touch PHONE and use the numeric keypad to edit
or add the number.
4. Touch the RETURN button to take you back to the
previous screen when you have �nished.
4-15
Page 212 of 438
Adding a Waypoint
To add a waypoint to your route, do the following:
1. Touch Add Waypoint.
2. Enter a destination. SeeEnter Destination on
page 4-21.
A map will appear showing the location of the
waypoint.
3. Touch Enter to add your waypoint.
4. Touch the ADD screen button to insert the waypoint
in the desired order.
5. The system will display the ROUTE INFORMATION
screen. From this screen, several options are
available.
List:Touch List to view the waypoint on the map or to
change the order of the waypoints and �nal destination.
To change the order, touch CHG ORDER, then
touch the blank screen button next to the destination to
select the order of the waypoints and �nal destination.
Press the MAP key to view the destination and
waypoints on the map screen.
4-18
Page 214 of 438
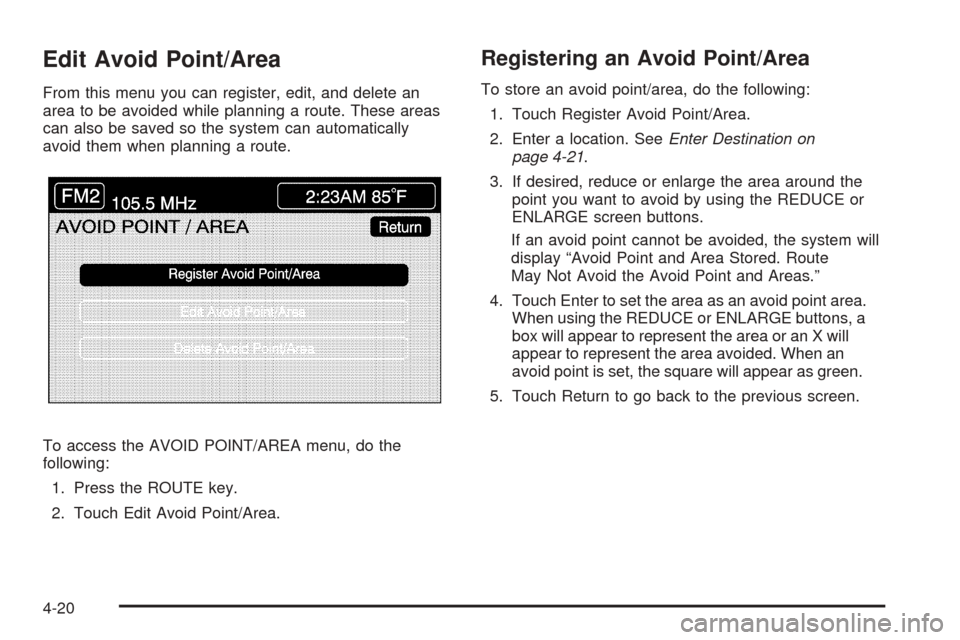
Edit Avoid Point/Area
From this menu you can register, edit, and delete an
area to be avoided while planning a route. These areas
can also be saved so the system can automatically
avoid them when planning a route.
To access the AVOID POINT/AREA menu, do the
following:
1. Press the ROUTE key.
2. Touch Edit Avoid Point/Area.
Registering an Avoid Point/Area
To store an avoid point/area, do the following:
1. Touch Register Avoid Point/Area.
2. Enter a location. SeeEnter Destination on
page 4-21.
3. If desired, reduce or enlarge the area around the
point you want to avoid by using the REDUCE or
ENLARGE screen buttons.
If an avoid point cannot be avoided, the system will
display “Avoid Point and Area Stored. Route
May Not Avoid the Avoid Point and Areas.”
4. Touch Enter to set the area as an avoid point area.
When using the REDUCE or ENLARGE buttons, a
box will appear to represent the area or an X will
appear to represent the area avoided. When an
avoid point is set, the square will appear as green.
5. Touch Return to go back to the previous screen.
4-20