Page 209 of 438

Name Editing of a Memory Point
To modify the name of a stored memory point, do the
following:
1. Select the category of the memory point.
2. Select the item you want to edit.
3. Touch the NAME screen button and use the alpha
keypad to edit the name. Names may contain up to
15 alpha and/or numeric characters.
4. Touch Return to go to the previous screen.
Moving Memory Points
To move a memory point from one category to another,
do the following:
1. Select the category of the memory point.
2. Select the memory point you want to edit.
3. Touch CATEGORY. A list of categories will appear.
The current category for the item will be highlighted
and cannot be selected.
4. Touch the screen button for the category you want
the memory point placed in. A pop-up window will
appear displaying the change in category.
5. Touch Return to go back to the previous screen.
Adjusting a Memory Point
To relocate a memory point’s location, do the following:
1. Select the category of the memory point.
2. Select the memory point you want to edit.
3. Touch POSITION. A map screen with the position
of this memory point will appear.
4. Touch anywhere on the screen to activate the scroll
feature and relocate the memory point. SeeMaps
on page 4-33.
5. Touch Enter to save the memory point’s new
location.
6. Touch Return to go back to the previous screen.
Changing the Phone Number of a
Memory Point
To edit or add the phone number of a memory point, do
the following:
1. Select the category of the memory point.
2. Select the memory point you want to edit.
3. Touch PHONE and use the numeric keypad to edit
or add the number.
4. Touch the RETURN button to take you back to the
previous screen when you have �nished.
4-15
Page 210 of 438

Deleting Single Memory Points
To delete a single memory point, do the following:
1. Press the ROUTE key.
2. Touch EDIT MEMORY POINT.
3. Select the category of the memory point.
4. Touch DELETE.
5. Select the memory point you want to delete. A
con�rmation window will appear.
6. Touch YES to delete the memory point or NO to
return to the previous menu.
7. Touch Return to go back to the previous screen.
Deleting All Memory Points
To delete all of the memory points in a category, do the
following:
1. Press the ROUTE key.
2. Touch EDIT MEMORY POINT.
3. Select the desired category.
4. Touch the DELETE ALL screen button. A
con�rmation window will appear.
5. Touch YES to delete the memory points or NO to
return to the previous menu.
6. Touch Return to go back to the previous screen.
Edit Category
To edit the name of a category, do the following:
1. Press the ROUTE key.
2. Touch EDIT MEMORY POINT.
3. Select the category you want to edit.
4. Touch the EDIT CATEGORY screen button and
use the alpha keypad to edit the category name.
The name can consist of up to 15 alpha and/or
numeric characters.
5. Touch Return to go back to the previous screen.
Marked Point
A marked point is a memory point which has been
stored by selecting the MARK screen button while
traveling on a planned route. You can also use the scroll
feature to plan a destination on the map after reaching
the destination, or by moving a memory point to a
marked point category. See “Editing Memory Points”
earlier in this section for more information.
4-16
Page 211 of 438

Previous Destination Memory
Each time you select Start from the map screen, that
destination will be stored as a memory point under
PREVIOUS DESTINATION. This category will store up
to 10 destinations.
When the Previous Destination category contains more
than 10 destinations, the system will remove the
oldest destination stored and add the most recent one
selected to the list.
If you do not want a previous destination to be lost,
you must move the destination into a memory
point category. See “Moving Memory Points” earlier
in this section for more information.
Home Memory
This memory point is stored by selecting Home from the
EDIT MEMORY POINT screen. See “Registering
Memory Points” earlier in this section and “Home” under
Enter Destination on page 4-21for more information.
Edit Waypoint
Waypoints are destinations you can set along the way
to your �nal destination. This feature allows you to
add, edit, and delete waypoints.
You may set up to �ve waypoints on the way to your
�nal destination.
To access the WAYPOINT menu, do the following:
1. Press the ROUTE key.
2. Touch Edit Waypoint.
4-17
Page 212 of 438
Adding a Waypoint
To add a waypoint to your route, do the following:
1. Touch Add Waypoint.
2. Enter a destination. SeeEnter Destination on
page 4-21.
A map will appear showing the location of the
waypoint.
3. Touch Enter to add your waypoint.
4. Touch the ADD screen button to insert the waypoint
in the desired order.
5. The system will display the ROUTE INFORMATION
screen. From this screen, several options are
available.
List:Touch List to view the waypoint on the map or to
change the order of the waypoints and �nal destination.
To change the order, touch CHG ORDER, then
touch the blank screen button next to the destination to
select the order of the waypoints and �nal destination.
Press the MAP key to view the destination and
waypoints on the map screen.
4-18
Page 213 of 438

Delete:Touch Delete to delete a waypoint or the �nal
destination. A con�rmation window will appear.
Touch YES to delete the point or NO to return to the
previous screen.
Delete All:Touch Delete All to delete all of the
waypoints and the �nal destination. A con�rmation
window will appear. Touch YES to delete all waypoints
or NO to return to the previous screen.
Change:Touch Change to change the �nal destination.
Enter a destination. SeeEnter Destination on page 4-21.
Add:Touch Add to add additional waypoints. Refer to
the steps for adding a waypoint listed previously in
this section.
Calculate:Touch Calculate to begin route calculation.
This feature will only be available if the �nal destination
has been set.Editing a Waypoint
This feature allows you to edit waypoints that have
already been set. To edit a waypoint, do the following:
1. Touch Edit Waypoint.
2. Touch the MAP key to view the destination location
on the map screen.
3. Touch CHANGE ORDER to change the order of the
waypoints and the �nal destination.
You can also use the map scroll to change a
waypoint from one location to another.
Deleting a Waypoint
To delete a waypoint from your route, do the following:
1. Touch Delete Waypoint.
2. Select the waypoint you want to delete. A
con�rmation window will appear.
3. Touch YES to delete the waypoint or NO to return
to the previous menu.
4-19
Page 214 of 438

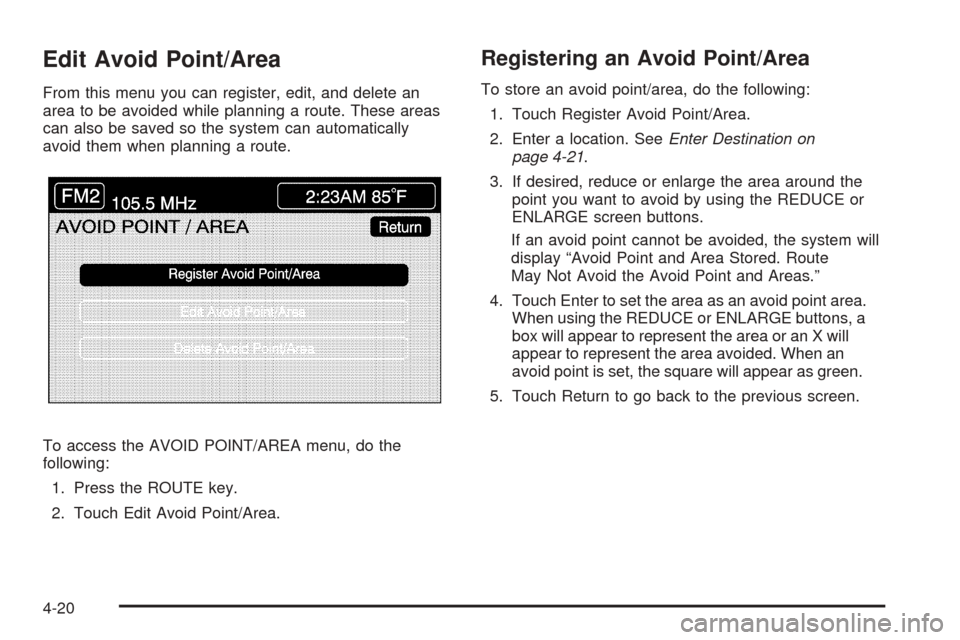
Edit Avoid Point/Area
From this menu you can register, edit, and delete an
area to be avoided while planning a route. These areas
can also be saved so the system can automatically
avoid them when planning a route.
To access the AVOID POINT/AREA menu, do the
following:
1. Press the ROUTE key.
2. Touch Edit Avoid Point/Area.
Registering an Avoid Point/Area
To store an avoid point/area, do the following:
1. Touch Register Avoid Point/Area.
2. Enter a location. SeeEnter Destination on
page 4-21.
3. If desired, reduce or enlarge the area around the
point you want to avoid by using the REDUCE or
ENLARGE screen buttons.
If an avoid point cannot be avoided, the system will
display “Avoid Point and Area Stored. Route
May Not Avoid the Avoid Point and Areas.”
4. Touch Enter to set the area as an avoid point area.
When using the REDUCE or ENLARGE buttons, a
box will appear to represent the area or an X will
appear to represent the area avoided. When an
avoid point is set, the square will appear as green.
5. Touch Return to go back to the previous screen.
4-20
Page 216 of 438

To enter a destination, choose from one of the
destination entry methods following in this section.
After entering a destination, If available, the system will
display up to three routes in a pop-up window
indicating the total mileage and time to destination for
each route. Select a route by touching NEXT. The map
will display each route in a different color. The selected
route will be highlighted in red.
To start route guidance, touch Start or begin driving
your vehicle. Route guidance will automatically begin
after a short distance.
If you touch CHG ROUTE before touching Start, you will
be able to change route preferences. SeeRoute
Preference on page 4-31for more information.
When a route has been planned, it will be highlighted
and a bulls-eye symbol will appear on the map to show
your �nal destination.
If you wish to cancel a route that has been set, see
“Cancel Route” underRoute Preference on page 4-31.Easy Planning Route
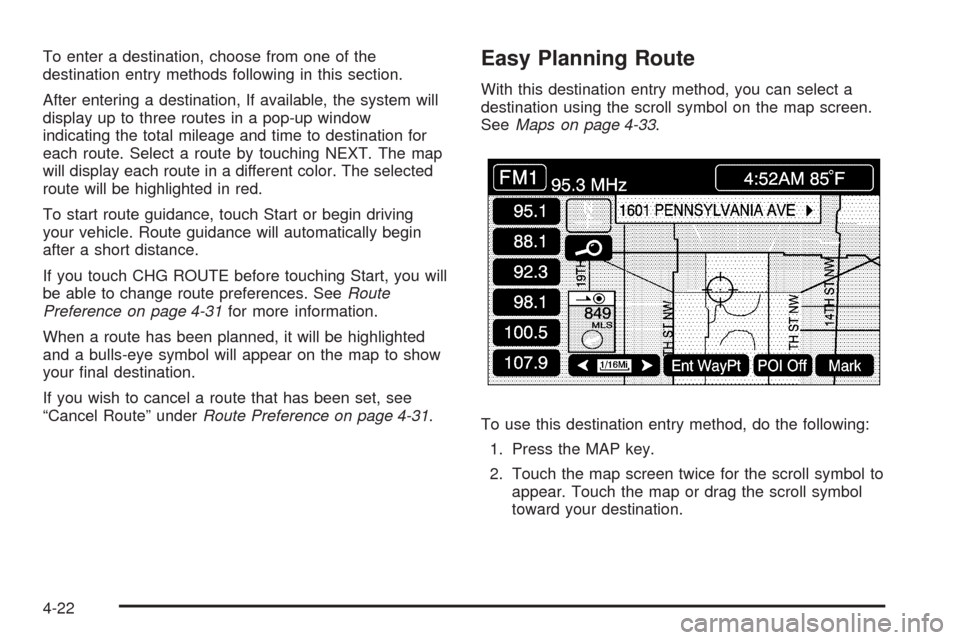
With this destination entry method, you can select a
destination using the scroll symbol on the map screen.
SeeMaps on page 4-33.
To use this destination entry method, do the following:
1. Press the MAP key.
2. Touch the map screen twice for the scroll symbol to
appear. Touch the map or drag the scroll symbol
toward your destination.
4-22
Page 217 of 438

3. Touch the map screen continuously to scroll
through the map faster. The address of the location
on the map will appear at the top of the screen.
If needed, use the zoom feature to locate your
destination. See “Map Scales” underMaps
on page 4-33for more information.
4. Touch ENT DEST to set this location as your
destination. You may also touch MARK to store this
location as a memory point.
5. Touch Enter to plan your route.Address
This destination entry method allows you to input an
address by providing the system with a house number,
street name, and city. Select Street to begin entering
the desired address.
To use this destination entry method, do the following:
1. Enter the street name using the alpha keypad. See
“Alpha-Numeric Keypad” underUsing the Navigation
System on page 4-4for more information.
Do not include name extensions such as N. or Drive.
For example, the street name N. Civic Center Drive
should be entered as Civic Center. As information is
entered, the system will automatically search for
available names, and List will become available.
4-23