Page 201 of 442

Radio with CDRadio Data System (RDS)
The audio system has a Radio Data System (RDS).
RDS features are available for use only on FM stations
that broadcast RDS information.
With RDS, the radio can do the following:
Seek to stations broadcasting the selected type of
programming
Receive announcements concerning local and
national emergencies
Display messages from radio stations
Seek to stations with traffic announcements
This system relies upon receiving speci c information
from these stations and will only work when the
information is available. In rare cases, a radio station
may broadcast incorrect information that will cause
the radio features to work improperly. If this happens,
contact the radio station.
While the radio is tuned to an RDS station, the station
name or call letters will appear on the display instead of
the frequency. RDS stations may also provide the
time of day, a program type (PTY) for current
programming, and the name of the program being
broadcast. Radio with CD shown, Radio with Six-Disc CD
similar
3-81
Page 202 of 442

XM™ Satellite Radio Service
XM™ is a satellite radio service that is based in the
48 contiguous United States. XM™ offers 100 coast to
coast channels including music, news, sports, talk,
and children’s programming. XM™ provides digital
quality audio and text information, including song title
and artist name. A service fee is required in order
to receive the XM™ service. For more information,
contact XM™ at www.xmradio.com or call
1-800-852-XMXM (9696).
CLOCK/INFO DISP (Clock/Information Display):
Press the CLOCK/INFO DISP button to switch between
the clock display, the XM screen, and the XM
information display.
Press this button while in XM mode to retrieve three
different categories of information related to the current
song or channel: Artist, Song Title, and Category.To view this information, perform the following:
1. Press the TUNE/SEL knob to enter the main menu.
2. Turn the TUNE/SEL knob until CLOCK/INFO
DISP appears on the display.
3. Press the TUNE/SEL knob to select CLOCK/INFO
DISP. The display will change to show the additional
XM information.
4. To return to the original display, press the CLR
button or wait for the display to time out.
If the CLOCK/INFO DISP is con gured into one of the
con gurable keys, pressing the key will switch the
display between the radio station frequency and the
time. See “Con gurable Radio Display Keys” later in this
section for more information.
3-82
Page 203 of 442

Playing the Radio
PWR (Power):Press this knob to turn the system on
and off.
VOL (Volume):Turn this knob to increase or to
decrease the volume.
AVC (Automatic Volume Compensation):Available
only with the premium Bose
®audio system, AVC
monitors the noise in the vehicle and will adjust the
volume level so that it always sounds the same to you.
AVC works best when listening at low volume levels.
At loud listening levels there will be little or no effect.
To turn AVC on and off, perform the following steps:
1. Press the TUNE/SEL knob to enter the main menu.
2. Turn the TUNE/SEL knob until AUTO VOLUME
COMP. appears on the display.
3. Press the TUNE/SEL knob to turn AVC on or off.
An X will appear in the box when AVC is selected on.
4. Press the CLR button to exit the display. To return
to the original display, repeatedly press the CLR
button or wait for the display to time out.
SOURCE:Press this button to select a source, either
radio or CD. The CD must be loaded to select the
source and to play. CD will appear on the display if a
CD is loaded. If a CD is not loaded the display will
not change from the radio source.
Finding a Station
BAND:Press this button to select FM1, FM2, AM, or
XM1 or XM2 (if equipped).
QSEEKR:Press the up or the down arrow to go to
the next or to the previous station and stay there.
SEEK will appear on the display. The sound will mute
while seeking.
The radio will only seek stations with a strong signal
that are in the selected band.
QSCANR:Press the SCAN button to enter scan
mode. SCAN will appear on the display. Press the
up arrow to scan to the next station. The radio will go to
a station, play for 5 seconds, then go on to the next
station. Press this button again to stop scanning.
To scan preset stations, press and hold SCAN for more
than two seconds until you hear a beep and PSCAN
appears on the display. The radio will go to the
rst preset station stored on your pushbuttons, play for
5 seconds, then go on to the next preset station.
Press SCAN again to stop scanning presets.
The radio will only scan stations with a strong signal
that are in the selected band.
3-83
Page 204 of 442

LOCAL/DISTANT Selection:With this feature you can
set the radio to search for local stations or stations
that are further away for a larger selection. To set this
feature to LOCAL or DISTANT, perform the
following steps:
1. Press the TUNE/SEL knob to enter the main menu.
2. Turn the TUNE/SEL knob until SEEK LOCAL or
SEEK DISTANT appears on the display.
3. Press the TUNE/SEL knob to select either LOCAL
or DISTANT.
4. Press the CLR button to exit the display. To return
to the original display, repeatedly press the CLR
button or wait for the display to time out.
To search for stations, press the SEEK up or down
arrows. If the system is set to LOCAL, SEEK will appear
in the display and seek to stations with strong signals
only. If the system is set to DISTANT, D-SEEK will
appear in the display and seek to stations with weak and
strong signals.Setting Preset Stations
Up to 30 stations (six FM1, six FM2, and six AM,
six XM1 and six XM2 (if equipped)), can be programmed
on the six numbered pushbuttons, by performing the
following steps:
1. Turn the radio on.
2. Press BAND to select FM1, FM2, or AM,
or XM1 or XM2.
3. Tune in the desired station.
4. Press and hold one of the six numbered
pushbuttons for two seconds until you hear a beep.
The set preset station number will appear on the
display above the pushbutton that it is set to.
Whenever that numbered pushbutton is pressed for
less than two seconds, the station that was set
will return.
5. Repeat the steps for each pushbutton.
To set the preset stations with an equalization
setting, DSP setting, or a PTY setting, see each of
these features later in this section. When a
preset station is selected, once one of these
additional settings is selected, the preset station will
remember each setting and it will remain active,
until the setting is selected off for that preset station.
3-84
Page 205 of 442

AUTOSTORE PRESETS:To set the preset stations
automatically, perform the following steps:
1. Turn the radio on.
2. Press BAND to select FM1, FM2, or AM.
3. Press the TUNE/SEL knob to enter the main menu.
4. Turn the TUNE/SEL knob until AUTOSTORE
PRESETS appears on the display.
5. Press the TUNE/SEL knob to select. AUTOSTORE
will appear on the display. The radio will
automatically search the band and select and store
the six radio stations with the strongest signal.
The stations will be stored by signal strength, not
sequential order. The set preset station number will
appear on the display above the pushbutton that
it is set to. Whenever that numbered pushbutton is
pressed for less than two seconds, the station
that was set will return.
6. Press the CLR button to exit the display. To return
to the original display, repeatedly press the CLR
button or wait for the display to time out.
When battery power is removed and later applied, you
will not have to reset your radio presets.PRESETS HOME/AWAY:This feature gives you the
ability to store two different kinds of station presets.
HOME can be used for stations available where you live
and AWAY can be for stations available outside of
your local broadcasting area. To set preset stations for
home and away perform the following steps:
1. Press the TUNE/SEL knob to enter the main menu.
2. Turn the TUNE/SEL knob until PRESETS
HOME/AWAY appears on the display.
3. Press the TUNE/SEL knob to select. HOME or
AWAY will appear on the display.
4. Press the CLR button to exit the display. To return
to the original display, repeatedly press the CLR
button or wait for the display to time out.
Follow the manual or automatic steps previously listed
for setting the preset pushbuttons for both home
and away.
3-85
Page 206 of 442

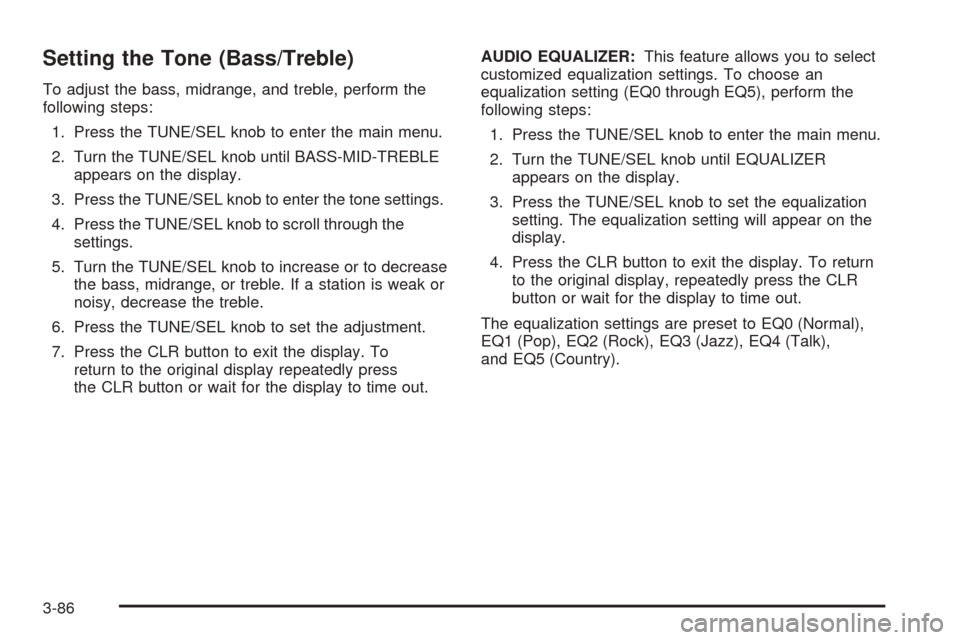
Setting the Tone (Bass/Treble)
To adjust the bass, midrange, and treble, perform the
following steps:
1. Press the TUNE/SEL knob to enter the main menu.
2. Turn the TUNE/SEL knob until BASS-MID-TREBLE
appears on the display.
3. Press the TUNE/SEL knob to enter the tone settings.
4. Press the TUNE/SEL knob to scroll through the
settings.
5. Turn the TUNE/SEL knob to increase or to decrease
the bass, midrange, or treble. If a station is weak or
noisy, decrease the treble.
6. Press the TUNE/SEL knob to set the adjustment.
7. Press the CLR button to exit the display. To
return to the original display repeatedly press
the CLR button or wait for the display to time out.AUDIO EQUALIZER:This feature allows you to select
customized equalization settings. To choose an
equalization setting (EQ0 through EQ5), perform the
following steps:
1. Press the TUNE/SEL knob to enter the main menu.
2. Turn the TUNE/SEL knob until EQUALIZER
appears on the display.
3. Press the TUNE/SEL knob to set the equalization
setting. The equalization setting will appear on the
display.
4. Press the CLR button to exit the display. To return
to the original display, repeatedly press the CLR
button or wait for the display to time out.
The equalization settings are preset to EQ0 (Normal),
EQ1 (Pop), EQ2 (Rock), EQ3 (Jazz), EQ4 (Talk),
and EQ5 (Country).
3-86
Page 207 of 442

Adjusting the Speakers (Balance/Fade)
To adjust the balance or fade, perform the
following steps:
1. Press the TUNE/SEL knob to enter the main menu.
2. Turn the TUNE/SEL knob until BASS-MID-TREBLE
appears on the display.
3. Press the TUNE/SEL knob to enter the tone settings.
4. Press the TUNE/SEL knob to scroll to BALANCE or
FADER.
5. Turn the TUNE/SEL knob to adjust the BALANCE
to the right or the left speakers and the FADER to
the front or the rear speakers.
6. Press the TUNE/SEL knob to set the adjustment.
7. Press the CLR button to exit the display. To
return to the original display, repeatedly press
the CLR button or wait for the display to time out.
EQ0 will not appear on the display when in this mode.
Using DSP
Available only with the premium Bose®audio system, this
feature is used to provide a choice of ve different
listening experiences: DSP normal, talk, spacious, rear
seat, and driver seat. DSP can be used while listening to
the radio or the CD player. The radio keeps separate
DSP settings for each band, preset, and source.
To select a DSP choice, perform the following steps:
1. Press the TUNE/SEL knob to enter the main menu.
2. Turn the TUNE/SEL knob until one of the ve
settings appears on the display.
3. Press the TUNE/SEL knob to select a DSP setting.
4. Press the CLR button to exit the display. To
return to the original display, repeatedly press
the CLR button or wait for the display to time out.
DSP NORMAL:This setting provides the best overall
audio performance for all passengers. DSP NORMAL
will not appear on the display when in this mode.
3-87
Page 208 of 442

TALK:This setting should be used when listening to
non-musical material such as news, talk shows,
sports broadcasts, and books on tape. Talk makes
spoken words sound very clear.
SPACIOUS:This setting is used to make the listening
space seem larger.
REAR SEAT:This setting adjusts the audio to give the
rear seat passenger(s) the best possible sound
quality. Sound quality for the front seat passengers may
be different when this setting is used.
DRIVER SEAT:This setting adjusts the audio to give
the driver the best possible sound quality. Sound quality
for the front and rear seat passenger(s) may be
different when this setting is used.RDS Messages
ALERT:Alert warns of local and national emergencies.
When, an alert announcement comes on the current
radio station or a related network station, ALERT
will appear on the display. You will hear the
announcement, even if the volume is low or a CD is
playing. If a CD is playing, play will stop during
the announcement. Alert announcements cannot be
turned off. If the radio tunes to a related network station
for the announcement, it will return to the original
station when the announcement is nished.
ALERT will not be affected by tests of the emergency
broadcast system. This feature is not supported by
all RDS stations.
3-88