2005 BUICK CENTURY mirror
[x] Cancel search: mirrorPage 1 of 348

Seats and Restraint Systems........................... 1-1
Front Seats
............................................... 1-2
Rear Seats
............................................... 1-6
Safety Belts
.............................................. 1-6
Child Restraints
.......................................1-27
Airbag System
.........................................1-49
Restraint System Check
............................1-58
Features and Controls..................................... 2-1
Keys
........................................................ 2-2
Doors and Locks
......................................2-10
Windows
.................................................2-14
Theft-Deterrent Systems
............................2-16
Starting and Operating Your Vehicle
...........2-17
Mirrors
....................................................2-29
OnStar
®System
......................................2-31
Storage Areas
.........................................2-33
Instrument Panel............................................. 3-1
Instrument Panel Overview
.......................... 3-4
Climate Controls
......................................3-18
Warning Lights, Gages, and Indicators
........3-28
Audio System(s)
.......................................3-44Driving Your Vehicle....................................... 4-1
Your Driving, the Road, and Your Vehicle
........ 4-2
Towing
...................................................4-36
Service and Appearance Care.......................... 5-1
Service
..................................................... 5-3
Fuel
......................................................... 5-5
Checking Things Under the Hood
...............5-10
Headlamp Aiming
.....................................5-45
Bulb Replacement
....................................5-47
Windshield Wiper Blade Replacement
.........5-52
Tires
......................................................5-53
Appearance Care
.....................................5-82
Vehicle Identi�cation
.................................5-90
Electrical System
......................................5-90
Capacities and Speci�cations
.....................5-96
Maintenance Schedule..................................... 6-1
Maintenance Schedule
................................ 6-2
Customer Assistance and Information.............. 7-1
Customer Assistance and Information
........... 7-2
Reporting Safety Defects
...........................7-10
Index.................................................................1
2005 Buick Century Owner ManualM
Page 67 of 348

Keys...............................................................2-2
Remote Keyless Entry System.........................2-4
Remote Keyless Entry System Operation...........2-5
Doors and Locks............................................2-10
Door Locks..................................................2-10
Power Door Locks........................................2-11
Programmable Automatic Door Locks..............2-11
Lockout Protection........................................2-12
Leaving Your Vehicle....................................2-12
Trunk..........................................................2-12
Windows........................................................2-14
Power Windows............................................2-15
Sun Visors...................................................2-15
Theft-Deterrent Systems..................................2-16
PASS-Key
®II ...............................................2-16
Starting and Operating Your Vehicle................2-17
New Vehicle Break-In....................................2-17
Ignition Positions..........................................2-18
Retained Accessory Power (RAP)...................2-19Starting Your Engine.....................................2-19
Engine Coolant Heater..................................2-20
Automatic Transaxle Operation.......................2-21
Parking Brake..............................................2-24
Shifting Into Park (P).....................................2-25
Shifting Out of Park (P).................................2-26
Parking Over Things That Burn.......................2-27
Engine Exhaust............................................2-27
Running Your Engine While You Are Parked.......2-28
Mirrors...........................................................2-29
Manual Rearview Mirror.................................2-29
Manual Rearview Mirror with OnStar
®..............2-29
Outside Power Mirrors...................................2-30
Outside Convex Mirror...................................2-30
OnStar
®System.............................................2-31
Storage Areas................................................2-33
Glove Box...................................................2-33
Front Storage Area.......................................2-33
Convenience Net..........................................2-33
Section 2 Features and Controls
2-1
Page 81 of 348

Power Windows
The switches on the driver’s door armrest are used to
control all of the windows. Each passenger door has its
own window switch.
Express-Down Window
The driver’s window switch has an express-down
feature. This switch is labeled AUTO. Tap the
switch rearward and the driver’s window will open
without stopping.To stop the window while it is lowering, press forward
on the switch. To raise the window, press and hold
the switch forward.
Window Lock-Out
The driver’s window controls also include a lock-out
switch. Press LOCK on this control to prevent
passengers from using their window switches. The
driver can still control all the windows with the lock on.
Press the other side of the window lock-out switch
to allow passengers individual control of their windows.
Sun Visors
To block out glare, you can swing down the visors.
You can also move them from side to side. The
visors also have extenders that you can pull out
for added coverage.
Visor Vanity Mirrors
Open the cover on the top of the sun visor to expose
the vanity mirror.
If your vehicle has the lighted vanity mirrors, the lamps
come on when you open the cover.
2-15
Page 95 of 348

Mirrors
Manual Rearview Mirror
Adjust all the mirrors so you can see clearly when
sitting in a comfortable driving position.
To reduce glare from other vehicles’ headlamps, pull the
lever at the bottom of the mirror, to the night position.
To return the mirror to the day position, push the lever.
Manual Rearview Mirror
with OnStar
®
The vehicle may have a mirror with Onstar®. It has a
lever located at the bottom between the two lamps.
Pull the lever to the night position to reduce glare from
other vehicles’ headlamps. Push the lever for the
day position.
There are two lamps located on the bottom of the
mirror. Press the button located next to each lamp to
turn it on or off.There are also three OnStar
®buttons located at the
bottom of the mirror. See your dealer for more
information on the system and how to subscribe to
OnStar
®. SeeOnStar®System on page 2-31for more
information about the services OnStar®provides.
2-29
Page 96 of 348

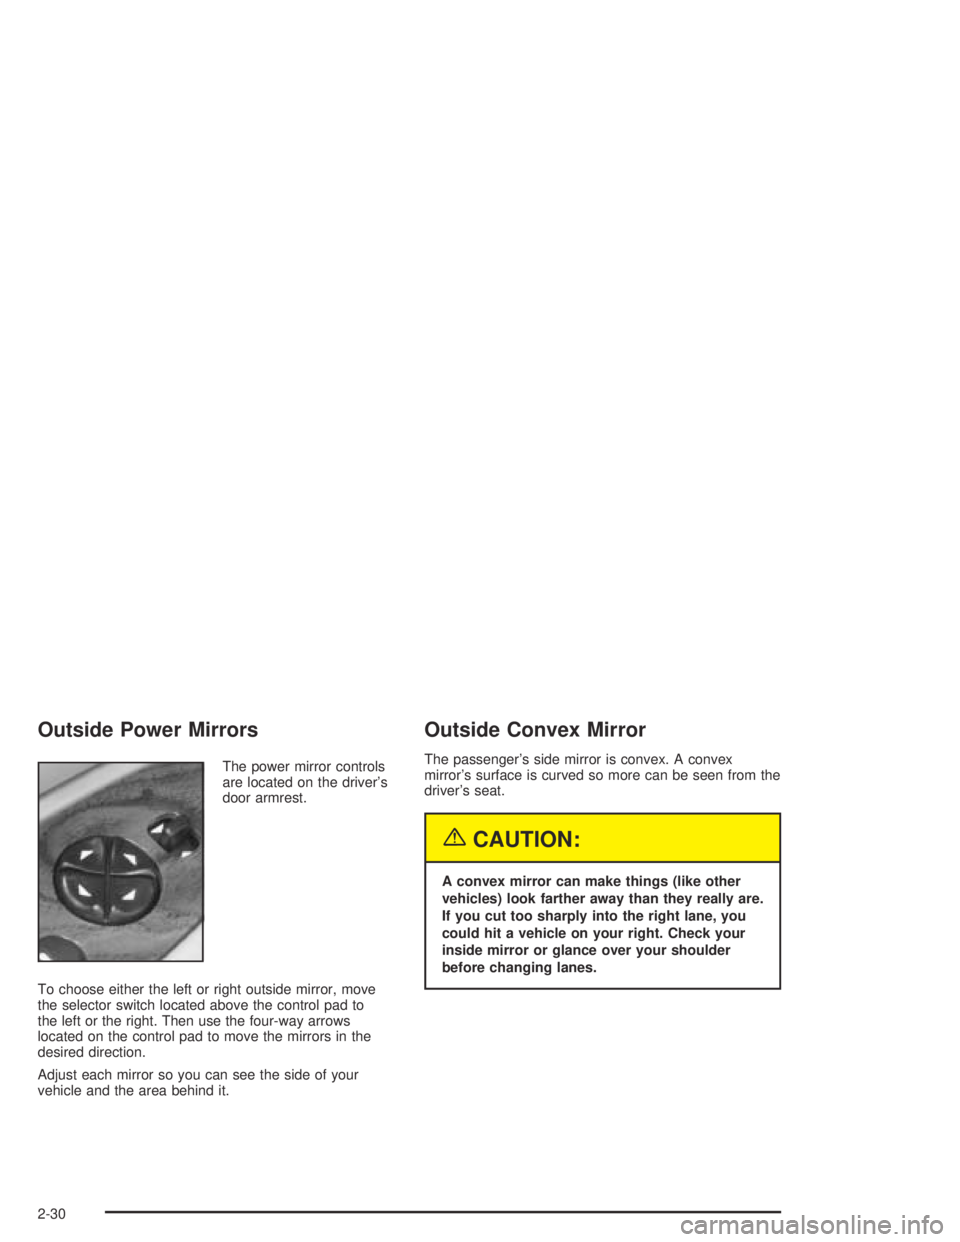
Outside Power Mirrors
The power mirror controls
are located on the driver’s
door armrest.
To choose either the left or right outside mirror, move
the selector switch located above the control pad to
the left or the right. Then use the four-way arrows
located on the control pad to move the mirrors in the
desired direction.
Adjust each mirror so you can see the side of your
vehicle and the area behind it.
Outside Convex Mirror
The passenger’s side mirror is convex. A convex
mirror’s surface is curved so more can be seen from the
driver’s seat.
{CAUTION:
A convex mirror can make things (like other
vehicles) look farther away than they really are.
If you cut too sharply into the right lane, you
could hit a vehicle on your right. Check your
inside mirror or glance over your shoulder
before changing lanes.
2-30
Page 117 of 348

Delayed Exit Lighting
This feature illuminates the interior for a period of time
after the ignition key is removed from the ignition.
The ignition must be off for delayed exit lighting to
work. When the ignition key is removed, interior
illumination will activate and remain on until one of the
following occurs:
The ignition is in RUN.
The power door locks are activated.
An illumination period of 25 seconds has elapsed.
If during the illumination period a door is opened,
the timed illumination period will be canceled and the
interior lamps will remain on.
Reading Lamps
The reading lamps are located on the underside of the
rearview mirror. Press the button next to each lamp
to turn it on and off.
Battery Run-Down Protection
This helps the vehicle’s battery from draining the battery
in case the interior courtesy lamps, reading lamps,
visor vanity lamps, trunk lamp, underhood lamp or glove
box lamps are left on. If any of these lamps are left
on while the ignition is off, they will automatically turn off
after 20 minutes. The lamps will not come back on
again until you do one of the following:
Turn the ignition on.
Turn the exterior lamps control off, then on.
Open a door.
If the vehicle has less than 15 miles (25 km) on the
odometer, the battery saver will turn off the lamps after
only three minutes.
3-17
Page 180 of 348

Do not get too close to the vehicle you want to
pass while you are awaiting an opportunity. For one
thing, following too closely reduces your area of
vision, especially if you are following a larger
vehicle. Also, you will not have adequate space if
the vehicle ahead suddenly slows or stops.
Keep back a reasonable distance.
When it looks like a chance to pass is coming up,
start to accelerate but stay in the right lane and do
not get too close. Time your move so you will be
increasing speed as the time comes to move into the
other lane. If the way is clear to pass, you will have a
running start that more than makes up for the
distance you would lose by dropping back. And if
something happens to cause you to cancel your
pass, you need only slow down and drop back again
and wait for another opportunity.
If other vehicles are lined up to pass a slow vehicle,
wait your turn. But take care that someone is not
trying to pass you as you pull out to pass the slow
vehicle. Remember to glance over your shoulder and
check the blind spot.
Check your mirrors, glance over your shoulder, and
start your left lane change signal before moving out
of the right lane to pass. When you are far enough
ahead of the passed vehicle to see its front in your
inside mirror, activate your right lane change signal
and move back into the right lane. Remember that
your right outside mirror is convex. The vehicle you
just passed may seem to be farther away from you
than it really is.
Try not to pass more than one vehicle at a time on
two-lane roads. Reconsider before passing the
next vehicle.
Do not overtake a slowly moving vehicle too rapidly.
Even though the brake lamps are not �ashing, it may
be slowing down or starting to turn.
If you are being passed, make it easy for the
following driver to get ahead of you. Perhaps you
can ease a little to the right.
4-14
Page 181 of 348

Loss of Control
Let us review what driving experts say about what
happens when the three control systems — brakes,
steering, and acceleration — do not have enough friction
where the tires meet the road to do what the driver
has asked.
In any emergency, do not give up. Keep trying to
steer and constantly seek an escape route or area of
less danger.
Skidding
In a skid, a driver can lose control of the vehicle.
Defensive drivers avoid most skids by taking reasonable
care suited to existing conditions, and by not overdriving
those conditions. But skids are always possible.
The three types of skids correspond to your vehicle’s
three control systems. In the braking skid, your wheels
are not rolling. In the steering or cornering skid, too much
speed or steering in a curve causes tires to slip and lose
cornering force. And in the acceleration skid, too much
throttle causes the driving wheels to spin.
A cornering skid and an acceleration skid are best
handled by easing your foot off the accelerator pedal.If your vehicle starts to slide, ease your foot off the
accelerator pedal and quickly steer the way you want
the vehicle to go. If you start steering quickly enough,
your vehicle may straighten out. Always be ready
for a second skid if it occurs.
Of course, traction is reduced when water, snow, ice,
gravel, or other material is on the road. For safety,
you will want to slow down and adjust your driving to
these conditions. It is important to slow down on slippery
surfaces because stopping distance will be longer and
vehicle control more limited.
While driving on a surface with reduced traction, try
your best to avoid sudden steering, acceleration,
or braking, including engine braking by shifting to a
lower gear. Any sudden changes could cause the tires
to slide. You may not realize the surface is slippery
until your vehicle is skidding. Learn to recognize warning
clues — such as enough water, ice, or packed snow
on the road to make a mirrored surface — and
slow down when you have any doubt.
If you have the anti-lock braking system, remember:
It helps avoid only the braking skid. If you do not have
anti-lock, then in a braking skid, where the wheels
are no longer rolling, release enough pressure on the
brakes to get the wheels rolling again. This restores
steering control. Push the brake pedal down steadily
when you have to stop suddenly. As long as the wheels
are rolling, you will have steering control.
4-15