2005 BMW Z4 ROADSTER 3.0I ignition
[x] Cancel search: ignitionPage 59 of 120

Reference
At a glance
Controls
Driving tips
Mobility
57
High beams/Standing lamps
1High beams
2Headlamp flasher
3Standing lamps
Left or right standing lamps*
As an additional feature, you can illuminate your
vehicle on either side for parking:
1.Turn the ignition key to position 0 or
remove it
2.Turn off the low beams
3.Push the lever in the appropriate turn-signal
direction, until it engages.
The standing lamps discharge the bat-
tery. Avoid using the standing lamps for
longer periods of time; otherwise, you may no
longer be able to start the engine.<
Fog lamps*
Tap the button to switch them on or off.
The parking lamps or low-beam head-
lamps must be switched on. A green indi-
cator lamp comes on in the instrument
cluster to indicate that the front fog lamps are on.If the automatic headlamp control is on,
the low beams will automatically come on
whenever you activate the front fog lamps.<
Instrument lighting
Turn the rotary dial to adjust the illumination
intensity.
Interior lamps
The interior lamps operate automatically.
To switch the interior lamps on and off
manually
Press button1 briefly.
If you would like the interior lamps to remain off
all the time, press and hold the button for
approx. 3 seconds.
Press the button briefly to revert to normal
operation.
Reading lamps*
Switch on and off with button2 adjacent to
each lamp.
Page 67 of 120
Reference
At a glance
Controls
Driving tips
Mobility
65
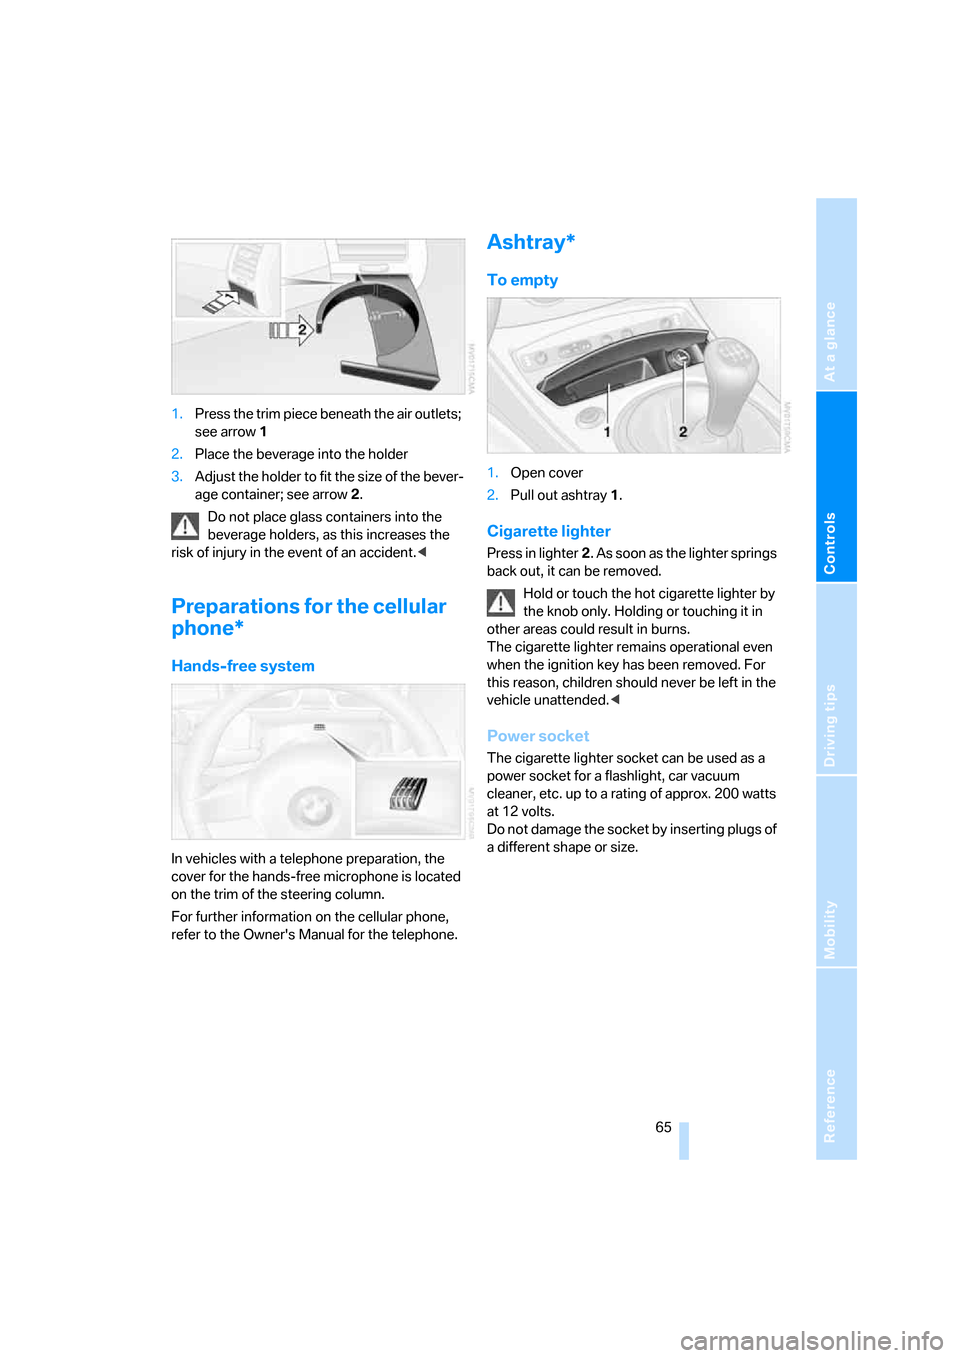
1.Press the trim piece beneath the air outlets;
see arrow1
2.Place the beverage into the holder
3.Adjust the holder to fit the size of the bever-
age container; see arrow2.
Do not place glass containers into the
beverage holders, as this increases the
risk of injury in the event of an accident.<
Preparations for the cellular
phone*
Hands-free system
In vehicles with a telephone preparation, the
cover for the hands-free microphone is located
on the trim of the steering column.
For further information on the cellular phone,
refer to the Owner's Manual for the telephone.
Ashtray*
To empty
1.Open cover
2.Pull out ashtray1.
Cigarette lighter
Press in lighter2. As soon as the lighter springs
back out, it can be removed.
Hold or touch the hot cigarette lighter by
the knob only. Holding or touching it in
other areas could result in burns.
The cigarette lighter remains operational even
when the ignition key has been removed. For
this reason, children should never be left in the
vehicle unattended.<
Power socket
The cigarette lighter socket can be used as a
power socket for a flashlight, car vacuum
cleaner, etc. up to a rating of approx. 200 watts
at 12 volts.
Do not damage the socket by inserting plugs of
a different shape or size.
Page 93 of 120
Reference
At a glance
Controls
Driving tips
Mobility
91
Replacement procedures
Onboard tool kit
The onboard tool kit is stored in a tool pouch. It
is located in the luggage compartment beneath
the floor panel.
Windshield wiper blades
1.Swich off the ignition
2.Fold the wiper arm completely out from the
windshield
3.Place the wiper blade in a position at right
angles to the wiper arm
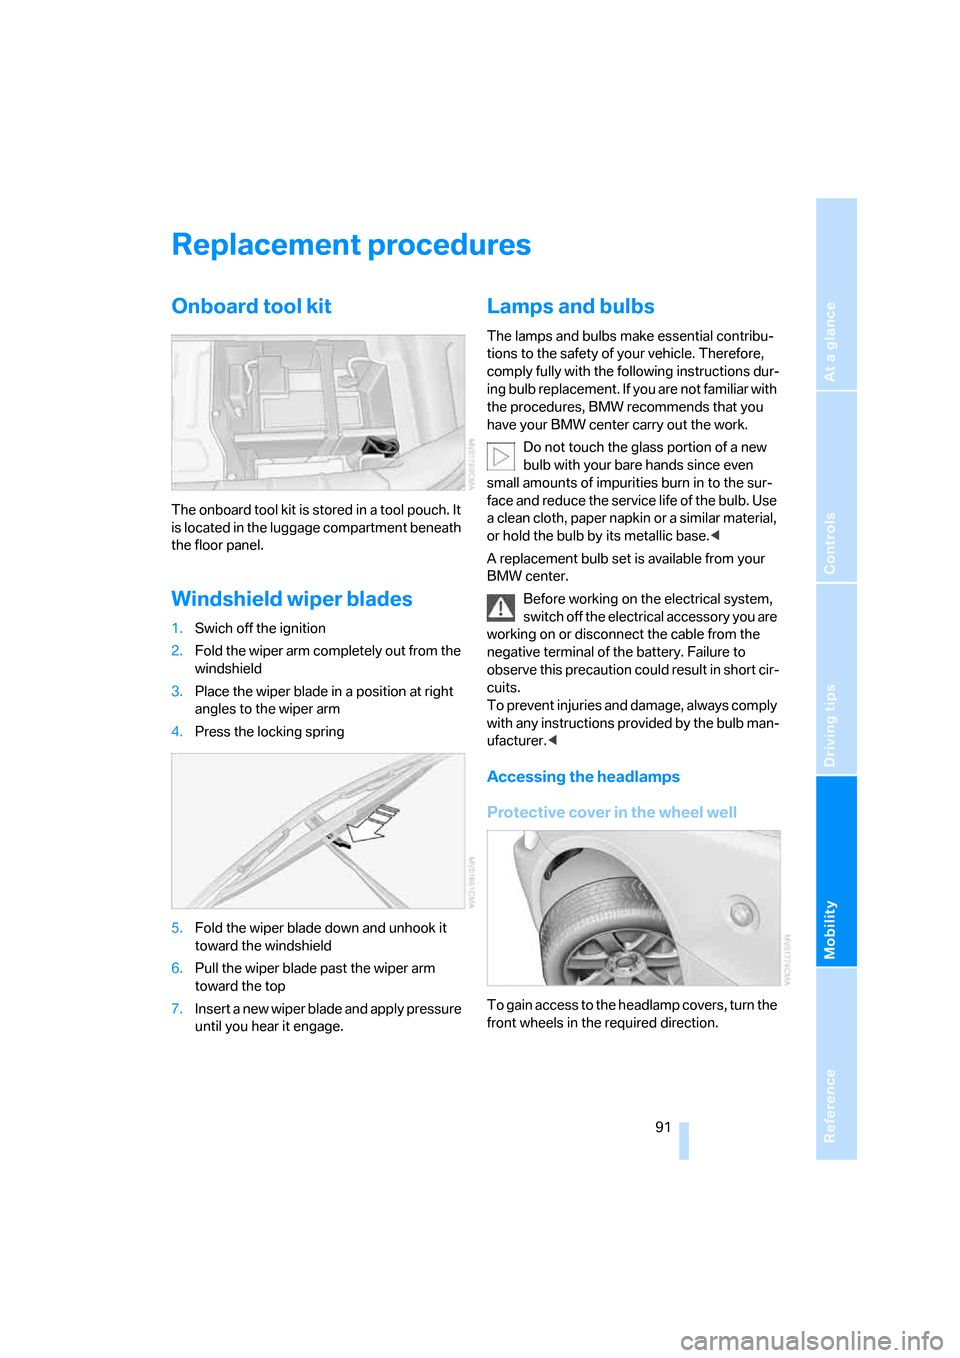
4.Press the locking spring
5.Fold the wiper blade down and unhook it
toward the windshield
6.Pull the wiper blade past the wiper arm
toward the top
7.Insert a new wiper blade and apply pressure
until you hear it engage.
Lamps and bulbs
The lamps and bulbs make essential contribu-
tions to the safety of your vehicle. Therefore,
comply fully with the following instructions dur-
ing bulb replacement. If you are not familiar with
the procedures, BMW recommends that you
have your BMW center carry out the work.
Do not touch the glass portion of a new
bulb with your bare hands since even
small amounts of impurities burn in to the sur-
face and reduce the service life of the bulb. Use
a clean cloth, paper napkin or a similar material,
or hold the bulb by its metallic base.<
A replacement bulb set is available from your
BMW center.
Before working on the electrical system,
switch off the electrical accessory you are
working on or disconnect the cable from the
negative terminal of the battery. Failure to
observe this precaution could result in short cir-
cuits.
To prevent injuries and damage, always comply
with any instructions provided by the bulb man-
ufacturer.<
Accessing the headlamps
Protective cover in the wheel well
To gain access to the headlamp covers, turn the
front wheels in the required direction.
Page 98 of 120
Giving and receiving assistance
96
Giving and receiving assistance
Receiving assistance
The BMW Group's Mobile Service offers you
24-hour assistance in the event of a breakdown,
even on weekends and holidays.
The telephone number of the Mobile Service
control center in your country is listed in the
Contact brochure.
If your vehicle has the necessary equipment,
you can contact the Mobile Service or issue an
emergency call using buttons in the center con-
sole, behind the parking brake under a cover.
When the emergency call is initiated, a tele-
phone connection is established with the BMW
Assist response center.
If your vehicle is equipped with an activated
BMW Assist and the current location of the
vehicle can be determined, this location is
transmitted to the BMW Assist response cen-
ter.
Requirements for initiating an emergency call or
contacting Mobile Service:
>Ignition key in position 1 or higher
>The car phone must be registered with a
mobile network
>The emergency call system must be opera-
tional.
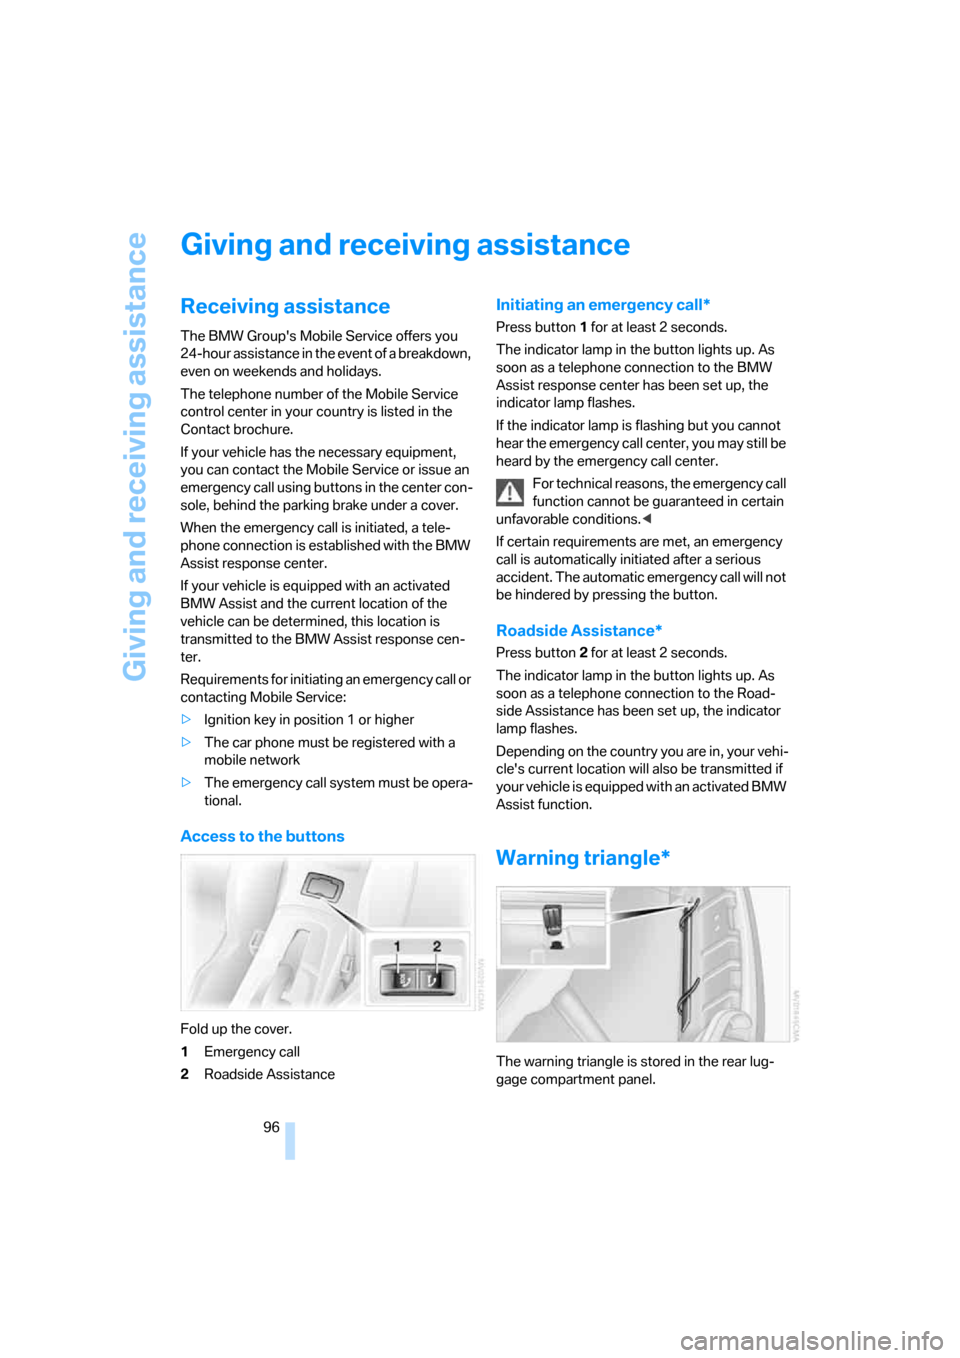
Access to the buttons
Fold up the cover.
1Emergency call
2Roadside Assistance
Initiating an emergency call*
Press button1 for at least 2 seconds.
The indicator lamp in the button lights up. As
soon as a telephone connection to the BMW
Assist response center has been set up, the
indicator lamp flashes.
If the indicator lamp is flashing but you cannot
hear the emergency call center, you may still be
heard by the emergency call center.
For technical reasons, the emergency call
function cannot be guaranteed in certain
unfavorable conditions.<
If certain requirements are met, an emergency
call is automatically initiated after a serious
accident. The automatic emergency call will not
be hindered by pressing the button.
Roadside Assistance*
Press button2 for at least 2 seconds.
The indicator lamp in the button lights up. As
soon as a telephone connection to the Road-
side Assistance has been set up, the indicator
lamp flashes.
Depending on the country you are in, your vehi-
cle's current location will also be transmitted if
your vehicle is equipped with an activated BMW
Assist function.
Warning triangle*
The warning triangle is stored in the rear lug-
gage compartment panel.
Page 100 of 120

Giving and receiving assistance
98 positive terminal of the battery or to an aux-
iliary jump-starting terminal of the vehicle to
be jump-started.
Your BMW is equipped with a special nut,
refer also to the engine compartment over-
view on page85
3.With the– jumper cable, connect the nega-
tive terminals of both vehicles.
To do this:
Attach one cable clamp to the negative bat-
tery terminal or to a suitable ground on the
engine or body work of the support vehicle.
Attach the second cable clamp to the nega-
tive battery terminal or to a suitable ground
on the engine or body work of the vehicle to
be jump-started.
Starting the engine
1.Start the engine of the support vehicle and
let it run for several minutes at a slightly ele-
vated engine idle speed
2.Start the engine of the other vehicle as
usual.
If the first start attempt is not successful,
wait a few minutes before another attempt
in order to allow the discharged battery to
recharge
3.Allow the engines to run for several minutes
4.Then disconnect the jumper cables in
reverse sequence
5.Depending on the cause of the fault, have
the battery checked and recharged.
Never use spray starter fluids to start the
engine.<
Towing and tow-starting the
vehicle
Using the towing eyelet
The screw-in towing eyelet is stored in the
onboard tool kit; be sure that it remains in the
vehicle at all times. It can be attached at the
front or rear of your BMW.
Observe the following instructions in
order to avoid damaging the towing eye-
let or the vehicle: use only the towing eyelet
supplied with the vehicle, and screw it in firmly
until it stops. Use the towing eyelet for towing
on paved roads only. Avoid subjecting the tow-
ing eyelet to lateral loads, e.g. do not lift the
vehicle using the towing eyelet.<
Access to the threaded socket
Press out the cover with a screwdriver inserted
in the recess at the top.
Being towed
Make sure that the ignition key is in posi-
tion 1, because the steering lock could
otherwise engage and the vehicle could no
longer be steered. There is no power assist
while the engine is off. Therefore, you will need
to exert more force to brake and steer the vehi-
cle.<
Turn on the hazard warning flashers, if required
by national regulations. If the electrical system
has failed, clearly identify the vehicle being
towed, e.g. by placing a sign or a warning trian-
gle in the rear window.
Vehicles with manual transmission
Gearshift lever in idling position.
Page 101 of 120
Reference
At a glance
Controls
Driving tips
Mobility
99
Vehicles with automatic transmission
Selector lever in position N.
Do not exceed a towing speed of 45 mph /
70 km/h or a towing distance of 90 miles/
150 km. Otherwise, the automatic transmission
could be damaged.<
Vehicles with sequential manual
gearbox SMG
To push or tow the vehicle, turn on the ignition
and move the selector lever to position N, then
turn the ignition off again.
Towing methods
In some countries, it is not permitted to tow the
vehicle with a tow bar or tow rope on public
roads.
Familiarize yourself with the applicable towing
regulations for the country in which you are
driving.
With a tow bar
The towing vehicle must not be lighter
than the vehicle being towed; otherwise,
vehicle handling can no longer be controlled.<
The towing eyelets of both vehicles should be
on the same side. If the tow bar can only be
used in a diagonal position, please note the fol-
lowing:
>Clearance is restricted while you are driving
around corners
>The inclination of the tow bar produces late-
ral force.
Only attach the tow bar to the towing eye-
lets. Other parts of the vehicle could oth-
erwise be damaged.<
With a tow rope
When the towing vehicle is driving off, make
sure that the tow rope is taut.
Use nylon ropes or straps for towing
because they prevent sudden jerking
movements. Attach tow ropes only to the tow-
ing eyelet. Other parts of the vehicle could oth-
erwise be damaged.<
With a tow truck
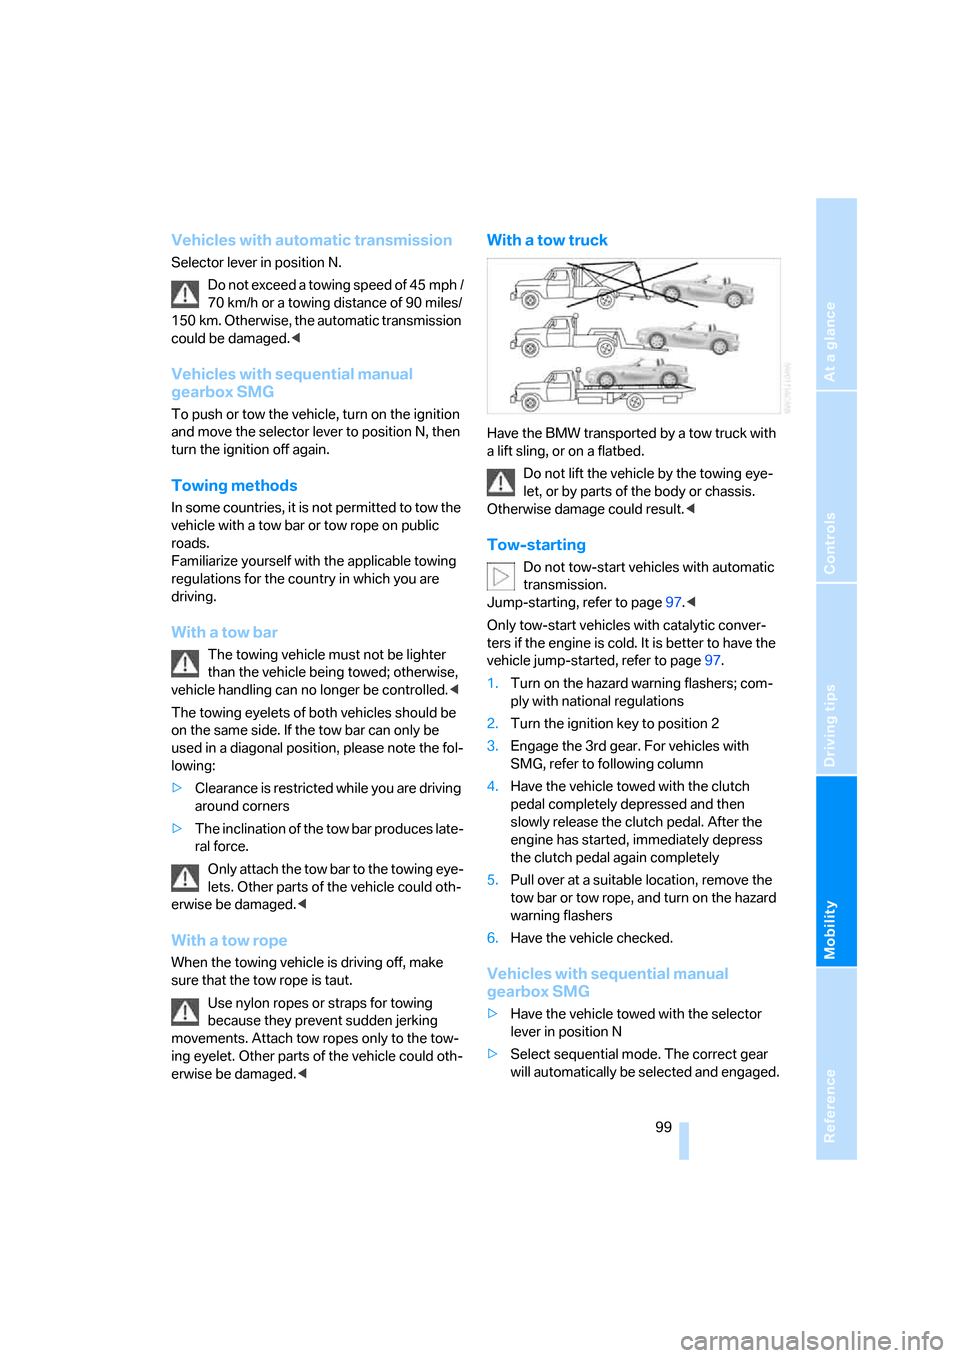
Have the BMW transported by a tow truck with
a lift sling, or on a flatbed.
Do not lift the vehicle by the towing eye-
let, or by parts of the body or chassis.
Otherwise damage could result.<
Tow-starting
Do not tow-start vehicles with automatic
transmission.
Jump-starting, refer to page97.<
Only tow-start vehicles with catalytic conver-
ters if the engine is cold. It is better to have the
vehicle jump-started, refer to page97.
1.Turn on the hazard warning flashers; com-
ply with national regulations
2.Turn the ignition key to position 2
3.Engage the 3rd gear. For vehicles with
SMG, refer to following column
4.Have the vehicle towed with the clutch
pedal completely depressed and then
slowly release the clutch pedal. After the
engine has started, immediately depress
the clutch pedal again completely
5.Pull over at a suitable location, remove the
tow bar or tow rope, and turn on the hazard
warning flashers
6.Have the vehicle checked.
Vehicles with sequential manual
gearbox SMG
>Have the vehicle towed with the selector
lever in position N
>Select sequential mode. The correct gear
will automatically be selected and engaged.
Page 108 of 120
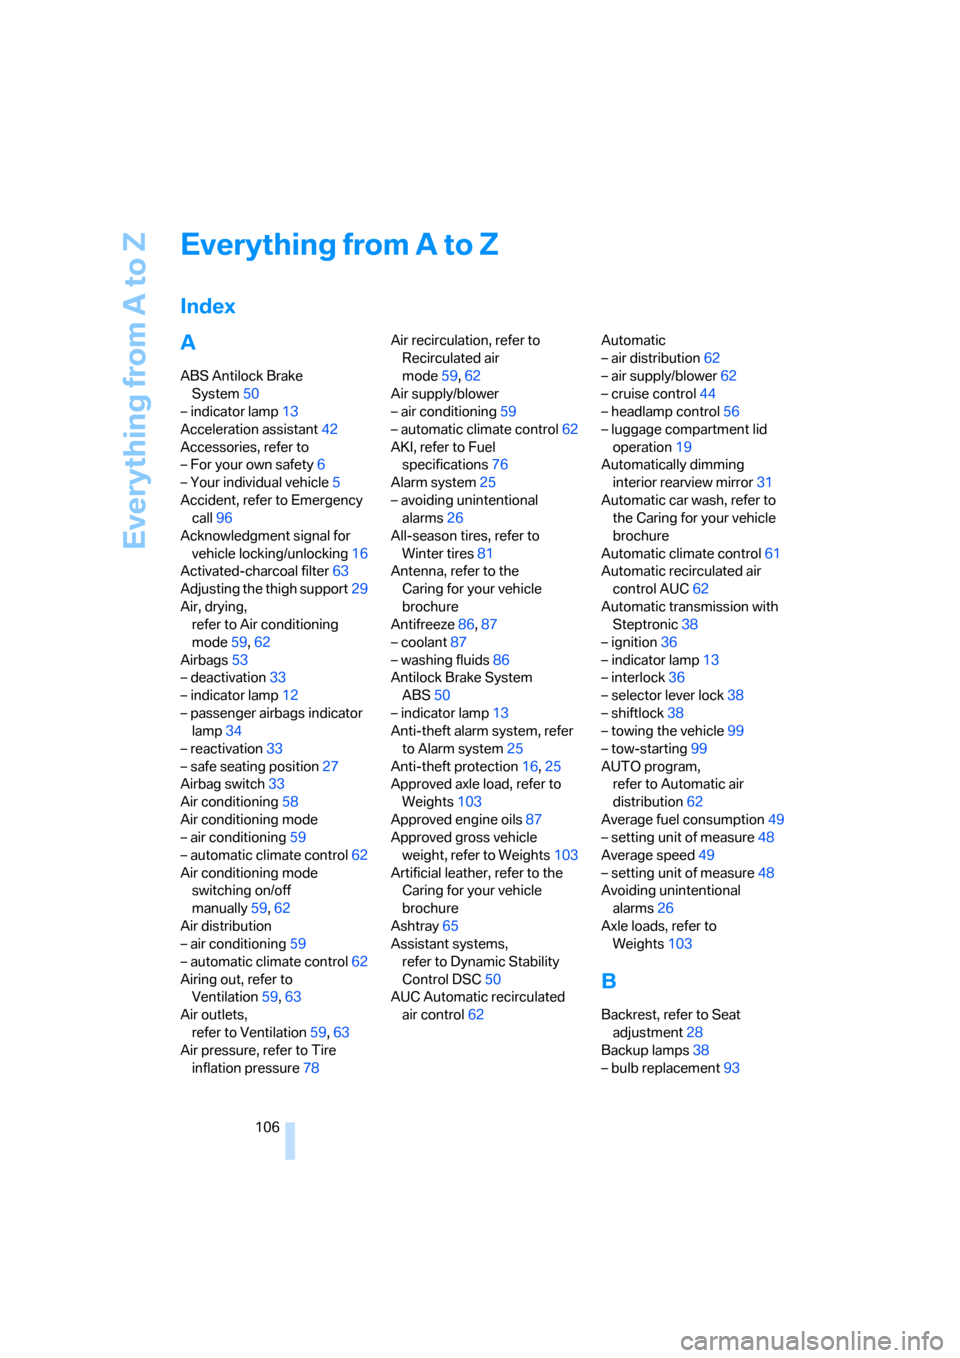
Everything from A to Z
106
A
ABS Antilock Brake
System50
– indicator lamp13
Acceleration assistant42
Accessories, refer to
– For your own safety6
– Your individual vehicle5
Accident, refer to Emergency
call96
Acknowledgment signal for
vehicle locking/unlocking16
Activated-charcoal filter63
Adjusting the thigh support29
Air, drying,
refer to Air conditioning
mode59,62
Airbags53
– deactivation33
– indicator lamp12
– passenger airbags indicator
lamp34
– reactivation33
– safe seating position27
Airbag switch33
Air conditioning58
Air conditioning mode
– air conditioning59
– automatic climate control62
Air conditioning mode
switching on/off
manually59,62
Air distribution
– air conditioning59
– automatic climate control62
Airing out, refer to
Ventilation59,63
Air outlets,
refer to Ventilation59,63
Air pressure, refer to Tire
inflation pressure78Air recirculation, refer to
Recirculated air
mode59,62
Air supply/blower
– air conditioning59
– automatic climate control62
AKI, refer to Fuel
specifications76
Alarm system25
– avoiding unintentional
alarms26
All-season tires, refer to
Winter tires81
Antenna, refer to the
Caring for your vehicle
brochure
Antifreeze86,87
– coolant87
– washing fluids86
Antilock Brake System
ABS50
– indicator lamp13
Anti-theft alarm system, refer
to Alarm system25
Anti-theft protection16,25
Approved axle load, refer to
Weights103
Approved engine oils87
Approved gross vehicle
weight, refer to Weights103
Artificial leather, refer to the
Caring for your vehicle
brochure
Ashtray65
Assistant systems,
refer to Dynamic Stability
Control DSC50
AUC Automatic recirculated
air control62Automatic
– air distribution62
– air supply/blower62
– cruise control44
– headlamp control56
– luggage compartment lid
operation19
Automatically dimming
interior rearview mirror31
Automatic car wash, refer to
the Caring for your vehicle
brochure
Automatic climate control61
Automatic recirculated air
control AUC62
Automatic transmission with
Steptronic38
– ignition36
– indicator lamp13
– interlock36
– selector lever lock38
– shiftlock38
– towing the vehicle99
– tow-starting99
AUTO program,
refer to Automatic air
distribution62
Average fuel consumption49
– setting unit of measure48
Average speed49
– setting unit of measure48
Avoiding unintentional
alarms26
Axle loads, refer to
Weights103
B
Backrest, refer to Seat
adjustment28
Backup lamps38
– bulb replacement93
Everything from A to Z
Index
Page 112 of 120
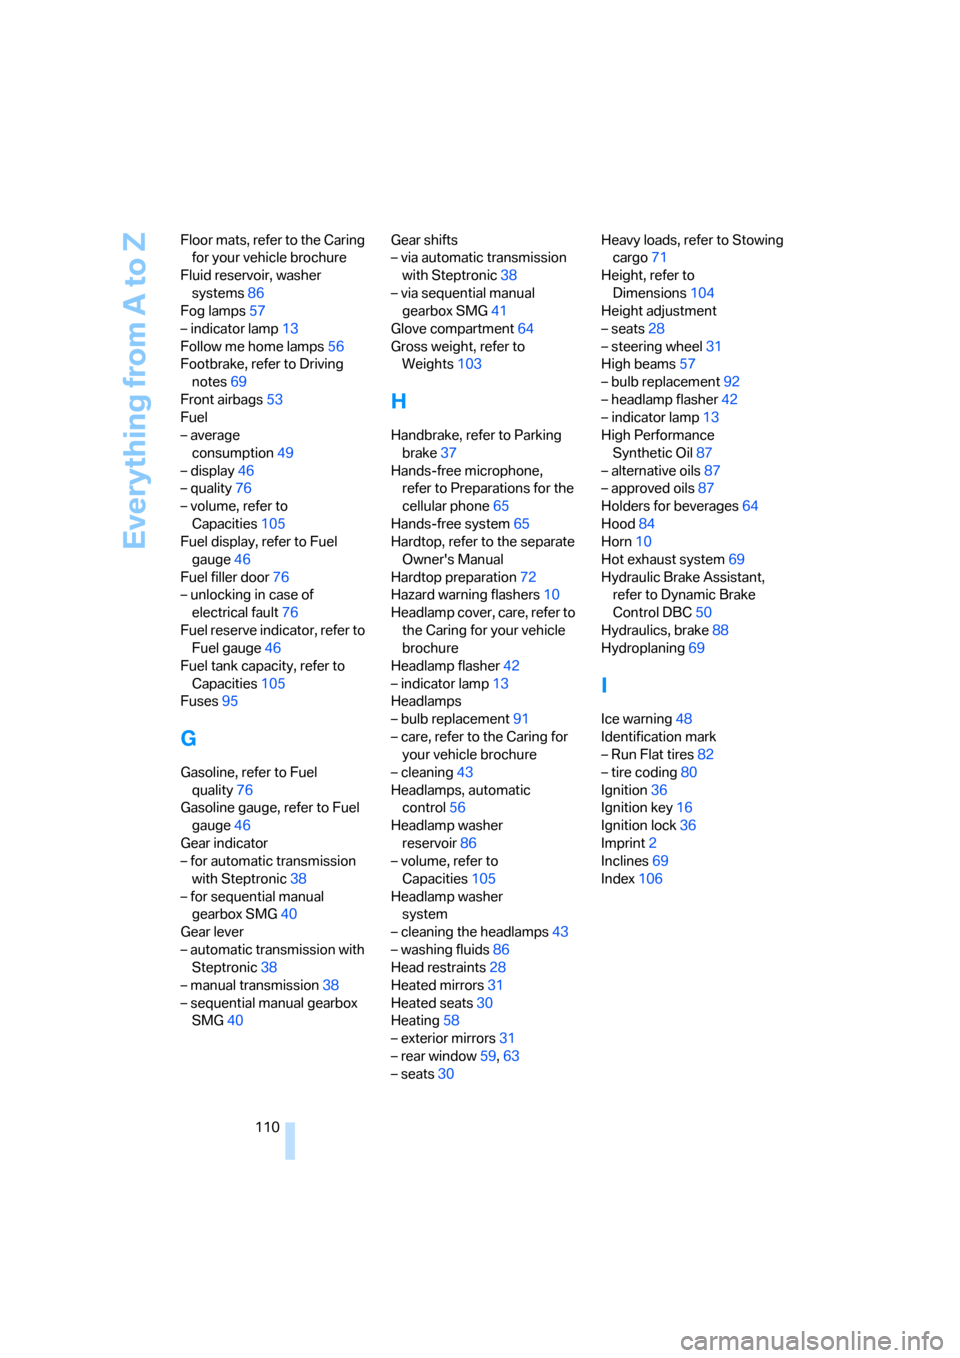
Everything from A to Z
110 Floor mats, refer to the Caring
for your vehicle brochure
Fluid reservoir, washer
systems86
Fog lamps57
– indicator lamp13
Follow me home lamps56
Footbrake, refer to Driving
notes69
Front airbags53
Fuel
– average
consumption49
– display46
– quality76
– volume, refer to
Capacities105
Fuel display, refer to Fuel
gauge46
Fuel filler door76
– unlocking in case of
electrical fault76
Fuel reserve indicator, refer to
Fuel gauge46
Fuel tank capacity, refer to
Capacities105
Fuses95
G
Gasoline, refer to Fuel
quality76
Gasoline gauge, refer to Fuel
gauge46
Gear indicator
– for automatic transmission
with Steptronic38
– for sequential manual
gearbox SMG40
Gear lever
– automatic transmission with
Steptronic38
– manual transmission38
– sequential manual gearbox
SMG40Gear shifts
– via automatic transmission
with Steptronic38
– via sequential manual
gearbox SMG41
Glove compartment64
Gross weight, refer to
Weights103
H
Handbrake, refer to Parking
brake37
Hands-free microphone,
refer to Preparations for the
cellular phone65
Hands-free system65
Hardtop, refer to the separate
Owner's Manual
Hardtop preparation72
Hazard warning flashers10
Headlamp cover, care, refer to
the Caring for your vehicle
brochure
Headlamp flasher42
– indicator lamp13
Headlamps
– bulb replacement91
– care, refer to the Caring for
your vehicle brochure
– cleaning43
Headlamps, automatic
control56
Headlamp washer
reservoir86
– volume, refer to
Capacities105
Headlamp washer
system
– cleaning the headlamps43
– washing fluids86
Head restraints28
Heated mirrors31
Heated seats30
Heating58
– exterior mirrors31
– rear window59,63
– seats30Heavy loads, refer to Stowing
cargo71
Height, refer to
Dimensions104
Height adjustment
– seats28
– steering wheel31
High beams57
– bulb replacement92
– headlamp flasher42
– indicator lamp13
High Performance
Synthetic Oil87
– alternative oils87
– approved oils87
Holders for beverages64
Hood84
Horn10
Hot exhaust system69
Hydraulic Brake Assistant,
refer to Dynamic Brake
Control DBC50
Hydraulics, brake88
Hydroplaning69
I
Ice warning48
Identification mark
– Run Flat tires82
– tire coding80
Ignition36
Ignition key16
Ignition lock36
Imprint2
Inclines69
Index106