2005 BMW Z4 ROADSTER 3.0I ignition
[x] Cancel search: ignitionPage 45 of 120

Reference
At a glance
Controls
Driving tips
Mobility
43
Washer/wiper system
0Wipers retracted
1Intermittent operation or rain sensor
*
2Normal wiper speed
3Fast wiper speed
4Brief wipe
5To set interval time or sensitivity of the rain
sensor
Intermittent operation or rain sensor*
In vehicles equipped without a rain sensor, the
wipe interval is predefined.
The interval time can be set over four stages. In
addition, the wipe interval is varied automati-
cally depending on road speed.
On vehicles with a rain sensor, the wipe interval
is automatically controlled according to rain
intensity. You can adjust the sensitivity of the
rain sensor. It is positioned on the windshield,
directly in front of the interior rearview mirror.
To activate intermittent operation or
rain sensor
Ignition key in position 1 or higher:
Lever to position 1.
In any case, the wipers will move once across
the windshield.
In vehicles equipped with a rain sensor, you can
leave the lever continuously in position1. Then,
as long as the ignition key is in position 1 or
higher, you only need to activate the rain sen-
sor.
Turn rotary dial5 briefly.
To set interval time or sensitivity of the
rain sensor
Turn rotary dial 5.
To deactivate intermittent operation or
rain sensor
Return lever to position 0.
Turn the rain sensor off in automatic car
washes. Failure to do so could result in
damage caused by undesired wiper activa-
tion.<
Normal wiper speed
When the vehicle is stopped the wipers switch
to intermittent wipe, except in vehicles without
rain sensor.
Fast wiper speed
When the vehicle is stopped the wipers switch
to normal wiping speed, except in vehicles with-
out rain sensor.
Cleaning windshield and headlamps*
0Wipers retracted
1Cleaning windshield and headlamps
*
The system sprays washer fluid against the
windshield and activates the wipers for a brief
period.
If the vehicle's lights are on, the headlamps are
cleaned at reasonable intervals.
Do not use the washers if there is any
danger that the fluid will freeze on the
windshield, otherwise vision could be
obscured. Therefore, use antifreeze, refer to
page86.
Do not use the washers if the fluid reservoir is
Page 46 of 120

Driving
44 empty, as the washer pump will otherwise be
damaged.<
Windshield washer nozzles
The windshield washer nozzles are automati-
cally heated
* when the engine is running or the
ignition is switched on.
Cruise control*
Do not use cruise control when unfavor-
able conditions make it inadvisable to
drive at a constant speed. Otherwise, the vehi-
cle could go out of control and an accident
could be caused. Unfavorable conditions
include, for example, twisting roads, high traffic
density, or adverse road conditions such as
snow, rain, ice, or loose surfaces.<
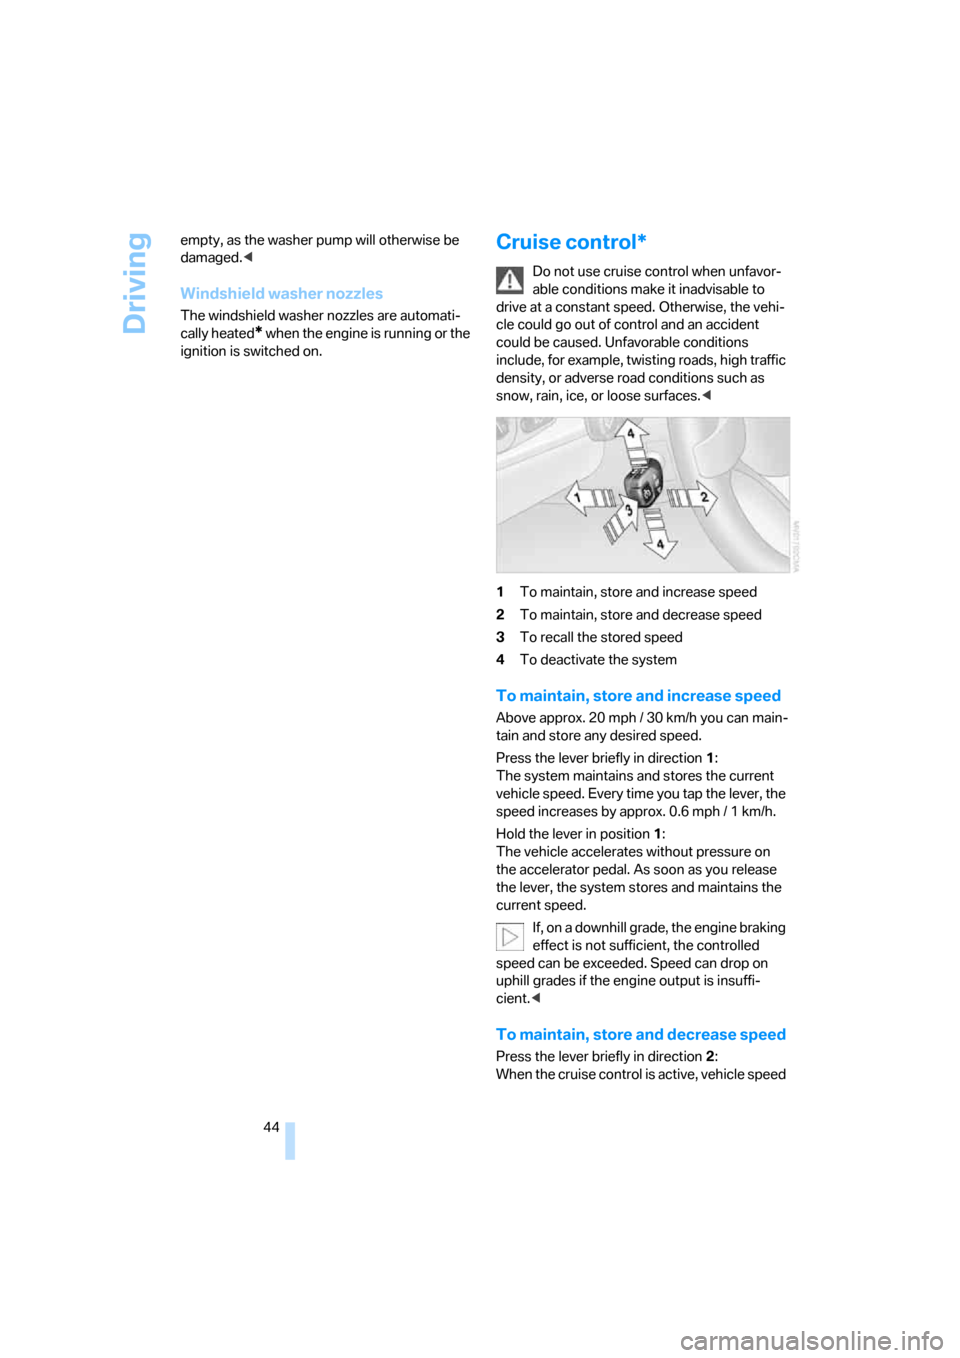
1To maintain, store and increase speed
2To maintain, store and decrease speed
3To recall the stored speed
4To deactivate the system
To maintain, store and increase speed
Above approx. 20 mph / 30 km/h you can main-
tain and store any desired speed.
Press the lever briefly in direction 1:
The system maintains and stores the current
vehicle speed. Every time you tap the lever, the
speed increases by approx. 0.6 mph / 1 km/h.
Hold the lever in position1:
The vehicle accelerates without pressure on
the accelerator pedal. As soon as you release
the lever, the system stores and maintains the
current speed.
If, on a downhill grade, the engine braking
effect is not sufficient, the controlled
speed can be exceeded. Speed can drop on
uphill grades if the engine output is insuffi-
cient.<
To maintain, store and decrease speed
Press the lever briefly in direction 2:
When the cruise control is active, vehicle speed
Page 48 of 120

Everything under control
46
Everything under control
Odometer
1Odometer
2Trip odometer
Odometer
With the ignition key in position 0, you can acti-
vate the displays shown in the illustration by
pressing the button – see arrow – in the instru-
ment cluster.
Trip odometer
To set to zero
Ignition key position 1
Keep the button pressed until the trip odometer
counter is set to zero.
Tachometer
Never allow the engine to operate with the nee-
dle in the red overspeed sector of the gauge.
To protect the engine, the fuel supply is inter-
rupted when you approach this sector.
Fuel gauge
When indicator lamp1 begins to stay on contin-
uously, there are still approx. 2.1 gallons/8 liters
of fuel in the fuel tank.
Tank capacity: approx. 14.5 gallons/55 liters.
If the tilt of the vehicle varies, for example when
you are driving in mountainous areas, the nee-
dle may fluctuate slightly.
Fill the fuel tank well before it is empty.
Driving to the last drop of fuel can prevent
the engine from operating properly and result in
damage.<
When you switch on the ignition, the indicator
lamp comes on briefly to indicate an operational
check.
Engine coolant temperature
gauge
Blue
The engine is still cold. Drive at moderate
engine and vehicle speeds.
Page 49 of 120

Reference
At a glance
Controls
Driving tips
Mobility
47
Between the blue and red zones
Normal operating range. The needle may rise as
far as the edge of the red sector during normal
operation.
Red
When you switch on the ignition, warning
lamp1 comes on briefly to indicate an opera-
tional check.
Comes on while driving:
The engine has overheated. Stop and switch
the engine off immediately and allow it to cool
down.
For checking the coolant level, refer to page87.
Service interval display
Remaining distance to next service
The displays shown in the illustration appear for
a few seconds when the ignition key is in
position 1 or after the engine is started.
The next service due appears with the message
OIL SERVICE or INSPECTION, together with
the distance remaining in miles – in kilometers
in Canada – before the next scheduled service.
The computer bases its calculations of the
remaining distance on the preceding driving
style.
A flashing message and a minus sign in front of
the number mean that the service interval has
already been exceeded by the distance shown
on the display. Please contact your BMW center
for an appointment.
Outside temperature
If the vehicle is not equipped with a computer,
the display in the instrument cluster always
shows the outside temperature.
Clock
If you wish to have a permanent time display,
you can have it appear in the car radio display,
refer to the Owner's Manual for Radio.
You can set the clock and the time display in the
car radio as follows.
To set
Ignition key in position 1 or higher:
Hours
1.Keep button2 pressed for several seconds
until the hours are displayed and the colon
flashes
2.Press button1 repeatedly until the required
hour is set
Minutes
3.Press button2 to switch to the minutes dis-
play
Page 50 of 120

Everything under control
48 4.Press button1 repeatedly until the required
minutes are set
5.Press button2 to confirm the settings.
The set time of day is transferred to the car
radio display or appears in the instrument clus-
ter display.
Display mode
In ignition key position 0:
Press button1.
The time of day is displayed for several sec-
onds.
Computer*
Mode selection
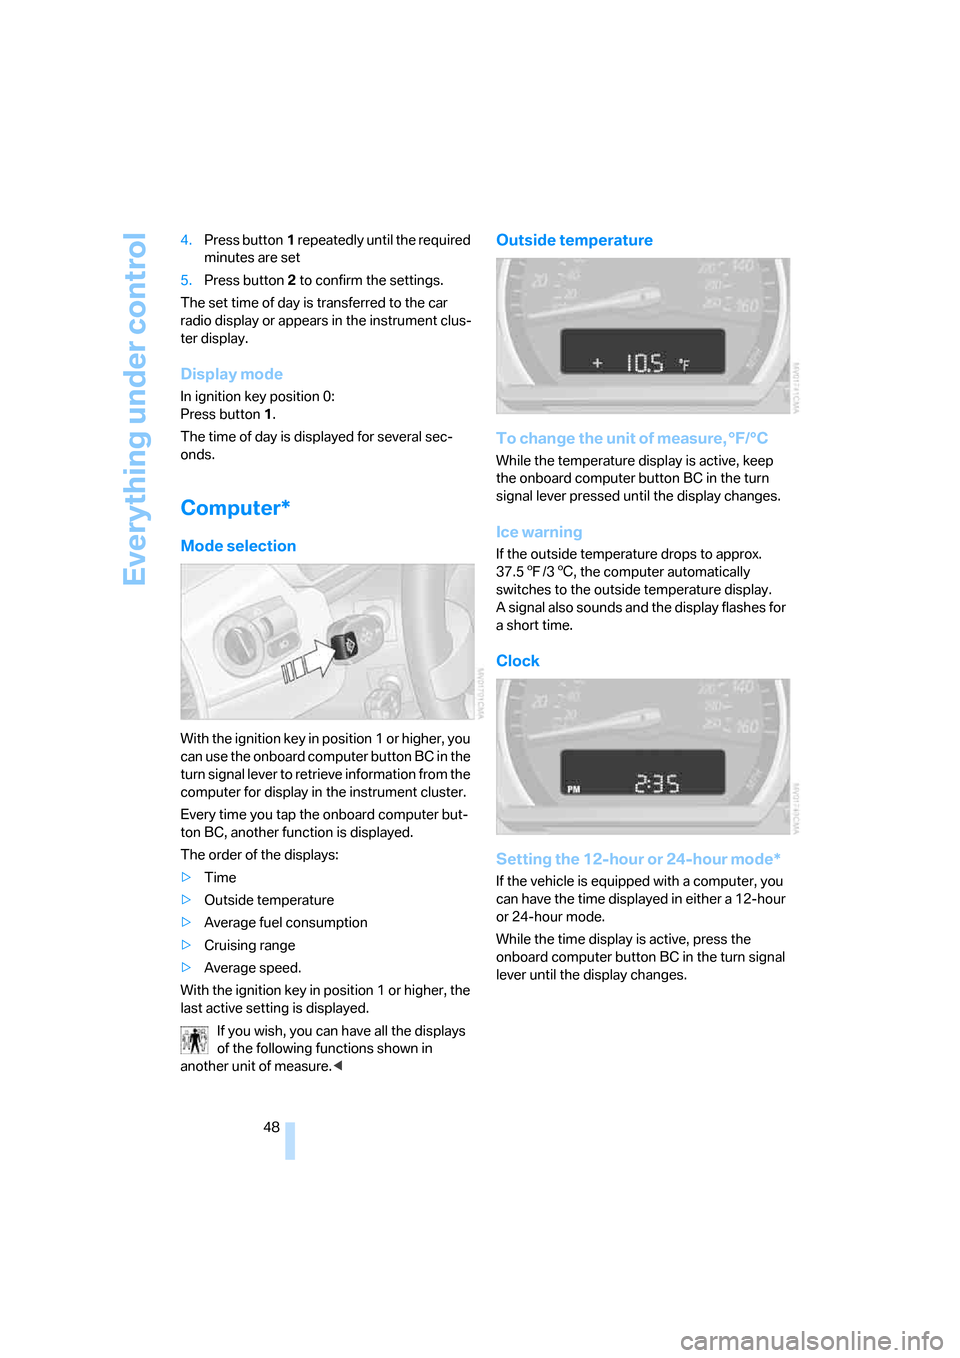
With the ignition key in position 1 or higher, you
can use the onboard computer button BC in the
turn signal lever to retrieve information from the
computer for display in the instrument cluster.
Every time you tap the onboard computer but-
ton BC, another function is displayed.
The order of the displays:
>Time
>Outside temperature
>Average fuel consumption
>Cruising range
>Average speed.
With the ignition key in position 1 or higher, the
last active setting is displayed.
If you wish, you can have all the displays
of the following functions shown in
another unit of measure.<
Outside temperature
To change the unit of measure, °F/°C
While the temperature display is active, keep
the onboard computer button BC in the turn
signal lever pressed until the display changes.
Ice warning
If the outside temperature drops to approx.
37.57/36, the computer automatically
switches to the outside temperature display.
A signal also sounds and the display flashes for
a short time.
Clock
Setting the 12-hour or 24-hour mode*
If the vehicle is equipped with a computer, you
can have the time displayed in either a 12-hour
or 24-hour mode.
While the time display is active, press the
onboard computer button BC in the turn signal
lever until the display changes.
Page 56 of 120

Technology for safety and driving convenience
54 For information on the correct seating position,
refer to page27.
Do not apply adhesive materials to the
cover panels of the airbags, cover them or
modify them in any other way. Do not attempt to
remove the airbag retention system from the
vehicle. Never modify or tamper with either the
wiring or the individual components in the air-
bag system. This category includes the uphol-
stery in the center of the steering wheel, on the
instrument panel, and the side trim panels on
the doors. Do not attempt to remove or disman-
tle the steering wheel.
Do not touch the individual components
directly after the system has been triggered,
because there is a danger of burns.
If you note any indication of system malfunc-
tion, if you desire to have an airbag deactivated,
or if the airbag retention system is triggered in
response to an accident, you should always
entrust all inspection, repair and dismantling
operations to your BMW center.
Unprofessional attempts to service the system
could lead to failure in an emergency or to
undesired airbag activation, either of which
could result in personal injury.
To ensure compliance with official safety regu-
lations, please also entrust disposal of airbag
generators to a BMW center.<
Airbag warning information is also provided on
the sun visors.
Automatic deactivation of the
passenger airbags
Before transporting a child on the pas-
senger seat be sure to observe the infor-
mation/instructions under Transporting chil-
dren safely, refer to page33.<
Your BMW has a seat occupation detection
system. By evaluating the weight on the pas-
senger's seat, the system detects whether or
not the seat is occupied by a child in the child-
restraint system or an adult.
>When a child is seated in the child-restraint
system or in an empty seat, the front, side
and knee airbags are automatically deacti-
vated on the passenger's side>When an adult is traveling in the passen-
ger's seat, the front, side and knee airbags
remain active on the passenger's side.
Although not desired, it can occur in the
case of heavier children that the passen-
ger airbags remain active or, in the case of very
light adults or young persons, that the passen-
ger airbags are deactivated. The condition of
the passenger airbag system will be shown by
the indicator lamp in the central console, refer
to Passenger airbag status lamp below. If the
indicator lamp indicates that the passenger air-
bags are active and you want them to be deac-
tivated, the airbags have to be deactivated with
the vehicle ignition key and the key switch on
the outer passenger's side of the instrument
panel. Apart from passengers, do not place any
additional objects on the passenger seat. Do
not fit seat covers, seat cushion padding, ball
mats or other items to the passenger seat
unless they are specifically recommended by
BMW. Do not place any items under the seat.
Otherwise, the function of the seat occupation
detection could be impaired.<
Operational readiness of the airbag
system
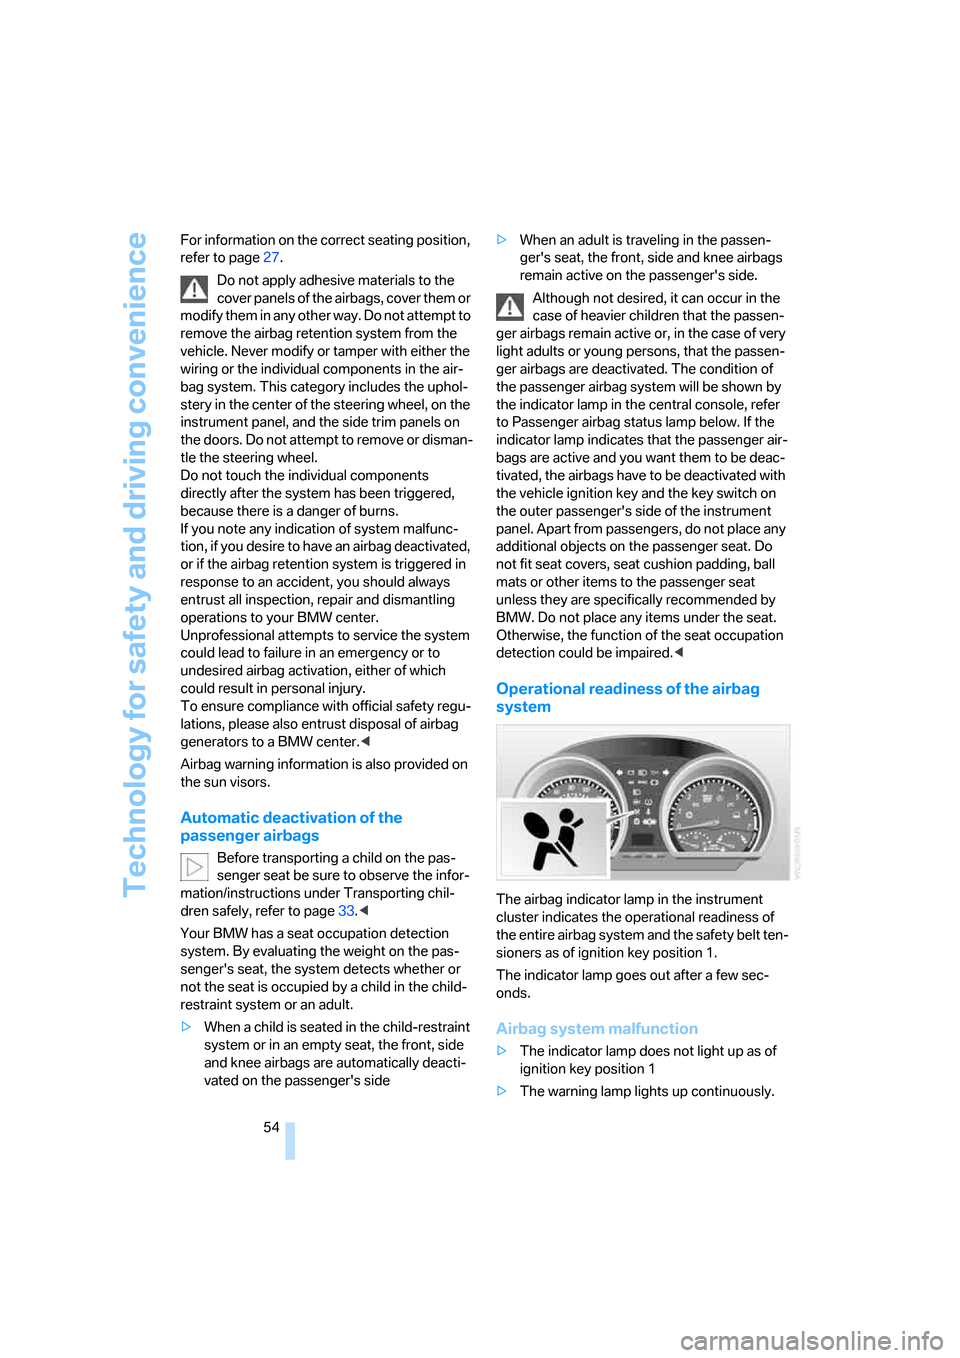
The airbag indicator lamp in the instrument
cluster indicates the operational readiness of
the entire airbag system and the safety belt ten-
sioners as of ignition key position 1.
The indicator lamp goes out after a few sec-
onds.
Airbag system malfunction
>The indicator lamp does not light up as of
ignition key position 1
>The warning lamp lights up continuously.
Page 57 of 120

Reference
At a glance
Controls
Driving tips
Mobility
55
In the event of a malfunction, have the air-
bag system checked immediately. Other-
wise, there is a risk that the system may not
respond in the expected manner to an impact
occurring within its normal response range.<
Passenger airbag status lamp
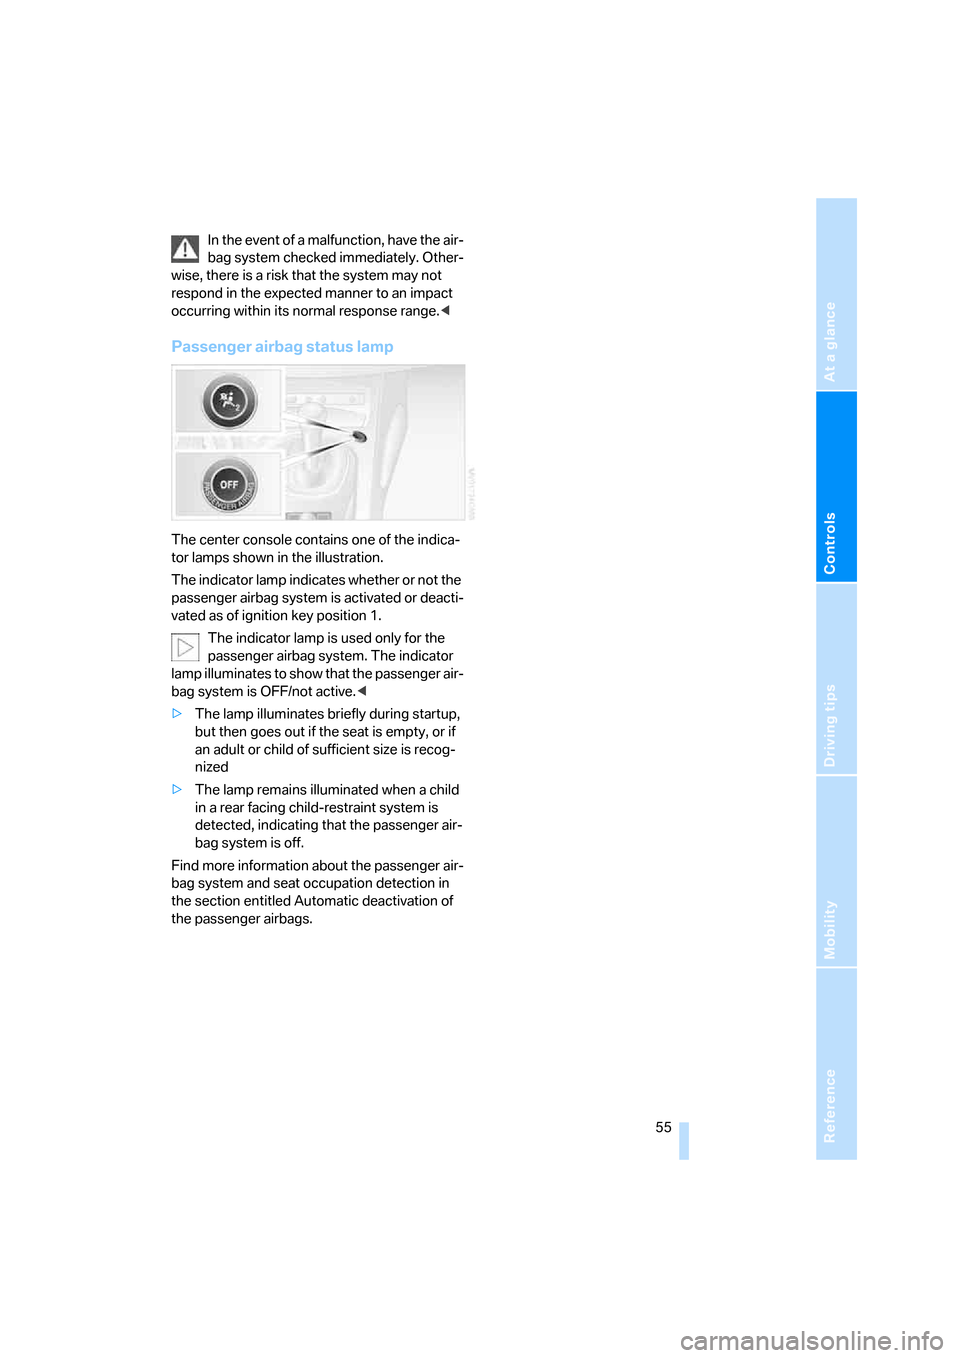
The center console contains one of the indica-
tor lamps shown in the illustration.
The indicator lamp indicates whether or not the
passenger airbag system is activated or deacti-
vated as of ignition key position 1.
The indicator lamp is used only for the
passenger airbag system. The indicator
lamp illuminates to show that the passenger air-
bag system is OFF/not active.<
>The lamp illuminates briefly during startup,
but then goes out if the seat is empty, or if
an adult or child of sufficient size is recog-
nized
>The lamp remains illuminated when a child
in a rear facing child-restraint system is
detected, indicating that the passenger air-
bag system is off.
Find more information about the passenger air-
bag system and seat occupation detection in
the section entitled Automatic deactivation of
the passenger airbags.
Page 58 of 120

Lamps
56
Lamps
Parking lamps/Low beams
Parking lamps
The front, rear and side vehicle lighting
is switched on. You can use the parking
lamps to signal the position of the vehi-
cle when it is parked. For information on lighting
on one side of the vehicle for parking, which is
available as an additional feature, refer to
page57.
Low beams
When you switch off the ignition with
the low beam headlamps on, only the
parking lamps will remain on.
Defective bulb
The indicator lamp lights up:
At least one bulb of the vehicle's exte-
rior lighting has failed.
For replacing bulbs refer to page91.
Follow me home lamps
When you activate the headlamp flasher after
parking the vehicle and switching off the lights,
the low beams will come on for a brief period.
You can also have this function activated/
deactivated if you wish.<
LIGHTS ON warning
Whenever you open the driver's door after hav-
ing turned the ignition key to position 0, you will
hear an acoustic signal for a few seconds to remind you that the lamps have not been
switched off.
Daytime driving lamps*
If you desire, the light switch can be left in the
second position:
When the ignition is switched off, the external
lighting is also switched off.
You can have the activation settings for
the daytime driving lamps programmed
on your vehicle.<
Automatic headlamp control*
When the switch is set to this position,
the system automatically activates and
cancels the low beams in response to
changes in ambient light, for example in tun-
nels, at dusk, and when it is raining or snowing.
The low-beam headlamps remain on
regardless of the ambient light when you
switch on the fog lamps.<
Automatic headlamp control cannot
serve as a substitute for the driver's jud-
gement in determining when the vehicle lights
should be switched on. For example, the sen-
sors are not able to detect fog. To avoid safety
risks, you should respond to these kinds of low-
visibility situations by switching the headlamps
on manually.<
You can have the sensitivity of your vehi-
cle's automatic headlamp control
adjusted.<