2005 BMW Z4 ROADSTER 2.5I tow
[x] Cancel search: towPage 23 of 120
Reference
At a glance
Controls
Driving tips
Mobility
21
Never store the convertible top for longer
than one day while it is wet to avoid per-
manent damage from moisture.<
To open
Operate the convertible top only when
the vehicle is stationary.
Before opening the convertible top, make sure
that the convertible top compartment panel has
been folded down in the luggage compartment
to avoid any possible damage, refer to
page19.<
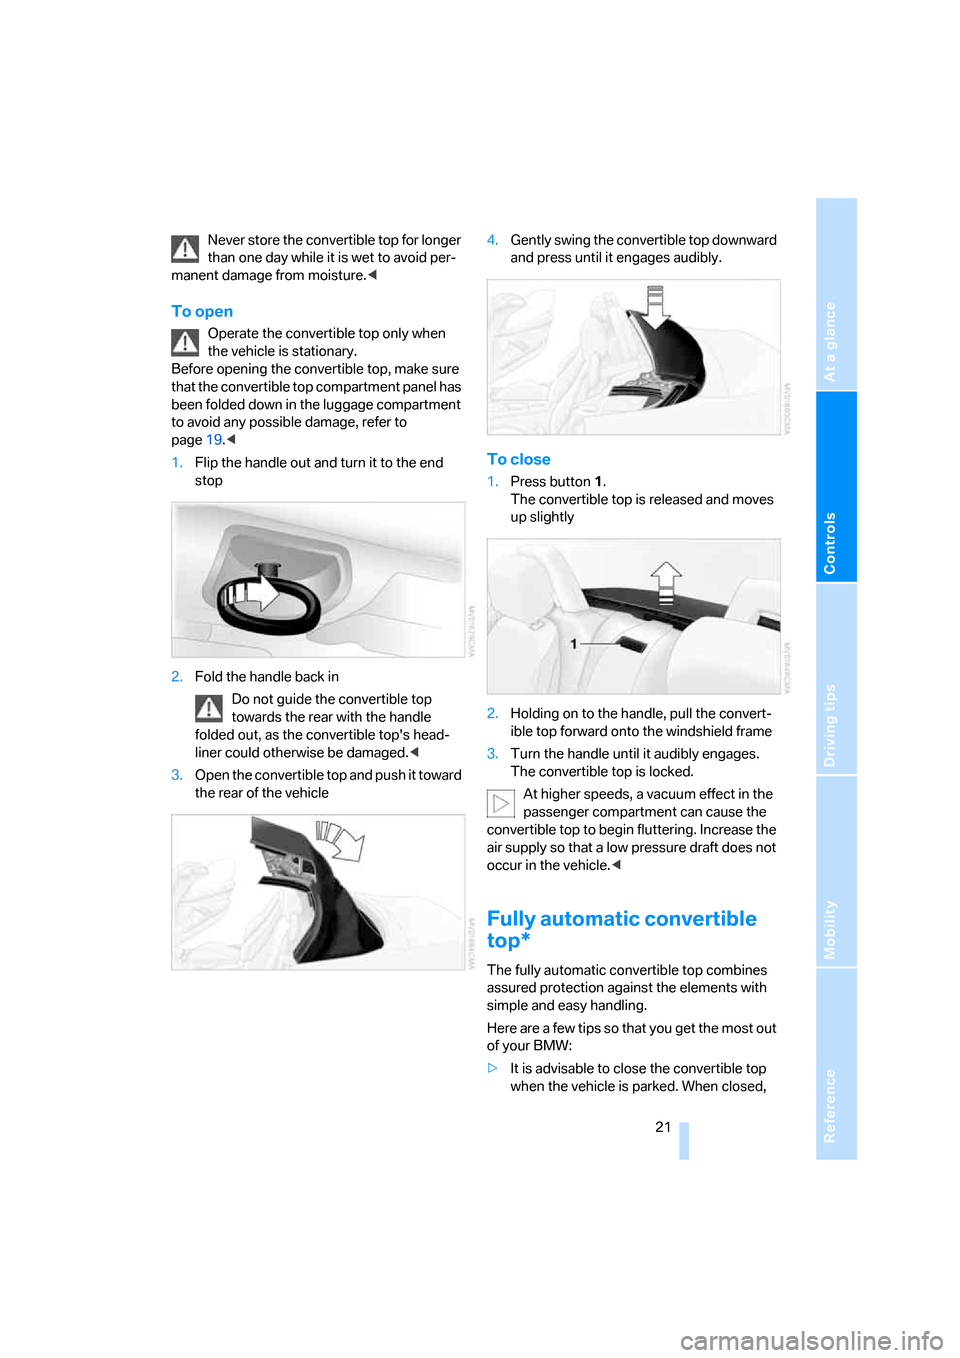
1.Flip the handle out and turn it to the end
stop
2.Fold the handle back in
Do not guide the convertible top
towards the rear with the handle
folded out, as the convertible top's head-
liner could otherwise be damaged.<
3.Open the convertible top and push it toward
the rear of the vehicle4.Gently swing the convertible top downward
and press until it engages audibly.
To close
1.Press button1.
The convertible top is released and moves
up slightly
2.Holding on to the handle, pull the convert-
ible top forward onto the windshield frame
3.Turn the handle until it audibly engages.
The convertible top is locked.
At higher speeds, a vacuum effect in the
passenger compartment can cause the
convertible top to begin fluttering. Increase the
air supply so that a low pressure draft does not
occur in the vehicle.<
Fully automatic convertible
top*
The fully automatic convertible top combines
assured protection against the elements with
simple and easy handling.
Here are a few tips so that you get the most out
of your BMW:
>It is advisable to close the convertible top
when the vehicle is parked. When closed,
Page 27 of 120

Reference
At a glance
Controls
Driving tips
Mobility
25
Clothes hooks
Clothes hooks1 are located on the wind deflec-
tor panels in the rollover bars.
Do not hang heavy objects on the hooks.
If you do, they could endanger the pas-
sengers, for example during braking or evasive
maneuvers.<
Storage
For storage, e.g. to achieve a better view to the
rear when the convertible top is closed, there
are two brackets on the inside of the luggage
compartment lid.
Insert the wind deflector into the brackets.
Make sure that the wind deflector cannot
be damaged by objects in the luggage
compartment.<
Alarm system*
The concept
The vehicle alarm system responds:
>When a door, the hood or the luggage com-
partment lid is opened
>When attempts are made to start the vehi-
cle
>When there are movements in the vehicle
interior: interior motion sensor, refer to
page26
>To alterations in the vehicle tilt, e.g. as
would occur during attempts to steal the
wheels or tow the vehicle
>To interruption of battery voltage.
The alarm produced by the system in the event
of unauthorized vehicle entry and attempted
theft depends on the country version:
>Sounding of an acoustical alarm for
30 seconds
>Activation of the hazard warning flashers for
approx. five minutes.
Arming and disarming the alarm
system
When the vehicle is locked or unlocked either
with the remote control or at the driver's door
lock, the alarm system is simultaneously armed
or disarmed.
The hazard warning flashers blink once when
the alarm system has been properly armed.
You can have different acknowledgment
signals set to confirm arming and disarm-
ing.<
You can still open the luggage compartment
even when the system is armed by pressing the
button on the remote control, refer to
page17. When it is closed, the lid is once again
secured.
Manual operation of the luggage com-
partment lid triggers the alarm. Refer to
page18.<
Page 28 of 120

Opening and closing
26
Stopping the alarm
>Unlock the vehicle with the remote control,
refer to page16
>or turn the ignition key to position 1, refer to
page36.
Indicator lamp displays
>The indicator lamp beneath the interior mir-
ror flashes continuously:
The system is armed
>The indicator lamp flashes immediately
after the vehicle is locked:
Doors or luggage compartment lid are not
completely closed. Even if you do not close
the area causing the alert, the remaining
areas are secured and the indicator lamp
flashes continuously after 10 seconds.
However, the interior motion sensor is not
activated
>If the indicator lamp goes out immediately
after the vehicle is unlocked:
No manipulation or attempted intrusions
have been detected in the period since the
system was armed
>If the indicator lamp flashes for 10 seconds
immediately after the vehicle is unlocked:
An attempted entry has been detected in
the period since the system was armed.
After an alarm has been triggered, the indicator
lamp will flash continuously.
Tilt alarm sensor and interior motion
sensor
Tilt alarm sensor
The inclination of the vehicle is monitored. The
alarm system reacts, e.g. to attempts to steal
the wheels or tow the vehicle.
Interior motion sensor*
The system monitors the footwells and the
seating areas of the driver and passenger. Even
when the convertible top is open, the alarm sys-
tem including the interior motion sensor is
armed. Objects falling into the vehicle, e.g.
leaves, can trigger unintentional alarms, refer to
Avoiding unintentional alarms.
Avoiding unintentional alarms
The tilt alarm sensor and interior motion sensor
can be deactivated at the same time. In this way
you can avoid unintentional alarms, e.g. in the
following situations:
>In duplex garages
>When the vehicle is being transported on a
car-carrying train
>If animals are to be left in the vehicle.
To deactivate the tilt alarm and interior
motion sensors
Press the button on the remote control
a second time immediately after locking.
The indicator lamp lights up briefly and then
flashes continuously. The tilt alarm sensor and
the interior motion sensor are deactivated until
the vehicle is again unlocked and locked.
Page 41 of 120
Reference
At a glance
Controls
Driving tips
Mobility
39
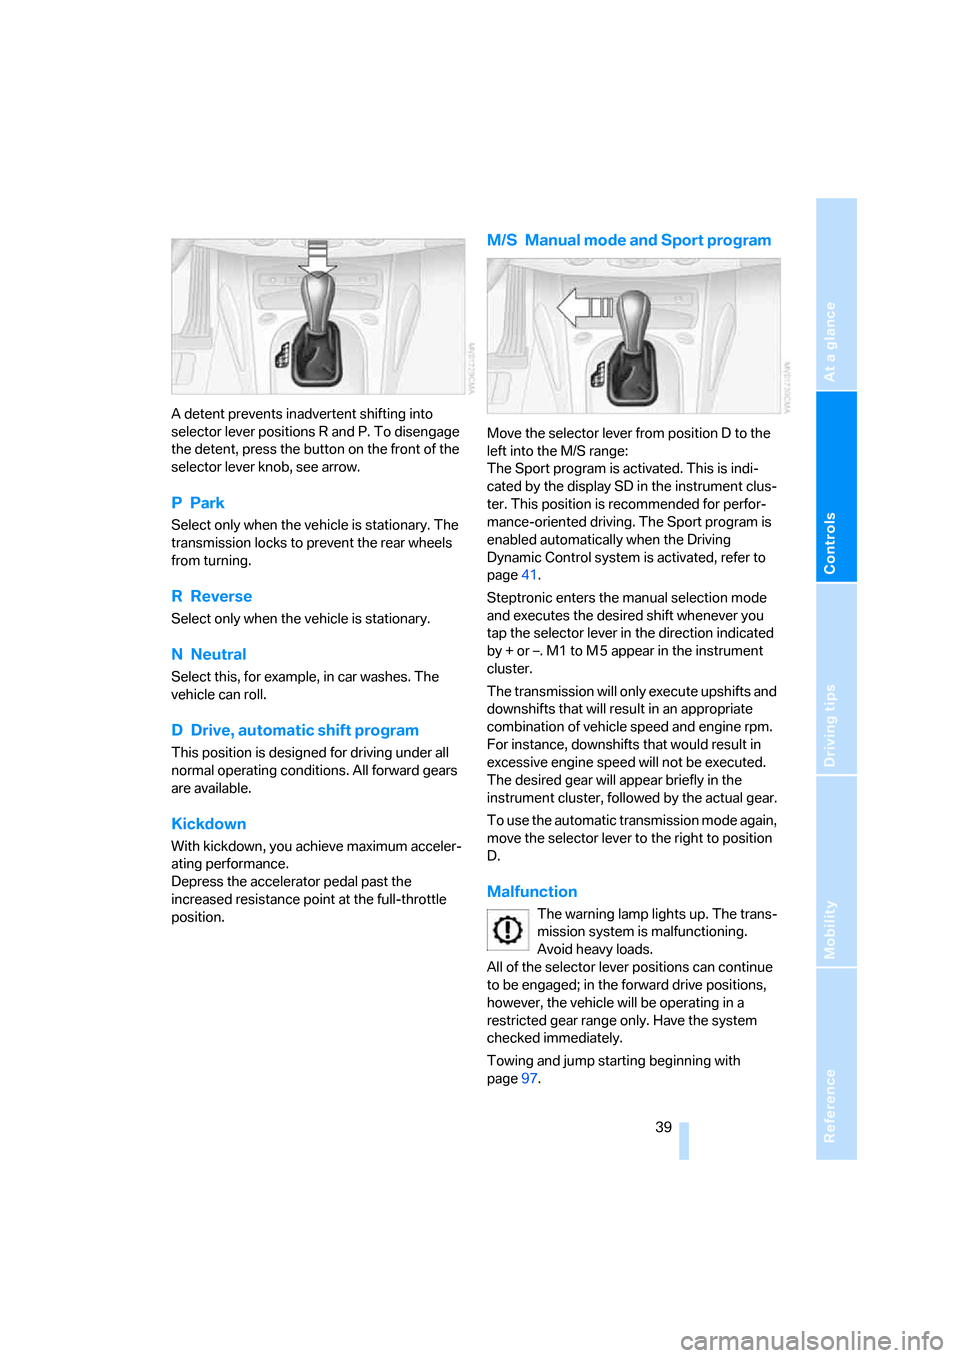
A detent prevents inadvertent shifting into
selector lever positions R and P. To disengage
the detent, press the button on the front of the
selector lever knob, see arrow.
PPark
Select only when the vehicle is stationary. The
transmission locks to prevent the rear wheels
from turning.
R Reverse
Select only when the vehicle is stationary.
NNeutral
Select this, for example, in car washes. The
vehicle can roll.
D Drive, automatic shift program
This position is designed for driving under all
normal operating conditions. All forward gears
are available.
Kickdown
With kickdown, you achieve maximum acceler-
ating performance.
Depress the accelerator pedal past the
increased resistance point at the full-throttle
position.
M/S Manual mode and Sport program
Move the selector lever from position D to the
left into the M/S range:
The Sport program is activated. This is indi-
cated by the display SD in the instrument clus-
ter. This position is recommended for perfor-
mance-oriented driving. The Sport program is
enabled automatically when the Driving
Dynamic Control system is activated, refer to
page41.
Steptronic enters the manual selection mode
and executes the desired shift whenever you
tap the selector lever in the direction indicated
by + or –. M1 to M 5 appear in the instrument
cluster.
The transmission will only execute upshifts and
downshifts that will result in an appropriate
combination of vehicle speed and engine rpm.
For instance, downshifts that would result in
excessive engine speed will not be executed.
The desired gear will appear briefly in the
instrument cluster, followed by the actual gear.
To use the automatic transmission mode again,
move the selector lever to the right to position
D.
Malfunction
The warning lamp lights up. The trans-
mission system is malfunctioning.
Avoid heavy loads.
All of the selector lever positions can continue
to be engaged; in the forward drive positions,
however, the vehicle will be operating in a
restricted gear range only. Have the system
checked immediately.
Towing and jump starting beginning with
page97.
Page 42 of 120
Driving
40
Sequential manual gearbox
SMG*
The concept
The sequential manual gearbox SMG is an
automated manual gearbox with which clutch-
ing and shifting is assumed by an electro-
hydraulic system.
The SMG is operated via two shift paddles on
the steering wheel and the selector lever in the
center console.
It offers the following functions:
>Optionally manual or automatic operation:
sequential mode or drive mode
>Ability to choose between two different
driving programs: standard or Sport, refer to
page41
>Protection against misshifting, and auto-
matic downshifting at minimum engine rpm
even in sequential mode
>Kickdown function in the drive mode
>Acceleration assistant, refer to page42.
The SMG is ready for operation when the igni-
tion key is in position 2.
Selector lever positions
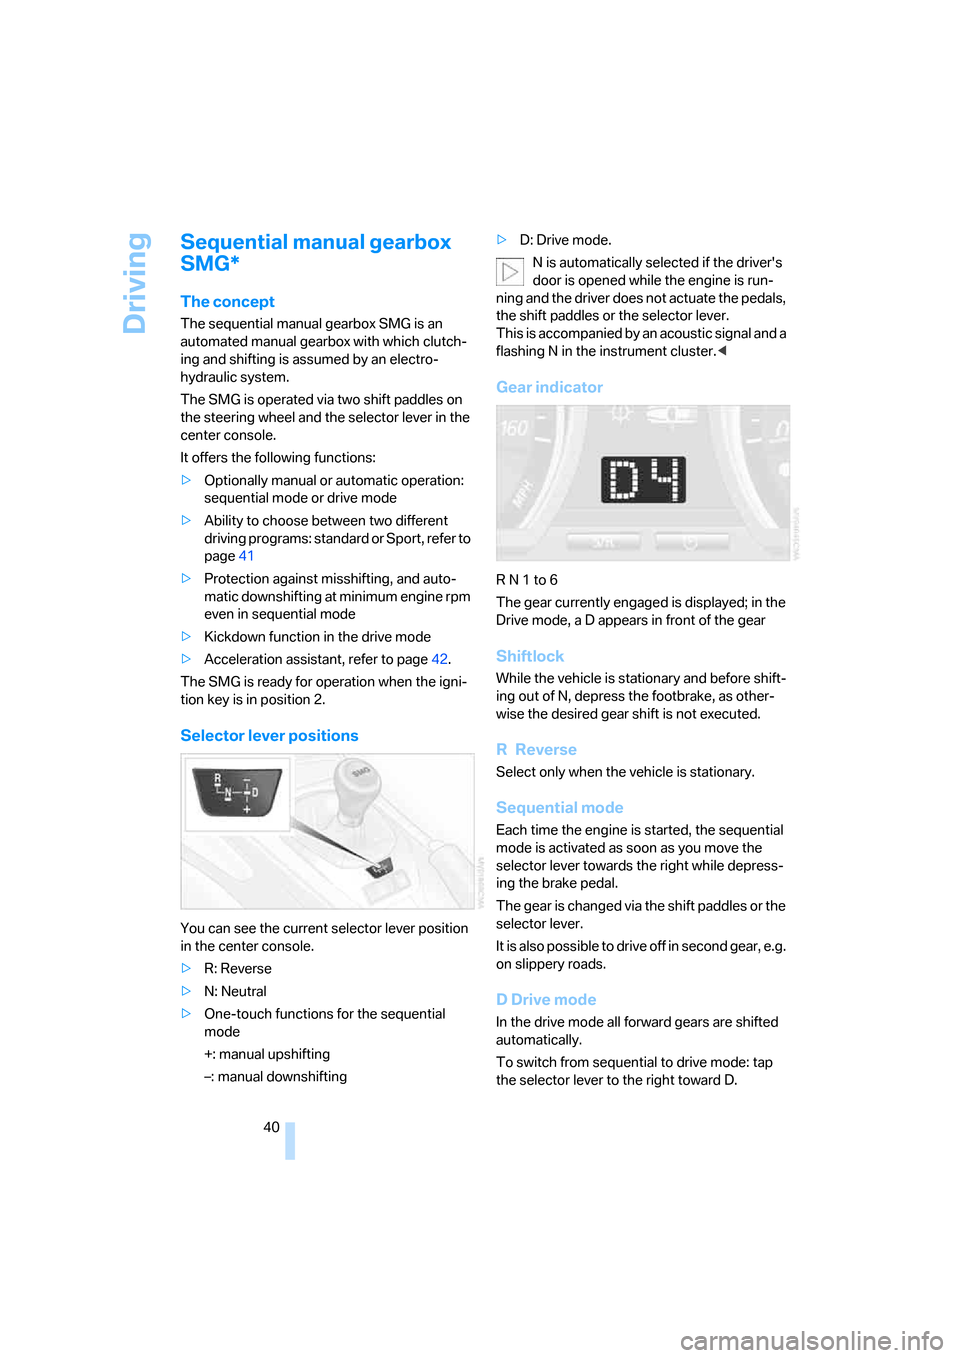
You can see the current selector lever position
in the center console.
>R: Reverse
>N: Neutral
>One-touch functions for the sequential
mode
+: manual upshifting
–: manual downshifting>D: Drive mode.
N is automatically selected if the driver's
door is opened while the engine is run-
ning and the driver does not actuate the pedals,
the shift paddles or the selector lever.
This is accompanied by an acoustic signal and a
flashing N in the instrument cluster.<
Gear indicator
R N 1 to 6
The gear currently engaged is displayed; in the
Drive mode, a D appears in front of the gear
Shiftlock
While the vehicle is stationary and before shift-
ing out of N, depress the footbrake, as other-
wise the desired gear shift is not executed.
R Reverse
Select only when the vehicle is stationary.
Sequential mode
Each time the engine is started, the sequential
mode is activated as soon as you move the
selector lever towards the right while depress-
ing the brake pedal.
The gear is changed via the shift paddles or the
selector lever.
It is also possible to drive off in second gear, e.g.
on slippery roads.
D Drive mode
In the drive mode all forward gears are shifted
automatically.
To switch from sequential to drive mode: tap
the selector lever to the right toward D.
Page 43 of 120

Reference
At a glance
Controls
Driving tips
Mobility
41
Kickdown:
For rapid acceleration, e.g. during passing,
depress the accelerator pedal completely. You
achieve maximum acceleration.
To switch back to sequential mode: tap the
selector lever again to the right toward D, or
change the current gear via the shift paddles or
the selector lever.
When driving off on inclines, drive
smoothly without pausing. Do not keep
the vehicle in place by depressing the accelera-
tor pedal; instead, apply the parking brake. Oth-
erwise, the gearbox could overheat.<
Shifting gears
With selector lever
>To upshift, tap the selector lever toward +
>To downshift, tap the lever toward –.
With shift paddles on steering wheel
>To upshift, pull one of the shift paddles
>To downshift, push the paddle.
In the following situations, the SMG in the
sequential mode assists you:
>The transmission will only execute upshifts
and downshifts that will result in an appro-
priate combination of vehicle speed and
engine rpm. For instance, downshifts that
would result in excessive engine speed
cannot be executed
>During a stop the gearbox is automatically
downshifted into first gear
>Shortly before a gear-dependent minimum
speed is reached, the gearbox automatically
shifts down without you taking any action.
Malfunction
The warning lamp lights up. The trans-
mission system is malfunctioning.
Avoid heavy loads.
All of the selector lever positions can continue
to be engaged; in the forward drive positions,
however, the vehicle will be operating in a
restricted gear range only. Have the system
checked as soon as possible.
Towing and tow-starting, refer to page98;
Jump starting, refer to page97.
Overheating
An acoustic warning signal sounds. The gear-
box is overheating. If possible, stop the vehicle
or drive off swiftly so that the system can cool
off again.
Driving Dynamic Control
Driving Dynamic Control allows your BMW to
react in a sportier driving style at the touch of a
button:
>The engine responds more spontaneously
to any motion of the accelerator pedal
>The vehicle is steered more directly and
traction is enhanced
>Cruise control:
When the speed last stored is called up, this
speed is attained more quickly.
Additional features with SMG:
>Gears are shifted more quickly
>The engine speed range is optimally utilized
in the drive mode.
With automatic transmission:
>The Sport program is activated.
Page 61 of 120
Reference
At a glance
Controls
Driving tips
Mobility
59
Air distribution
You can direct airflow onto the win-
dows , toward the upper body
and into the footwell . All interme-
diate settings are possible.
Air supply/blower
Turn the rotary control to adjust the
air supply. Both heating and ventila-
tion become more effective as the air
supply rate is increased.
Turn the rotary control toward zero:
The blower and the heating are turned off, and
the air supply is stopped.
Temperature
In order to increase the temperature
of the passenger compartment, turn
to the right toward the red zone.
Air conditioning
The air is cooled and dehumidified
and, depending on the temperature
setting, rewarmed.
Depending on the weather, the wind-
shield may fog over briefly when the engine is
started.
Condensation forms during operation of
the air conditioning system, which then
exits under the vehicle. Traces of condensed
water on the ground underneath the vehicle are
thus normal.<
Outside air/recirculated air mode
If there are unpleasant odors in the
outside air, you can temporarily block
the supply of incoming air. The sys-
tem then recirculates the air currently
within the vehicle.
If the windows fog over in the recirculated
air mode, switch this mode off and
increase the air supply as required. Do not use
the recirculated-air mode continuously over a
long period of time as this would otherwise
reduce the air quality in the interior of the vehi-
cle.<
Rear window defroster
The indicator lamp lights up when
the rear window defroster is active.
The rear window defroster switches
off automatically.
Ventilation
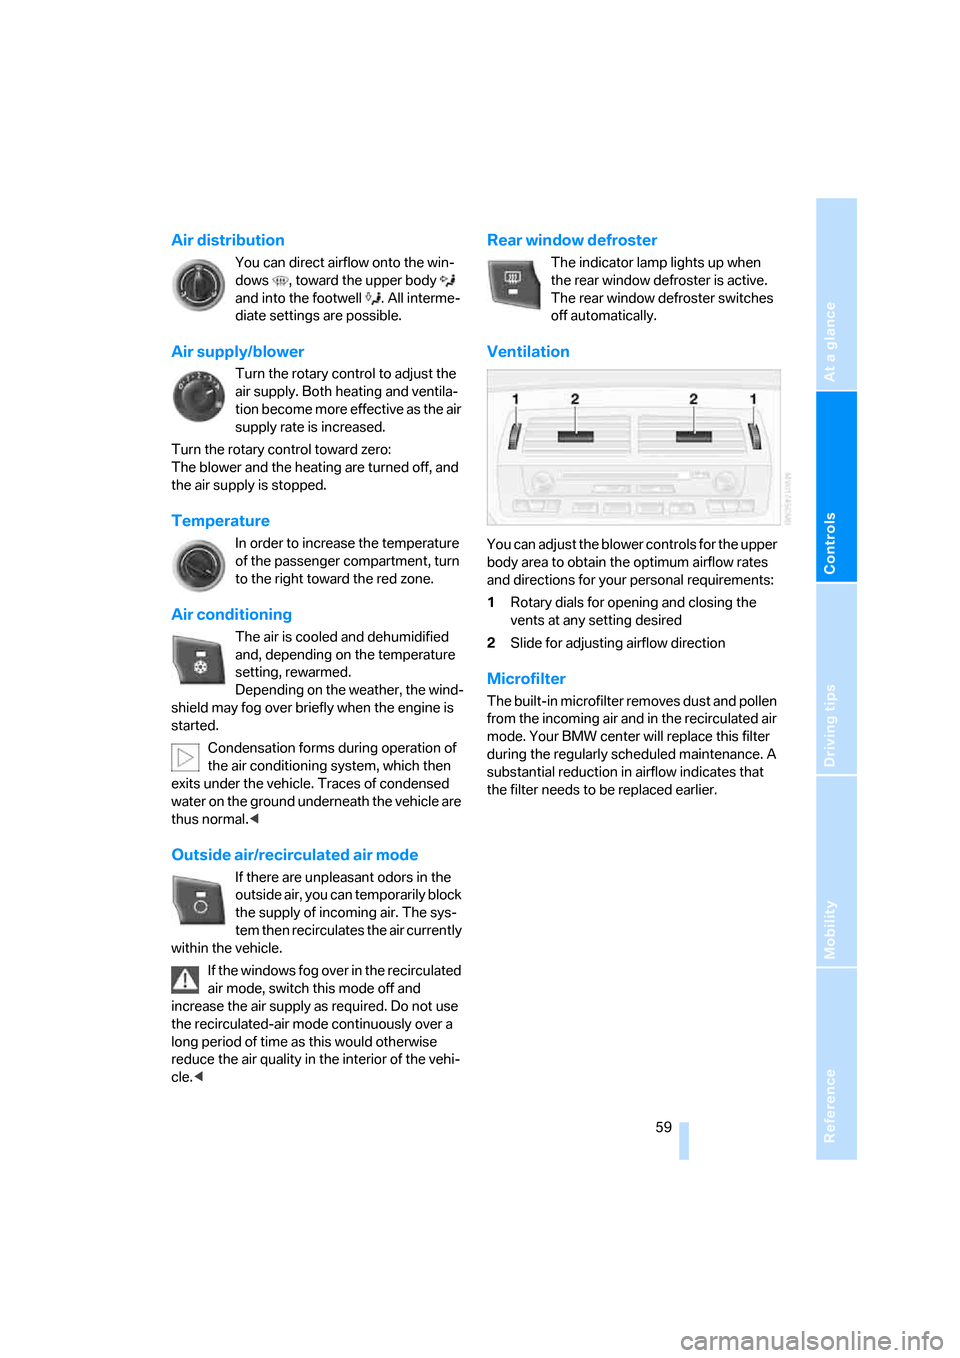
You can adjust the blower controls for the upper
body area to obtain the optimum airflow rates
and directions for your personal requirements:
1Rotary dials for opening and closing the
vents at any setting desired
2Slide for adjusting airflow direction
Microfilter
The built-in microfilter removes dust and pollen
from the incoming air and in the recirculated air
mode. Your BMW center will replace this filter
during the regularly scheduled maintenance. A
substantial reduction in airflow indicates that
the filter needs to be replaced earlier.
Page 64 of 120
Controlling the climate for pleasant driving
62
Tips for pleasant driving
Use the automatic system – switch on with
AUTO button 6. Select the desired interior tem-
perature.
Detailed setting options are described for you
below.
Automatic air distribution and supply
The AUTO program assumes the
adjustment of the air distribution and
air supply for you and in addition
adapts the temperature to external
influences, summer or winter, to meet prefer-
ences you can specify.
In the AUTO program, the air conditioning
mode is also turned on at the same time.
The AUTO program functions only to a
limited extent when the convertible top is
open.<
Individual air distribution
You yourself can direct airflow onto
the windows , toward the upper
body and into the footwell . The
arrow lights up. The automatic air
supply remains unchanged. All intermediate
settings are possible. By pressing the AUTO
button, you can reactivate the air distribution.
Temperature
The interior temperature that
appears on the display panel is a gen-
eral figure intended for reference
purposes. When you start the vehi-
cle, the system ensures that the selected tem-
perature is reached as quickly as possible,
regardless of the season. It then maintains this
temperature.
Air supply/blower
Turn the rotary control to adjust the
air supply. This shuts off the auto-
matic air supply. The arrow lights up.
The automatic air distribution
remains unchanged. You can reactivate the
automatic air supply by pressing the AUTO but-
ton.When you turn the rotary control toward zero:
the blower, heating and air conditioner are
switched off, and the air supply is stopped. You
can reactivate the system by turning the control
toward the right again.
To defrost windows and remove
condensation
This program quickly removes ice
and condensation from the wind-
shield and the side windows.
Maximum cooling
Above an outside temperature of
327/06 and with the engine run-
ning, you achieve a maximum cooling
effect as quickly as possible. At the
same time, the air conditioning is turned on.
The temperature is set to the lowest possible
value. The system switches to the recirculated
air mode, and air flows at maximum blower
speed from the ventilation grills in the upper
body area only. Therefore, the air outlets must
always be open when you select this program.
Air conditioning
The air is cooled and dehumidified
and, depending on the temperature
setting, rewarmed.
Depending on the weather, the wind-
shield may fog over briefly when the engine is
started.
The air conditioning system is automatically
switched on when you use the AUTO program.
Condensation forms during operation of
the air conditioning system, which then
exits under the vehicle. Traces of condensed
water on the ground underneath the vehicle are
thus normal.<
Outside air/Automatic recirculated air
control AUC/recirculated air mode
You can respond to unpleasant
external odors or pollutants by tem-
porarily stopping the flow of outside
air. The system then recirculates the
air currently within the vehicle.