2005 BMW Z4 2.5I ECO mode
[x] Cancel search: ECO modePage 9 of 120
Reference
At a glance
Controls
Driving tips
Mobility
7
Service and warranty
This manual is supplemented by a Service and
Warranty Information Booklet for US models,
Warranty and Service Guide Booklet for Cana-
dian models.
We recommend that you read this publication
thoroughly.
Your BMW is covered by the following warran-
ties:
>New Vehicle Limited Warranty
>Rust Perforation Limited Warranty
>Federal Emissions System Defect Warranty
>Federal Emissions Performance Warranty
>California Emission Control System Limited
Warranty.
Detailed information about these warranties is
listed in the Service and Warranty Information
Booklet for US models, Warranty and Service
Guide Booklet for Canadian models.
Reporting safety defects
The following only applies to vehicles owned
and operated in the US.
If you believe that your vehicle has a defect
which could cause a crash or could cause injury
or death, you should immediately inform the
National Highway Traffic Safety Administration
NHTSA in addition to notifying BMW of North
America, LLC, P.O. Box 1227, Westwood, New
Jersey 07675-1227, telephone toll-free
1-800-831-1117.
If NHTSA receives similar complaints, it may
open an investigation, and if it finds that a safety
defect exists in a group of vehicles, it may order
a recall and remedy campaign. However,
NHTSA cannot become involved in individual
problems between you, your retailer, or BMW of
North America, LLC.
To contact NHTSA, you may either call the Auto
Safety Hotline toll-free at 1-800-424-9393 or
366-0123 in Washington, D.C. area, or write to:
NHTSA, U.S. Department of Transportation,
Washington, D.C. 20590. You can also obtain
other information about motor vehicle safety
from the Hotline.
Page 19 of 120
Reference
At a glance
Controls
Driving tips
Mobility
17
Press the button once to unlock the driver’s
door and the fuel filler door; press a second time
to disengage all vehicle locks.
Convenience opening mode
Keep the button pressed:
The windows and the fully automatic convert-
ible top are opened.
To lock and secure
Press the button.
The hazard warning flashers light up once.
If you wish, you can have this special fea-
ture activated/deactivated.<
To switch on the interior lamps
With the vehicle locked:
Press the button.
With this function, you can also search for your
vehicle when parked in an underground garage,
for instance.
To open the luggage compartment
Press button briefly.
The luggage compartment lid will open slightly,
regardless of whether it was locked or
unlocked.
Before and after a trip, be sure that the
luggage compartment lid has not been
opened unintentionally.<
Panic mode*
By pressing and holding button for more
than approx. two seconds, you can trigger the
alarm systems
* in response to any impending
danger.
To switch off the alarm: press any of the but-
tons.
Malfunction
Local radio waves can impede the functioning
of the remote control.
Should this occur, open and close the vehicle
using the master key in either a door or the lug-
gage compartment lock.If it is no longer possible to lock the vehicle with
the remote control, the battery is discharged.
Use this remote control key while driving for an
extended period in order to recharge the bat-
tery, refer to page16.
For US owners only
The transmitter and receiver units comply with
part 15 of the FCC, Federal Communications
Commission, regulations. Operation is gov-
erned by the following:
FCC ID: LX8EWS
LX8FZVS
LX8FZVE
Compliance statement:
This device complies with part 15 of the FCC
Rules. Operation is subject to the following two
conditions:
>This device may not cause harmful interfer-
ence, and
>this device must accept any interference
received, including interference that may
cause undesired operation.
Any unauthorized modifications to these
devices could void the user's authority to
operate the equipment.<
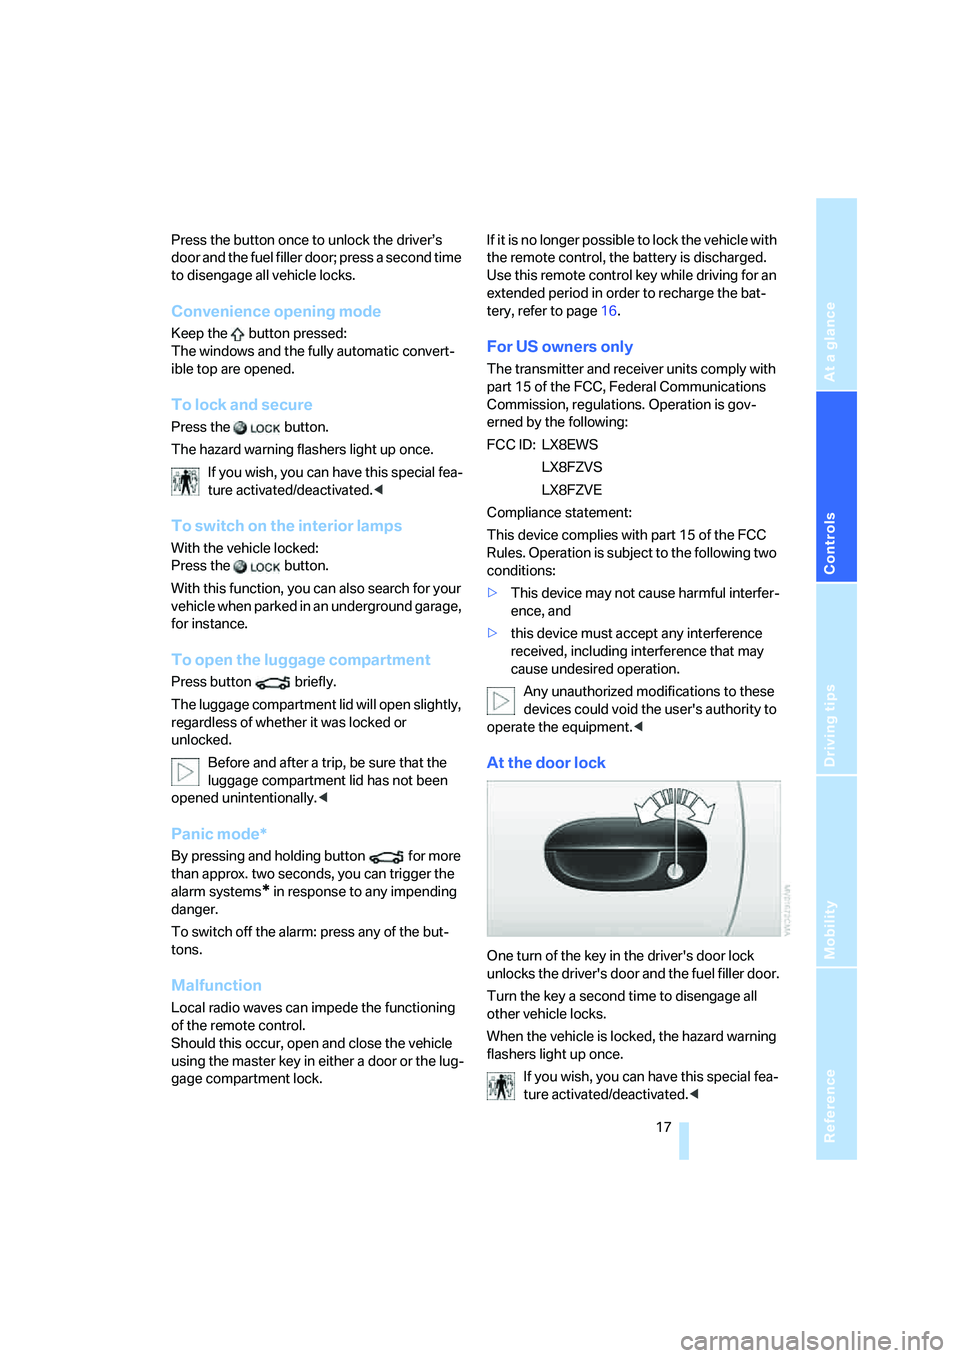
At the door lock
One turn of the key in the driver's door lock
unlocks the driver's door and the fuel filler door.
Turn the key a second time to disengage all
other vehicle locks.
When the vehicle is locked, the hazard warning
flashers light up once.
If you wish, you can have this special fea-
ture activated/deactivated.<
Page 38 of 120
Driving
36
Driving
Ignition lock
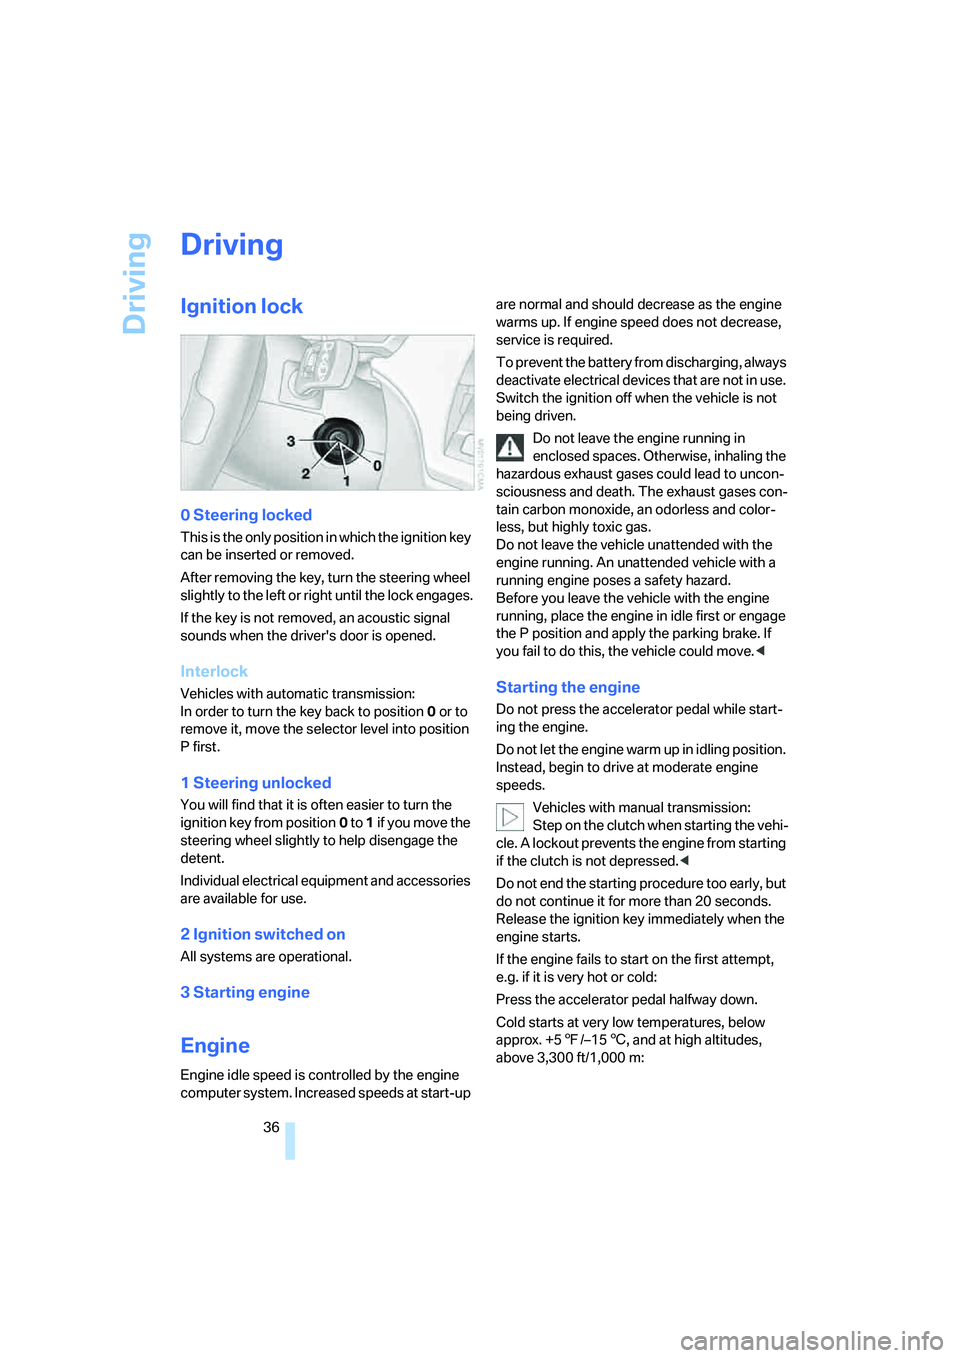
0 Steering locked
This is the only position in which the ignition key
can be inserted or removed.
After removing the key, turn the steering wheel
slightly to the left or right until the lock engages.
If the key is not removed, an acoustic signal
sounds when the driver's door is opened.
Interlock
Vehicles with automatic transmission:
In order to turn the key back to position0 or to
remove it, move the selector level into position
P first.
1 Steering unlocked
You will find that it is often easier to turn the
ignition key from position0 to 1 if you move the
steering wheel slightly to help disengage the
detent.
Individual electrical equipment and accessories
are available for use.
2 Ignition switched on
All systems are operational.
3 Starting engine
Engine
Engine idle speed is controlled by the engine
computer system. Increased speeds at start-up are normal and should decrease as the engine
warms up. If engine speed does not decrease,
service is required.
To prevent the battery from discharging, always
deactivate electrical devices that are not in use.
Switch the ignition off when the vehicle is not
being driven.
Do not leave the engine running in
enclosed spaces. Otherwise, inhaling the
hazardous exhaust gases could lead to uncon-
sciousness and death. The exhaust gases con-
tain carbon monoxide, an odorless and color-
less, but highly toxic gas.
Do not leave the vehicle unattended with the
engine running. An unattended vehicle with a
running engine poses a safety hazard.
Before you leave the vehicle with the engine
running, place the engine in idle first or engage
the P position and apply the parking brake. If
you fail to do this, the vehicle could move.<
Starting the engine
Do not press the accelerator pedal while start-
ing the engine.
Do not let the engine warm up in idling position.
Instead, begin to drive at moderate engine
speeds.
Vehicles with manual transmission:
Step on the clutch when starting the vehi-
cle. A lockout prevents the engine from starting
if the clutch is not depressed.<
Do not end the starting procedure too early, but
do not continue it for more than 20 seconds.
Release the ignition key immediately when the
engine starts.
If the engine fails to start on the first attempt,
e.g. if it is very hot or cold:
Press the accelerator pedal halfway down.
Cold starts at very low temperatures, below
approx. +57/–156, and at high altitudes,
above 3,300 ft/1,000 m:
Page 39 of 120

Reference
At a glance
Controls
Driving tips
Mobility
37
>On the first attempt, engage the starter for
approx. 10 seconds
>Press the accelerator pedal halfway down.
Avoid frequent starting attempts in short
succession or repeated starting attempts
during which the engine does not start. Other-
wise, uncombusted or incompletely combusted
fuel will pose a risk of the catalytic converter
overheating and being damaged.<
Manual transmission
1.Engage the parking brake
2.Gearshift lever in idling position
3.Depress the clutch pedal.
If the clutch pedal is not depressed, the
engine cannot be started
4.Start the engine.
Automatic transmission
1.Depress footbrake
2.Place selector lever in position P or N
3.Start the engine.
Sequential manual gearbox SMG
1.Depress footbrake
2.Move selector lever to neutral position N
3.Start the engine.
If the engine does not start, re-engage the
position last selected, refer to the display
in the instrument cluster, and then engage posi-
tion N again.<
Switching off the engine
Do not remove the ignition key while the
vehicle is still moving. If you did so, the
steering lock would engage when the steering
wheel is turned.
When you leave the vehicle, always remove the
ignition key and engage the steering lock.
Apply the parking brake when parking on steep
gradients, as the vehicle could otherwise start
to roll.<
You can have an acoustic signal set as a
reminder that the ignition key is still in the ignition switch after the driver's door has been
opened.<
Manual transmission
1.Turn the ignition key to position 1 or 0
2.Engage first gear or reverse gear.
Automatic transmission
1.Place the selector lever in position P
2.Turn the ignition key to position 1 or 0.
Sequential manual gearbox SMG
1.Engage a drive position
2.Turn the ignition key to position 1 or 0. An
acoustic signal sounds if the engine is
switched off while position N is engaged.
Parking brake
The parking brake is designed primarily to pre-
vent the vehicle from rolling when parked. It
operates against the rear wheels.
The indicator lamp lights up. As the
vehicle drives off, an acoustic signal
also sounds. The parking brake has
been applied.
Indicator lamp for Canadian models.
To engage
The detent engages automatically and the indi-
cator lamp in the instrument cluster comes on
when the ignition key is in position 2.
Page 41 of 120

Reference
At a glance
Controls
Driving tips
Mobility
39
A detent prevents inadvertent shifting into
selector lever positions R and P. To disengage
the detent, press the button on the front of the
selector lever knob, see arrow.
PPark
Select only when the vehicle is stationary. The
transmission locks to prevent the rear wheels
from turning.
R Reverse
Select only when the vehicle is stationary.
NNeutral
Select this, for example, in car washes. The
vehicle can roll.
D Drive, automatic shift program
This position is designed for driving under all
normal operating conditions. All forward gears
are available.
Kickdown
With kickdown, you achieve maximum acceler-
ating performance.
Depress the accelerator pedal past the
increased resistance point at the full-throttle
position.
M/S Manual mode and Sport program
Move the selector lever from position D to the
left into the M/S range:
The Sport program is activated. This is indi-
cated by the display SD in the instrument clus-
ter. This position is recommended for perfor-
mance-oriented driving. The Sport program is
enabled automatically when the Driving
Dynamic Control system is activated, refer to
page41.
Steptronic enters the manual selection mode
and executes the desired shift whenever you
tap the selector lever in the direction indicated
by + or –. M1 to M 5 appear in the instrument
cluster.
The transmission will only execute upshifts and
downshifts that will result in an appropriate
combination of vehicle speed and engine rpm.
For instance, downshifts that would result in
excessive engine speed will not be executed.
The desired gear will appear briefly in the
instrument cluster, followed by the actual gear.
To use the automatic transmission mode again,
move the selector lever to the right to position
D.
Malfunction
The warning lamp lights up. The trans-
mission system is malfunctioning.
Avoid heavy loads.
All of the selector lever positions can continue
to be engaged; in the forward drive positions,
however, the vehicle will be operating in a
restricted gear range only. Have the system
checked immediately.
Towing and jump starting beginning with
page97.
Page 42 of 120
Driving
40
Sequential manual gearbox
SMG*
The concept
The sequential manual gearbox SMG is an
automated manual gearbox with which clutch-
ing and shifting is assumed by an electro-
hydraulic system.
The SMG is operated via two shift paddles on
the steering wheel and the selector lever in the
center console.
It offers the following functions:
>Optionally manual or automatic operation:
sequential mode or drive mode
>Ability to choose between two different
driving programs: standard or Sport, refer to
page41
>Protection against misshifting, and auto-
matic downshifting at minimum engine rpm
even in sequential mode
>Kickdown function in the drive mode
>Acceleration assistant, refer to page42.
The SMG is ready for operation when the igni-
tion key is in position 2.
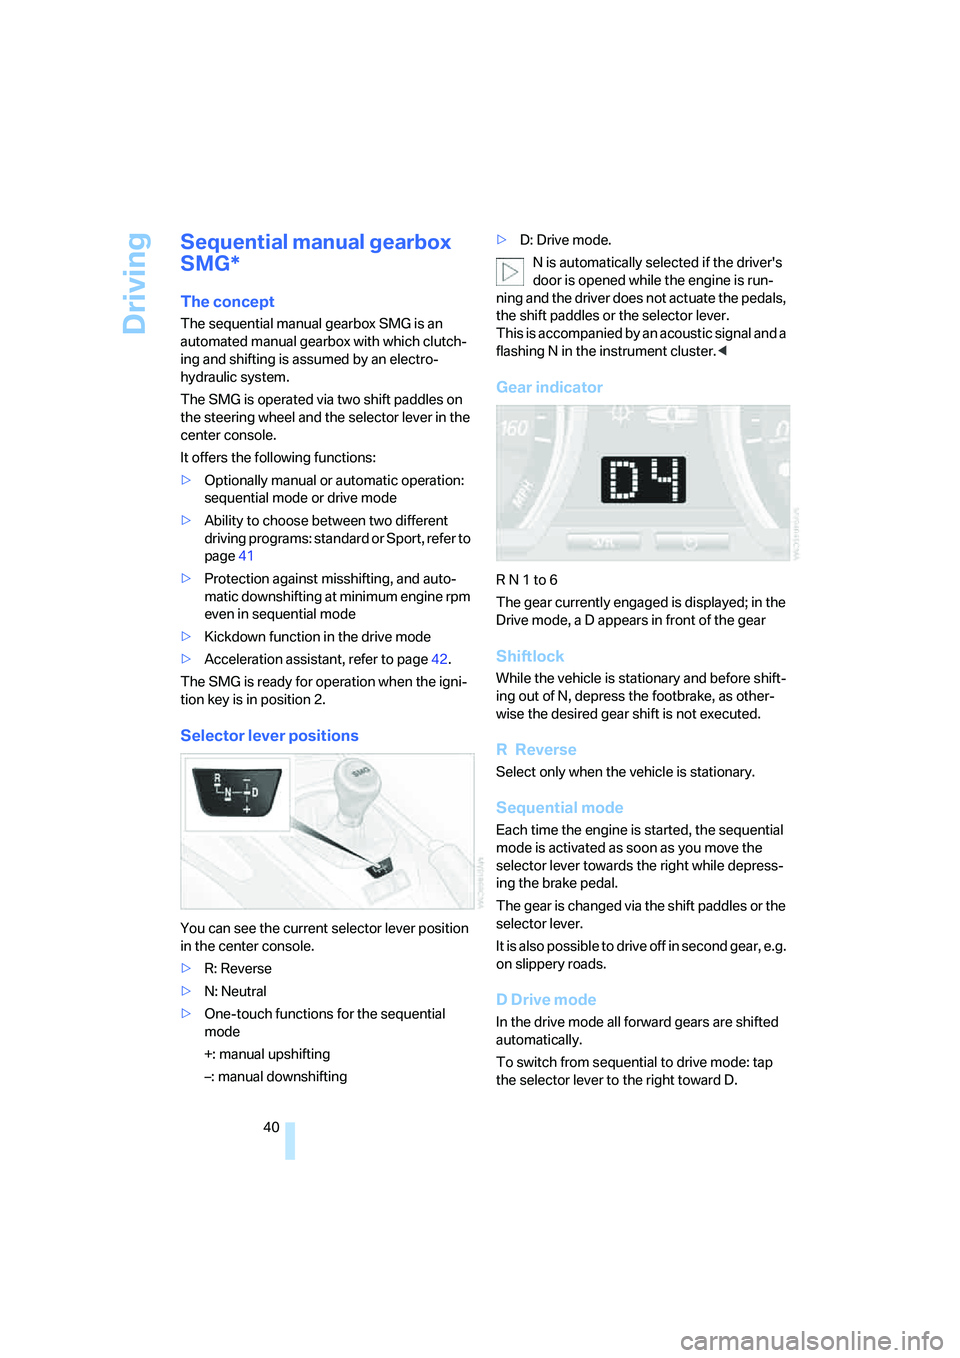
Selector lever positions
You can see the current selector lever position
in the center console.
>R: Reverse
>N: Neutral
>One-touch functions for the sequential
mode
+: manual upshifting
–: manual downshifting>D: Drive mode.
N is automatically selected if the driver's
door is opened while the engine is run-
ning and the driver does not actuate the pedals,
the shift paddles or the selector lever.
This is accompanied by an acoustic signal and a
flashing N in the instrument cluster.<
Gear indicator
R N 1 to 6
The gear currently engaged is displayed; in the
Drive mode, a D appears in front of the gear
Shiftlock
While the vehicle is stationary and before shift-
ing out of N, depress the footbrake, as other-
wise the desired gear shift is not executed.
R Reverse
Select only when the vehicle is stationary.
Sequential mode
Each time the engine is started, the sequential
mode is activated as soon as you move the
selector lever towards the right while depress-
ing the brake pedal.
The gear is changed via the shift paddles or the
selector lever.
It is also possible to drive off in second gear, e.g.
on slippery roads.
D Drive mode
In the drive mode all forward gears are shifted
automatically.
To switch from sequential to drive mode: tap
the selector lever to the right toward D.
Page 53 of 120
Reference
At a glance
Controls
Driving tips
Mobility
51
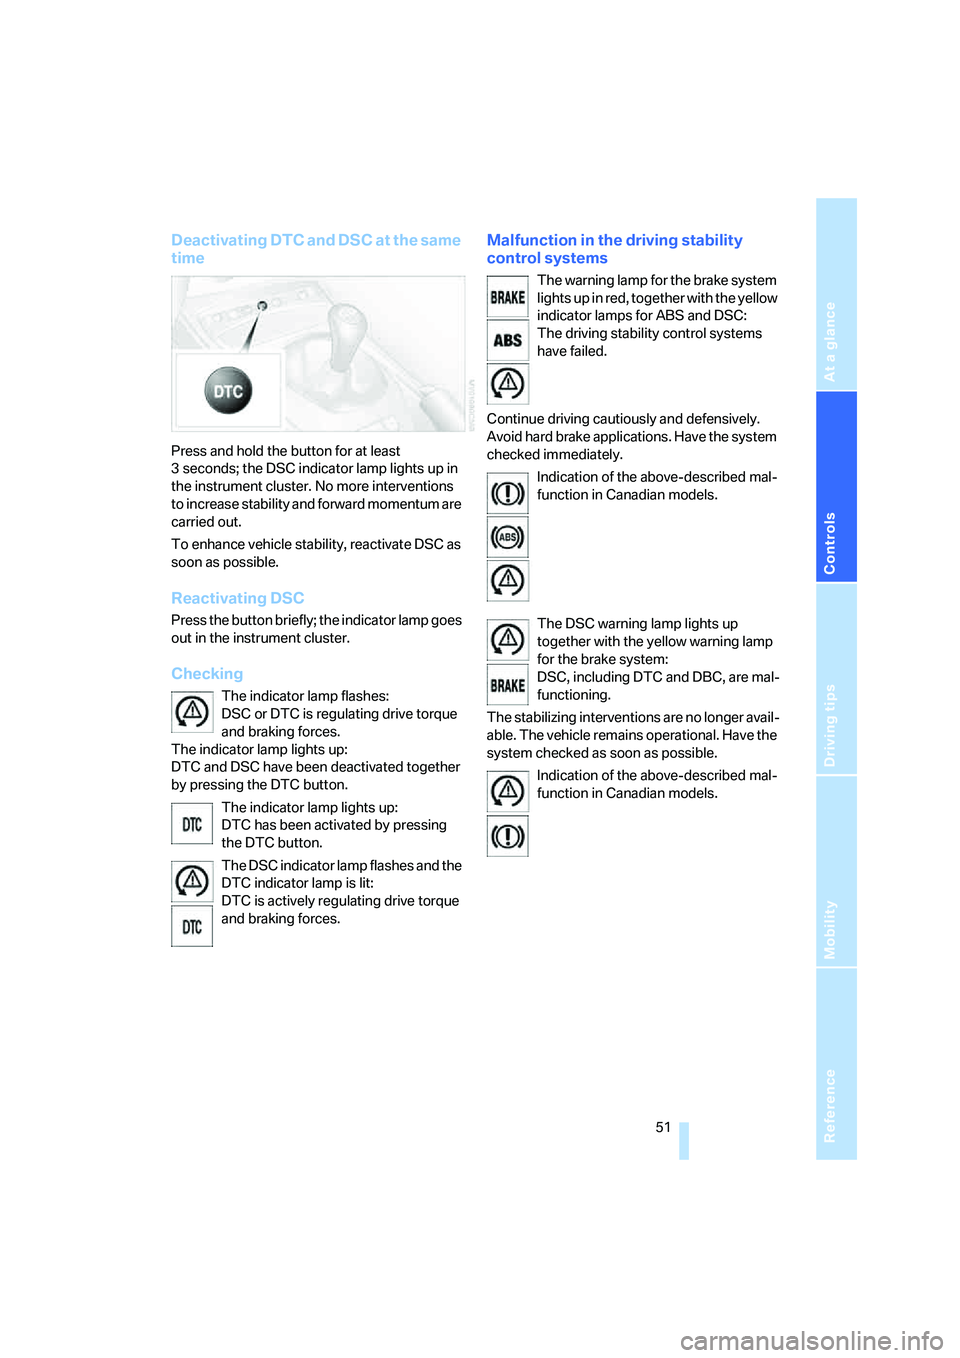
Deactivating DTC and DSC at the same
time
Press and hold the button for at least
3 seconds; the DSC indicator lamp lights up in
the instrument cluster. No more interventions
to increase stability and forward momentum are
carried out.
To enhance vehicle stability, reactivate DSC as
soon as possible.
Reactivating DSC
Press the button briefly; the indicator lamp goes
out in the instrument cluster.
Checking
The indicator lamp flashes:
DSC or DTC is regulating drive torque
and braking forces.
The indicator lamp lights up:
DTC and DSC have been deactivated together
by pressing the DTC button.
The indicator lamp lights up:
DTC has been activated by pressing
the DTC button.
The DSC indicator lamp flashes and the
DTC indicator lamp is lit:
DTC is actively regulating drive torque
and braking forces.
Malfunction in the driving stability
control systems
The warning lamp for the brake system
lights up in red, together with the yellow
indicator lamps for ABS and DSC:
The driving stability control systems
have failed.
Continue driving cautiously and defensively.
Avoid hard brake applications. Have the system
checked immediately.
Indication of the above-described mal-
function in Canadian models.
The DSC warning lamp lights up
together with the yellow warning lamp
for the brake system:
DSC, including DTC and DBC, are mal-
functioning.
The stabilizing interventions are no longer avail-
able. The vehicle remains operational. Have the
system checked as soon as possible.
Indication of the above-described mal-
function in Canadian models.
Page 61 of 120
Reference
At a glance
Controls
Driving tips
Mobility
59
Air distribution
You can direct airflow onto the win-
dows , toward the upper body
and into the footwell . All interme-
diate settings are possible.
Air supply/blower
Turn the rotary control to adjust the
air supply. Both heating and ventila-
tion become more effective as the air
supply rate is increased.
Turn the rotary control toward zero:
The blower and the heating are turned off, and
the air supply is stopped.
Temperature
In order to increase the temperature
of the passenger compartment, turn
to the right toward the red zone.
Air conditioning
The air is cooled and dehumidified
and, depending on the temperature
setting, rewarmed.
Depending on the weather, the wind-
shield may fog over briefly when the engine is
started.
Condensation forms during operation of
the air conditioning system, which then
exits under the vehicle. Traces of condensed
water on the ground underneath the vehicle are
thus normal.<
Outside air/recirculated air mode
If there are unpleasant odors in the
outside air, you can temporarily block
the supply of incoming air. The sys-
tem then recirculates the air currently
within the vehicle.
If the windows fog over in the recirculated
air mode, switch this mode off and
increase the air supply as required. Do not use
the recirculated-air mode continuously over a
long period of time as this would otherwise
reduce the air quality in the interior of the vehi-
cle.<
Rear window defroster
The indicator lamp lights up when
the rear window defroster is active.
The rear window defroster switches
off automatically.
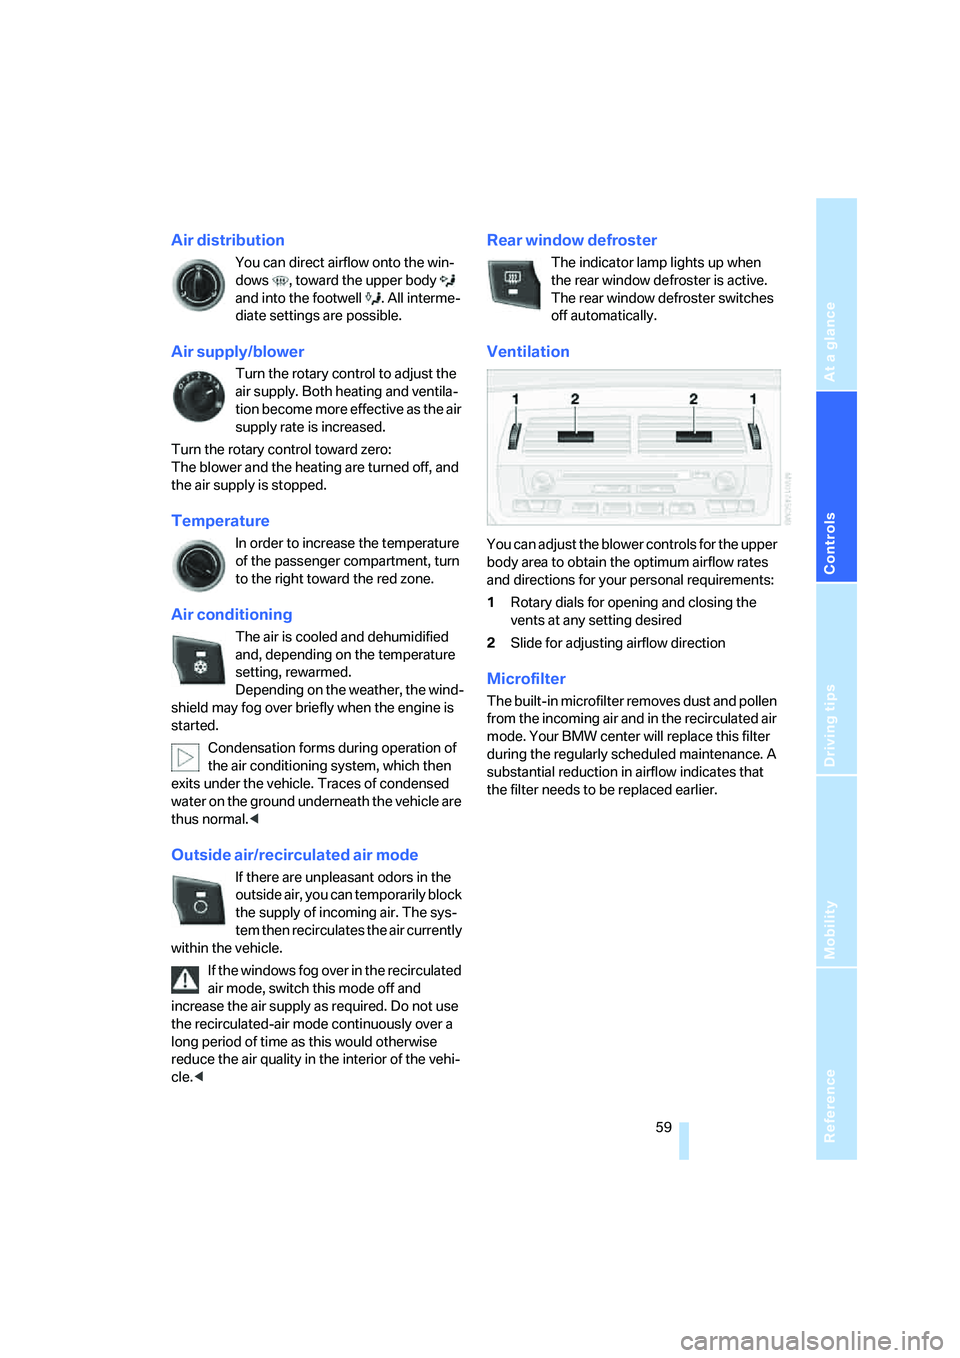
Ventilation
You can adjust the blower controls for the upper
body area to obtain the optimum airflow rates
and directions for your personal requirements:
1Rotary dials for opening and closing the
vents at any setting desired
2Slide for adjusting airflow direction
Microfilter
The built-in microfilter removes dust and pollen
from the incoming air and in the recirculated air
mode. Your BMW center will replace this filter
during the regularly scheduled maintenance. A
substantial reduction in airflow indicates that
the filter needs to be replaced earlier.