Page 67 of 165

The ABS warning light
does not go out until the
pull-away test completes.
Pulling awayStarting on gradientsSelect a gear.
Release the clutch lever and
both brake levers.
Switch on the ignition.
ABS pull-away testWhen you pull away, the
BMW Integral ABS checks the
ABS sensors.
ABS warning light
flashes once per
second.
The ABS warning light goes
out when the pull-away test
completes.
If an error message appears
when the pull-away test com-
pletes: See the section entitled
"Status indicators" for in-
formation on how to inter-
pret these messages.Running inThe first 1000 kmWhile running in the mo-
torcycle, vary the throttle
opening and engine-speed
range frequently. Try to do most of your rid-
ing during this initial period
on twisting, fairly hilly roads,
avoiding high-speed main
roads and highways if pos-
sible.
Exceeding the specified
engine speeds while run-
ning in will lead to increased
engine wear.
Keep to the specified engine
speeds for running in.
Do not exceed the rpm lim-
its recommended for run-
ning in.
Running-in speeds
7000 min
-1
No full-load acceleration.
Avoid low engine speeds at
full load.
Do not omit the first inspec-
tion after 500 - 1200 km.
565zRiding
Wait for ABS self-diagnosis
to complete.
Apply the brakes and disen-
gage the clutch.
Start the engine.Pre-ride check is
performed. ( 63)
Page 104 of 165
rad recommends the BMW
Motorrad rear-wheel stand.
Install the rear-wheel stand.
with OA Centre stand:
Make sure the ground is
level and firm and place
the motorcycle on its centre
stand.
Remove screws 1on left
and right.
Pull the front mudguard for-
ward to remove. Once the calipers have
been removed, there is
a risk of the brake pads be-
ing pressed together to the
extent that they cannot be
slipped back over the brake
disc on reassembly.
Do not operate the handbrake
lever when the brake calipers
have been removed.
Remove securing screws 3
of the brake calipers on left
and right. Force the brake pads
slightly apart by rocking
brake calipers
4back
and forth Aagainst brake
discs 5.
Mask off the parts of the
wheel rim that could be
scratched in the process of
removing the brake calipers.
Carefully pull the brake cal-
ipers back and out until
clear of the brake discs.
When removing the left
brake caliper, take care not
to damage the ABS sensor
cable.
7102zMaintenance
Page 106 of 165

Always have the security of
the fasteners checked by a
specialist workshop, prefer-
ably an authorised BMW Mo-
torrad dealer.There is a risk of
damaging parts of the
front brake, particularly the
BMW Integral ABS, in the
course of the procedure
described below.
Take care not to damage the
brake system, in particular the
ABS sensor with cable and
the ABS sensor ring.
The front wheel must be
installed right way round
to rotate in the correct direc-
tion.
Note the direction-of-rotation
arrows on the tyre or the
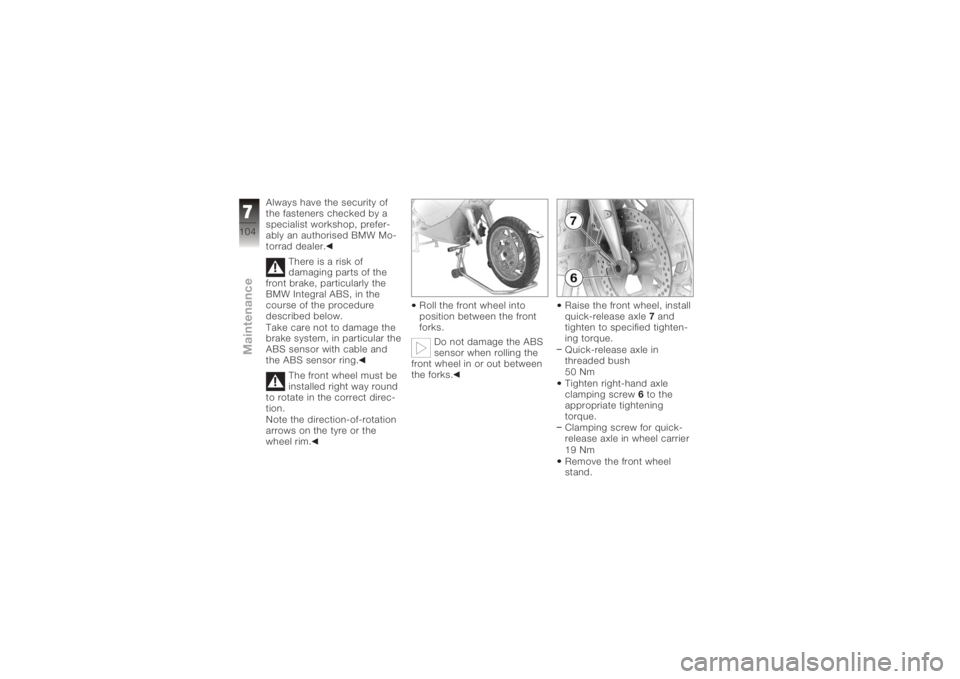
wheel rim. Roll the front wheel into
position between the front
forks.
Do not damage the ABS
sensor when rolling the
front wheel in or out between
the forks. Raise the front wheel, install
quick-release axle
7and
tighten to specified tighten-
ing torque.
Quick-release axle in
threaded bush
50 Nm
Tighten right-hand axle
clamping screw 6to the
appropriate tightening
torque.
Clamping screw for quick-
release axle in wheel carrier
19 Nm
Remove the front wheel
stand.
7104zMaintenance
Page 107 of 165
Ease the brake calipers on
to the brake discs.The cable of the ABS
sensor could chafe
through if it comes into
contact with the brake disc.
Make sure that the ABS
sensor cable is routed
correctly.
Carefully route the ABS
cable.
Install securing screws 3.
Front brake caliper, wheel
carrier installed ( 133) Remove the adhesive tape
from the wheel rim.
Install the front mudguard
and tighten screws
1.
Switch on the ignition.
Wait for ABS self-diagnosis
to complete.
Firmly pull the handbrake
lever until the pressure point
is perceptible, and repeat
this operation several times.
7105zMaintenance
Removing rear wheelPlace the motorcycle on an
auxiliary stand; BMW Motor-
rad recommends the BMW
Motorrad rear-wheel stand.
Install the rear-wheel stand.
with OA Centre stand:
Make sure the ground is
level and firm and place
the motorcycle on its centre
stand.
Remove screw 1from silen-
cer cover 2.
Page 112 of 165

and push it against the front
axle.
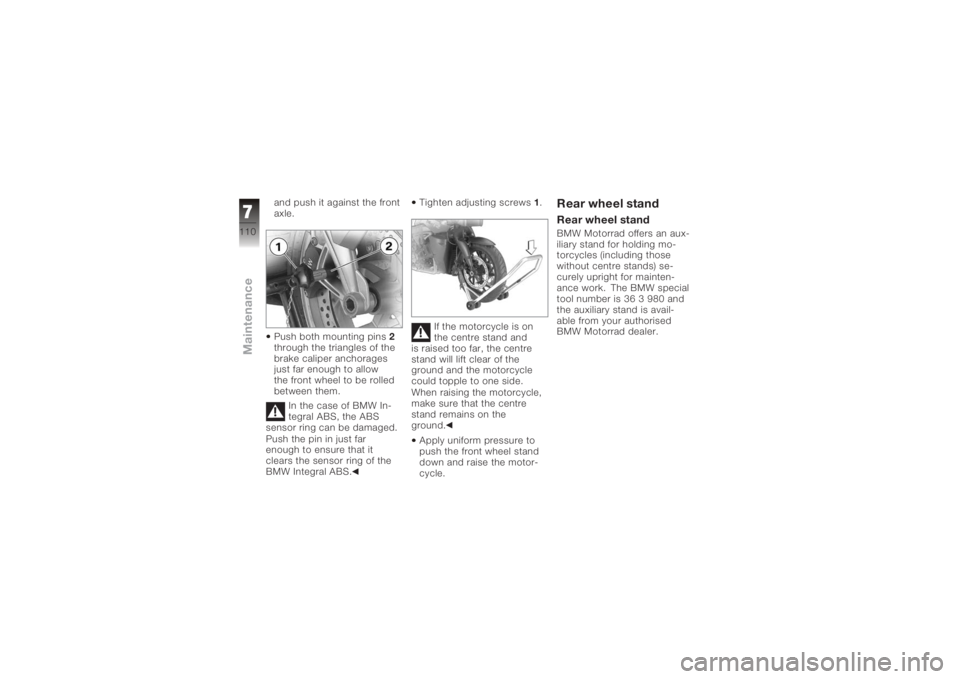
Push both mounting pins2
through the triangles of the
brake caliper anchorages
just far enough to allow
the front wheel to be rolled
between them.
In the case of BMW In-
tegral ABS, the ABS
sensor ring can be damaged.
Push the pin in just far
enough to ensure that it
clears the sensor ring of the
BMW Integral ABS. Tighten adjusting screws
1.
If the motorcycle is on
the centre stand and
is raised too far, the centre
stand will lift clear of the
ground and the motorcycle
could topple to one side.
When raising the motorcycle,
make sure that the centre
stand remains on the
ground.
Apply uniform pressure to
push the front wheel stand
down and raise the motor-
cycle.
Rear wheel standRear wheel standBMW Motorrad offers an aux-
iliary stand for holding mo-
torcycles (including those
without centre stands) se-
curely upright for mainten-
ance work. The BMW special
tool number is 36 3 980 and
the auxiliary stand is avail-
able from your authorised
BMW Motorrad dealer.
7110zMaintenance