2005 BMW 645CI COUPE&CONVERTIBLE navigation
[x] Cancel search: navigationPage 176 of 217
Mobility
175Reference
At a glance
Controls
Driving tips
Communications
Navigation
Entertainment
Engine compartment
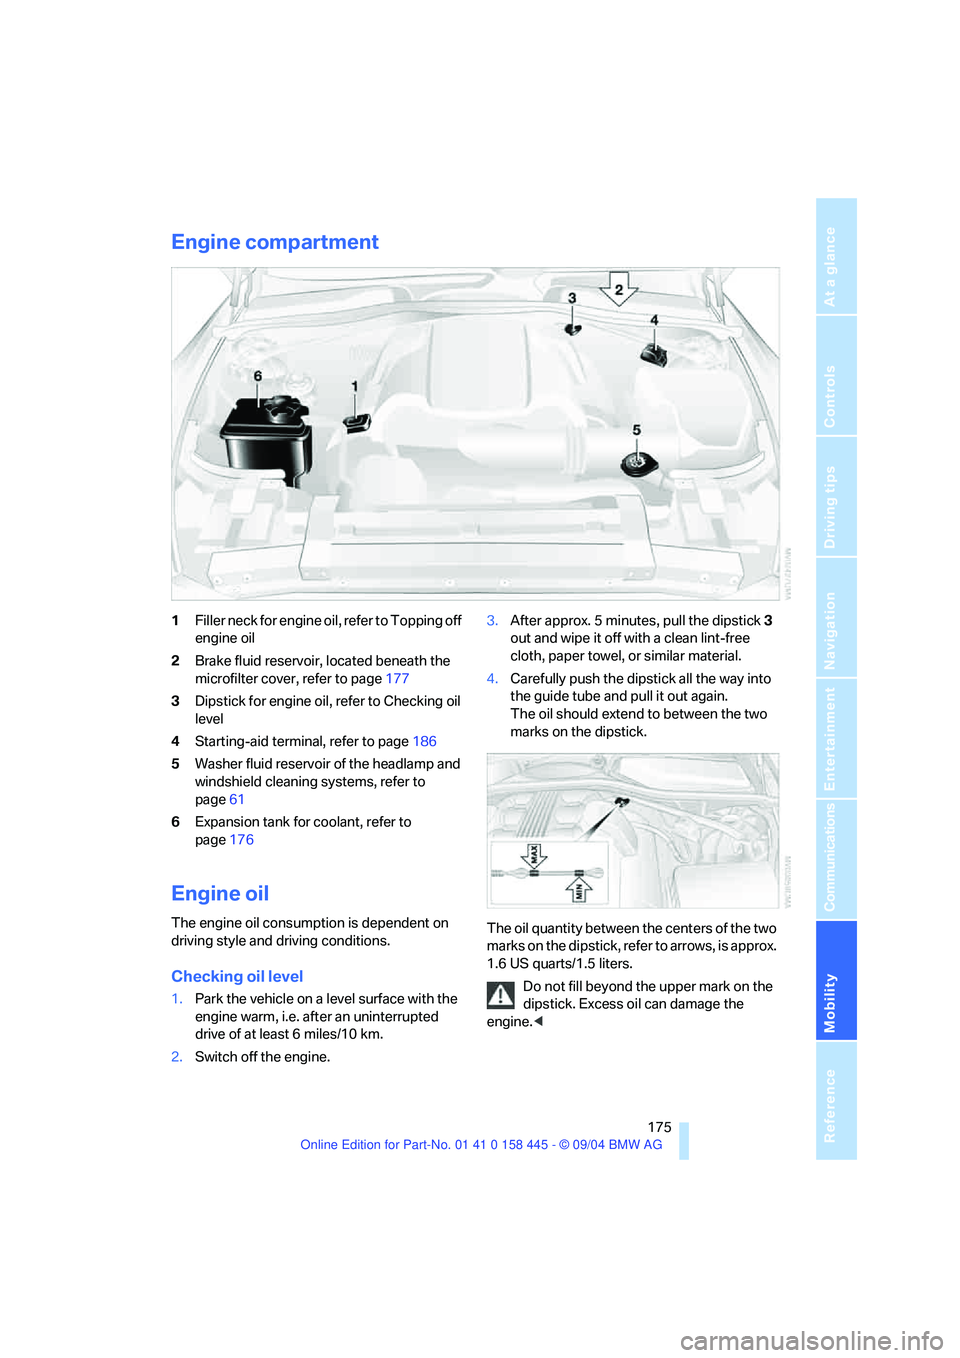
1Filler neck for engine oil, refer to Topping off
engine oil
2Brake fluid reservoir, located beneath the
microfilter cover, refer to page177
3Dipstick for engine oil, refer to Checking oil
level
4Starting-aid terminal, refer to page186
5Washer fluid reservoir of the headlamp and
windshield cleaning systems, refer to
page61
6Expansion tank for coolant, refer to
page176
Engine oil
The engine oil consumption is dependent on
driving style and driving conditions.
Checking oil level
1.Park the vehicle on a level surface with the
engine warm, i.e. after an uninterrupted
drive of at least 6 miles/10 km.
2.Switch off the engine.3.After approx. 5 minutes, pull the dipstick3
out and wipe it off with a clean lint-free
cloth, paper towel, or similar material.
4.Carefully push the dipstick all the way into
the guide tube and pull it out again.
The oil should extend to between the two
marks on the dipstick.
The oil quantity between the centers of the two
marks on the dipstick, refer to arrows, is approx.
1.6 US quarts/1.5 liters.
Do not fill beyond the upper mark on the
dipstick. Excess oil can damage the
engine.<
Page 178 of 217
Mobility
177Reference
At a glance
Controls
Driving tips
Communications
Navigation
Entertainment
2.Turn the cap of the expansion tank counter-
clockwise to allow any accumulated pres-
sure to escape, then continue turning to
open.
3.The coolant level is correct when it lies
between the Min and Max mark, also refer to
the drawing next the filler neck.
4.If the coolant is low, slowly add coolant up to
the specified level – do not overfill.
5.Turn the cap until it clicks.
6.Have the reason for the coolant loss elimi-
nated as soon as possible.
Brake system
Malfunction
Brake fluid
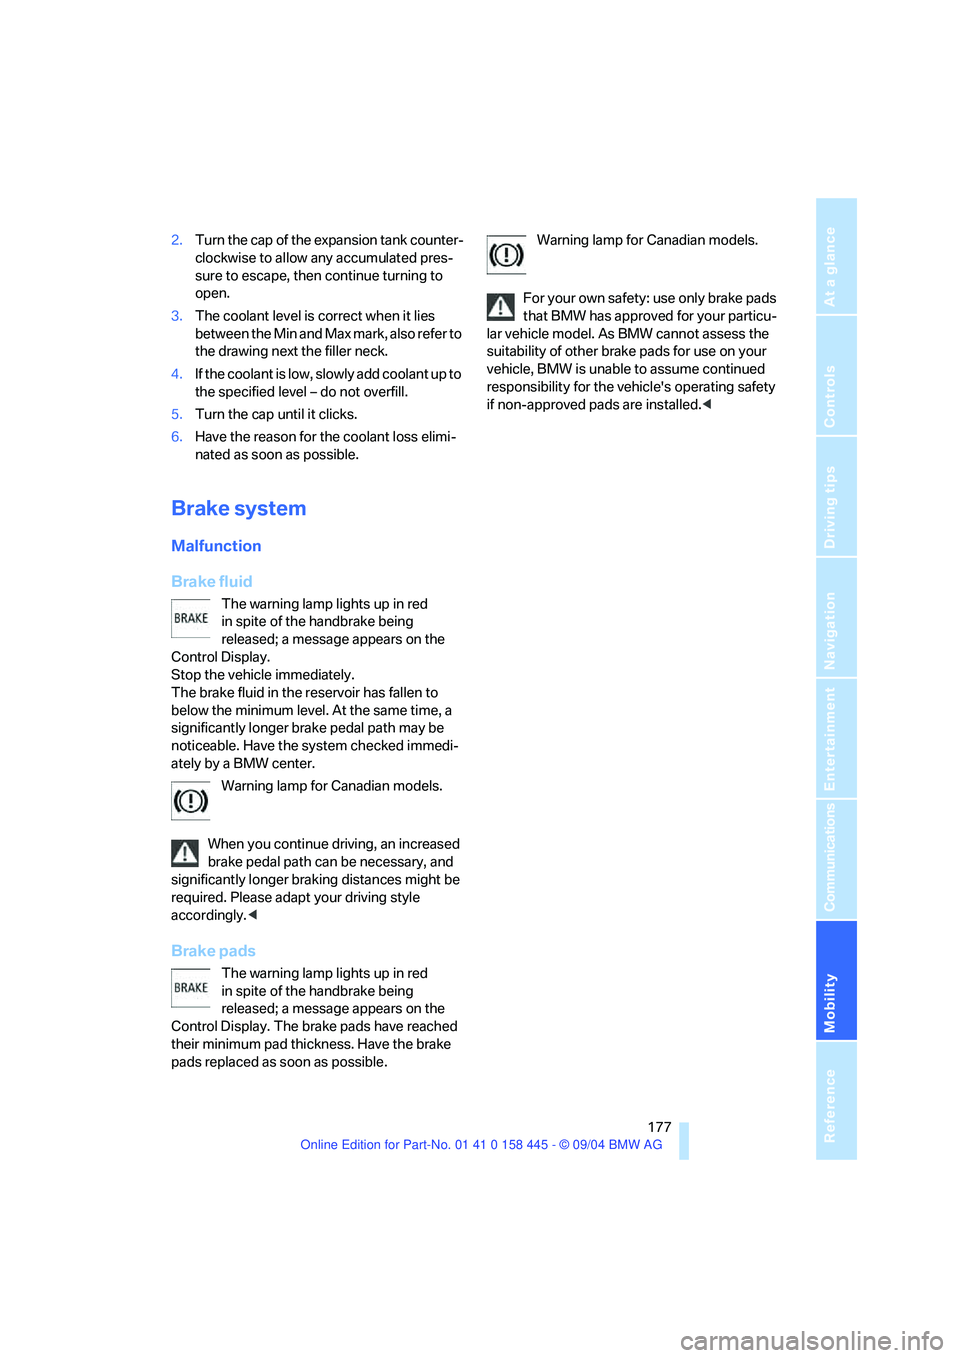
The warning lamp lights up in red
in spite of the handbrake being
released; a message appears on the
Control Display.
Stop the vehicle immediately.
The brake fluid in the reservoir has fallen to
below the minimum level. At the same time, a
significantly longer brake pedal path may be
noticeable. Have the system checked immedi-
ately by a BMW center.
Warning lamp for Canadian models.
When you continue driving, an increased
brake pedal path can be necessary, and
significantly longer braking distances might be
required. Please adapt your driving style
accordingly.<
Brake pads
The warning lamp lights up in red
in spite of the handbrake being
released; a message appears on the
Control Display. The brake pads have reached
their minimum pad thickness. Have the brake
pads replaced as soon as possible.Warning lamp for Canadian models.
For your own safety: use only brake pads
that BMW has approved for your particu-
lar vehicle model. As BMW cannot assess the
suitability of other brake pads for use on your
vehicle, BMW is unable to assume continued
responsibility for the vehicle's operating safety
if non-approved pads are installed.<
Page 180 of 217

Mobility
179Reference
At a glance
Controls
Driving tips
Communications
Navigation
Entertainment
OBD Socket
The Onboard Diagnostics OBD interface
socket is located on the left of the driver's side
under the instrument panel and under a cover.
The cover has the letters OBD on it.
The purpose of the OBD system is to ensure
proper operation of the emission control sys-
tem for the vehicle's lifetime. The system mon-
itors emission-related components and sys-
tems for deterioration and malfunction.
An illuminated indicator lamp informs
you of the need for service, not of the
need to stop the vehicle. However, the
systems should be checked by your BMW cen-
ter at the earliest possible opportunity.
Display of the previously described
malfunction on Canadian models.
Under certain conditions, the indicator
lamp will blink or flash. This indicates a rather
severe level of engine misfire. When this
occurs, you should reduce speed and consult
the nearest BMW center as soon as possible.
Severe engine misfire over only a short period
of time can seriously damage emissions control
components, especially the catalytic converter.
When the fuel filler cap is not properly
tightened, the OBD system can detect
the vapor leak and the indicator lamp will light
up. If the filler cap is subsequently tightened,
the indicator lamp should go out within a few
days.<
Event Data Recorders
Your vehicle may be equipped with one or more
sensing and diagnostic modules or a recording
device capable of recording or transmitting cer-
tain vehicle data or information. In addition, if
you have a Subscription Service Agreement for
the BMW Assist system, certain vehicle infor-
mation may be transmitted or recorded in order
to provide such services.
Care
Important information on care and maintenance
of your BMW is contained in the Caring for your
vehicle brochure.
Page 182 of 217
Mobility
181Reference
At a glance
Controls
Driving tips
Communications
Navigation
Entertainment
High beams, parking lamps
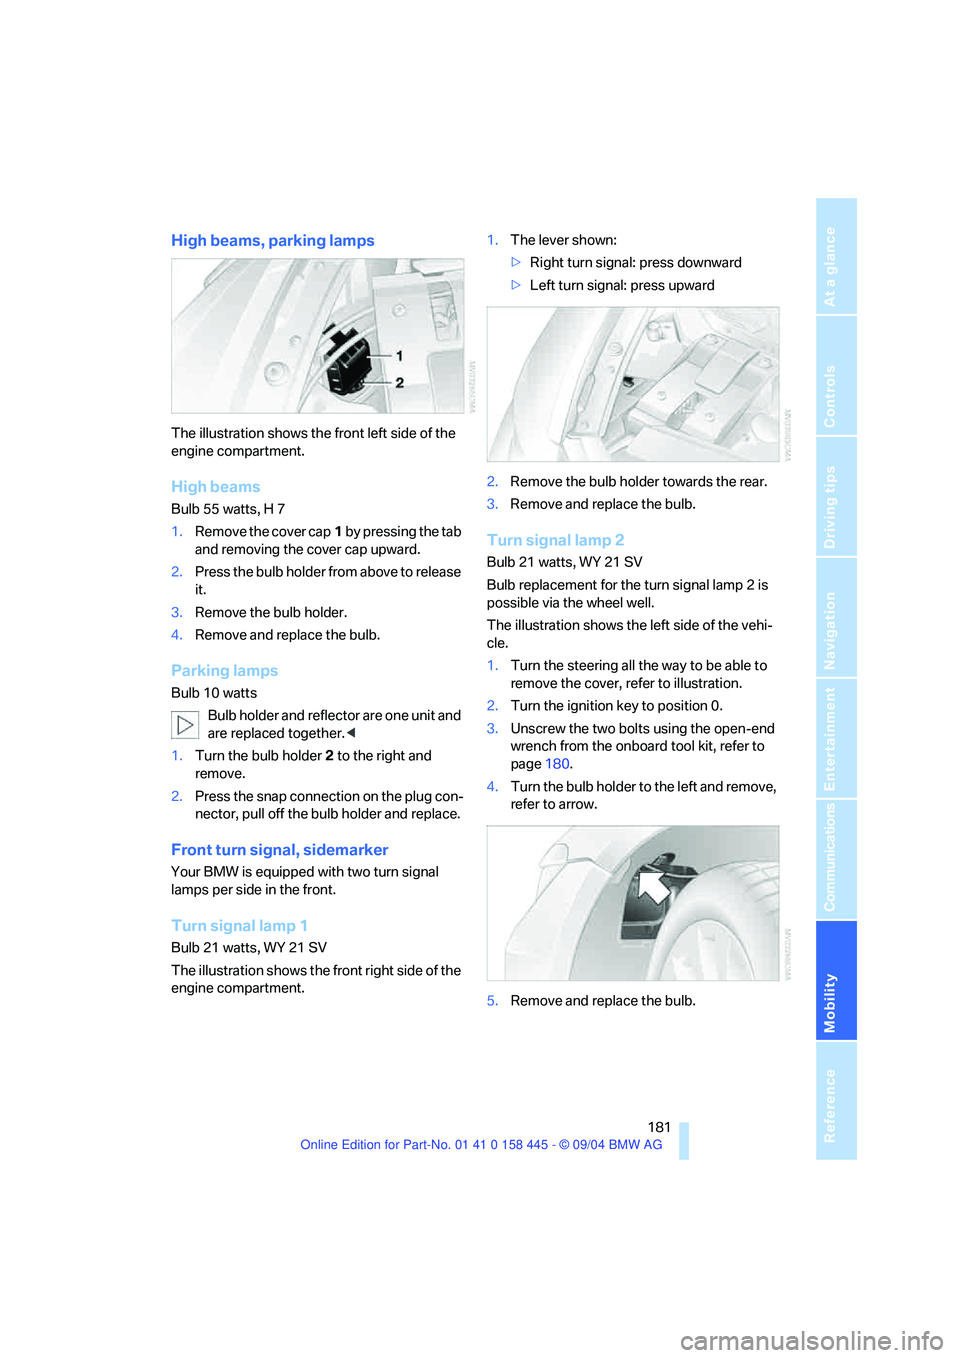
The illustration shows the front left side of the
engine compartment.
High beams
Bulb 55 watts, H 7
1.Remove the cover cap1 by pressing the tab
and removing the cover cap upward.
2.Press the bulb holder from above to release
it.
3.Remove the bulb holder.
4.Remove and replace the bulb.
Parking lamps
Bulb 10 watts
Bulb holder and reflector are one unit and
are replaced together.<
1.Turn the bulb holder2 to the right and
remove.
2.Press the snap connection on the plug con-
nector, pull off the bulb holder and replace.
Front turn signal, sidemarker
Your BMW is equipped with two turn signal
lamps per side in the front.
Turn signal lamp 1
Bulb 21 watts, WY 21 SV
The illustration shows the front right side of the
engine compartment.1.The lever shown:
>Right turn signal: press downward
>Left turn signal: press upward
2.Remove the bulb holder towards the rear.
3.Remove and replace the bulb.
Turn signal lamp 2
Bulb 21 watts, WY 21 SV
Bulb replacement for the turn signal lamp 2 is
possible via the wheel well.
The illustration shows the left side of the vehi-
cle.
1.Turn the steering all the way to be able to
remove the cover, refer to illustration.
2.Turn the ignition key to position 0.
3.Unscrew the two bolts using the open-end
wrench from the onboard tool kit, refer to
page180.
4.Turn the bulb holder to the left and remove,
refer to arrow.
5.Remove and replace the bulb.
Page 184 of 217

Mobility
183Reference
At a glance
Controls
Driving tips
Communications
Navigation
Entertainment
1.Push a screwdriver from the left under the
lamp and lever up the lamp to the right.
2.Turn the bulb holder 905 to the left and
remove.
3.Remove and replace the bulb.
LEDs Light-emitting diodes
Light-emitting diodes installed behind translu-
cent lenses serve as the light source for many of
the controls and displays in your vehicle. These
light-emitting diodes, which operate using a
concept similar to that applied in conventional
lasers, are officially designated as Class 1 light-
emitting diodes.
Do not remove the covers, and never
stare into the unfiltered light several
hours, as irritation of the retina could result.<
Changing a wheel
Your BMW is equipped with run-flat tires as
standard. An immediate wheel change in the
event of a flat tire is therefore no longer
required.
You will recognize run-flat tires by a circular
symbol containing the letters RSC on the side
of the tire, refer to Run-flat tires on page171.
If you have new tires mounted or switch from
summer to winter tires, or vice versa, use run-
flat tires, as in the event of a flat tire there is no
spare tire available. Your BMW center will be
glad to advise you.
Also refer to New wheels and tires, page172.
Car jacking points
The jacking points for the car jack are located in
the positions shown.
The suitable tools for changing tires are
available as accessories from your BMW
center.<
Vehicle battery
Battery care
The battery is 100 % maintenance-free, i.e., the
electrolyte will last for the life of the battery
when the vehicle is operated in a temperate cli-
mate.
Your BMW center will be glad to advise in all
matters concerning the battery.
Charging battery
Only charge the battery in the vehicle via the
terminals in the engine compartment with the
engine switched off. For the connections, refer
to Jump starting on page186.
Disposal
After replacement, have old batteries dis-
posed of by your BMW center or deposit
them at a recycling center. Maintain the battery
in an upright position for transport and storage.
Always secure the battery to prevent it from tip-
ping over during transport.<
Page 185 of 217
Replacing components
184
Power failure
Following a temporary interruption of the power
supply, the operation of some equipment is lim-
ited and must be reinitialized. Individual settings
are also lost and have to be updated:
>Active steering
The system is deactivated and has to be ini-
tialized, refer to page86. Until then, the
steering will react in an unaccustomed
manner.
>Seat, mirror and steering wheel memory
The position must be stored again, refer to
page46.
>Time and date
The settings must be updated, refer to
page78.
>Radio
Radio stations have to be stored again, refer
to page138.
>Navigation system
You must wait until it becomes operational
again, refer to page129.
Fuses
Never attempt to repair a blown fuse, and
do not replace a defective fuse with a sub-
stitute of another color or amperage rating, as
this could lead to overloading of the wiring, ulti-
mately resulting in a fire in the vehicle.<
Spare fuses and a pair of plastic tweezers are
located in the compartment for the onboard tool
kit, refer to page180.
Information on fuse allocation is located below
the bracket for the onboard tool kit, see below.
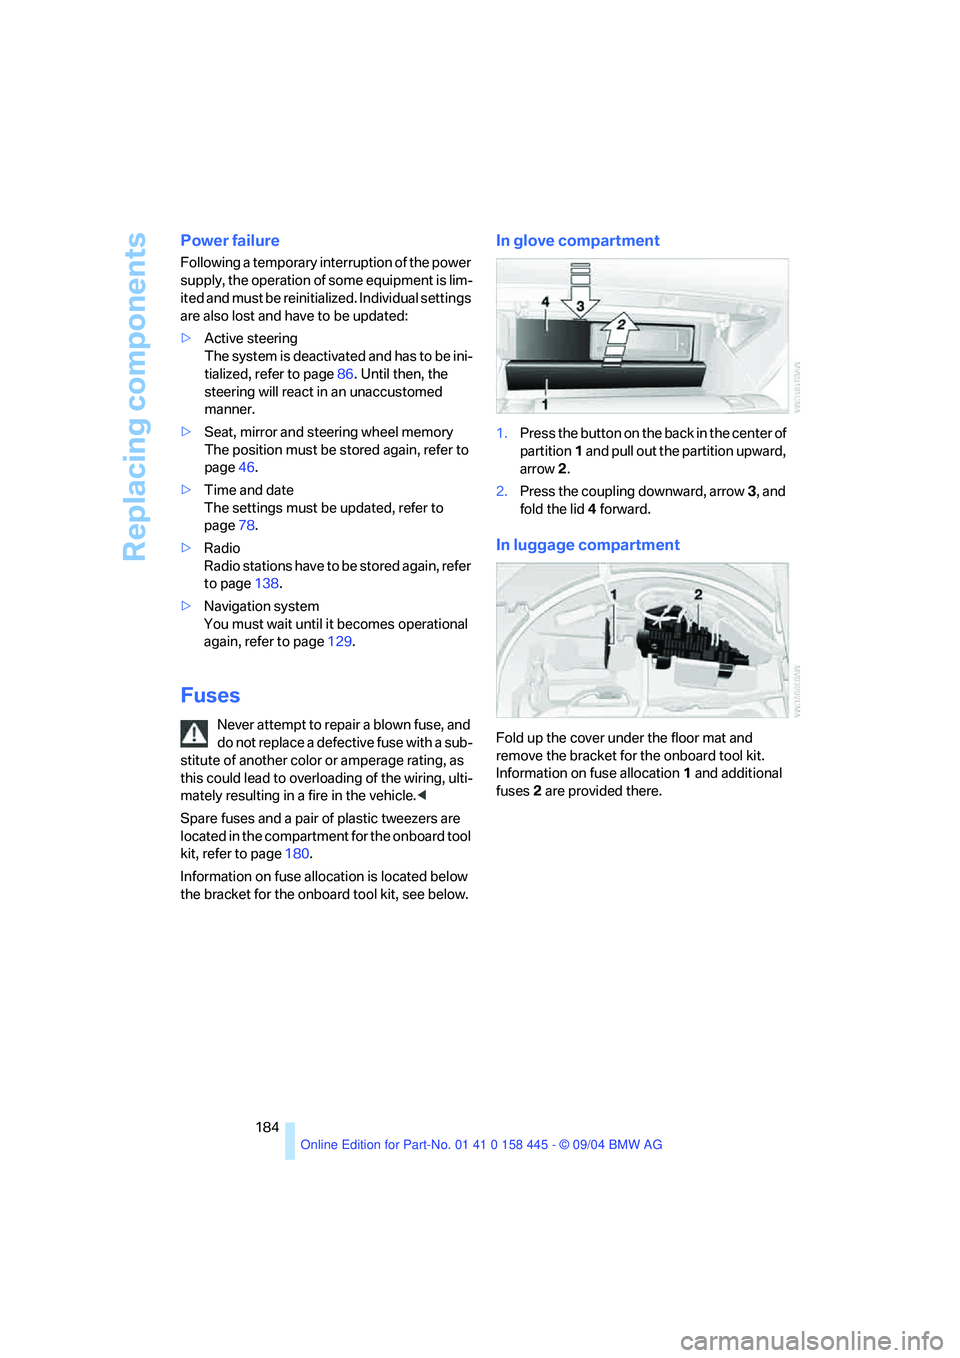
In glove compartment
1.Press the button on the back in the center of
partition1 and pull out the partition upward,
arrow2.
2.Press the coupling downward, arrow3, and
fold the lid 4 forward.
In luggage compartment
Fold up the cover under the floor mat and
remove the bracket for the onboard tool kit.
Information on fuse allocation1 and additional
fuses2 are provided there.
Page 186 of 217
Mobility
185Reference
At a glance
Controls
Driving tips
Communications
Navigation
Entertainment
Giving and receiving assistance
Emergency call*
Conditions for an emergency call:
>Ignition key in position 1 or greater.
>The car phone is logged on to a portable
telephone network.
>The emergency call system is operable.
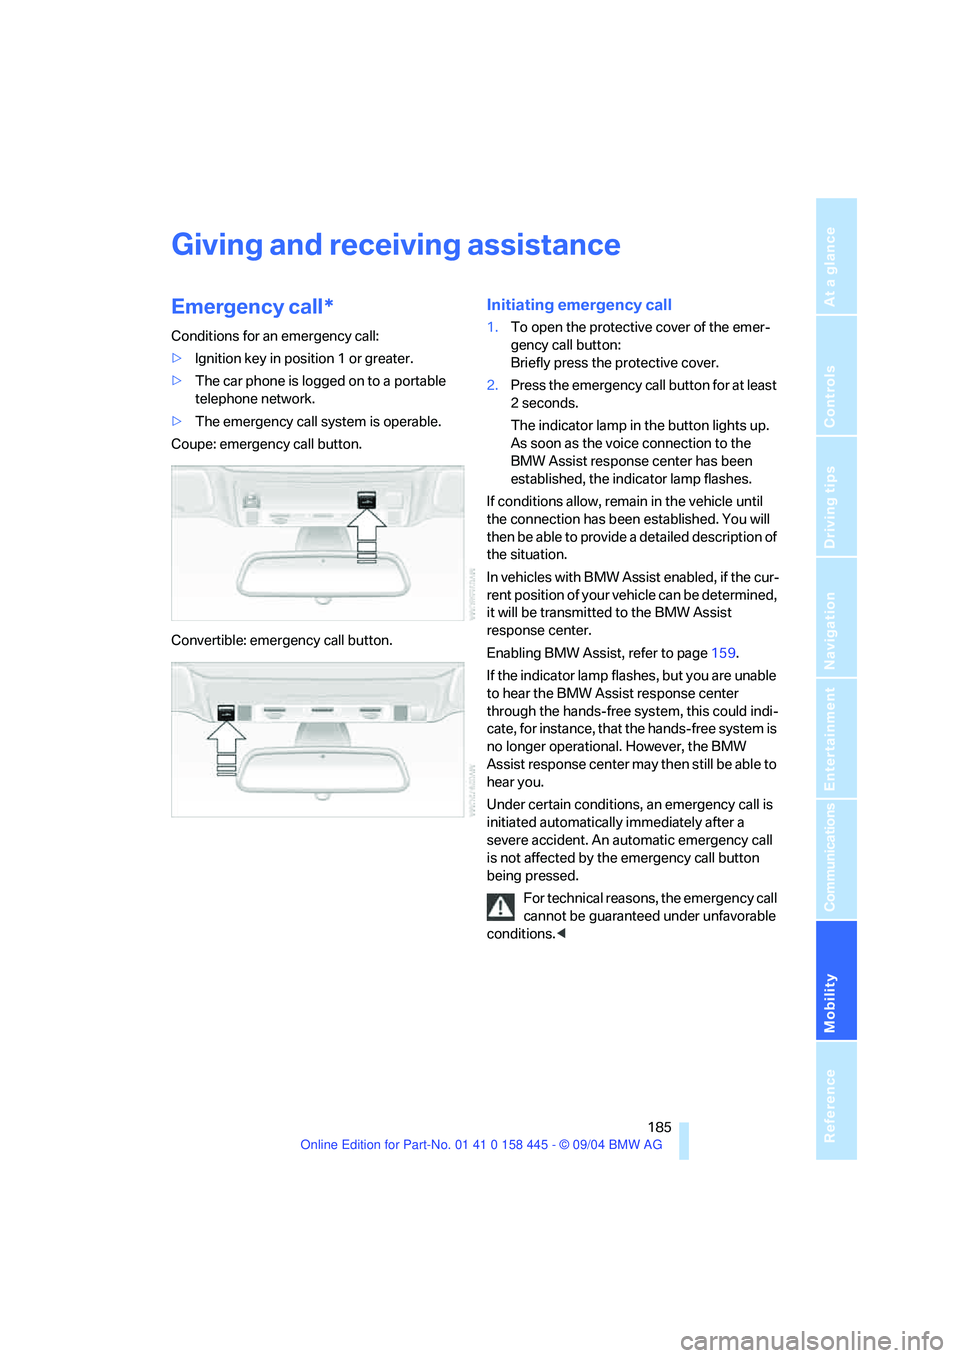
Coupe: emergency call button.
Convertible: emergency call button.
Initiating emergency call
1.To open the protective cover of the emer-
gency call button:
Briefly press the protective cover.
2.Press the emergency call button for at least
2seconds.
The indicator lamp in the button lights up.
As soon as the voice connection to the
BMW Assist response center has been
established, the indicator lamp flashes.
If conditions allow, remain in the vehicle until
the connection has been established. You will
then be able to provide a detailed description of
the situation.
In vehicles with BMW Assist enabled, if the cur-
r en t p o s it i o n o f y o u r v eh i c le c a n b e d et e r m in e d ,
it will be transmitted to the BMW Assist
response center.
Enabling BMW Assist, refer to page159.
If the indicator lamp flashes, but you are unable
to hear the BMW Assist response center
through the hands-free system, this could indi-
cate, for instance, that the hands-free system is
no longer operational. However, the BMW
Assist response center may then still be able to
hear you.
Under certain conditions, an emergency call is
initiated automatically immediately after a
severe accident. An automatic emergency call
is not affected by the emergency call button
being pressed.
For technical reasons, the emergency call
cannot be guaranteed under unfavorable
conditions.<
Page 188 of 217
Mobility
187Reference
At a glance
Controls
Driving tips
Communications
Navigation
Entertainment
Preparing
1.Check whether the battery of the other
vehicle has a voltage of 12 Volts and
approximately the same capacitance in Ah.
This information can be found on the bat-
tery.
2.Switch off the engine of the vehicle provid-
ing assistance.
3.Switch off all electrical accessories in both
vehicles.
There must not be any contact between
the bodies of the two vehicles, as other-
wise there is a danger of shorting.<
Connecting jumper cables
To avoid personal injury from sparks,
observe this sequence when connecting
jumper cables.<
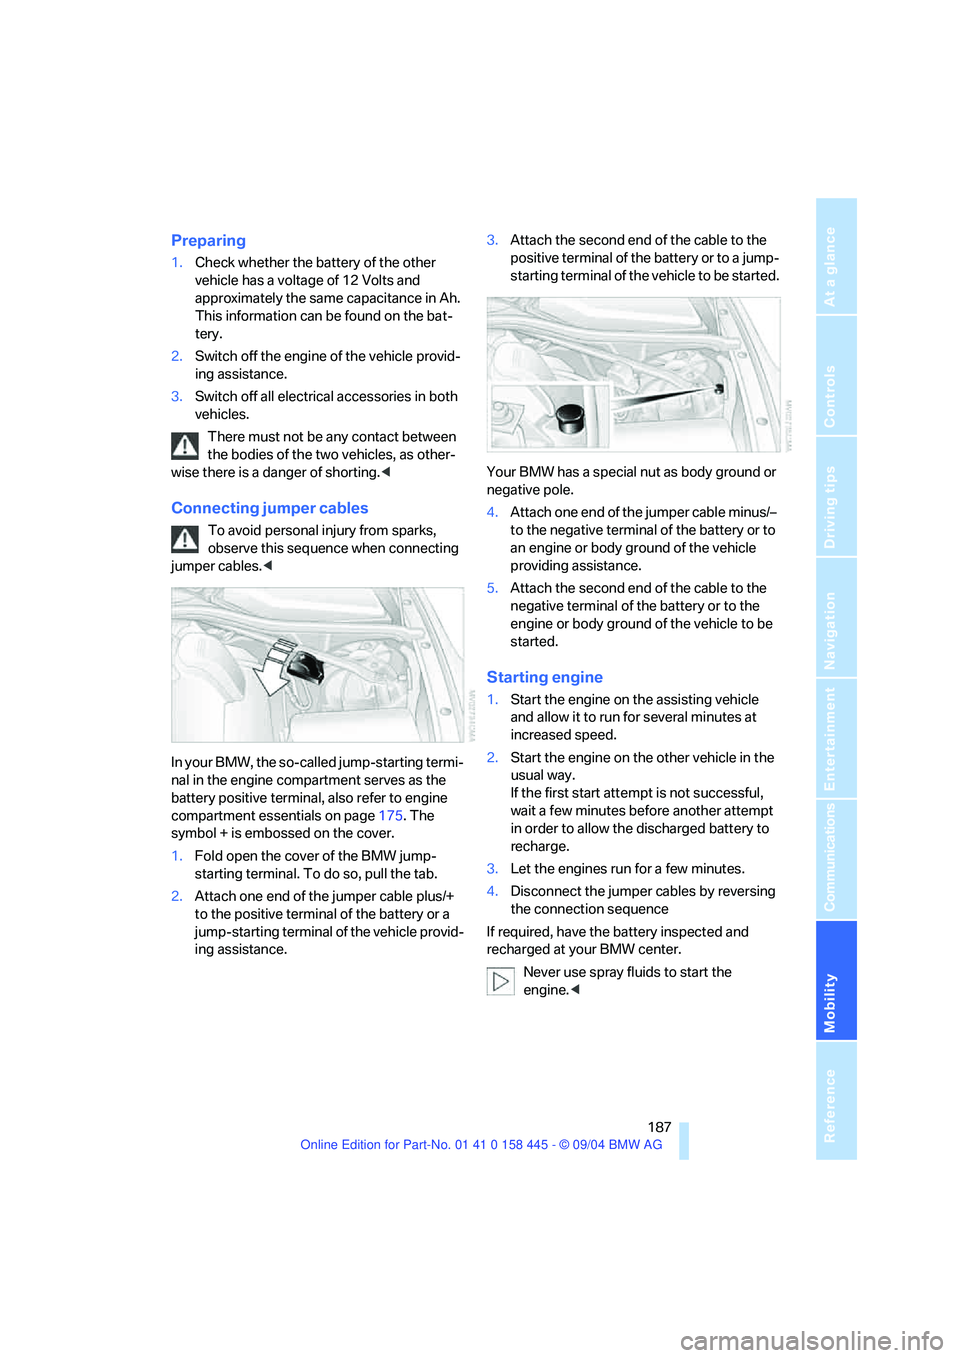
In your BMW, the so-called jump-starting termi-
nal in the engine compartment serves as the
battery positive terminal, also refer to engine
compartment essentials on page175. The
symbol + is embossed on the cover.
1.Fold open the cover of the BMW jump-
starting terminal. To do so, pull the tab.
2.Attach one end of the jumper cable plus/+
to the positive terminal of the battery or a
jump-starting terminal of the vehicle provid-
ing assistance.3.Attach the second end of the cable to the
positive terminal of the battery or to a jump-
starting terminal of the vehicle to be started.
Your BMW has a special nut as body ground or
negative pole.
4.Attach one end of the jumper cable minus/–
to the negative terminal of the battery or to
an engine or body ground of the vehicle
providing assistance.
5.Attach the second end of the cable to the
negative terminal of the battery or to the
engine or body ground of the vehicle to be
started.
Starting engine
1.Start the engine on the assisting vehicle
and allow it to run for several minutes at
increased speed.
2.Start the engine on the other vehicle in the
usual way.
If the first start attempt is not successful,
wait a few minutes before another attempt
in order to allow the discharged battery to
recharge.
3.Let the engines run for a few minutes.
4.Disconnect the jumper cables by reversing
the connection sequence
If required, have the battery inspected and
recharged at your BMW center.
Never use spray fluids to start the
engine.<