2005 BMW 645CI CONVERTIBLE clock
[x] Cancel search: clockPage 29 of 217
Opening and closing
28
Opening and closing
The key set
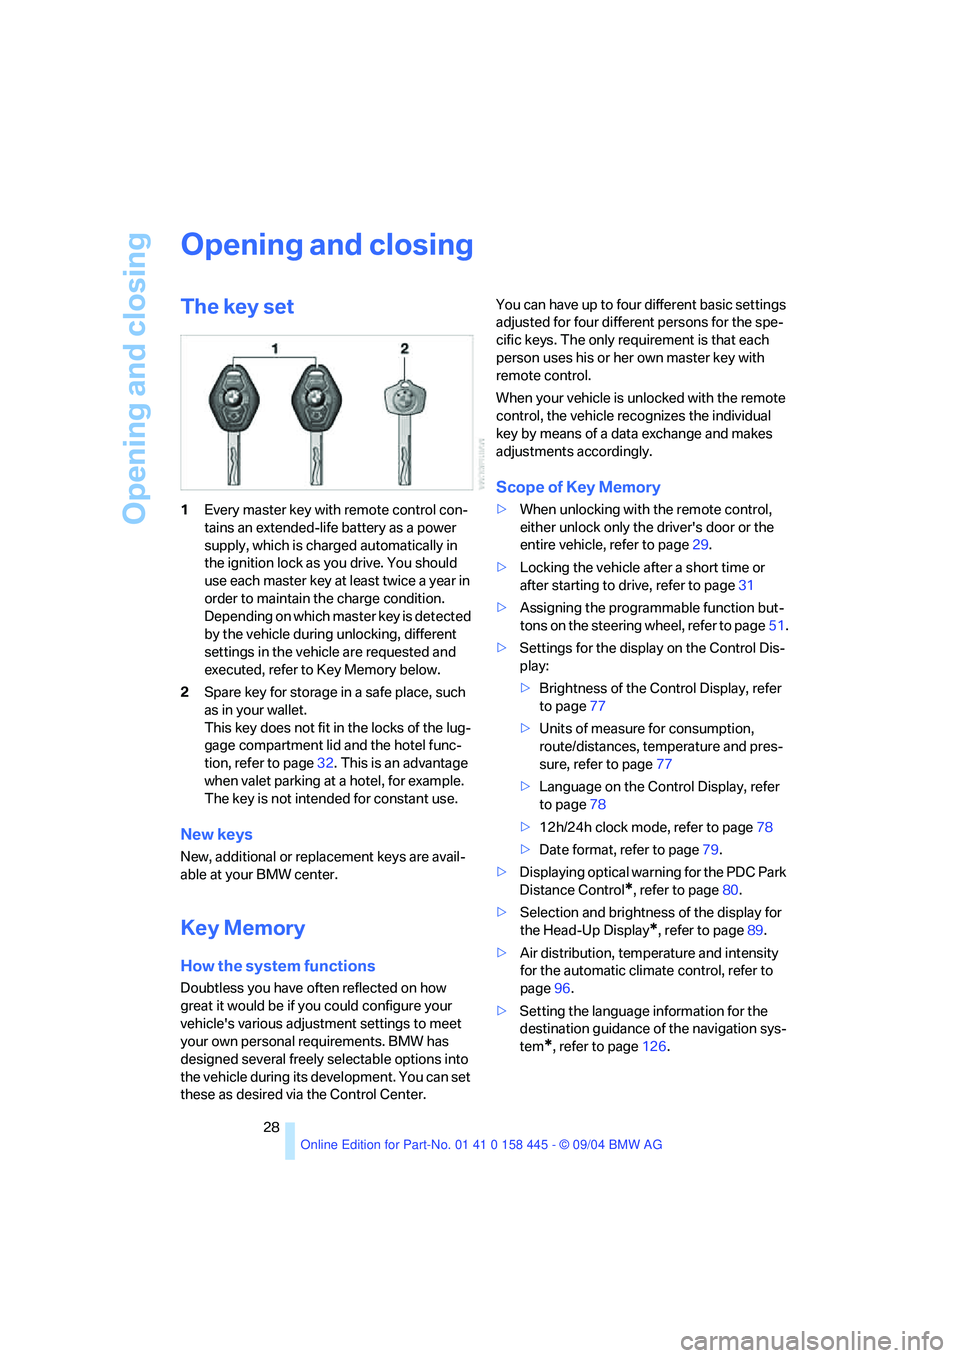
1Every master key with remote control con-
tains an extended-life battery as a power
supply, which is charged automatically in
the ignition lock as you drive. You should
use each master key at least twice a year in
order to maintain the charge condition.
Depending on which master key is detected
by the vehicle during unlocking, different
settings in the vehicle are requested and
executed, refer to Key Memory below.
2Spare key for storage in a safe place, such
as in your wallet.
This key does not fit in the locks of the lug-
gage compartment lid and the hotel func-
tion, refer to page32. This is an advantage
when valet parking at a hotel, for example.
The key is not intended for constant use.
New keys
New, additional or replacement keys are avail-
able at your BMW center.
Key Memory
How the system functions
Doubtless you have often reflected on how
great it would be if you could configure your
vehicle's various adjustment settings to meet
your own personal requirements. BMW has
designed several freely selectable options into
the vehicle during its development. You can set
these as desired via the Control Center.You can have up to four different basic settings
adjusted for four different persons for the spe-
cific keys. The only requirement is that each
person uses his or her own master key with
remote control.
When your vehicle is unlocked with the remote
control, the vehicle recognizes the individual
key by means of a data exchange and makes
adjustments accordingly.
Scope of Key Memory
>When unlocking with the remote control,
either unlock only the driver's door or the
entire vehicle, refer to page29.
>Locking the vehicle after a short time or
after starting to drive, refer to page31
>Assigning the programmable function but-
tons on the steering wheel, refer to page51.
>Settings for the display on the Control Dis-
play:
>Brightness of the Control Display, refer
to page77
>Units of measure for consumption,
route/distances, temperature and pres-
sure, refer to page77
>Language on the Control Display, refer
to page78
>12h/24h clock mode, refer to page78
>Date format, refer to page79.
>Displaying optical warning for the PDC Park
Distance Control
*, refer to page80.
>Selection and brightness of the display for
the Head-Up Display
*, refer to page89.
>Air distribution, temperature and intensity
for the automatic climate control, refer to
page96.
>Setting the language information for the
destination guidance of the navigation sys-
tem
*, refer to page126.
Page 45 of 217
Adjustments
44
Adjustments
Sitting safely
The ideal sitting position can make a vital con-
tribution to relaxed, fatigue-free driving. The sit-
ting position also plays an important role
together with the safety belts and airbags in
providing occupants with maximum levels of
passive safety in an accident. To ensure that
the safety systems operate with optimal effi-
ciency, we strongly urge you to observe the
instructions contained in the following section.
For additional information on transporting chil-
dren safely, refer to page52.
Airbags
Always maintain an adequate distance
between yourself and the airbags. Always
hold the steering wheel by its rim with hands at
the 9 o'clock and 3 o'clock positions, to mini-
mize the risk of injuries to your hands and arms
in the event of airbag deployment.
No one and nothing is to come between the air-
bags and the seat occupant.
Do not use the cover of the front airbag on the
front passenger side as a storage area. Make
sure that the front passenger is sitting correctly
and does not rest feet or legs on the instrument
panel, otherwise leg injuries can occur if the
knee and front airbags are triggered.
Never let an occupant's head rest near or on a
side airbag because the inflating airbag could
cause a serious or fatal injury.<
Even if you adhere to all the instructions, inju-
ries resulting from contact with airbags cannot
be fully excluded, depending on the circum-
stances. The ignition and inflation noise may
provoke a mild hearing loss in extremely sensi-
tive individuals. This effect is usually only tem-
porary.
For airbag locations and additional information
on airbags, refer to page86.
Safety belt
Fasten your safety belt before starting any trip.
Airbags complement the safety belt as an addi-
tional safety device, but they do not represent a
substitute.
Your vehicle has four seats that are all equipped
with a safety belt.
At all times, occupants should sit upright
and be properly restrained: infants and
small children in appropriate child-restraint sys-
tems; larger children and adults using the safety
belts.
Never allow more than one person to wear a sin-
gle safety belt. Never allow infants or small chil-
dren to ride in a passenger's lap.
Expectant mothers should always wear their
safety belts, taking care to position the lap belt
against the lower hips, where it will not exert
pressure against the abdominal area.
Do not route the belt across your neck, or run it
across sharp edges. Be sure that the belt does
not become caught or jammed. Avoid twisting
the belt while routing it firmly across the hips
and shoulder. Do not allow the belt to rest
against hard or fragile objects. Otherwise, in the
event of a frontal impact, a loose lap belt could
slide over your hips, leading to abdominal injury.
Avoid wearing clothing that prevents the belt
from fitting properly and pull the shoulder belt
periodically to readjust the tension across your
lap in order to avoid a reduction in the retention
effect of the safety belt.<
For instructions on operating safety belts, refer
to page48.
Seats
Note before adjusting
Never attempt to adjust your seat while
operating the vehicle. The seat could
respond with unexpected movement, and the
ensuing loss of vehicle control could lead to an
accident.
Page 70 of 217
Controls
69Reference
At a glance
Driving tips
Communications
Navigation
Entertainment
Mobility
Everything under control
Odometer, outside
temperature display, clock
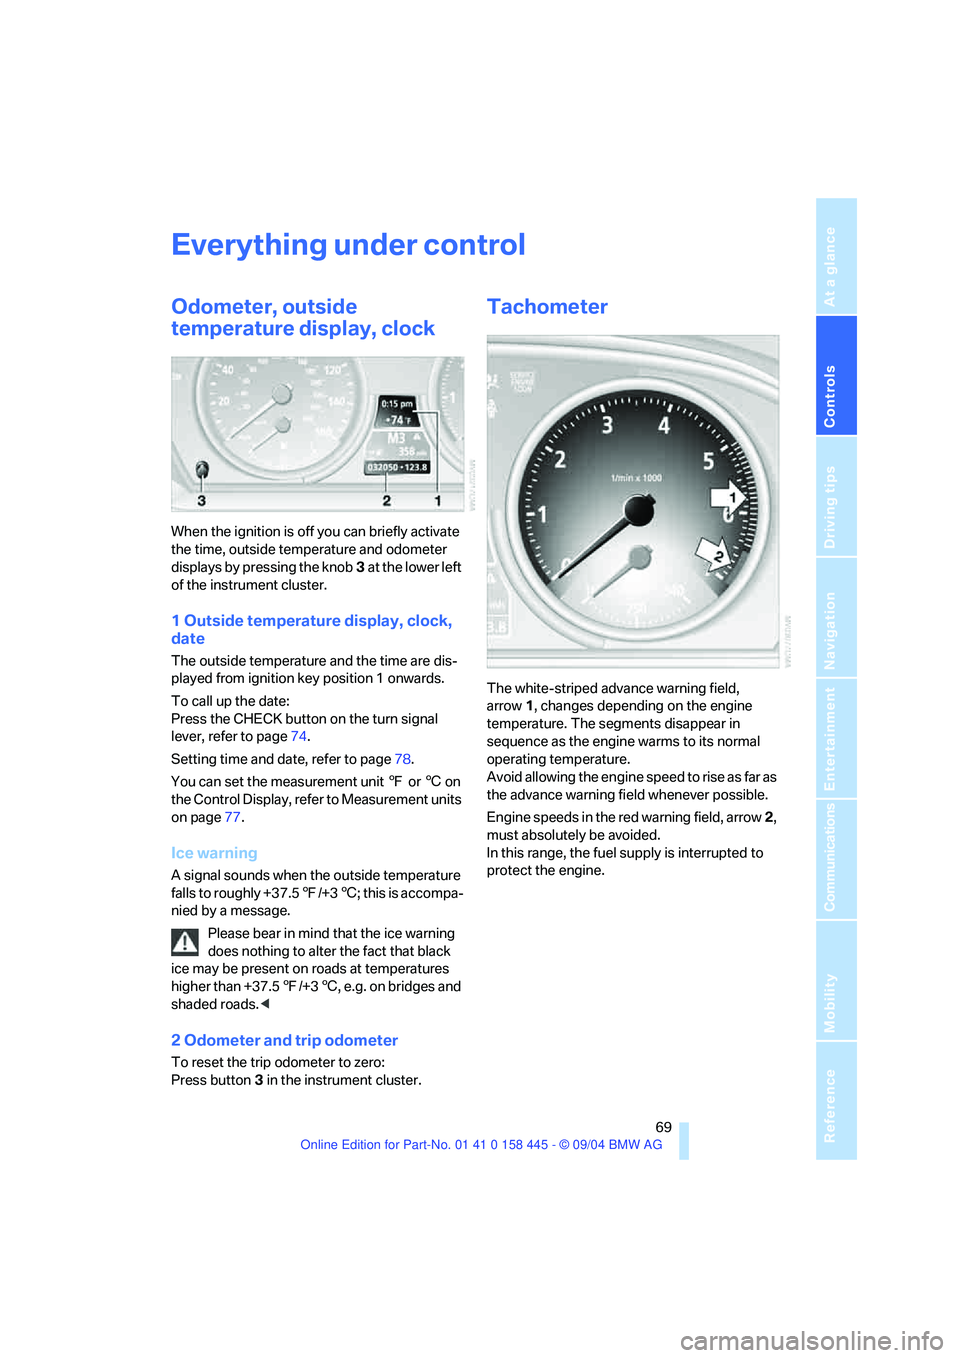
When the ignition is off you can briefly activate
the time, outside temperature and odometer
displays by pressing the knob3 at the lower left
of the instrument cluster.
1 Outside temperature display, clock,
date
The outside temperature and the time are dis-
played from ignition key position 1 onwards.
To call up the date:
Press the CHECK button on the turn signal
lever, refer to page74.
Setting time and date, refer to page78.
You can set the measurement unit 7 or 6 on
the Control Display, refer to Measurement units
on page77.
Ice warning
A signal sounds when the outside temperature
falls to roughly +37.57/+36; this is accompa-
nied by a message.
Please bear in mind that the ice warning
does nothing to alter the fact that black
ice may be present on roads at temperatures
higher than +37.57/+36, e.g. on bridges and
shaded roads.<
2 Odometer and trip odometer
To reset the trip odometer to zero:
Press button3 in the instrument cluster.
Tachometer
The white-striped advance warning field,
arrow1, changes depending on the engine
temperature. The segments disappear in
sequence as the engine warms to its normal
operating temperature.
Avoid allowing the engine speed to rise as far as
the advance warning field whenever possible.
Engine speeds in the red warning field, arrow2,
must absolutely be avoided.
In this range, the fuel supply is interrupted to
protect the engine.
Page 167 of 217
Refueling
166
Refueling
Always switch off the engine before refu-
eling. If you do not, fuel cannot be dis-
pensed into the tank and a message on the
Control Display will appear.<
Always observe all applicable precautions
and regulations when handling fuels.
Never carry spare fuel containers in your vehi-
cle. Whether empty or full, these containers can
leak, cause an explosion, and lead to fire in the
event of a collision.<
Fuel filler door
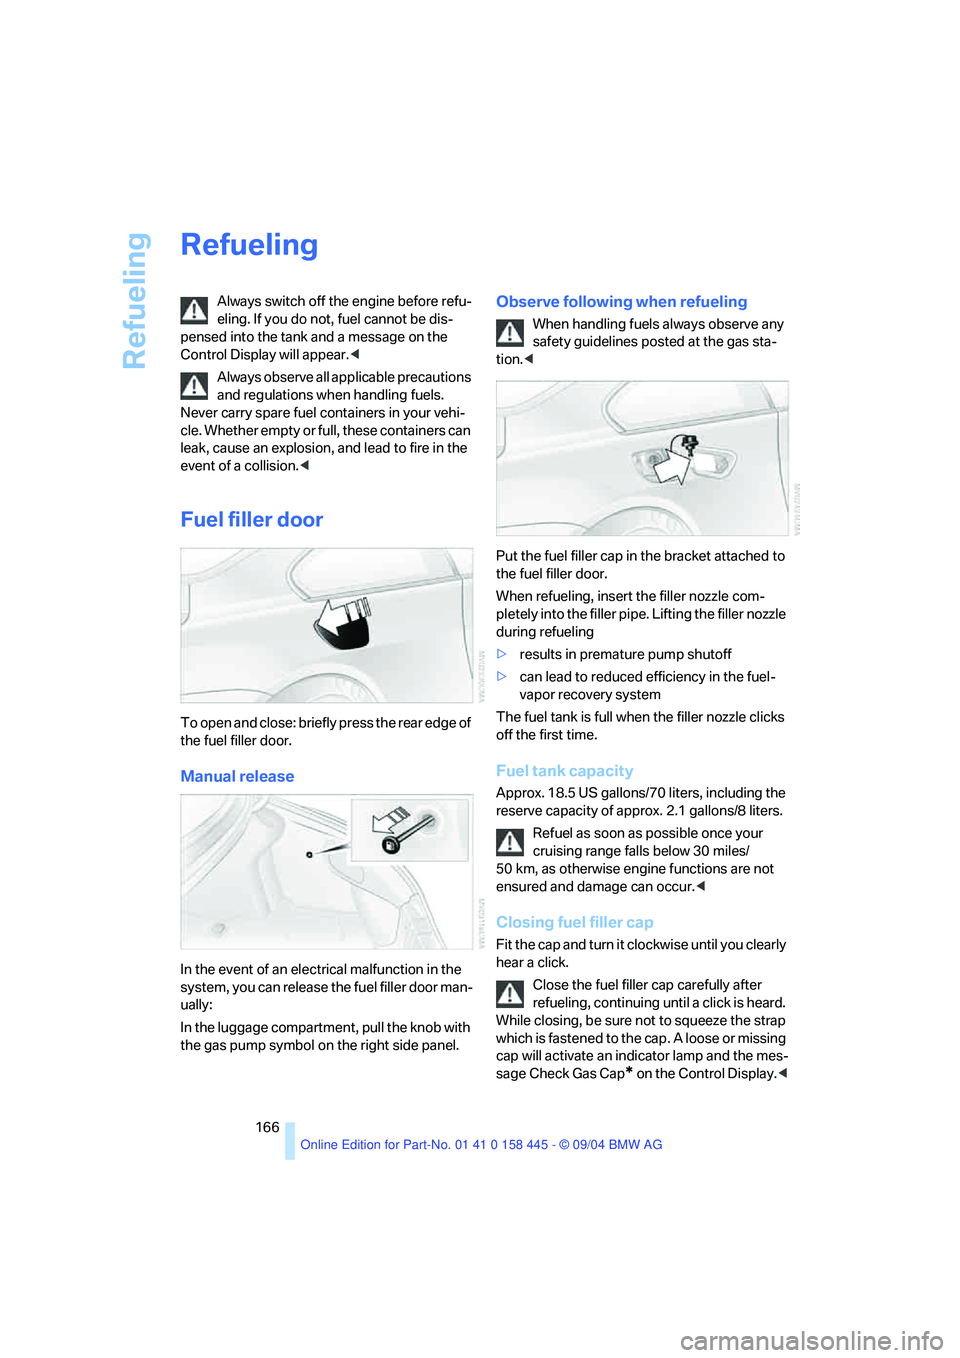
To open and close: briefly press the rear edge of
the fuel filler door.
Manual release
In the event of an electrical malfunction in the
system, you can release the fuel filler door man-
ually:
In the luggage compartment, pull the knob with
the gas pump symbol on the right side panel.
Observe following when refueling
When handling fuels always observe any
safety guidelines posted at the gas sta-
tion.<
Put the fuel filler cap in the bracket attached to
the fuel filler door.
When refueling, insert the filler nozzle com-
pletely into the filler pipe. Lifting the filler nozzle
during refueling
>results in premature pump shutoff
>can lead to reduced efficiency in the fuel-
vapor recovery system
The fuel tank is full when the filler nozzle clicks
off the first time.
Fuel tank capacity
Approx. 18.5 US gallons/70 liters, including the
reserve capacity of approx. 2.1 gallons/8 liters.
Refuel as soon as possible once your
cruising range falls below 30 miles/
50 km, as otherwise engine functions are not
ensured and damage can occur.<
Closing fuel filler cap
Fit the cap and turn it clockwise until you clearly
hear a click.
Close the fuel filler cap carefully after
refueling, continuing until a click is heard.
While closing, be sure not to squeeze the strap
which is fastened to the cap. A loose or missing
cap will activate an indicator lamp and the mes-
sage Check Gas Cap
* on the Control Display.<
Page 178 of 217
Mobility
177Reference
At a glance
Controls
Driving tips
Communications
Navigation
Entertainment
2.Turn the cap of the expansion tank counter-
clockwise to allow any accumulated pres-
sure to escape, then continue turning to
open.
3.The coolant level is correct when it lies
between the Min and Max mark, also refer to
the drawing next the filler neck.
4.If the coolant is low, slowly add coolant up to
the specified level – do not overfill.
5.Turn the cap until it clicks.
6.Have the reason for the coolant loss elimi-
nated as soon as possible.
Brake system
Malfunction
Brake fluid
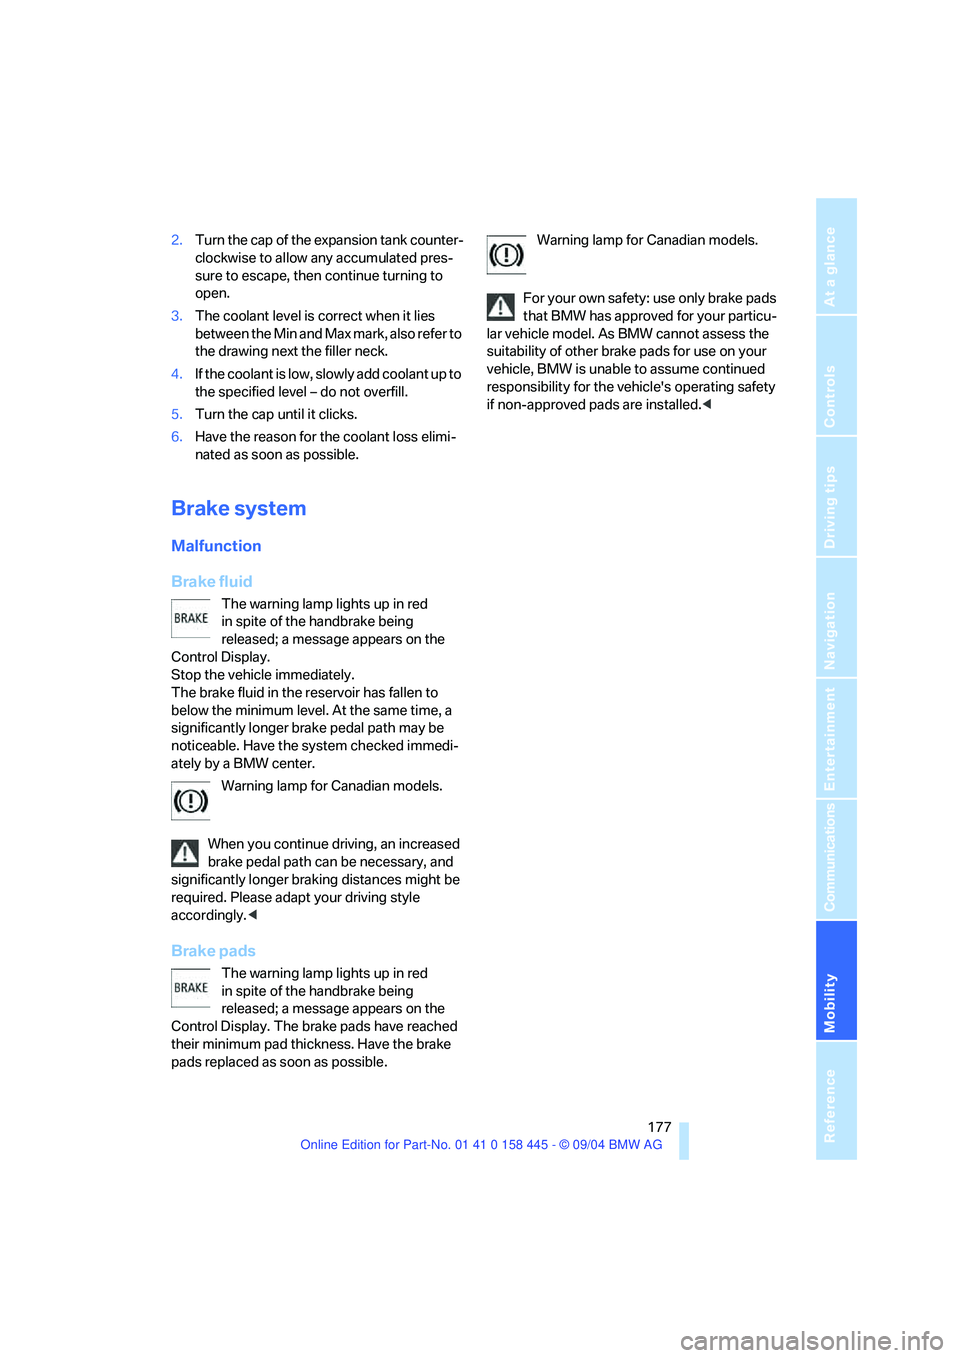
The warning lamp lights up in red
in spite of the handbrake being
released; a message appears on the
Control Display.
Stop the vehicle immediately.
The brake fluid in the reservoir has fallen to
below the minimum level. At the same time, a
significantly longer brake pedal path may be
noticeable. Have the system checked immedi-
ately by a BMW center.
Warning lamp for Canadian models.
When you continue driving, an increased
brake pedal path can be necessary, and
significantly longer braking distances might be
required. Please adapt your driving style
accordingly.<
Brake pads
The warning lamp lights up in red
in spite of the handbrake being
released; a message appears on the
Control Display. The brake pads have reached
their minimum pad thickness. Have the brake
pads replaced as soon as possible.Warning lamp for Canadian models.
For your own safety: use only brake pads
that BMW has approved for your particu-
lar vehicle model. As BMW cannot assess the
suitability of other brake pads for use on your
vehicle, BMW is unable to assume continued
responsibility for the vehicle's operating safety
if non-approved pads are installed.<
Page 187 of 217
Giving and receiving assistance
186
Warning triangle*
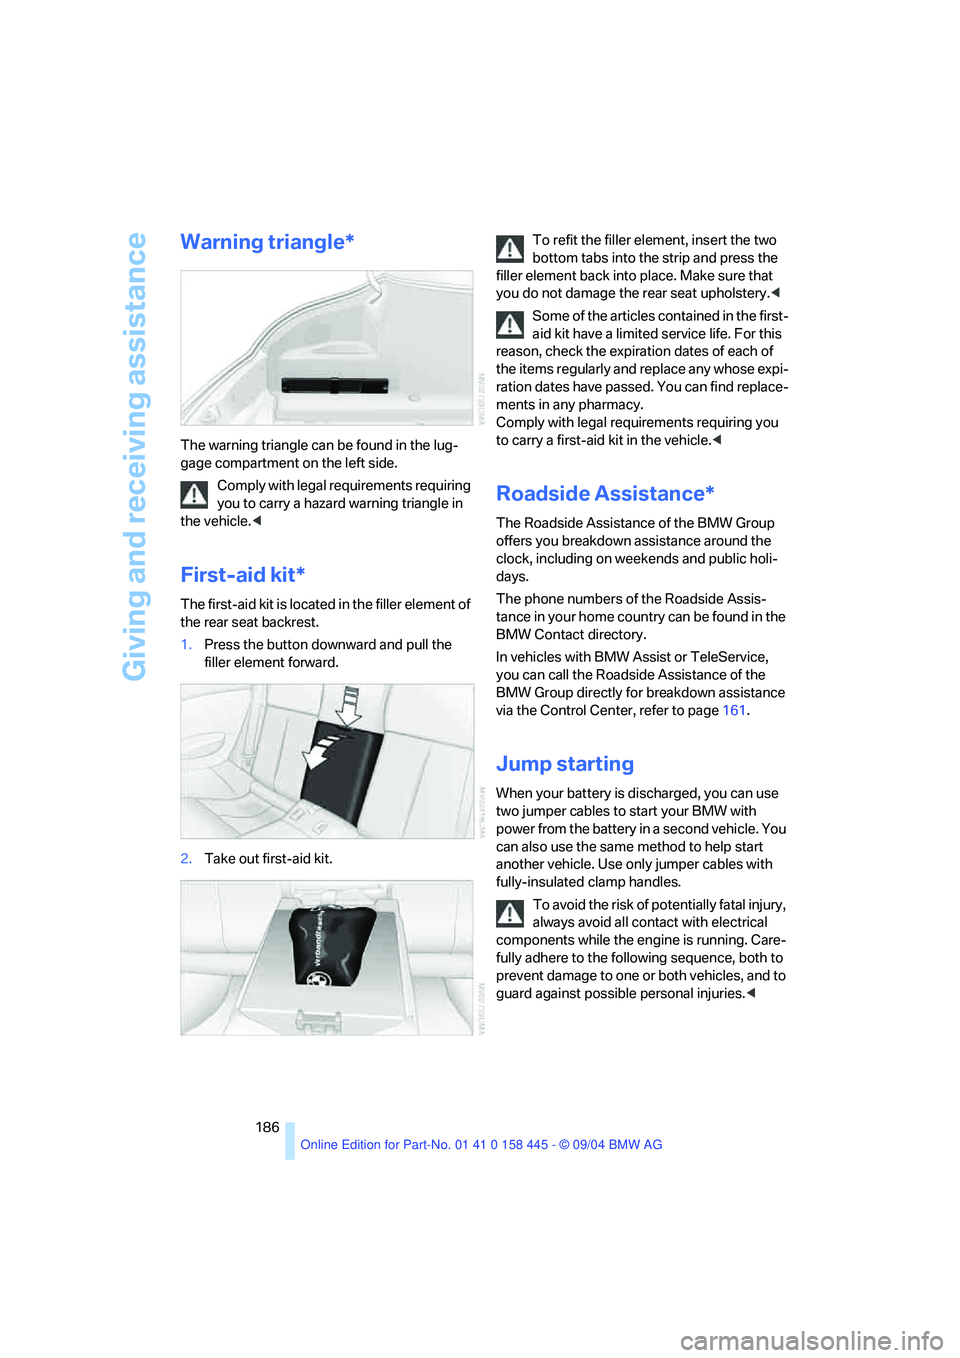
The warning triangle can be found in the lug-
gage compartment on the left side.
Comply with legal requirements requiring
you to carry a hazard warning triangle in
the vehicle.<
First-aid kit*
The first-aid kit is located in the filler element of
the rear seat backrest.
1.Press the button downward and pull the
filler element forward.
2.Take out first-aid kit.To refit the filler element, insert the two
bottom tabs into the strip and press the
filler element back into place. Make sure that
you do not damage the rear seat upholstery.<
Some of the articles contained in the first-
aid kit have a limited service life. For this
reason, check the expiration dates of each of
the items regularly and replace any whose expi-
ration dates have passed. You can find replace-
ments in any pharmacy.
Comply with legal requirements requiring you
to carry a first-aid kit in the vehicle.<
Roadside Assistance*
The Roadside Assistance of the BMW Group
offers you breakdown assistance around the
clock, including on weekends and public holi-
days.
The phone numbers of the Roadside Assis-
tance in your home country can be found in the
BMW Contact directory.
In vehicles with BMW Assist or TeleService,
you can call the Roadside Assistance of the
BMW Group directly for breakdown assistance
via the Control Center, refer to page161.
Jump starting
When your battery is discharged, you can use
two jumper cables to start your BMW with
power from the battery in a second vehicle. You
can also use the same method to help start
another vehicle. Use only jumper cables with
fully-insulated clamp handles.
To avoid the risk of potentially fatal injury,
always avoid all contact with electrical
components while the engine is running. Care-
fully adhere to the following sequence, both to
prevent damage to one or both vehicles, and to
guard against possible personal injuries.<
Page 202 of 217
Reference 201
At a glance
Controls
Driving tips
Communications
Navigation
Entertainment
Mobility
C
California law
– Event Data Recorders179
California Proposition 65
Warning6
"Call"153
Call
– accepting152
– display accepted153
– ending152
– in absence153
– starting152
Calling
– from phone book153
– from the Top 8 list153
– redialing153
"Call sender"156
Can holder, refer to Cup
holders103
Capacities195
Capacity of the luggage
compartment192
Car battery, refer to Vehicle
battery183
Car care, refer to the Caring
for your vehicle brochure
Car-care products, refer to the
Caring for your vehicle
brochure
"Car data"74
Care, refer to the Caring for
your vehicle brochure
Cargo loading
– securing cargo111
– stowing cargo111
– vehicle110
Caring for artificial leather,
refer to the Caring for your
vehicle brochure
Caring for leather, refer to the
Caring for your vehicle
brochure
Caring for light-alloy wheels,
refer to the Caring for your
vehicle brochure
Caring for plastic, refer to the
Caring for your vehicle
brochureCaring for the carpet, refer to
the Caring for your vehicle
brochure
Caring for the vehicle finish,
refer to the Caring for your
vehicle brochure
Car keys, refer to Key set28
Car phone151
– installation location, refer to
Center armrest102
– refer to Portable phone150
– refer to separate Owner's
Manual
Car radio, refer to Radio136
Car wash110
– also refer to the Caring for
your vehicle brochure
– refer to Before driving into a
car wash110
Catalytic converter, refer to
Hot exhaust system108
"Categories"141
CBC Cornering Brake
Control81
CBS Condition Based
Service178
"CD"133,143
CD changer143
– controls132
– fast forward/reverse145
– installation location145
– playing a track145
– random play sequence145
– repeating a track144
– selecting a CD144
– selecting a track144
– switching on/off132
– tone control133
– volume133
CD player143
– controls132
– fast forward/reverse145
– playing a track145
– random play sequence145
– repeating a track144
– selecting a track144
– switching on/off132
– tone control133
– volume133Center armrest
– adjusting the height102
– front102
Center console14
"Central locking"29
Central locking system29
– from inside vehicle31
Changes, technical, refer to
For your own safety6
Changing a wheel183
Changing gear
– automatic transmission with
Steptronic58
Changing language on
Control Display78
Changing measurement units
on Control Display77
Changing wheels183
CHECK button73
Check Control71
"Check Control
messages"73
Check Gas Cap166
Checking the air pressure,
refer to Tire inflation
pressure168
Child's seats, refer to Child-
restraint systems52
Child-restraint fixing system
LATCH53
Child restraints52
Child-restraint systems52
Chrome parts, care, refer to
the Caring for your vehicle
brochure
Cigarette lighter103
Cleaning, refer to the Caring
for your vehicle brochure
Cleaning the windshield, refer
to Wiper system61
"Climate"96
Clock69
– 12h/24h mode78
– setting time and date78
Closing
– from inside31
– from outside29
Clothes hooks, Coupe102
Cockpit10
Page 203 of 217
Everything from A to Z
202 Cold start, refer to Starting
engine54
"Communication"152
"Communication
settings"159
Compact disc
– refer to CD changer143
– refer to CD player143
Computer74
– clock, 12h/24h clock
mode78
– displays on Control
Display74
– hour signal78
"Concert hall"135
Condition Based Service
CBS178
"Confirmation"30
Confirmation signals for
locking and unlocking30
Connecting a vacuum cleaner,
refer to Socket103
Consumption display, refer to
Average fuel
consumption74
"Continue guidance to
destination?"125
Control Center16
– adjusting brightness77
– assistance window20
– automatic climate control96
– changing settings19,77
– changing the menu page19
– changing time and date78
– confirming selection or
entry19
– controller16
– display, menus16
– language selection78
– menu item selection19
– menu navigation17
– operating elements16
– selecting units of
measurement and display
format77
– start menu17
– status information20
– symbols17
Control Display16Controller, refer to Control
Center16
Controls, refer to Cockpit10
Convenience operation
– convertible top30,31
– glass sunroof30,31
– windows30,31
Convenience start, refer to
Starting engine54,55
Convertible
– convertible program for
automatic climate control97
– opening and closing
windows36
– rollover protection
system87
– top39
– wind deflector42
Convertible top
– care, refer to the Caring for
your vehicle brochure
– convenience operation31
– emergency closing41
– manual closing in the event
of an electrical
malfunction41
– opening and closing40
Coolant176
– level176
Cooling, maximum95
Cornering Brake Control
CBC81
Country of destination for
navigation116
Courtesy lighting93
Cruise control61
– active cruise control62
Cruising range74
Cup holders103
Curb weight, refer to
Weights192
"Current position"125
Current position
– displaying125
– entering120
– storing120
"Customer Relations"162
Cylinders, refer to Engine
data192
D
Dashboard, refer to
Cockpit10
Dashboard lighting, refer to
Instrument lighting93
Data192
– capacities195
– dimensions193
– engine192
– weights192
"Date"79
Date69
– setting78
"Date format"79
Daytime driving lamps91
DBC Dynamic Brake
Control81
– malfunction83
– warning lamp83
"Deactivated"47
Deactivating front passenger
airbag, Coupe52
Decommissioning the vehicle,
refer to the Caring for your
vehicle brochure
Deep water, refer to Driving
through water109
Defrosting windows95
Defrosting windows and
removing condensation95
Defrosting windshield, refer to
Defrosting windows95
Defrost position, refer to
Defrosting windows95
"Delete address book" for
navigation121
"Delete all numbers" on the
portable phone155
"Delete data" for
navigation121
"Delete" for portable
phone154
Destination address
– deleting121
– entering115