Page 49 of 221

Transporting children safely
48 1.After the vehicle is unlocked, sit in the pas-
senger seat and close the door.
2.Open the backrest width adjustment com-
pletely, refer to page39.
3.Deactivate active backrest width adjust-
ment, refer to page40.
4.Install child's seat.
Installing child-restraint
systems
Before installing any child-restraint system or
child seat, read the following:
Observe the child-restraint system man-
ufacturer's instructions for installation
and use. Otherwise the degree of protection
may be reduced. After an accident, have all
parts of the child-restraint system and of the
relevant vehicle safety belt system checked and
r e p la c e d i f n e c e s s a ry . H a v e t h is w o r k d o n e o n ly
at your BMW center or at a workshop that works
according to BMW repair procedures with cor-
respondingly trained personnel. <
Commercially-available child-restraint systems
are designed to be secured with a lap belt or
with the lap belt portion of a combination lap/
shoulder belt. Improperly or inadequately
installed restraint systems can increase the risk
of injury to children. Always read and follow the
instructions that come with the system.
Child seat security
All of the rear belt retractors and the front pas-
senger safety belt can be locked for mounting
and securing child-restraint systems.Information regarding this is located near the
buckle latch of each safety belt.
To lock safety belt
Pull the entire length of the belt from the belt
retractor. Allow the reel to retract the belt
somewhat and engage the buckle, then tighten
the belt against the child-restraint system. The
retraction mechanism is now locked.
To unlock the safety belt
Release the buckle, remove the child-restraint
system and allow the belt retractor to reel the
belt completely in.
Child-restraint system with tether
strap
If you use a child-restraint system with a tether
strap, three additional tether anchorage points
have been provided, refer to the arrows in the
illustration. Depending on the location selected
for sitting in the rear passenger area, attach the
tether strap to the corresponding anchorage
point to secure the child-restraint system, as
shown in the illustration below.
Placement of the tether strap
Outer sitting positions:
Lift the head restraint and pass the tether strap
Page 50 of 221

Controls
49Reference
At a glance
Driving tips
Communication
Navigation
Entertainment
Mobility
between the head restraint and the seat back. It
is recommended to readjust the head restraint
into the lowest possible position.
Center sitting position:
Pull the center armrest forward somewhat to
guide the tether strap through the opening.
Then reengage the center armrest.
Adjust the tether strap according to the
child-restraint manufacturer's instruc-
tions.<
LATCH child-restraint fixing system
LATCH: Lower Anchor and Tethers for CHil-
dren.
The rear outer sitting positions are provided
with anchors for a LATCH child-restraint fixing
system.
To attach the LATCH child-restraint fix-
ing system, follow the operating and
safety instructions of the manufacturer.<
Access to anchorage points on rear
seat with through-loading system
The illustration shows the left rear seat as an
example.The anchorage points for the LATCH child-
restraint fixing system are located underneath
the identifying symbols.
Before attaching the LATCH child-restraint fix-
ing system, pull the belt out of the region of the
child-restraint fixing system.
Access to anchorage points on rear
seat with through-loading system
The illustration shows the right rear seat as an
example.
The anchorage points for the LATCH child-
restraint fixing system are located behind the
indicated protective caps.
Before attaching the child-restraint fixing sys-
tem, remove the LATCH protective caps and
pull the belt away from the region of the child-
restraint fixing system.
On journeys
If the rear is equipped with side airbags,
make s ure that children do not lean o ut of
the child's seat towards the door panels. Other-
wise severe injuries can be caused if the side
airbags are triggered.<
Page 51 of 221
Transporting children safely
50
Child-safety locks for rear doors
Slide down the safety lever on the rear doors:
The door can now be opened from the outside
only.
Safety switch for power windows
Always press the safety switch for the power
windows, refer to page35, when children are
riding in the rear of the vehicle.
Page 52 of 221

Controls
51Reference
At a glance
Driving tips
Communication
Navigation
Entertainment
Mobility
Driving
Ignition lock
0 Steering locked
The key can only be inserted or removed in this
position.
After removing the key, turn the steering wheel
slightly until it locks.
Interlock on automatic transmission
>Only move the selector lever from posi-
tion P when the engine is running.
>To turn the key back to position 0 or to
remove it, first place the selector lever in
position P.
1 Steering unlocked
A slight steering wheel movement often makes
it easier to turn the key from 0 to 1.
Some vehicle systems are ready for operation.
2 Ignition switched on
All vehicle systems are ready for operation.
3 Start engine
Starting engine
Do not run the engine in closed rooms, as
otherwise the inhaling of toxic exhaust
gases can cause unconsciousness and death.
The exhaust gases contain carbon monoxide,
an odorless and colorless, but highly toxic gas.
Never leave an unattended vehicle with the engine running, as such a vehicle represents a
potential safety hazard.
To prevent the vehicle from rolling, always
select neutral position or position N and apply
the handbrake before leaving the vehicle with
the engine running.<
When starting the engine, do not press the
accelerator pedal.
Do not allow the engine to warm up by leaving it
running while the vehicle remains stationary.
Instead, begin to drive immediately at a moder-
ate engine speed.
Special starting conditions
Press the accelerator pedal halfway down when
starting if
>the engine fails to start on the first attempt,
for instance, if it is very hot or cold
>the engine is started at very low tempera-
tures, below approx. 57/–156, at high
altitudes, over approx. 3,300 ft/1,000 m.
Avoid frequent starting in quick succes-
sion or repeated start attempts in which
the engine does not start. Otherwise, the fuel is
not burned or inadequately burned and there is
a danger of overheating and damaging the cat-
alytic converter.<
Manual transmission
1.Apply the handbrake.
2.Gearshift lever in neutral position.
3.Press the clutch pedal.
If the clutch pedal is not depressed,
the engine will not start.<
4.Start the engine.
Do not end the starting procedure too early,
however after approx. 20 seconds at the lat-
est. Release the ignition key immediately as
soon as the engine starts.
Page 53 of 221

Driving
52
SMG Sequential manual transmission
and automatic transmission
Your BMW is equipped with the convenience
starting feature. It is sufficient to turn the igni-
tion key into position 3 for only a short time and
then release it again. The system responds by
automatically engaging the starter for a certain
period and allowing it to run until the engine
starts, after which it then disengages automati-
cally.
SMG Sequential manual transmission
1.Press the brake pedal.
2.Place selector lever in position N.
3.Start the engine.
If the engine does not start, shift back to
the last gear selected, refer to Instrument
cluster display, and then shift into position N.<
Automatic transmission
1.Press the brake pedal.
2.Place selector lever in position P or N.
3.Start the engine.
Switching off engine
Do not remove the ignition key while the
vehicle is rolling, as otherwise the steer-
ing wheel lock will immobilize the steering.
When leaving the vehicle, remove the ignition
key and lock the steering. When parking on a
downhill incline, apply the handbrake, as other-
wise the vehicle could roll away.<
Manual transmission
1.Turn the ignition key to position 1 or 0.
2.Shift into first gear or reverse.
SMG Sequential manual transmission
1.Engage a driving position.
2.Turn the ignition key to position 1 or 0.
A signal sounds if the transmission is in
Neutral when the engine is switched off.
Automatic transmission
1.Engage selector lever position P.
2.Turn the ignition key to position 1 or 0.
Handbrake
The handbrake is primarily intended to prevent
the vehicle from rolling while parked; it brakes
the rear wheels.
Indicator lamp
The indicator lamp lights up, and an
acoustic signal also sounds when start-
ing off. The handbrake is applied.
Indicator lamp for Canadian models.
Applying
The lever locks in position automatically.
Releasing
Pull slightly upwards, press the button and
lower the lever.
If it becomes necessary under special cir-
cumstances to use the handbrake while
driving, it must not be pulled too sharply. In
doing so, continuously press the button of the
handbrake lever. Strong application of the
handbrake can lead to overbraking of the rear
axle and associated 'fishtailing' of the vehicle
rear end.
The brake lamps do not light up when the hand-
brake is applied.<
To prevent corrosion and one-sided brak-
ing action, occasionally apply the hand-
Page 54 of 221

Controls
53Reference
At a glance
Driving tips
Communication
Navigation
Entertainment
Mobility
brake lightly when the vehicle is slowly coming
to a stop if the traffic conditions are suitable.<
Manual transmission
When shifting into 5th/6th gear, press the
selector lever toward the right, otherwise
an inadvertent shift into 3rd or 4th gear could
damage the engine.<
Reverse gear
Select only when the vehicle is stationary.
When pressing the gearshift lever to the left,
overcome some resistance.
The backup lamps switch on automatically
when the ignition key is in position 2.
SMG Sequential manual
transmission*
The concept
The SMG Sequential manual transmission is an
automated manual transmission in which an
electrohydraulic system handles the clutching
and gear changes.
You operate the SMG using the selector lever in
the center console and two shift paddles on the
steering wheel.
It offers you the following functions:
>Optional manual or automatic operation:
Sequential mode or Drive mode
>You have a choice of two driving programs:
Normal or Sport, refer to Dynamic Driving
Control page54 >Automatic downshifting and prevention of
incorrect shifting even in sequential opera-
tion
>Acceleration assistant, refer to page55.
The SMG is operational when the ignition key is
in position 2.
Selector lever positions
The current selector lever position is displayed
on the center console.
>R: Reverse
>N: Neutral
>One-touch functions for Sequential mode:
+: manual upshifting
–: manual downshifting
>D: Drive mode
The transmission automatically shifts into
N if the driver's door is opened with the
engine running and neither the pedals, the shift
paddles nor the selector lever are operated.
This is indicated by an acoustic signal and the
flashing display N in the instrument cluster.<
Gear display
R N 1 to 6
The currently engaged gear is displayed, pre-
ceded by a D in Drive mode.
Page 55 of 221

Driving
54
Shiftlock
Press the brake pedal before shifting out of N;
the shift command will not be executed unless
the brake is applied.
R Reverse
Select only when the vehicle is stationary.
Sequential mode
After every engine start, as soon as the selector
lever is pushed to the right and the brake pedal
is pressed, the Sequential mode is activated.
You can shift up and down using the shifting
paddles or the selector lever. You do not need
to remove your foot from the accelerator to do
so.
It is also possible to start off in second gear, e. g.
in slippery conditions.
D Drive mode
In the Drive mode, all forward gears are shifted
automatically.
Shifting from Sequential mode to Drive mode:
press selector lever to the right toward D.
Kick-down:
For rapid acceleration, e. g. when passing, press
the accelerator pedal as far down as it will go.
You achieve maximum acceleration.
To switch back into the Sequential mode: press
selector lever to the right again toward D or shift
using the shifting paddles or the selector lever.
Start off quickly on slopes. Do not hold
the vehicle on a hill by pressing the accel-
erator, but apply the handbrake instead. Other-
wise overheating can occur in the transmission
region.<
Gear changes
Using selector lever
>To upshift, pull the selector lever back.
>To downshift, push the selector lever for-
ward.
Using shift paddles on steering wheel
>To upshift, pull one of the shift paddles.
>To downshift, press.
In the following situations, the SMG in Sequen-
tial mode assists you:
>Upshifts and downshifts are executed only
when they will result in a plausible combina-
tion of engine and vehicle speed; thus, for
example, a downshift that would cause the
engine to overrev will not be executed by
the system.
>When the vehicle is stationary, the trans-
mission automatically downshifts into first
gear.
>Shortly before dropping below a gear-
dependent minimum speed, the transmis-
sion downshifts automatically even without
your intervention.
Dynamic Driving Control
The Dynamic Driving Control makes it possible
for your BMW to react in an even more perfor-
mance-oriented manner at the push of a button:
>The engine responds more spontaneously
to accelerator pedal movements.
>Gearshifts are faster.
>The engine speed range is used optimally in
the Drive mode.
>Cruise control
*:
The stored speed is reached more quickly
when it is requested.
Page 56 of 221

Controls
55Reference
At a glance
Driving tips
Communication
Navigation
Entertainment
Mobility
Activating system
Press the SPORT button with the ignition key in
position 2.
The LED in the button lights up and SPORT is
displayed in the instrument cluster.
Deactivating system
Press the SPORT button again.
The LED in the button and SPORT in the instru-
ment cluster go out.
Acceleration assistant
The acceleration assistant enables optimized
vehicle acceleration at racing car level on road
surfaces with good adhesion when starting off.
Do not use the acceleration assistant too
often, as otherwise components will wear
prematurely.<
1.Activate the Dynamic Traction Control.
2.Press the DTC button, refer to page78, for
longer than 3 seconds.
3.Quickly press accelerator pedal all the way
down: kick-down. The ideal starting-off
engine speed is set.
To maintain driving stability, do not deac-
tivate DSC if at all possible.<
Automatic transmission with
Steptronic
In addition to fully automatic operation, you can
also manually shift with the Steptronic, refer to
page56.
Selector lever positions
P R N D M/S + –
Displays in instrument cluster
P R N D DS M1 to M6
The selector lever position is indicated, and in
the manual mode the gear currently engaged.
Changing selector lever positions
An interlock prevents inadvertent gearshifts
into selector lever positions R and P. To cancel
the interlock, press the button on the front of
the selector lever knob, refer to arrow.
Shiftlock
Press the brake pedal before shifting out of P
or N; the shift command will not be executed
unless the brake is applied.
To prevent the vehicle from creeping after you
select a driving position, maintain pressure on
the brake pedal until you are ready to start.
P Park
Select only when the vehicle is stationary.
The rear wheels are locked.
 1
1 2
2 3
3 4
4 5
5 6
6 7
7 8
8 9
9 10
10 11
11 12
12 13
13 14
14 15
15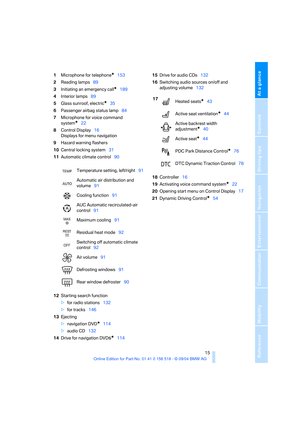 16
16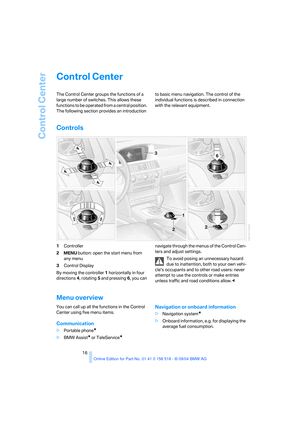 17
17 18
18 19
19 20
20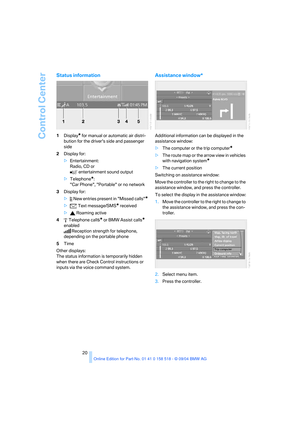 21
21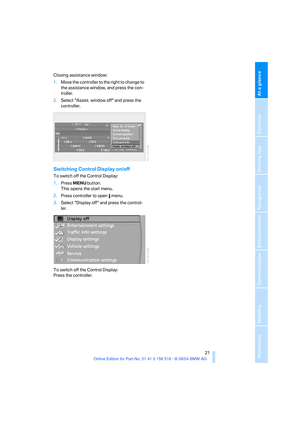 22
22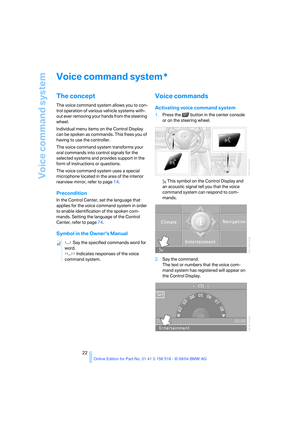 23
23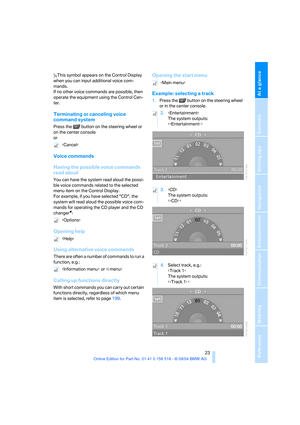 24
24 25
25 26
26 27
27 28
28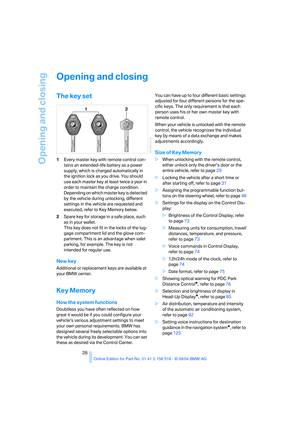 29
29 30
30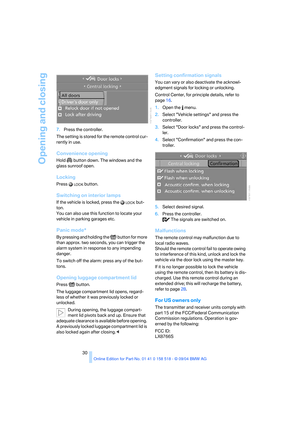 31
31 32
32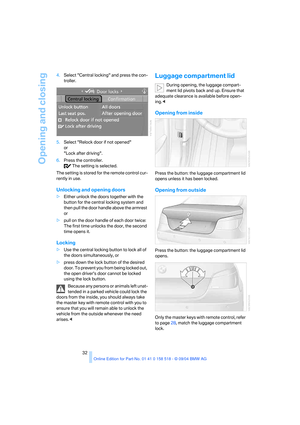 33
33 34
34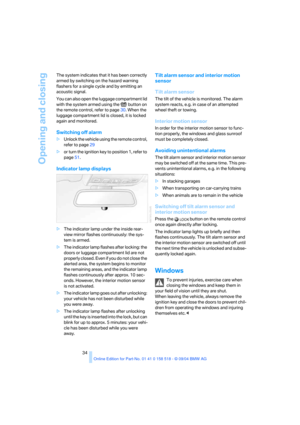 35
35 36
36 37
37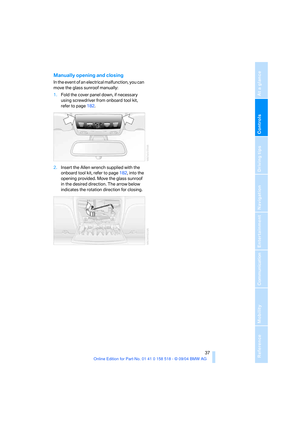 38
38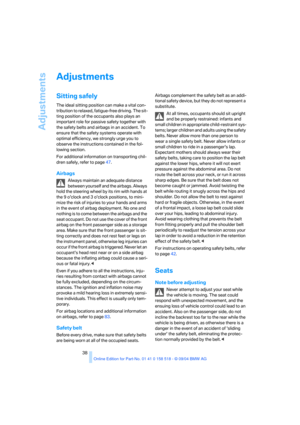 39
39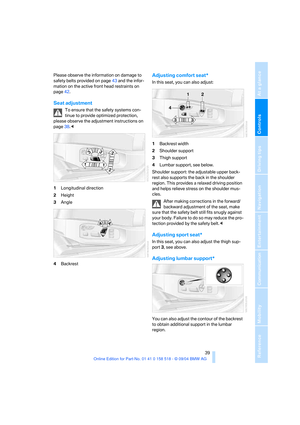 40
40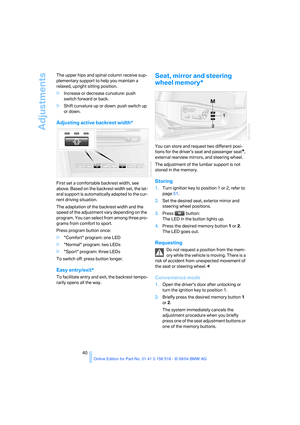 41
41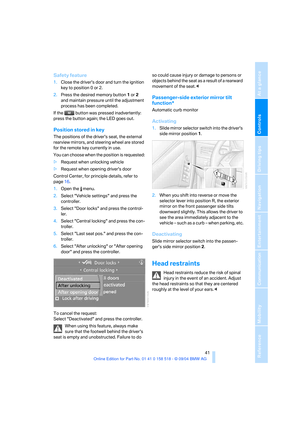 42
42 43
43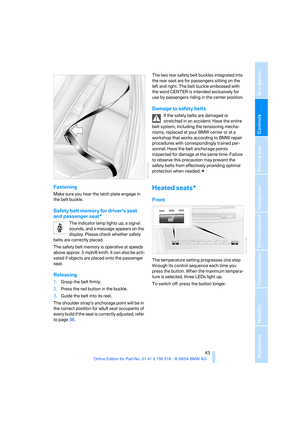 44
44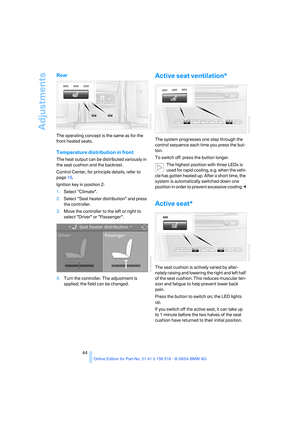 45
45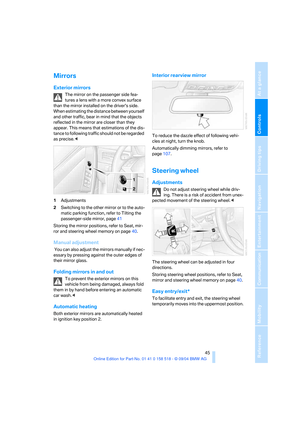 46
46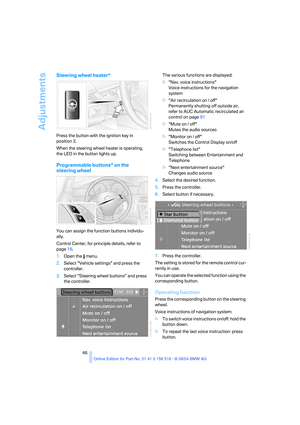 47
47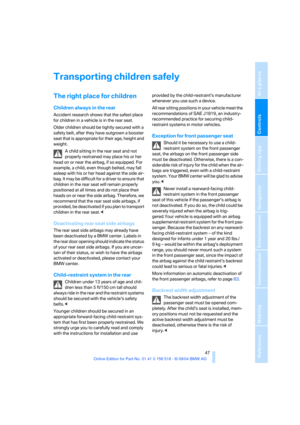 48
48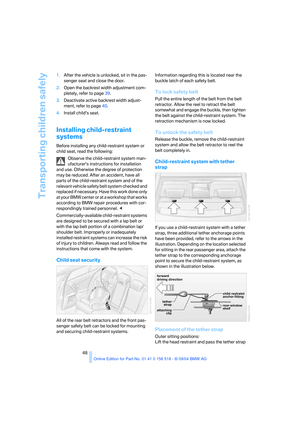 49
49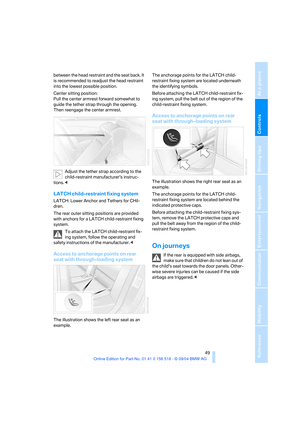 50
50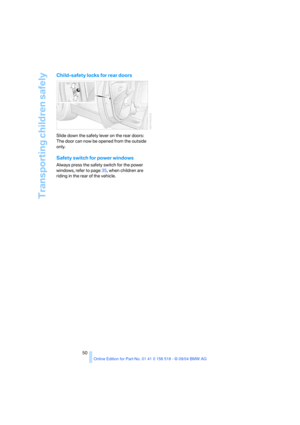 51
51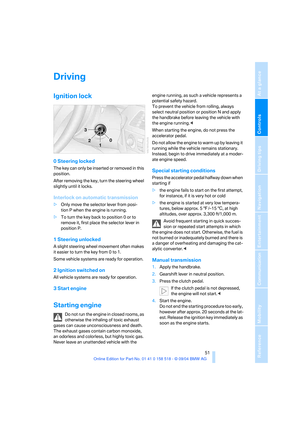 52
52 53
53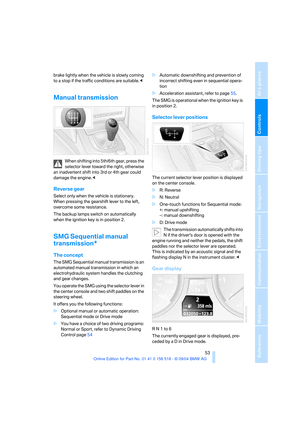 54
54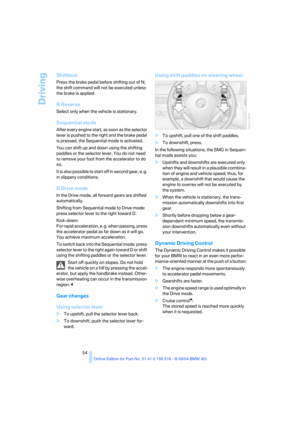 55
55 56
56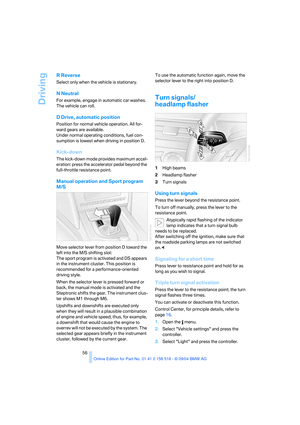 57
57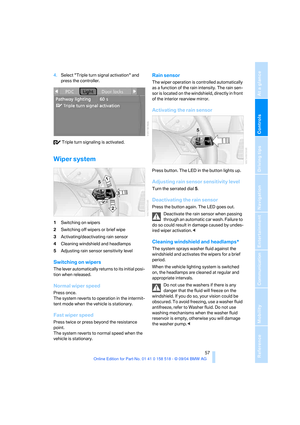 58
58 59
59 60
60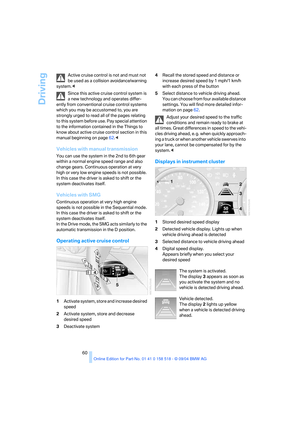 61
61 62
62 63
63 64
64 65
65 66
66 67
67 68
68 69
69 70
70 71
71 72
72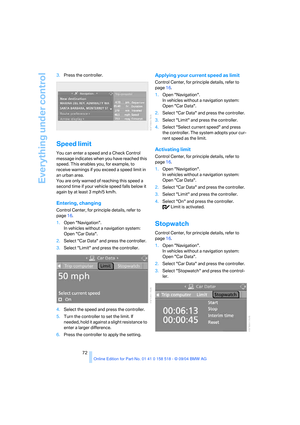 73
73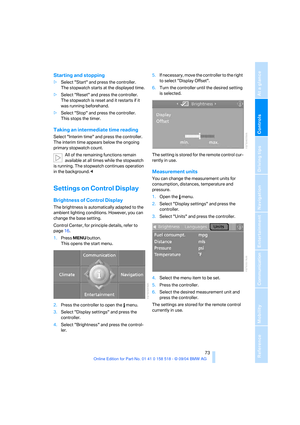 74
74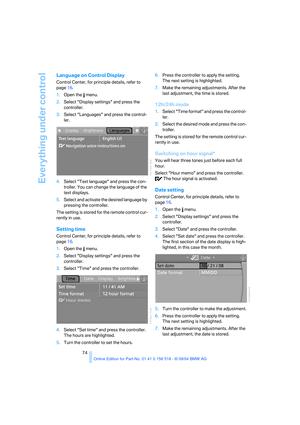 75
75 76
76 77
77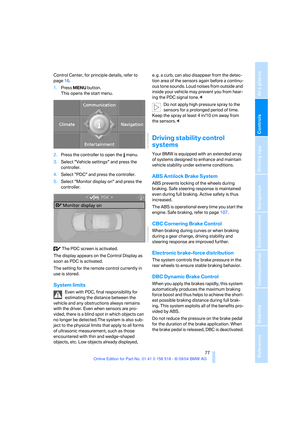 78
78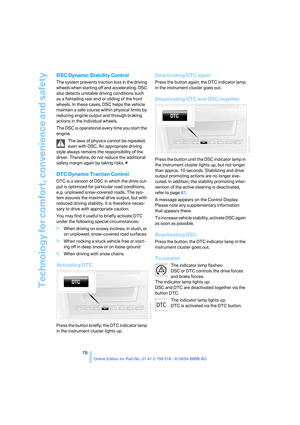 79
79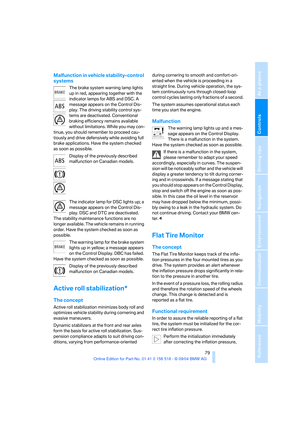 80
80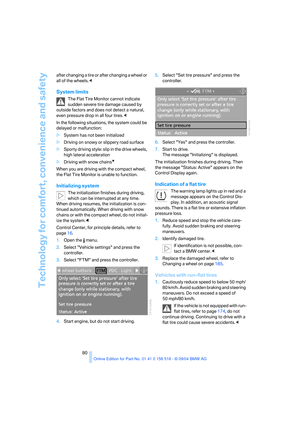 81
81 82
82 83
83 84
84 85
85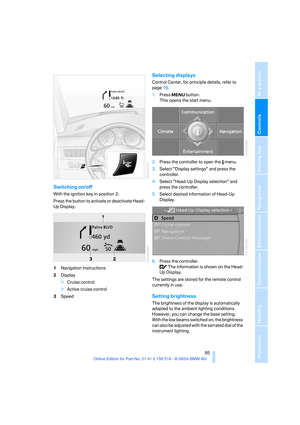 86
86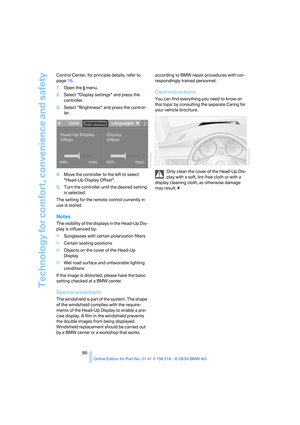 87
87 88
88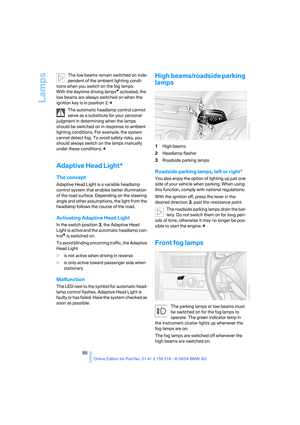 89
89 90
90 91
91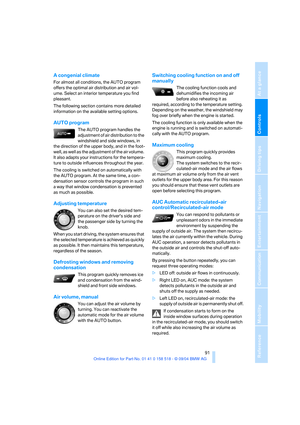 92
92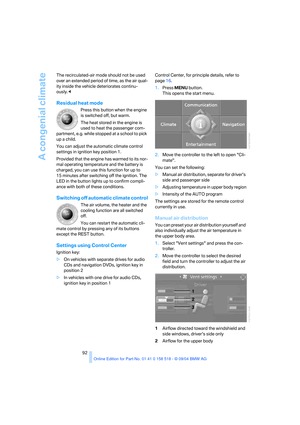 93
93 94
94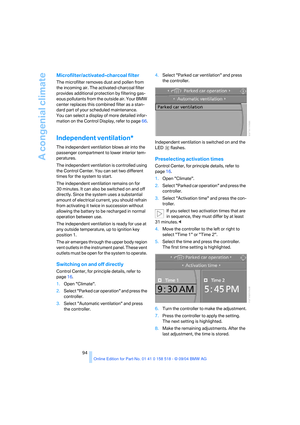 95
95 96
96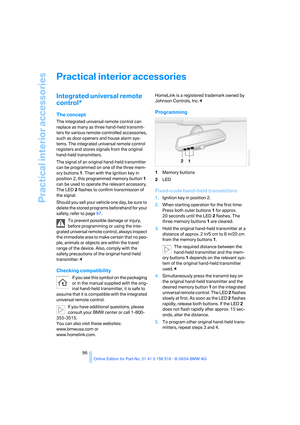 97
97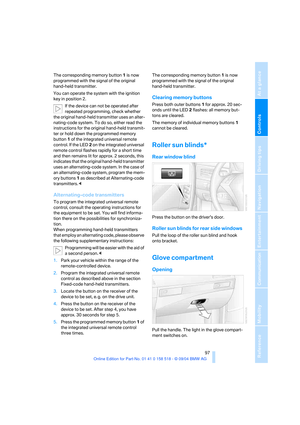 98
98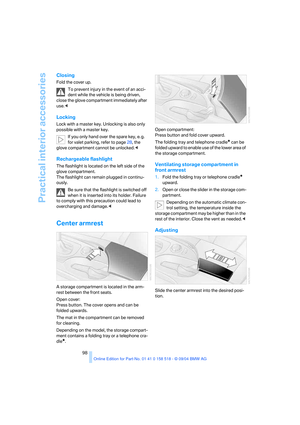 99
99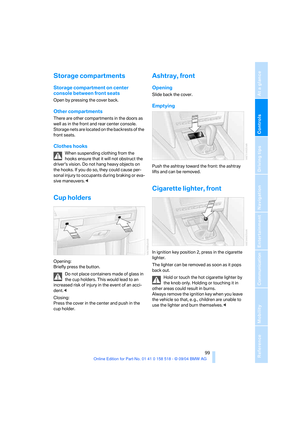 100
100 101
101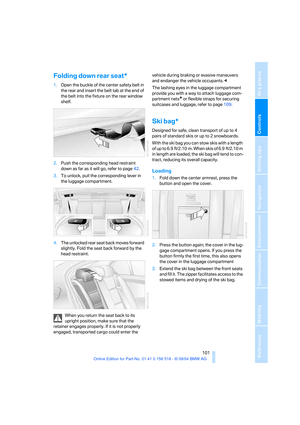 102
102 103
103 104
104 105
105 106
106 107
107 108
108 109
109 110
110 111
111 112
112 113
113 114
114 115
115 116
116 117
117 118
118 119
119 120
120 121
121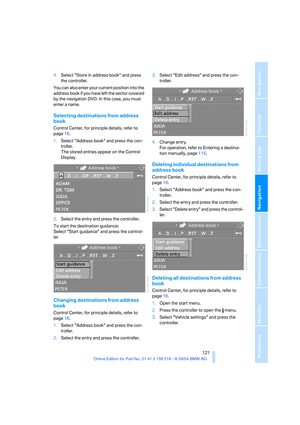 122
122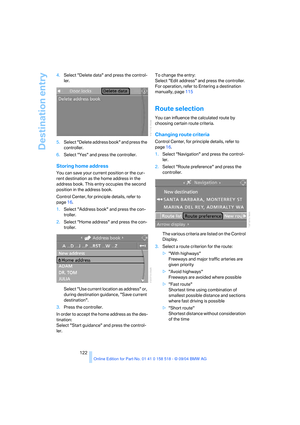 123
123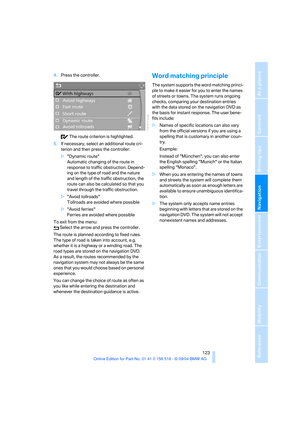 124
124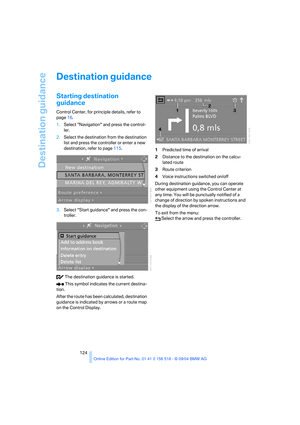 125
125 126
126 127
127 128
128 129
129 130
130 131
131 132
132 133
133 134
134 135
135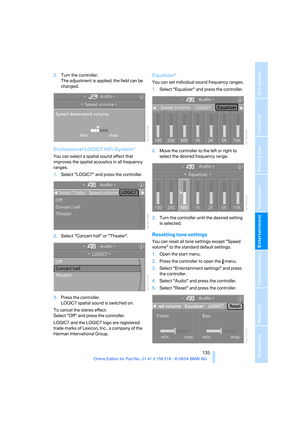 136
136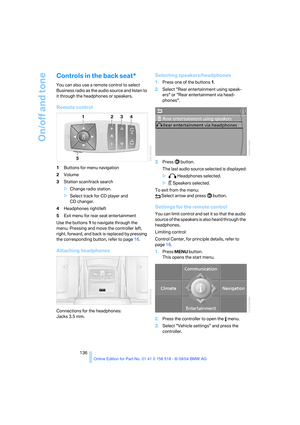 137
137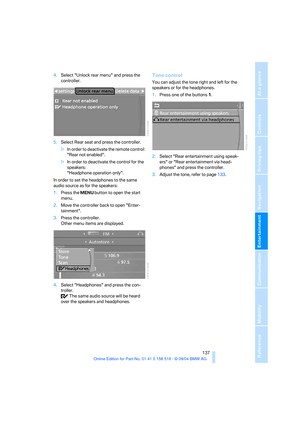 138
138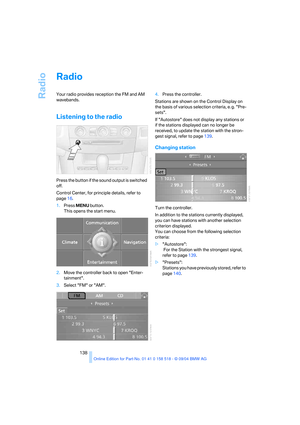 139
139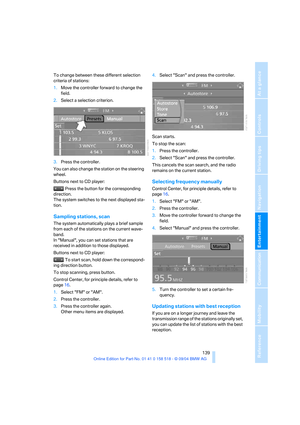 140
140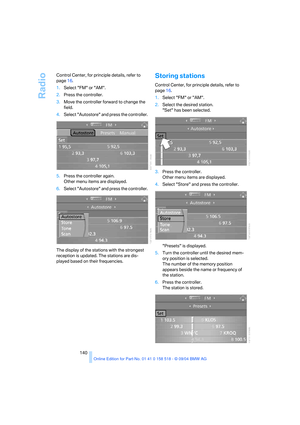 141
141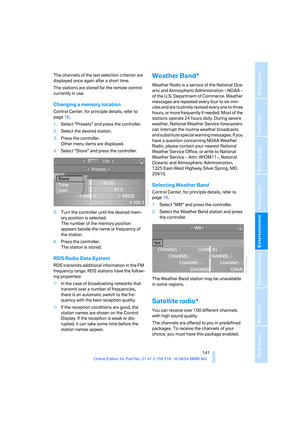 142
142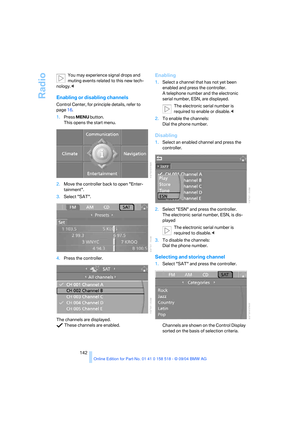 143
143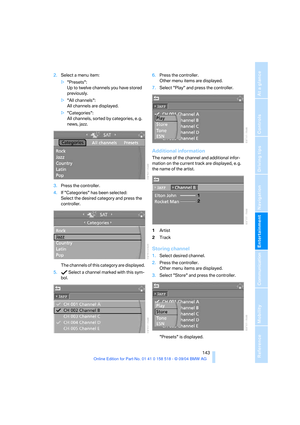 144
144 145
145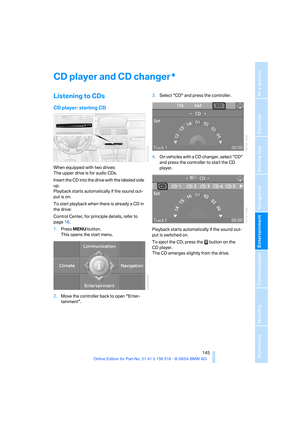 146
146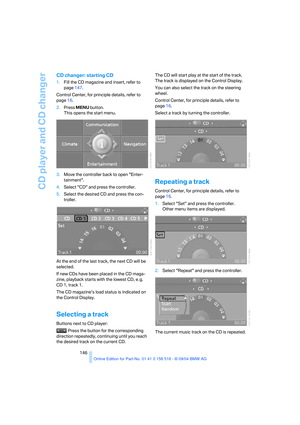 147
147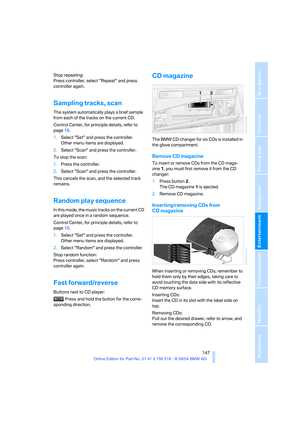 148
148 149
149 150
150 151
151 152
152 153
153 154
154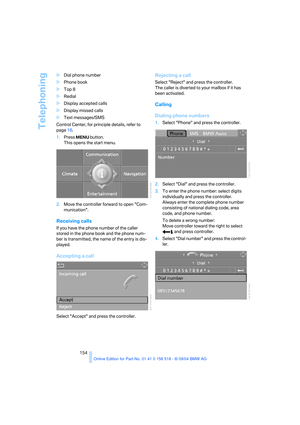 155
155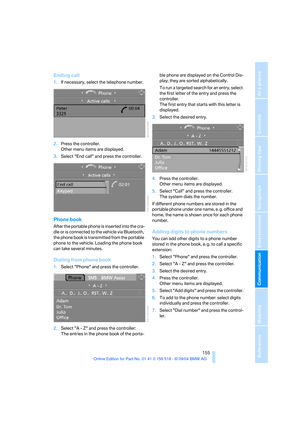 156
156 157
157 158
158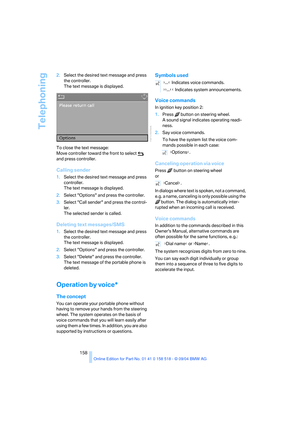 159
159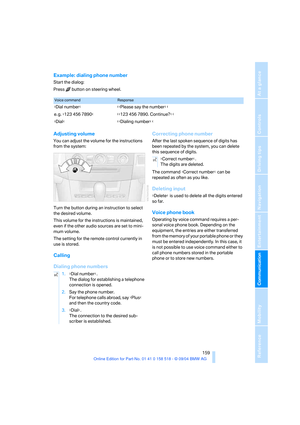 160
160 161
161 162
162 163
163 164
164 165
165 166
166 167
167 168
168 169
169 170
170 171
171 172
172 173
173 174
174 175
175 176
176 177
177 178
178 179
179 180
180 181
181 182
182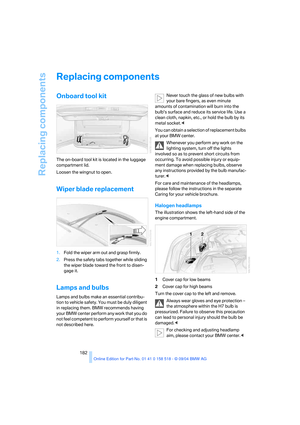 183
183 184
184 185
185 186
186 187
187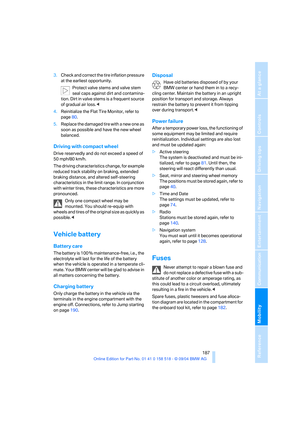 188
188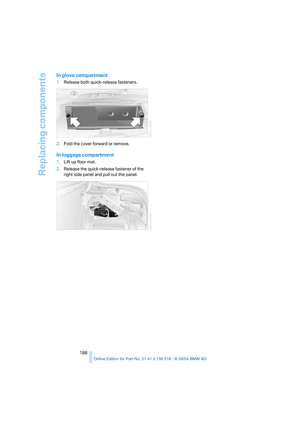 189
189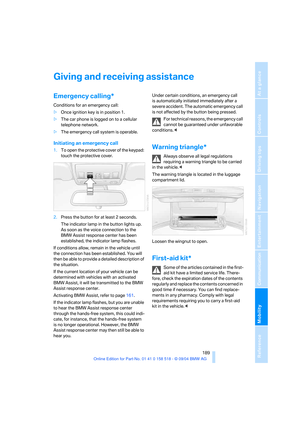 190
190 191
191 192
192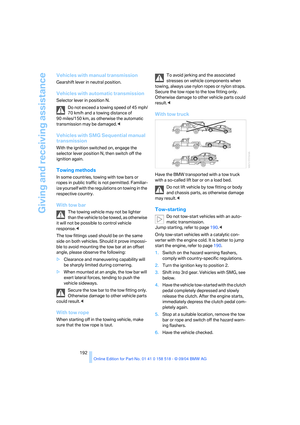 193
193 194
194 195
195 196
196 197
197 198
198 199
199 200
200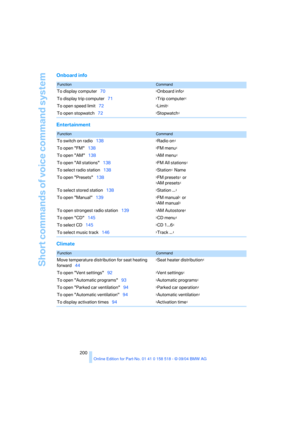 201
201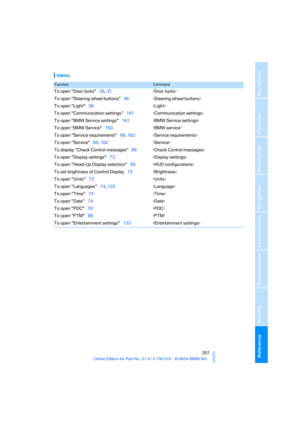 202
202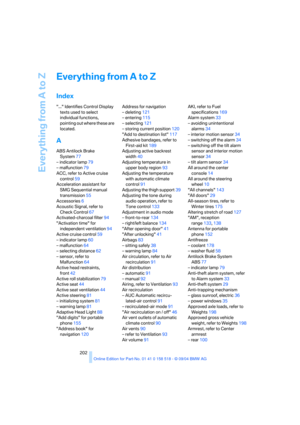 203
203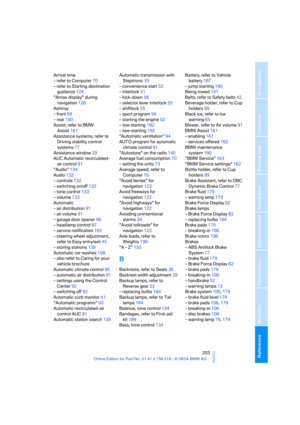 204
204 205
205 206
206 207
207 208
208 209
209 210
210 211
211 212
212 213
213 214
214 215
215 216
216 217
217 218
218 219
219 220
220