2005 BMW 525I SEDAN steering
[x] Cancel search: steeringPage 78 of 221

Controls
77Reference
At a glance
Driving tips
Communication
Navigation
Entertainment
Mobility
Control Center, for principle details, refer to
page16.
1.Press button.
This opens the start menu.
2.Press the controller to open the menu.
3.Select "Vehicle settings" and press the
controller.
4.Select "PDC" and press the controller.
5.Select "Monitor display on" and press the
controller.
The PDC screen is activated.
The display appears on the Control Display as
soon as PDC is activated.
The setting for the remote control currently in
use is stored.
System limits
Even with PDC, final responsibility for
estimating the distance between the
vehicle and any obstructions always remains
with the driver. Even when sensors are pro-
vided, there is a blind spot in which objects can
no longer be detected.The system is also sub-
ject to the physical limits that apply to all forms
of ultrasonic measurement, such as those
encountered with thin and wedge-shaped
objects, etc. Low objects already displayed, e. g. a curb, can also disappear from the detec-
tion area of the sensors again before a continu-
ous tone sounds. Loud noises from outside and
inside your vehicle may prevent you from hear-
ing the PDC signal tone.<
Do not apply high pressure spray to the
sensors for a prolonged period of time.
Keep the spray at least 4 in/10 cm away from
the sensors.<
Driving stability control
systems
Your BMW is equipped with an extended array
of systems designed to enhance and maintain
vehicle stability under extreme conditions.
ABS Antilock Brake System
ABS prevents locking of the wheels during
braking. Safe steering response is maintained
even during full braking. Active safety is thus
increased.
The ABS is operational every time you start the
engine. Safe braking, refer to page107.
CBC Cornering Brake Control
When braking during curves or when braking
during a gear change, driving stability and
steering response are improved further.
Electronic brake-force distribution
The system controls the brake pressure in the
rear wheels to ensure stable braking behavior.
DBC Dynamic Brake Control
When you apply the brakes rapidly, this system
automatically produces the maximum braking
force boost and thus helps to achieve the short-
est possible braking distance during full brak-
ing. This system exploits all of the benefits pro-
vided by ABS.
Do not reduce the pressure on the brake pedal
for the duration of the brake application. When
the brake pedal is released, DBC is deactivated.
Page 79 of 221
Technology for comfort, convenience and safety
78
DSC Dynamic Stability Control
The system prevents traction loss in the driving
wheels when starting off and accelerating. DSC
also detects unstable driving conditions such
as a fishtailing rear end or sliding of the front
wheels. In these cases, DSC helps the vehicle
maintain a safe course within physical limits by
reducing engine output and through braking
actions in the individual wheels.
The DSC is operational every time you start the
engine.
The laws of physics cannot be repealed,
even with DSC. An appropriate driving
style always remains the responsibility of the
driver. Therefore, do not reduce the additional
safety margin again by taking risks.<
DTC Dynamic Traction Control
DTC is a version of DSC in which the drive out-
put is optimized for particular road conditions,
e.g. unplowed snow-covered roads. The sys-
tem assures the maximal drive output, but with
reduced driving stability. It is therefore neces-
sary to drive with appropriate caution.
You may find it useful to briefly activate DTC
under the following special circumstances:
>When driving on snowy inclines, in slush, or
on unplowed, snow-covered road surfaces
>When rocking a stuck vehicle free or start-
ing off in deep snow or on loose ground
>When driving with snow chains
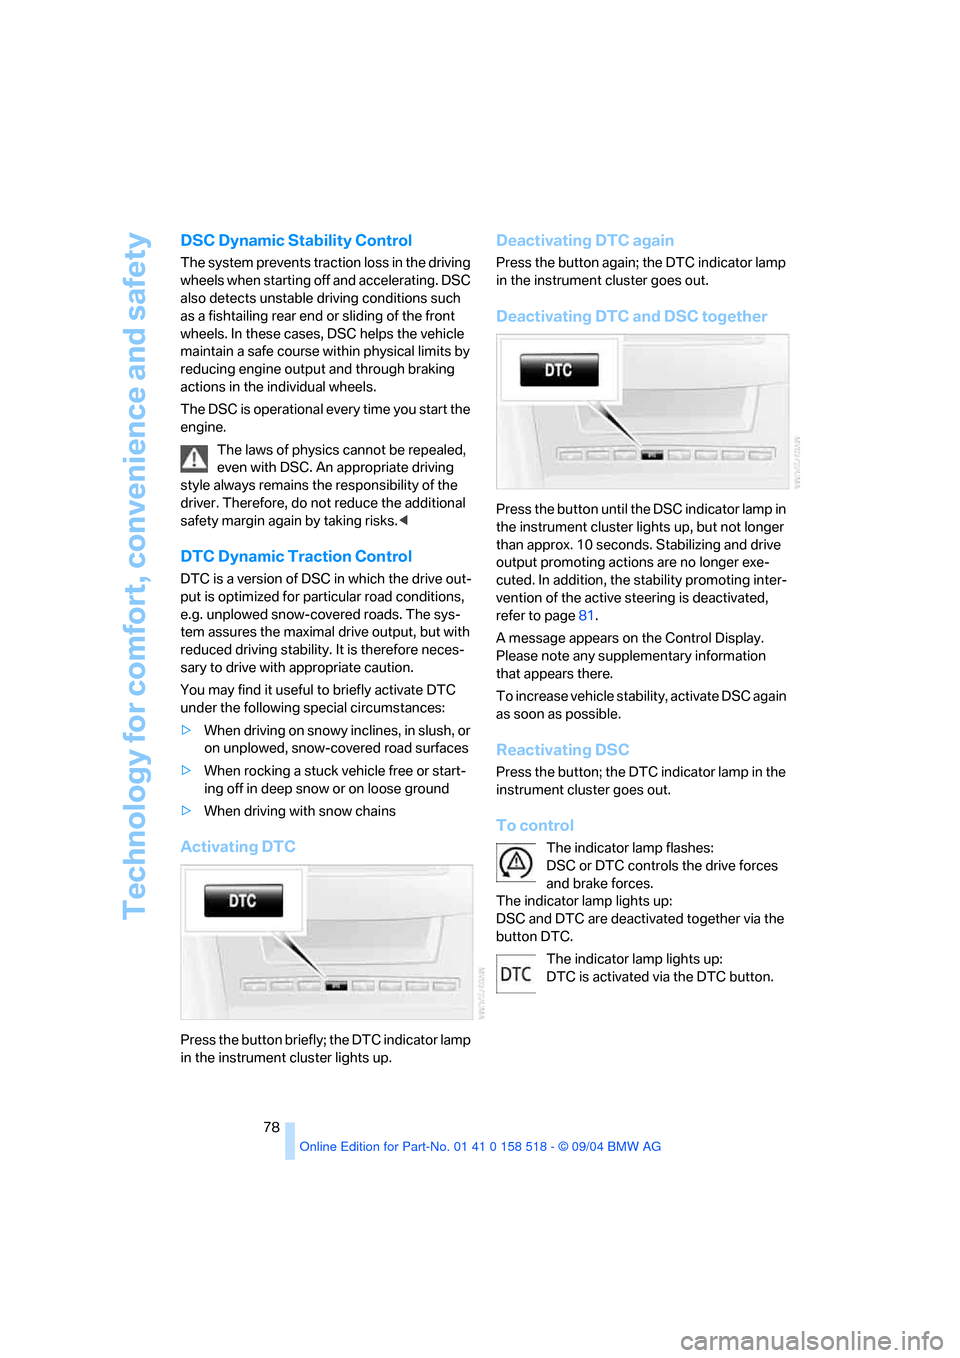
Activating DTC
Press the button briefly; the DTC indicator lamp
in the instrument cluster lights up.
Deactivating DTC again
Press the button again; the DTC indicator lamp
in the instrument cluster goes out.
Deactivating DTC and DSC together
Press the button until the DSC indicator lamp in
the instrument cluster lights up, but not longer
than approx. 10 seconds. Stabilizing and drive
output promoting actions are no longer exe-
cuted. In addition, the stability promoting inter-
vention of the active steering is deactivated,
refer to page81.
A message appears on the Control Display.
Please note any supplementary information
that appears there.
To increase vehicle stability, activate DSC again
as soon as possible.
Reactivating DSC
Press the button; the DTC indicator lamp in the
instrument cluster goes out.
To control
The indicator lamp flashes:
DSC or DTC controls the drive forces
and brake forces.
The indicator lamp lights up:
DSC and DTC are deactivated together via the
button DTC.
The indicator lamp lights up:
DTC is activated via the DTC button.
Page 81 of 221
Technology for comfort, convenience and safety
80 after changing a tire or after changing a wheel or
all of the wheels.<
System limits
The Flat Tire Monitor cannot indicate
sudden severe tire damage caused by
outside factors and does not detect a natural,
even pressure drop in all four tires.<
In the following situations, the system could be
delayed or malfunction:
>System has not been initialized
>Driving on snowy or slippery road surface
>Sporty driving style: slip in the drive wheels,
high lateral acceleration
>Driving with snow chains
*
When you are driving with the compact wheel,
the Flat Tire Monitor is unable to function.
Initializing system
The initialization finishes during driving,
which can be interrupted at any time.
When driving resumes, the initialization is con-
tinued automatically. When driving with snow
chains or with the compact wheel, do not initial-
ize the system.<
Control Center, for principle details, refer to
page16.
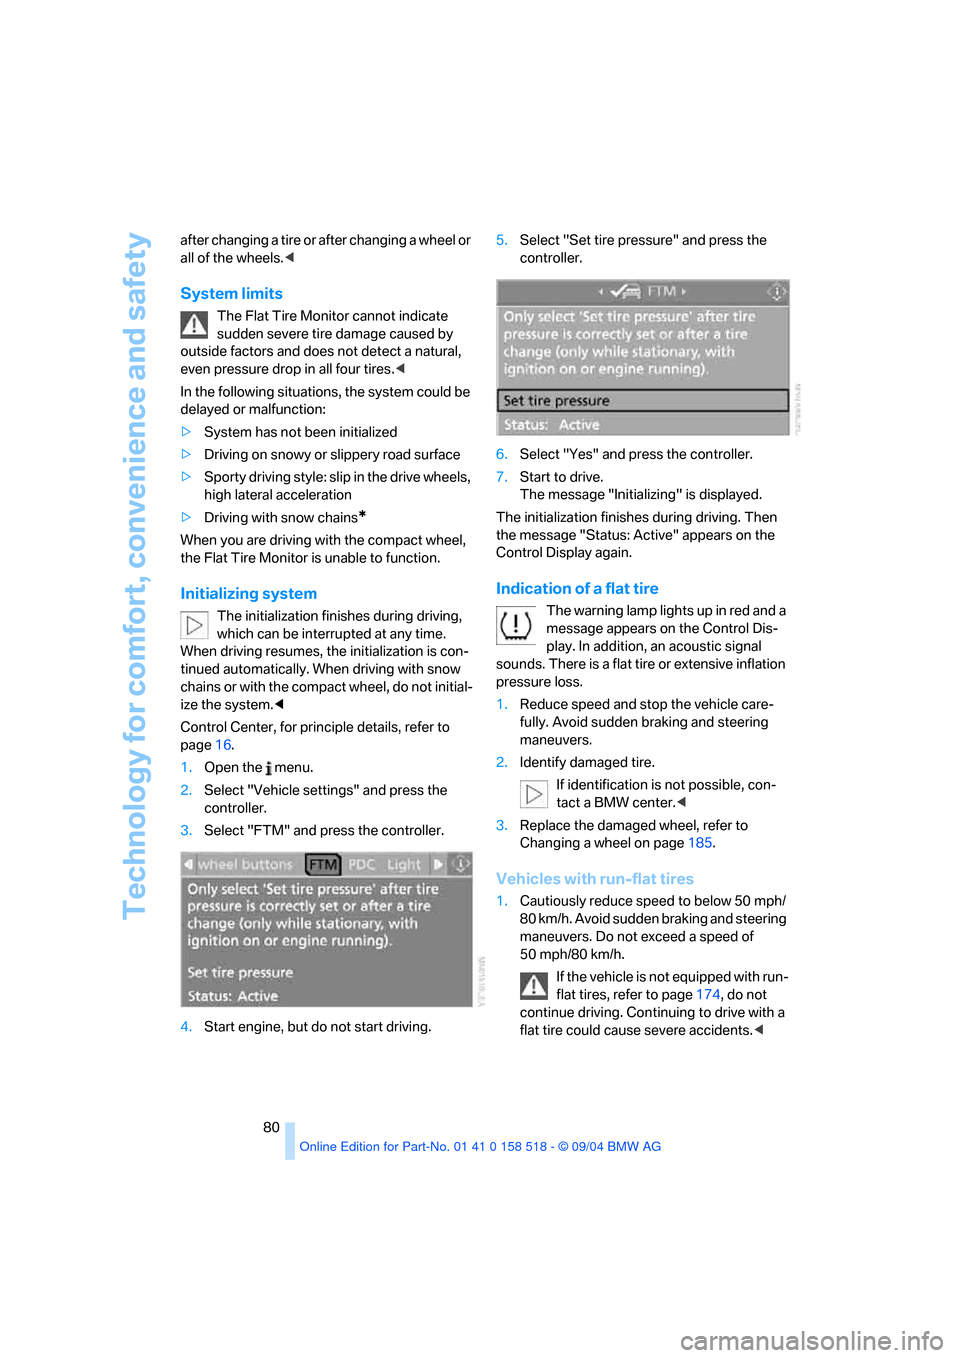
1.Open the menu.
2.Select "Vehicle settings" and press the
controller.
3.Select "FTM" and press the controller.
4.Start engine, but do not start driving.5.Select "Set tire pressure" and press the
controller.
6.Select "Yes" and press the controller.
7.Start to drive.
The message "Initializing" is displayed.
The initialization finishes during driving. Then
the message "Status: Active" appears on the
Control Display again.
Indication of a flat tire
The warning lamp lights up in red and a
message appears on the Control Dis-
play. In addition, an acoustic signal
sounds. There is a flat tire or extensive inflation
pressure loss.
1.Reduce speed and stop the vehicle care-
fully. Avoid sudden braking and steering
maneuvers.
2.Identify damaged tire.
If identification is not possible, con-
tact a BMW center.<
3.Replace the damaged wheel, refer to
Changing a wheel on page185.
Vehicles with run-flat tires
1.Cautiously reduce speed to below 50 mph/
80 km/h. Avoid sudden braking and steering
maneuvers. Do not exceed a speed of
50 mph/80 km/h.
If the vehicle is not equipped with run-
flat tires, refer to page174, do not
continue driving. Continuing to drive with a
flat tire could cause severe accidents.<
Page 82 of 221

Controls
81Reference
At a glance
Driving tips
Communication
Navigation
Entertainment
Mobility
2.At the next opportunity, check the air pres-
sure in all four tires.
If the tire inflation pressure in all four
tires is correct, the Flat Tire Monitor
has not been initialized. The system must
then be initialized.<
3.In the event of complete tire pressure loss,
0 psi/0 kPa, or obvious tire damage, you can
estimate the possible distance for contin-
ued driving on the basis of the following
guide values:
>With a light load:
1 to 2 persons without luggage:
approx. 155 miles/250 km
>With a medium load:
2 persons, luggage compartment full, or
4 persons without luggage:
approx. 94 miles/150 km
>With a full load:
4 or more persons, luggage compart-
ment full:
approx. 30 miles/50 km
Drive reservedly and do not exceed a
speed of 50 mph/80 km/h. In the event of
pressure loss, vehicle handling changes. This
includes reduced tracking stability in braking,
extended braking distance and altered natural
steering characteristics.
If unusual vibrations occur while the vehicle is
being driven, this can indicate final failure of the
damaged tire. Reduce speed and stop as soon
as possible. Do not continue driving. Contact
your BMW center.<
Malfunction
The warning lamp lights up yellow and
a message appears on the Control Dis-
play. The Flat Tire Monitor has a mal-
function or has failed. Have the system checked
as soon as possible.
Active steering*
The concept
The active steering is a system that actively var-
ies the steering angle of the front wheels in rela-
tion to the steering wheel movements.
When you are driving in the low road speed
range, e. g. in a town or when parking, the steer-
ing angle increases, i.e. the steering becomes
very direct. In the higher speed range, on the
other hand, the steering angle is reduced more
and more. This improves the handling capability
of your BMW over the entire speed range.
In critical situations, the system can make tar-
geted corrections to the steering angle pro-
vided by the driver and thus stabilize the vehicle
before the driver intervenes. This stabilizing
intervention is simultaneously deactivated
when DSC is switched off, refer to page78.
Malfunction
The warning lamp lights up. The active
steering is no longer operational. At low
speeds, greater steering wheel move-
ments are required, whereas at higher speeds,
the vehicle reacts more sensitively to steering
wheel movements. Have the system checked.
If the warning lamp lights up during the first
engine starting following a power supply inter-
ruption, the system must be activated by being
initialized.
Initializing system
1.Start the engine.
2.With the vehicle stationary, turn the steer-
ing wheel from the straight-ahead position
t o t h e le f t a s f a r a s i t w i ll g o a n d t h e n b a c k t o
the straight-ahead position.
3.Switch off the engine.
When you start the engine again, all the func-
tions of the active steering are available once
again.
Page 84 of 221
Controls
83Reference
At a glance
Driving tips
Communication
Navigation
Entertainment
Mobility
Airbags
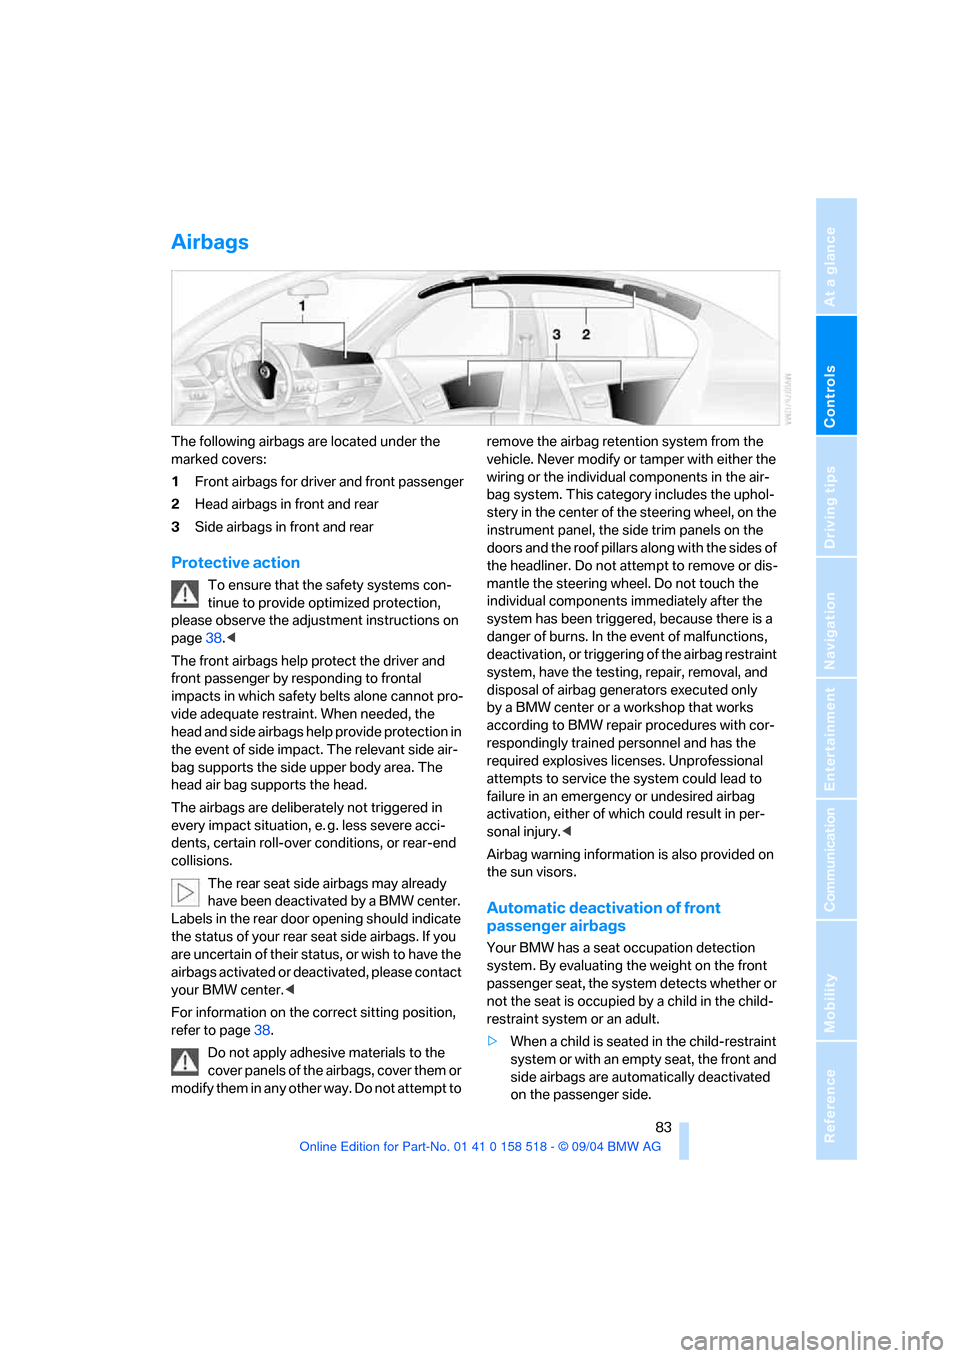
The following airbags are located under the
marked covers:
1Front airbags for driver and front passenger
2Head airbags in front and rear
3Side airbags in front and rear
Protective action
To ensure that the safety systems con-
tinue to provide optimized protection,
please observe the adjustment instructions on
page38.<
The front airbags help protect the driver and
front passenger by responding to frontal
impacts in which safety belts alone cannot pro-
vide adequate restraint. When needed, the
head and side airbags help provide protection in
the event of side impact. The relevant side air-
bag supports the side upper body area. The
head air bag supports the head.
The airbags are deliberately not triggered in
every impact situation, e. g. less severe acci-
dents, certain roll-over conditions, or rear-end
collisions.
The rear seat side airbags may already
have been deactivated by a BMW center.
Labels in the rear door opening should indicate
the status of your rear seat side airbags. If you
are uncertain of their status, or wish to have the
airbags activated or deactivated, please contact
your BMW center.<
For information on the correct sitting position,
refer to page38.
Do not apply adhesive materials to the
cover panels of the airbags, cover them or
modify them in any other way. Do not attempt to remove the airbag retention system from the
vehicle. Never modify or tamper with either the
wiring or the individual components in the air-
bag system. This category includes the uphol-
stery in the center of the steering wheel, on the
instrument panel, the side trim panels on the
doors and the roof pillars along with the sides of
the headliner. Do not attempt to remove or dis-
mantle the steering wheel. Do not touch the
individual components immediately after the
system has been triggered, because there is a
danger of burns. In the event of malfunctions,
deactivation, or triggering of the airbag restraint
system, have the testing, repair, removal, and
disposal of airbag generators executed only
by a BMW center or a workshop that works
according to BMW repair procedures with cor-
respondingly trained personnel and has the
required explosives licenses. Unprofessional
attempts to service the system could lead to
failure in an emergency or undesired airbag
activation, either of which could result in per-
sonal injury.<
Airbag warning information is also provided on
the sun visors.
Automatic deactivation of front
passenger airbags
Your BMW has a seat occupation detection
system. By evaluating the weight on the front
passenger seat, the system detects whether or
not the seat is occupied by a child in the child-
restraint system or an adult.
>When a child is seated in the child-restraint
system or with an empty seat, the front and
side airbags are automatically deactivated
on the passenger side.
Page 89 of 221

Lamps
88 The low beams remain switched on inde-
pendent of the ambient lighting condi-
tions when you switch on the fog lamps.
With the daytime driving lamps
* activated, the
low beams are always switched on when the
ignition key is in position 2.<
The automatic headlamp control cannot
serve as a substitute for your personal
judgment in determining when the lamps
should be switched on in response to ambient
lighting conditions. For example, the system
cannot detect fog. To avoid safety risks, you
should always switch on the lamps manually
under these conditions.<
Adaptive Head Light*
The concept
Adaptive Head Light is a variable headlamp
control system that enables better illumination
of the road surface. Depending on the steering
angle and other assumptions, the light from the
headlamp follows the course of the road.
Activating Adaptive Head Light
In the switch position3, the Adaptive Head
Light is active and the automatic headlamp con-
trol
* is switched on.
To avoid blinding oncoming traffic, the Adaptive
Head Light
>is not active when driving in reverse
>is only active toward passenger side when
stationary
Malfunction
The LED next to the symbol for automatic head-
lamp control flashes. Adaptive Head Light is
faulty or has failed. Have the system checked as
soon as possible.
High beams/roadside parking
lamps
1High beams
2Headlamp flasher
3Roadside parking lamps
Roadside parking lamps, left or right*
You also enjoy the option of lighting up just one
side of your vehicle when parking. When using
this function, comply with national regulations:
With the ignition off, press the lever in the
desired direction3, past the resistance point.
The roadside parking lamps drain the bat-
tery. Do not switch them on for long peri-
ods of time, otherwise it may no longer be pos-
sible to start the engine.<
Front fog lamps
The parking lamps or low beams must
be switched on for the fog lamps to
operate. The green indicator lamp in
the instrument cluster lights up whenever the
fog lamps are on.
The fog lamps are switched off whenever the
high beams are switched on.
Page 108 of 221
Driving tips
107Reference
At a glance
Controls
Communication
Navigation
Entertainment
Mobility
Portable phone in the vehicle
BMW discourages the use of mobile
communications devices, e. g. portable
phones, inside the vehicle without a direct con-
nection to an outside antenna. Otherwise, the
vehicle electronics and mobile communication
device can influence one another. In addition,
there is no assurance that the radiation which
results from transmission will be dissipated
from the vehicle interior.<
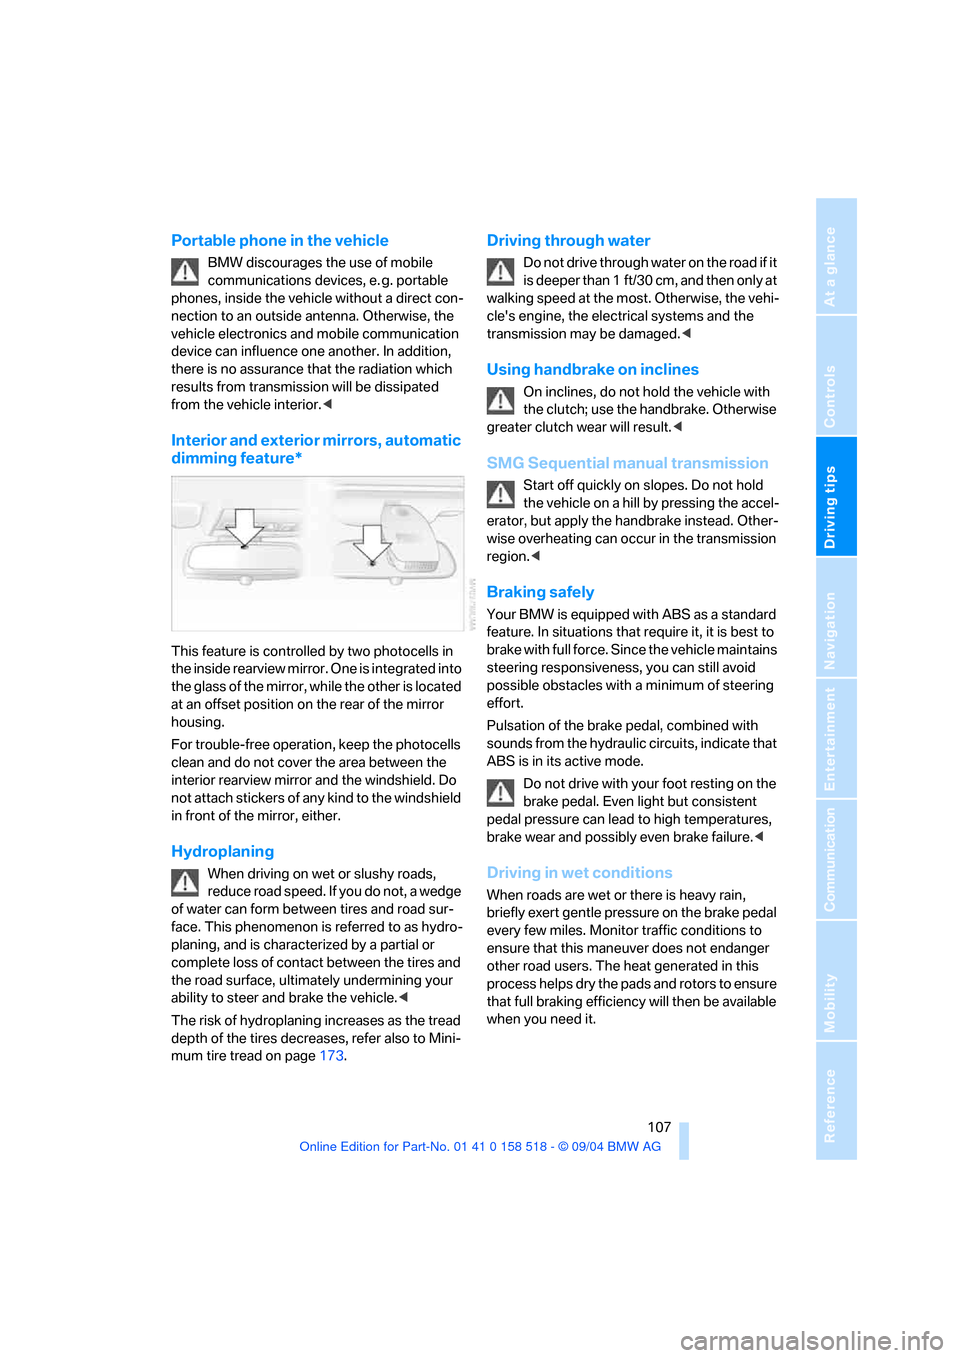
Interior and exterior mirrors, automatic
dimming feature*
This feature is controlled by two photocells in
the inside rearview mirror. One is integrated into
the glass of the mirror, while the other is located
at an offset position on the rear of the mirror
housing.
For trouble-free operation, keep the photocells
clean and do not cover the area between the
interior rearview mirror and the windshield. Do
not attach stickers of any kind to the windshield
in front of the mirror, either.
Hydroplaning
When driving on wet or slushy roads,
reduce road speed. If you do not, a wedge
of water can form between tires and road sur-
face. This phenomenon is referred to as hydro-
planing, and is characterized by a partial or
complete loss of contact between the tires and
the road surface, ultimately undermining your
ability to steer and brake the vehicle.<
The risk of hydroplaning increases as the tread
depth of the tires decreases, refer also to Mini-
mum tire tread on page173.
Driving through water
Do not drive through water on the road if it
is deeper than 1 ft/30 cm, and then only at
walking speed at the most. Otherwise, the vehi-
cle's engine, the electrical systems and the
transmission may be damaged.<
Using handbrake on inclines
On inclines, do not hold the vehicle with
the clutch; use the handbrake. Otherwise
greater clutch wear will result.<
SMG Sequential manual transmission
Start off quickly on slopes. Do not hold
the vehicle on a hill by pressing the accel-
erator, but apply the handbrake instead. Other-
wise overheating can occur in the transmission
region.<
Braking safely
Your BMW is equipped with ABS as a standard
feature. In situations that require it, it is best to
brake with full force. Since the vehicle maintains
steering responsiveness, you can still avoid
possible obstacles with a minimum of steering
effort.
Pulsation of the brake pedal, combined with
sounds from the hydraulic circuits, indicate that
ABS is in its active mode.
Do not drive with your foot resting on the
brake pedal. Even light but consistent
pedal pressure can lead to high temperatures,
brake wear and possibly even brake failure.<
Driving in wet conditions
When roads are wet or there is heavy rain,
briefly exert gentle pressure on the brake pedal
every few miles. Monitor traffic conditions to
ensure that this maneuver does not endanger
other road users. The heat generated in this
process helps dry the pads and rotors to ensure
that full braking efficiency will then be available
when you need it.
Page 109 of 221
Things to remember when driving
108
Hills
To prevent overheating and the resulting
reduced efficiency of the brake system,
drive long or steep downhill gradients in the
gear in which the least braking is required. Even
light but consistent pedal pressure can lead to
high temperatures, brake wear and possibly
even brake failure.<
You can further enhance the engine's braking
action by selecting a lower gear in the automatic
transmission's manual mode, downshifting as
far as first gear on extremely steep stretches,
refer to page56. This strategy helps you avoid
placing excessive loads on the brake system.
Never drive with the clutch pressed or
allow the vehicle to coast with the trans-
mission in Neutral – or with the engine switched
off – there is no engine braking when the trans-
mission is in Neutral, and no power-assist for
brakes and steering when the engine is not run-
ning.
Never allow floor mats, carpets or any other
objects to protrude into the area around the
accelerator and brake pedals and obstruct their
movement.<
Corrosion on brake rotors
When the vehicle is driven only occasionally,
during extended periods when the vehicle is not
used at all, and in operating conditions where
brake applications are less frequent, there is an
increased tendency for corrosion to form on
rotors, while contaminants accumulate on the
brake pads. This occurs because the minimum
pressure which must be exerted by the pads
during brake applications to clean the rotors is
not reached.
Should corrosion form on the brake rotors, the
brakes will tend to respond with a pulsating
effect that even extended application will fail to
cure.
When the vehicle is parked
Condensation forms in the air conditioner sys-
tem during operation, and then exits under the
vehicle.
Traces of condensed water under the
vehicle are therefore normal
.
Before driving into a car wash
To prevent the exterior mirrors on this vehicle
from being damaged, always fold them in by
hand before entering an automatic car wash.
Cargo loading
To avoid loading the tires beyond their
approved carrying capacity, never over-
load the vehicle. Overloading can lead to over-
heating and increases the rate at which damage
develops inside the tires. The ultimate result
can assume the form of a sudden blow-out.<
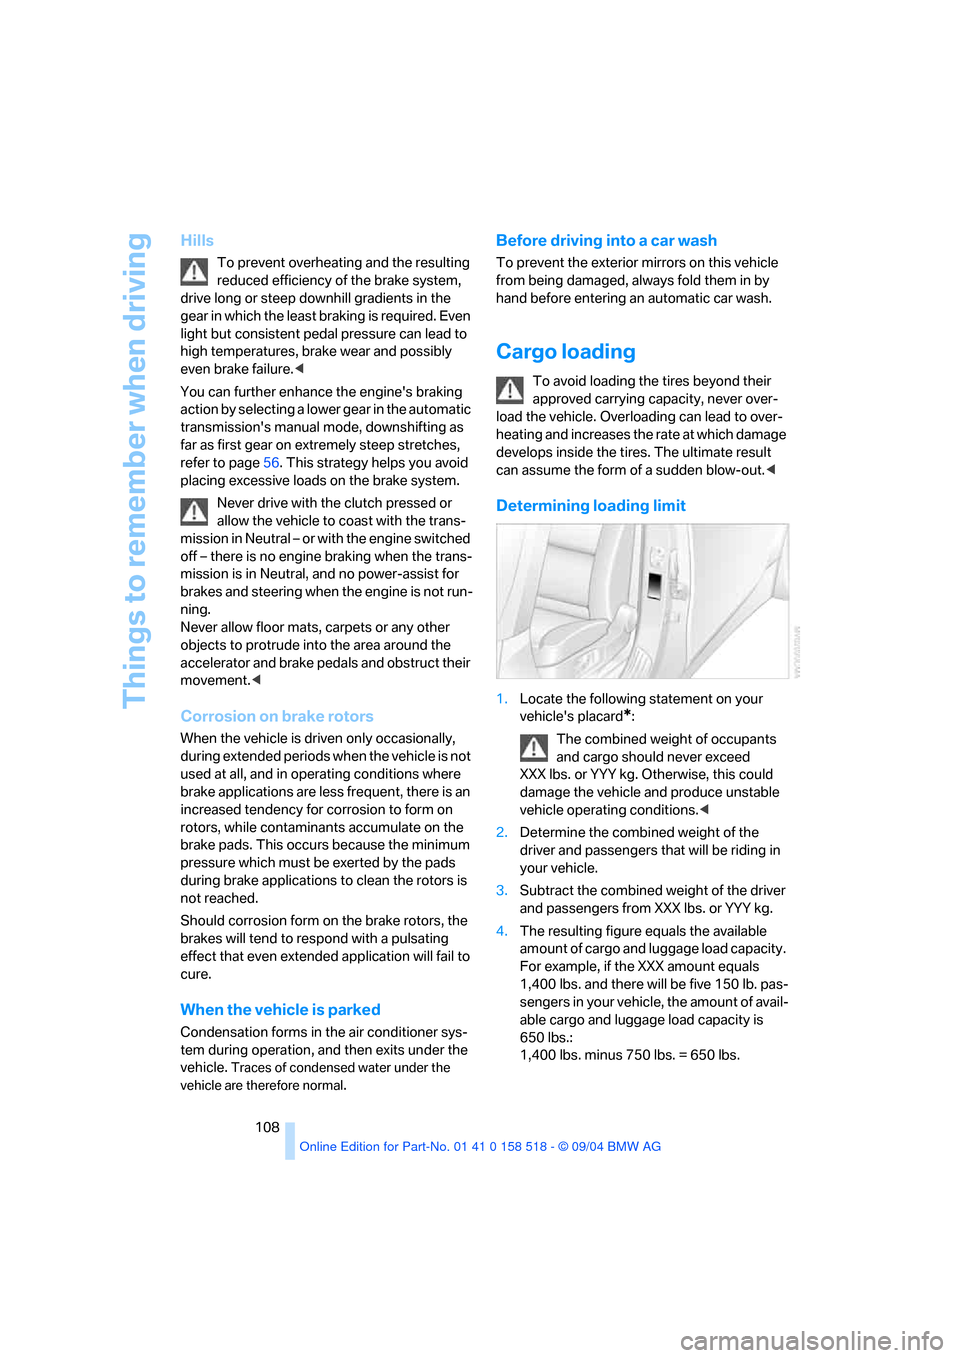
Determining loading limit
1.Locate the following statement on your
vehicle's placard
*:
The combined weight of occupants
and cargo should never exceed
XXX lbs. or YYY kg. Otherwise, this could
damage the vehicle and produce unstable
vehicle operating conditions.<
2.Determine the combined weight of the
driver and passengers that will be riding in
your vehicle.
3.Subtract the combined weight of the driver
and passengers from XXX lbs. or YYY kg.
4.The resulting figure equals the available
amount of cargo and luggage load capacity.
For example, if the XXX amount equals
1,400 lbs. and there will be five 150 lb. pas-
sengers in your vehicle, the amount of avail-
able cargo and luggage load capacity is
650 lbs.:
1,400 lbs. minus 750 lbs. = 650 lbs.