2005 BMW 330XI SEDAN ESP
[x] Cancel search: ESPPage 109 of 223
Things to remember when driving
108 the transmission in neutral and there will be no
power assistance to the brakes or steering
while the engine is switched off.
Never allow floor mats, carpets or any other
objects to protrude into the area around the
accelerator and brake pedals and obstruct their
movement.<
Corrosion on brake rotors
When the vehicle is driven only occasionally,
during extended periods when the vehicle is not
used at all, and in operating conditions where
brake applications are less frequent, there is an
increased tendency for corrosion to form on
rotors, while contaminants accumulate on the
brake pads. This occurs because the minimum
pressure which must be exerted by the pads
during brake applications to clean the rotors is
not reached.
Should corrosion form on the brake rotors, the
brakes will tend to respond with a pulsating
effect that even extended application will fail to
cure.
When the vehicle is parked
Condensation forms while the automatic cli-
mate control is in operation, and then exits
under the vehicle. Traces of condensed water
under the vehicle are therefore normal.
Before driving into a car wash
For general information about taking care of
your BMW, refer to the Caring for your vehicle
brochure.
Cargo loading
To avoid loading the tires beyond their
approved carrying capacity, never over-
load the vehicle. Overloading can lead to over-
heating and increases the rate at which damage
develops inside the tires. The ultimate result
can assume the form of a sudden blow-out.<
Determining loading limit
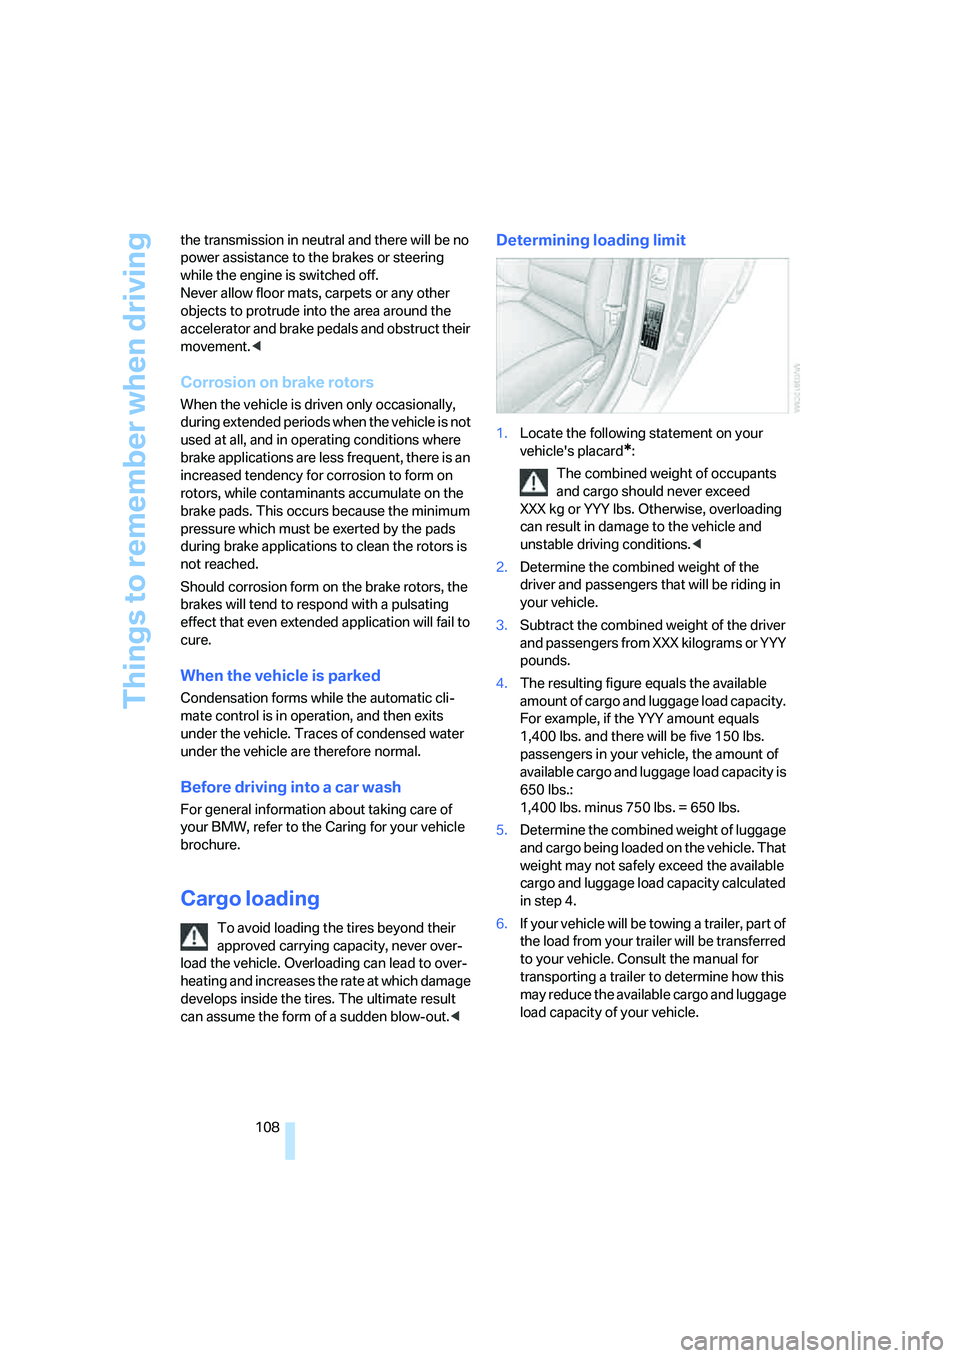
1.Locate the following statement on your
vehicle's placard
*:
The combined weight of occupants
and cargo should never exceed
XXX kg or YYY lbs. Otherwise, overloading
can result in damage to the vehicle and
unstable driving conditions.<
2.Determine the combined weight of the
driver and passengers that will be riding in
your vehicle.
3.Subtract the combined weight of the driver
and passengers from XXX kilograms or YYY
pounds.
4.The resulting figure equals the available
amount of cargo and luggage load capacity.
For example, if the YYY amount equals
1,400 lbs. and there will be five 150 lbs.
passengers in your vehicle, the amount of
available cargo and luggage load capacity is
650 lbs.:
1,400 lbs. minus 750 lbs. = 650 lbs.
5.Determine the combined weight of luggage
and cargo being loaded on the vehicle. That
weight may not safely exceed the available
cargo and luggage load capacity calculated
in step 4.
6.If your vehicle will be towing a trailer, part of
the load from your trailer will be transferred
to your vehicle. Consult the manual for
transporting a trailer to determine how this
may reduce the available cargo and luggage
load capacity of your vehicle.
Page 110 of 223
Driving tips
109Reference
At a glance
Controls
Communications
Navigation
Entertainment
Mobility
Load
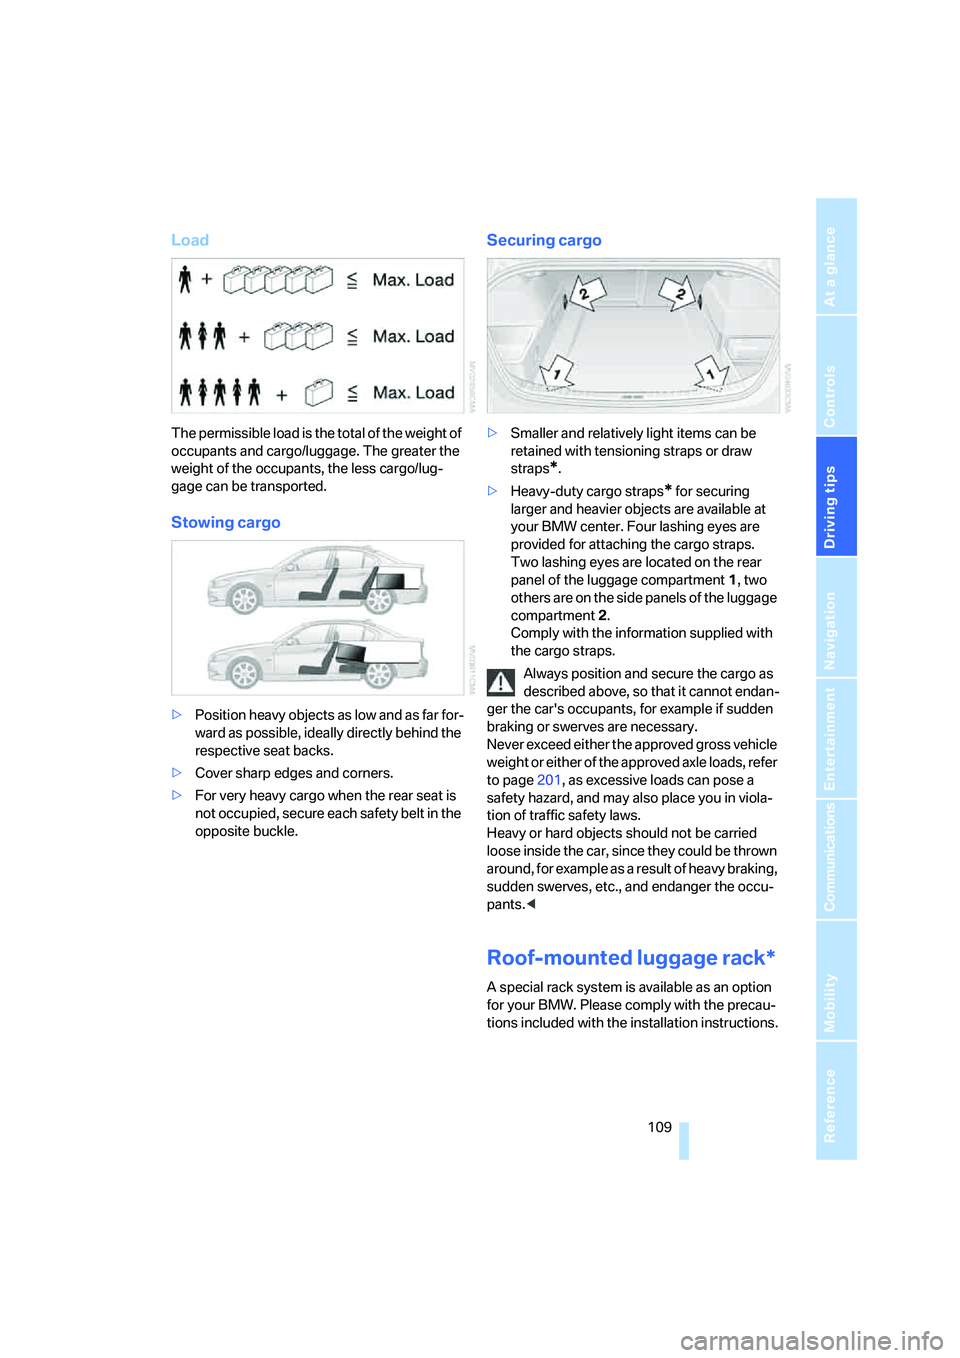
The permissible load is the total of the weight of
occupants and cargo/luggage. The greater the
weight of the occupants, the less cargo/lug-
gage can be transported.
Stowing cargo
>Position heavy objects as low and as far for-
ward as possible, ideally directly behind the
respective seat backs.
>Cover sharp edges and corners.
>For very heavy cargo when the rear seat is
not occupied, secure each safety belt in the
opposite buckle.
Securing cargo
>Smaller and relatively light items can be
retained with tensioning straps or draw
straps
*.
>Heavy-duty cargo straps
* for securing
larger and heavier objects are available at
your BMW center. Four lashing eyes are
provided for attaching the cargo straps.
Two lashing eyes are located on the rear
panel of the luggage compartment 1, two
others are on the side panels of the luggage
compartment 2.
Comply with the information supplied with
the cargo straps.
Always position and secure the cargo as
described above, so that it cannot endan-
ger the car's occupants, for example if sudden
braking or swerves are necessary.
Never exceed either the approved gross vehicle
weight or either of the approved axle loads, refer
to page201, as excessive loads can pose a
safety hazard, and may also place you in viola-
tion of traffic safety laws.
Heavy or hard objects should not be carried
loose inside the car, since they could be thrown
around, for example as a result of heavy braking,
sudden swerves, etc., and endanger the occu-
pants.<
Roof-mounted luggage rack*
A special rack system is available as an option
for your BMW. Please comply with the precau-
tions included with the installation instructions.
Page 111 of 223
Things to remember when driving
110
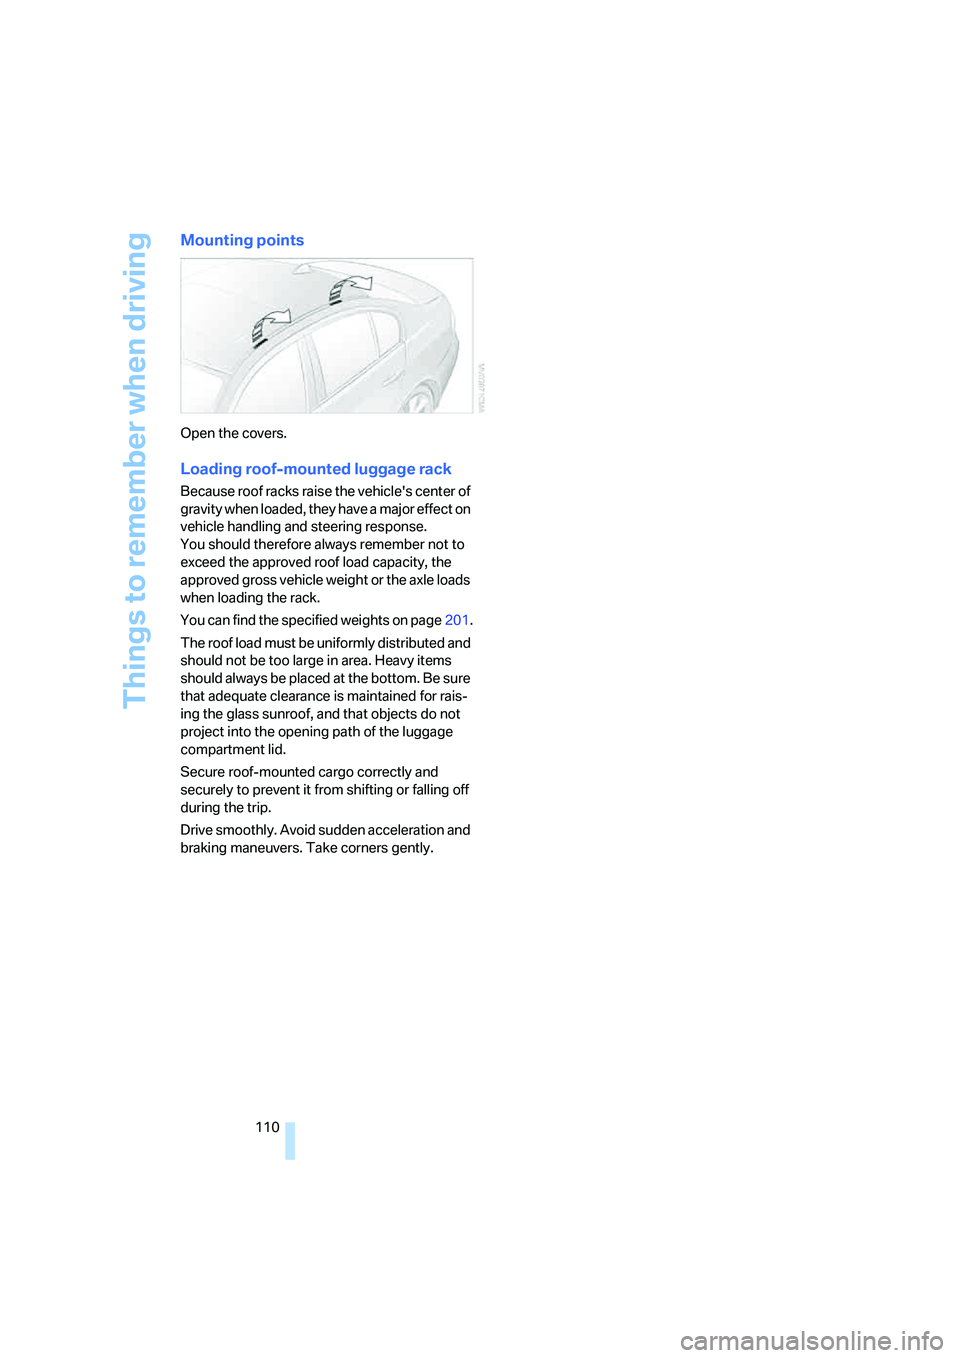
Mounting points
Open the covers.
Loading roof-mounted luggage rack
Because roof racks raise the vehicle's center of
gravity when loaded, they have a major effect on
vehicle handling and steering response.
You should therefore always remember not to
exceed the approved roof load capacity, the
approved gross vehicle weight or the axle loads
when loading the rack.
You can find the specified weights on page201.
The roof load must be uniformly distributed and
should not be too large in area. Heavy items
should always be placed at the bottom. Be sure
that adequate clearance is maintained for rais-
ing the glass sunroof, and that objects do not
project into the opening path of the luggage
compartment lid.
Secure roof-mounted cargo correctly and
securely to prevent it from shifting or falling off
during the trip.
Drive smoothly. Avoid sudden acceleration and
braking maneuvers. Take corners gently.
Page 118 of 223
Navigation
Driving tips
117Reference
At a glance
Controls
Communications
Entertainment
Mobility
Inputting destination by zip code
1.Select "Town / City" and press the control-
ler.
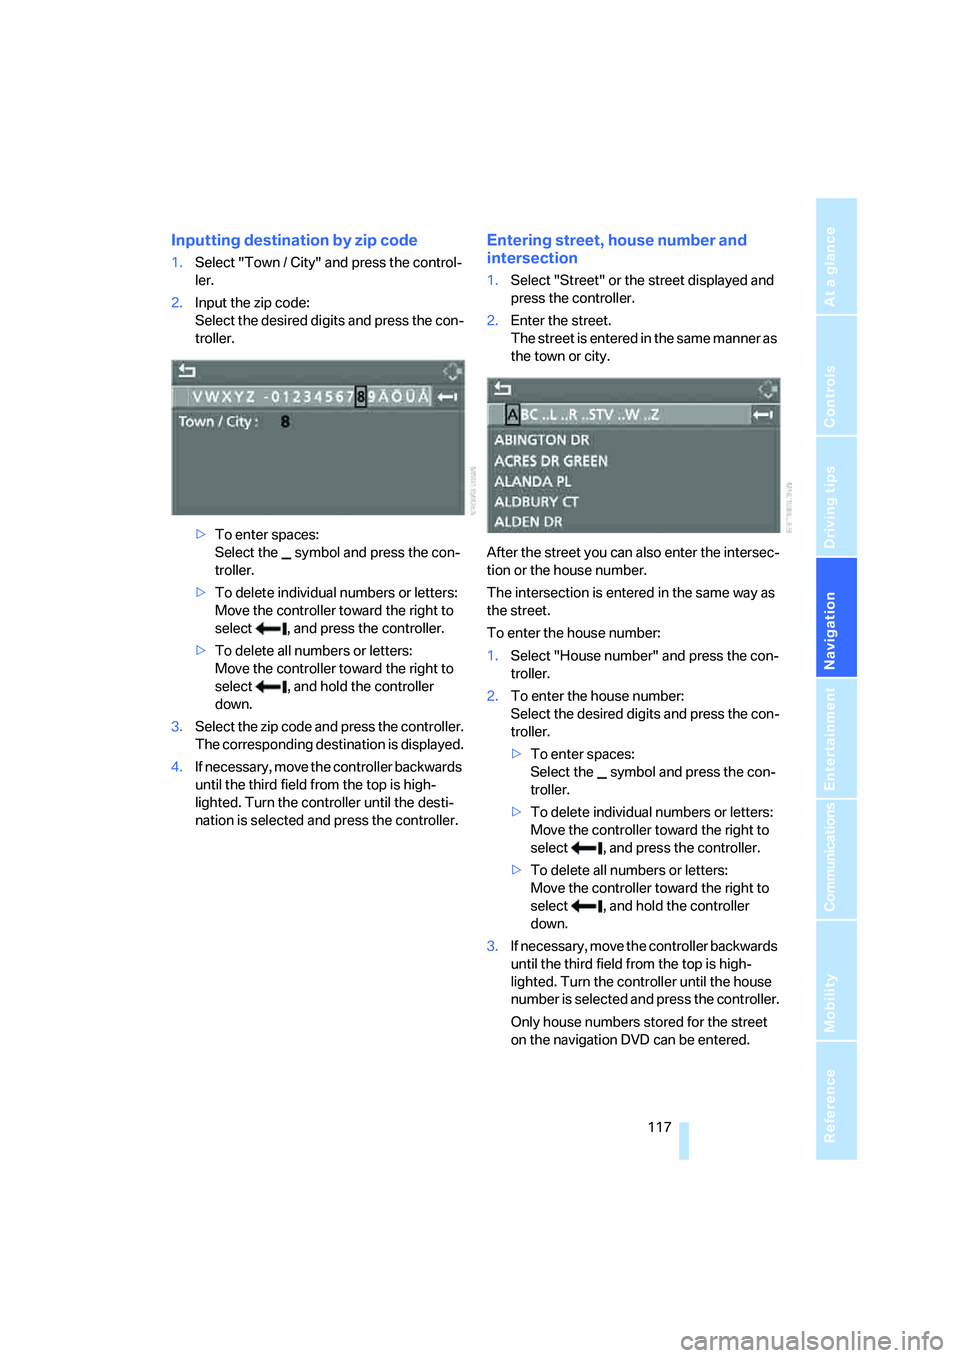
2.Input the zip code:
Select the desired digits and press the con-
troller.
>To enter spaces:
Select the symbol and press the con-
troller.
>To delete individual numbers or letters:
Move the controller toward the right to
select , and press the controller.
>To delete all numbers or letters:
Move the controller toward the right to
select , and hold the controller
down.
3.Select the zip code and press the controller.
The corresponding destination is displayed.
4.If necessary, move the controller backwards
until the third field from the top is high-
lighted. Turn the controller until the desti-
nation is selected and press the controller.
Entering street, house number and
intersection
1.Select "Street" or the street displayed and
press the controller.
2.Enter the street.
The street is entered in the same manner as
the town or city.
After the street you can also enter the intersec-
tion or the house number.
The intersection is entered in the same way as
the street.
To enter the house number:
1.Select "House number" and press the con-
troller.
2.To enter the house number:
Select the desired digits and press the con-
troller.
>To enter spaces:
Select the symbol and press the con-
troller.
>To delete individual numbers or letters:
Move the controller toward the right to
select , and press the controller.
>To delete all numbers or letters:
Move the controller toward the right to
select , and hold the controller
down.
3.If necessary, move the controller backwards
until the third field from the top is high-
lighted. Turn the controller until the house
number is selected and press the controller.
Only house numbers stored for the street
on the navigation DVD can be entered.
Page 124 of 223
Navigation
Driving tips
123Reference
At a glance
Controls
Communications
Entertainment
Mobility
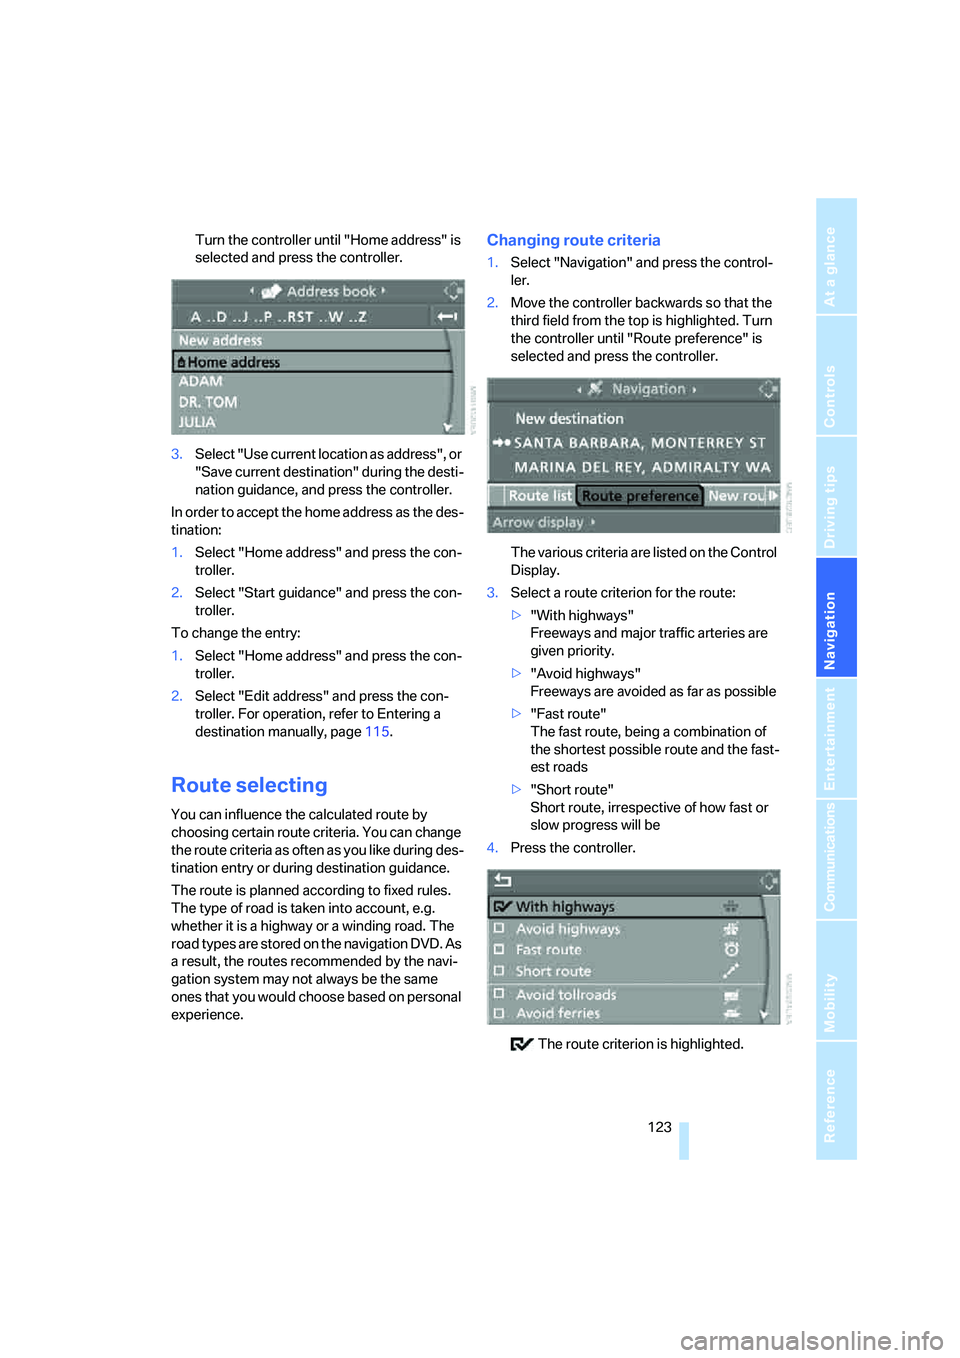
Turn the controller until "Home address" is
selected and press the controller.
3.Select "Use current location as address", or
"Save current destination" during the desti-
nation guidance, and press the controller.
In order to accept the home address as the des-
tination:
1.Select "Home address" and press the con-
troller.
2.Select "Start guidance" and press the con-
troller.
To change the entry:
1.Select "Home address" and press the con-
troller.
2.Select "Edit address" and press the con-
troller. For operation, refer to Entering a
destination manually, page115.
Route selecting
You can influence the calculated route by
choosing certain route criteria. You can change
the route criteria as often as you like during des-
tination entry or during destination guidance.
The route is planned according to fixed rules.
The type of road is taken into account, e.g.
whether it is a highway or a winding road. The
road types are stored on the navigation DVD. As
a result, the routes recommended by the navi-
gation system may not always be the same
ones that you would choose based on personal
experience.
Changing route criteria
1.Select "Navigation" and press the control-
ler.
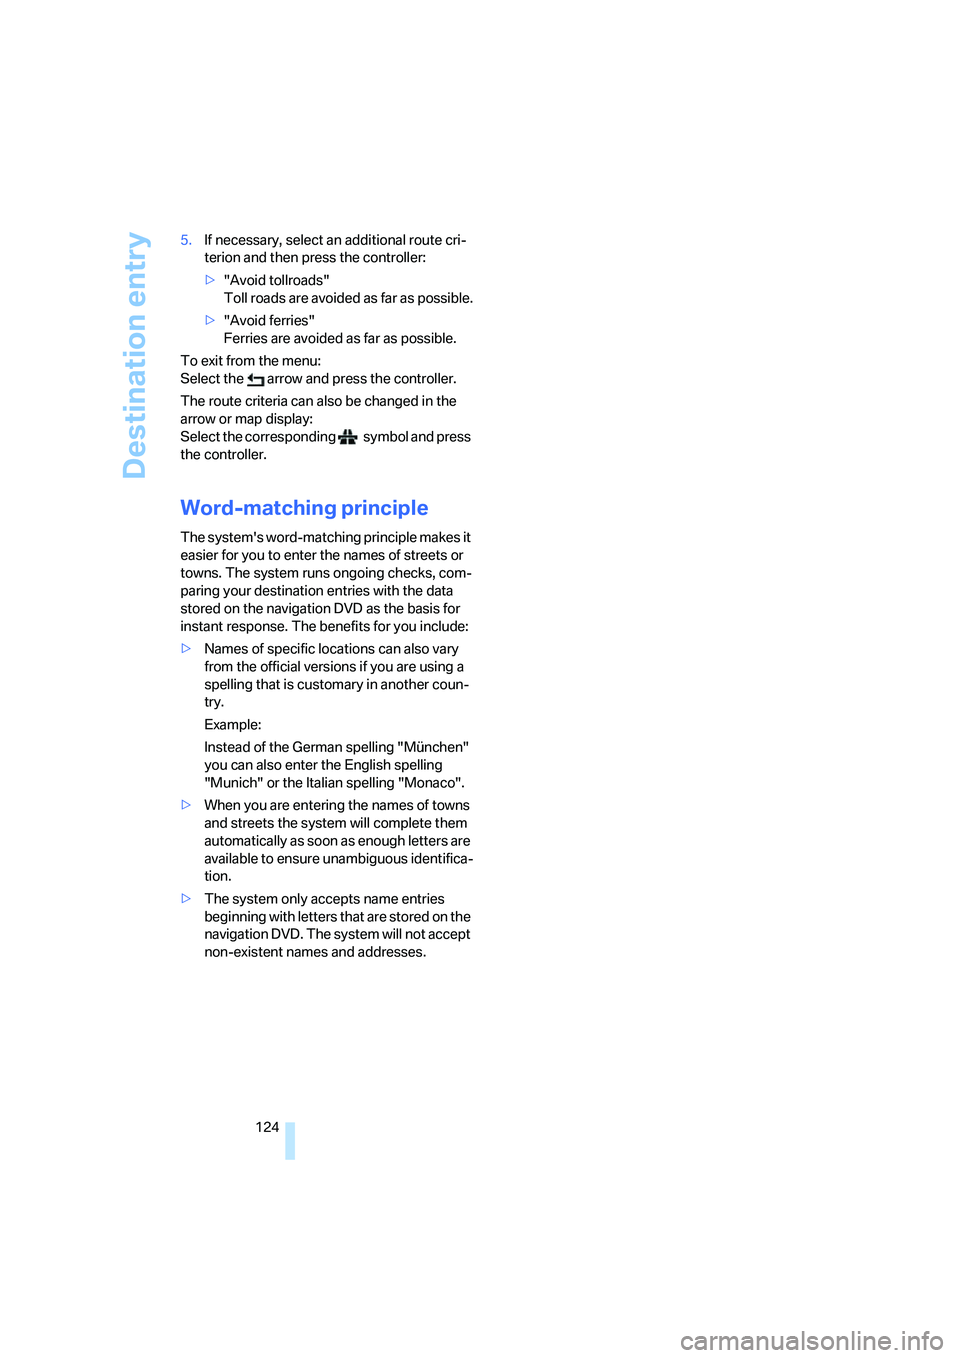
2.Move the controller backwards so that the
third field from the top is highlighted. Turn
the controller until "Route preference" is
selected and press the controller.
The various criteria are listed on the Control
Display.
3.Select a route criterion for the route:
>"With highways"
Freeways and major traffic arteries are
given priority.
>"Avoid highways"
Freeways are avoided as far as possible
>"Fast route"
The fast route, being a combination of
the shortest possible route and the fast-
est roads
>"Short route"
Short route, irrespective of how fast or
slow progress will be
4.Press the controller.
The route criterion is highlighted.
Page 125 of 223
Destination entry
124 5.If necessary, select an additional route cri-
terion and then press the controller:
>"Avoid tollroads"
Toll roads are avoided as far as possible.
>"Avoid ferries"
Ferries are avoided as far as possible.
To exit from the menu:
Select the arrow and press the controller.
The route criteria can also be changed in the
arrow or map display:
Select the corresponding symbol and press
the controller.
Word-matching principle
The system's word-matching principle makes it
easier for you to enter the names of streets or
towns. The system runs ongoing checks, com-
paring your destination entries with the data
stored on the navigation DVD as the basis for
instant response. The benefits for you include:
>Names of specific locations can also vary
from the official versions if you are using a
spelling that is customary in another coun-
try.
Example:
Instead of the German spelling "München"
you can also enter the English spelling
"Munich" or the Italian spelling "Monaco".
>When you are entering the names of towns
and streets the system will complete them
automatically as soon as enough letters are
available to ensure unambiguous identifica-
tion.
>The system only accepts name entries
beginning with letters that are stored on the
navigation DVD. The system will not accept
non-existent names and addresses.
Page 128 of 223
Navigation
Driving tips
127Reference
At a glance
Controls
Communications
Entertainment
Mobility
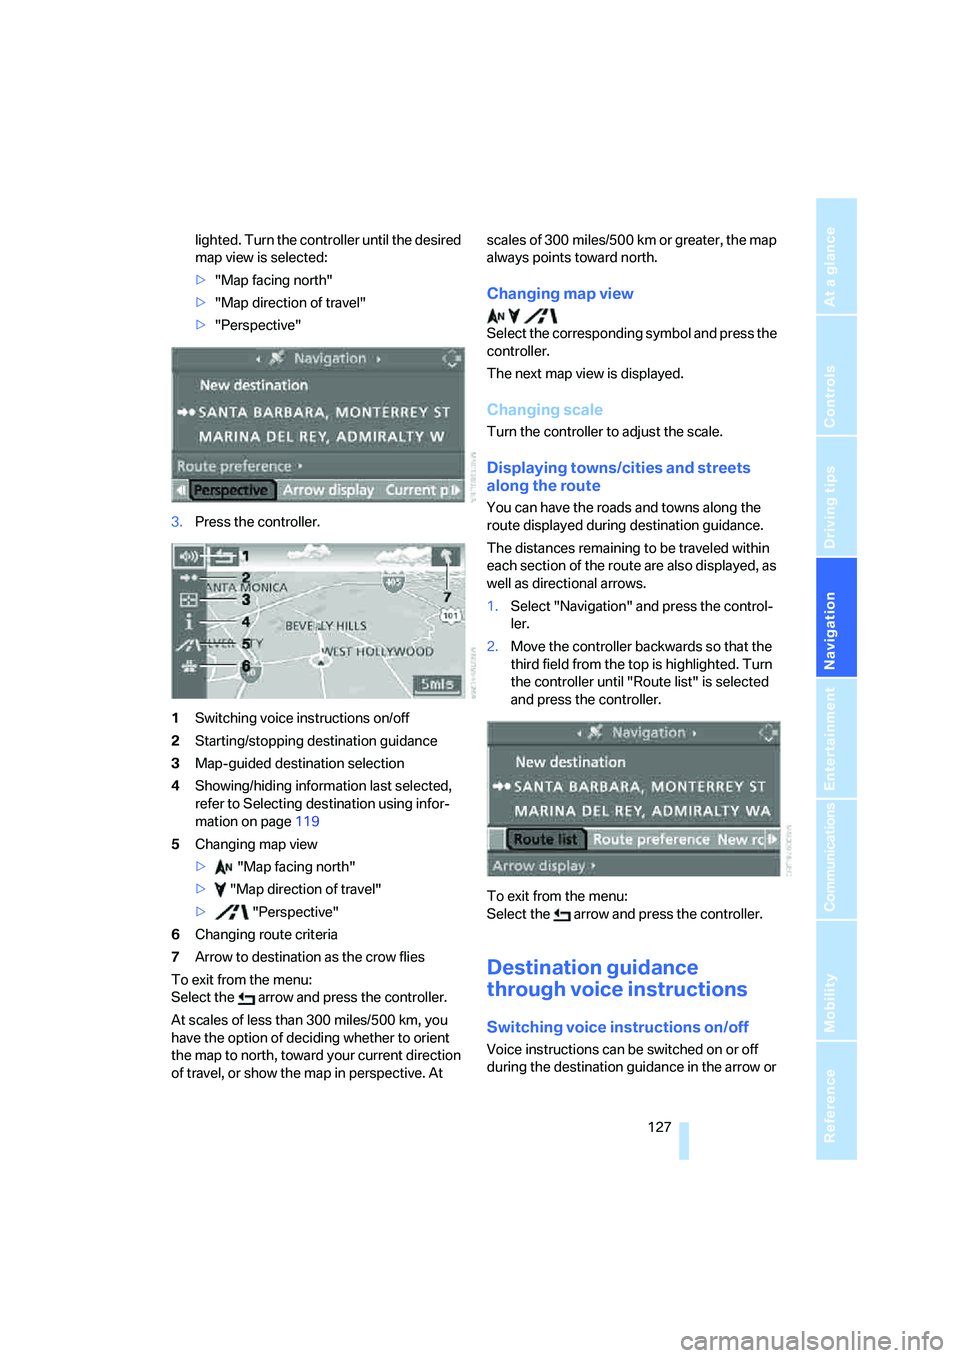
lighted. Turn the controller until the desired
map view is selected:
>"Map facing north"
>"Map direction of travel"
>"Perspective"
3.Press the controller.
1Switching voice instructions on/off
2Starting/stopping destination guidance
3Map-guided destination selection
4Showing/hiding information last selected,
refer to Selecting destination using infor-
mation on page119
5Changing map view
> "Map facing north"
> "Map direction of travel"
> "Perspective"
6Changing route criteria
7Arrow to destination as the crow flies
To exit from the menu:
Select the arrow and press the controller.
At scales of less than 300 miles/500 km, you
have the option of deciding whether to orient
the map to north, toward your current direction
of travel, or show the map in perspective. At scales of 300 miles/500 km or greater, the map
always points toward north.
Changing map view
Select the corresponding symbol and press the
controller.
The next map view is displayed.
Changing scale
Turn the controller to adjust the scale.
Displaying towns/cities and streets
along the route
You can have the roads and towns along the
route displayed during destination guidance.
The distances remaining to be traveled within
each section of the route are also displayed, as
well as directional arrows.
1.Select "Navigation" and press the control-
ler.
2.Move the controller backwards so that the
third field from the top is highlighted. Turn
the controller until "Route list" is selected
and press the controller.
To exit from the menu:
Select the arrow and press the controller.
Destination guidance
through voice instructions
Switching voice instructions on/off
Voice instructions can be switched on or off
during the destination guidance in the arrow or
Page 145 of 223
Radio
144
Changing channels with buttons on CD
player
Press the button for the corresponding
direction.
The system switches to the next enabled chan-
nel.
Notes
When there is a signal blockage or the transmis-
sion is suspended momentarily for more than
4 seconds, a message appears on the Control
Display.
Service may be interrupted or unavailable
for specific reasons such as environmen-
tal or topographic conditions and others that
satellite radio cannot directly control.
Signal may not be available under tunnels, in
parking garages, next to tall buildings, nearby
trees with dense foliage, nearby mountains or
other possible strong sources of radio interfer-
ence.
Service should resume normally after the
source of signal unavailability has been
cleared.<