2005 BMW 330XI IDRIVE SEDAN ignition
[x] Cancel search: ignitionPage 12 of 223

At a glance
11Reference
Controls
Driving tips
Communications
Navigation
Entertainment
Mobility
7Instrument cluster12
10Ignition lock49
11Buttons
* on the steering wheel12Horn: the entire surface
13Steering wheel adjustment44
15Releasing the hood180
16Opening the luggage compartment lid
*
6
Turn signals53
High beams, headlamp flasher86
Roadside parking lamps
*86
Computer65
Settings and information about the
vehicle68
Instrument lighting87
8
Windshield wipers54
Rain sensor
*54
9Switching the ignition on/off and
starting/stopping the engine49
Telephone
*:
>Press briefly: receiving and
ending a call, starting dialing
*
for a selected number
>Press longer: redialing
Volume
Activating/deactivating voice com-
mand system
*
Switching radio stations
Selecting music tracks
Scrolling through phone book
Individually programmable45
Individually programmable45
14
Cruise control*55
Active cruise control
*57
Page 14 of 223
At a glance
13Reference
Controls
Driving tips
Communications
Navigation
Entertainment
Mobility
Indicator and warning lamps
The concept
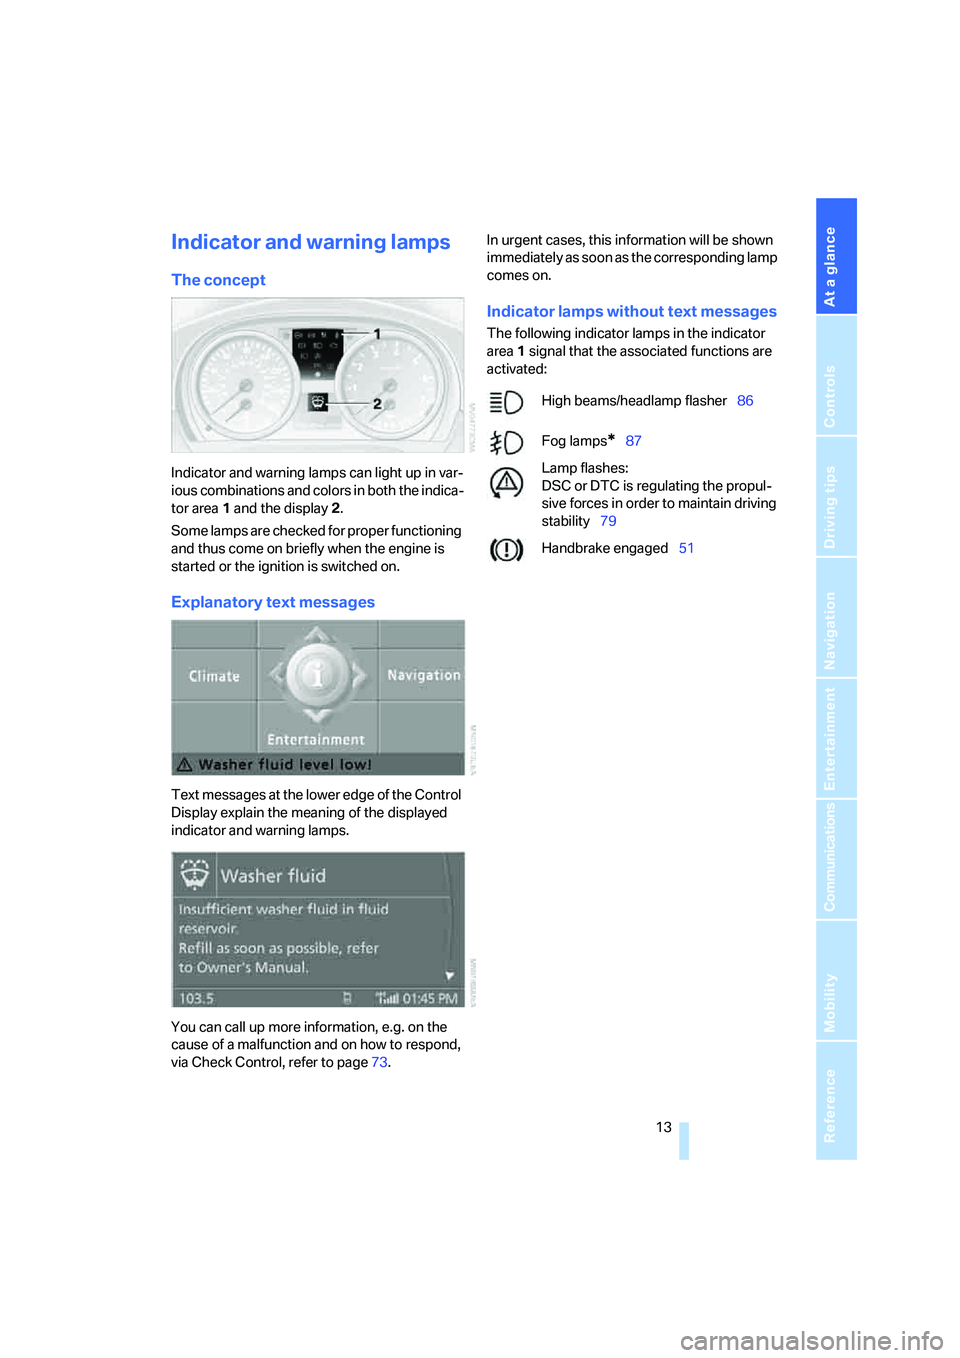
Indicator and warning lamps can light up in var-
ious combinations and colors in both the indica-
tor area 1 and the display 2.
Some lamps are checked for proper functioning
and thus come on briefly when the engine is
started or the ignition is switched on.
Explanatory text messages
Text messages at the lower edge of the Control
Display explain the meaning of the displayed
indicator and warning lamps.
You can call up more information, e.g. on the
cause of a malfunction and on how to respond,
via Check Control, refer to page73.In urgent cases, this information will be shown
immediately as soon as the corresponding lamp
comes on.
Indicator lamps without text messages
The following indicator lamps in the indicator
area1 signal that the associated functions are
activated:
High beams/headlamp flasher86
Fog lamps
*87
Lamp flashes:
DSC or DTC is regulating the propul-
sive forces in order to maintain driving
stability79
Handbrake engaged51
Page 29 of 223
Opening and closing
28
Opening and closing
Keys/remote controls
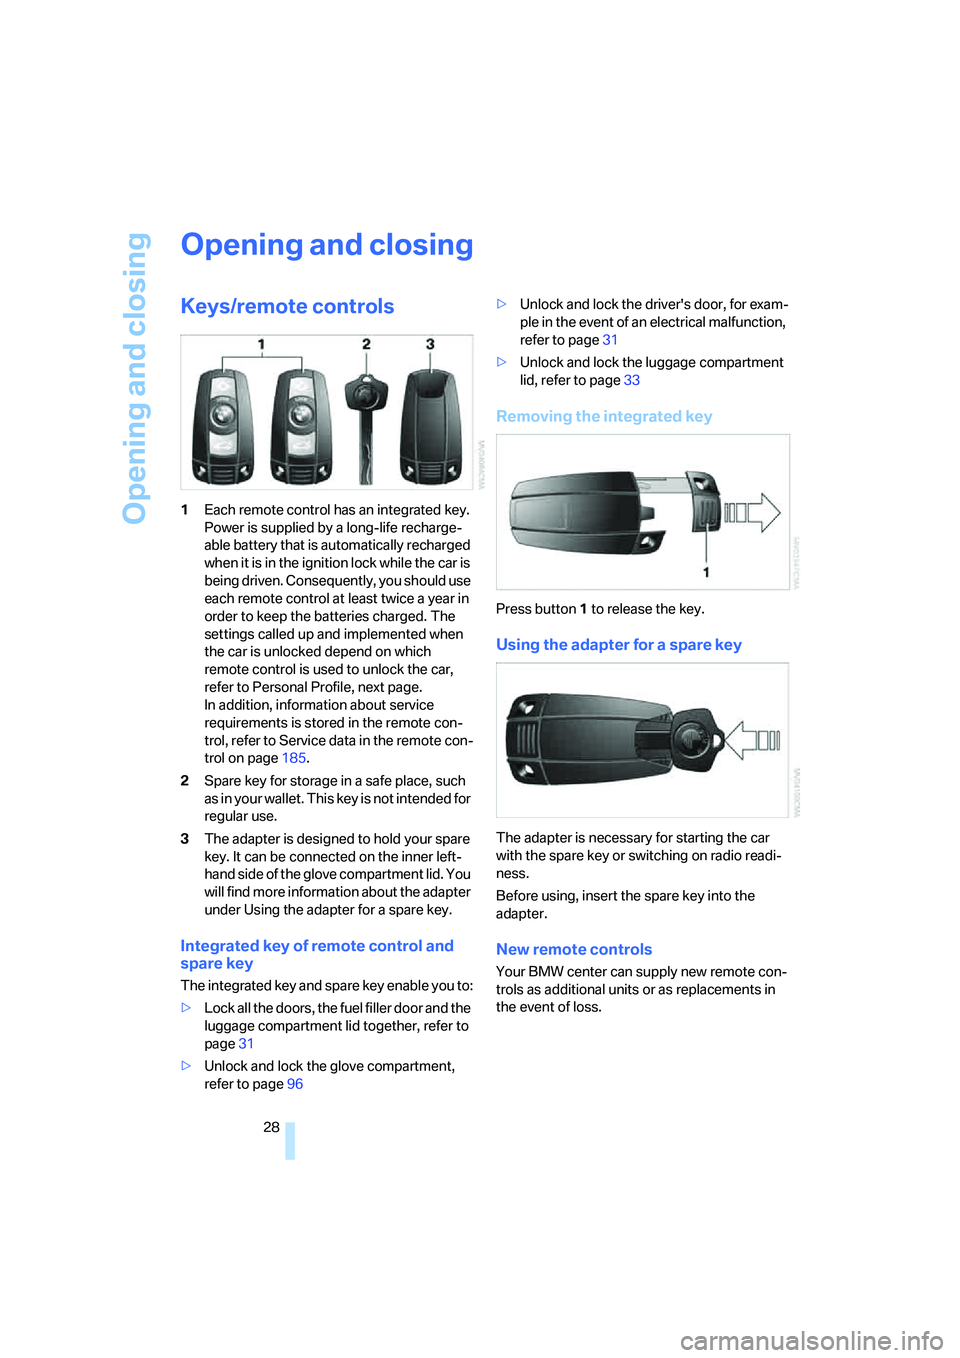
1Each remote control has an integrated key.
Power is supplied by a long-life recharge-
able battery that is automatically recharged
when it is in the ignition lock while the car is
being driven. Consequently, you should use
each remote control at least twice a year in
order to keep the batteries charged. The
settings called up and implemented when
the car is unlocked depend on which
remote control is used to unlock the car,
refer to Personal Profile, next page.
In addition, information about service
requirements is stored in the remote con-
trol, refer to Service data in the remote con-
trol on page185.
2Spare key for storage in a safe place, such
as in your wallet. This key is not intended for
regular use.
3The adapter is designed to hold your spare
key. It can be connected on the inner left-
hand side of the glove compartment lid. You
will find more information about the adapter
under Using the adapter for a spare key.
Integrated key of remote control and
spare key
The integrated key and spare key enable you to:
>Lock all the doors, the fuel filler door and the
luggage compartment lid together, refer to
page31
>Unlock and lock the glove compartment,
refer to page96>Unlock and lock the driver's door, for exam-
ple in the event of an electrical malfunction,
refer to page31
>Unlock and lock the luggage compartment
lid, refer to page33
Removing the integrated key
Press button1 to release the key.
Using the adapter for a spare key
The adapter is necessary for starting the car
with the spare key or switching on radio readi-
ness.
Before using, insert the spare key into the
adapter.
New remote controls
Your BMW center can supply new remote con-
trols as additional units or as replacements in
the event of loss.
Page 35 of 223

Opening and closing
34
Closing
The handle recesses on the interior trim of the
luggage compartment lid make it easier to pull
down.
Make sure that the closing path of the
luggage compartment lid is clear, as oth-
erwise injuries may result.<
Alarm system*
The concept
The vehicle alarm system responds:
>When a door, the hood or the luggage com-
partment lid is opened
>To movements inside the vehicle: Interior
motion sensor, refer to the information fur-
ther below
>When the car's inclination changes, for
instance if an attempt is made to jack it up
and steal the wheels or to raise it prior to
towing away
>When there is an interruption in the power
supply from the battery.
The system responds to unauthorized vehicle
entry and attempted theft by simultaneously
activating:
>An acoustic alarm, which lasts for a period
of approx. 30 seconds
>The hazard warning flashers, which operate
for approx. 5 minutes
*
>The high beams, which flash on and off in
the same rhythm.
Arming and disarming
When you lock or unlock the vehicle, either with
the remote control or at the door lock, the alarm
system is armed or disarmed at the same time.
The system indicates that it has been correctly
armed by switching on the hazard warning
flashers for a single cycle and by emitting an
acoustic signal.
Even when the alarm system is armed, you can
open the luggage compartment lid by means of
the button on the remote control, refer to
page30. When you subsequently close the lug-
gage compartment lid it is again locked and
monitored.
Switching off an alarm
>Unlock the car with the remote control, refer
to page30, or
>insert the remote control all the way into the
ignition lock.
Indicator lamp displays
>The indicator lamp under the inside rear-
view mirror flashes continuously: the sys-
tem is armed.
>The indicator lamp flashes after locking:
doors, hood or luggage compartment lid are
not properly closed. Even if you do not close
the alerted area, the system begins to mon-
itor the remaining areas, and the indicator
lamp flashes continuously after approx. 10
seconds. However, the interior motion sen-
sor is not activated.
>The indicator lamp goes out after unlocking:
your vehicle has not been disturbed while
you were away.
Page 36 of 223

Controls
35Reference
At a glance
Driving tips
Communications
Navigation
Entertainment
Mobility
>If the indicator lamp flashes after unlocking
until the remote control is inserted in the
ignition, but for no longer than approx.
5 minutes: your vehicle has been disturbed
while you were away.
Tilt alarm sensor and interior motion
sensor
Tilt alarm sensor
The tilt of the vehicle is monitored. The alarm
system reacts, e.g. to attempts to steal a wheel
or tow the vehicle.
Interior motion sensor
In order for the interior motion sensor to func-
tion properly, the windows and glass sunroof
must be completely closed.
Avoiding unintentional alarms
The tilt alarm sensor and interior motion sensor
may be switched off at the same time. This pre-
vents unintentional alarms, e.g. in the following
situations:
>In duplex garages
>When transporting on car-carrying trains
>When animals are to remain in the vehicle
Switching off tilt alarm sensor and
interior motion sensor
Press the button on the remote control
twice in a row.
The indicator lamp comes on for approx. two
seconds, then begins to flash steadily. The tilt
alarm sensor and the interior motion sensor are
switched off until the next time the vehicle is
unlocked and subsequently locked again.
Windows
To prevent injuries, exercise care when
closing the windows and keep them in
your field of vision until they are shut.
When leaving the car, take the remote control
out of the ignition lock and close the doors, oth-erwise children could operate the power win-
dows and possibly injure themselves.<
Opening, closing
>Press the switch to the resistance point.
The window continues to open as long as
you keep the switch pressed.
>Briefly press the switch beyond the resis-
tance point.
The window opens automatically. Briefly
press the switch again to stop the opening
movement.
You can close the windows in the same manner
by pulling the switch.
There are separate switches in the rear seat
armrests.
After switching off the ignition
You can still operate the windows:
>In radio readiness, for approx. 15 minutes
>For about one minute when the remote
control is removed or the ignition and radio
readiness are switched off, as long as nei-
ther front door has been opened
For information on convenient operation via the
remote control or door lock, refer to page30
or31.
Take the remote control with you when
you leave the car, otherwise children
could operate the electric windows and possi-
bly injure themselves.<
Anti-trapping mechanism
If the closing force of an electric window
exceeds a specific value as it closes, the closing
Page 39 of 223
Adjustments
38
Adjustments
Sitting safely
The ideal sitting position can make a vital con-
tribution to relaxed, fatigue-free driving. In con-
junction with the safety belts, the head
restraints and the airbags, the seated position
has a major influence on your safety in the event
of an accident. To ensure that the safety sys-
tems operate with optimal efficiency, we
strongly urge you to observe the instructions
contained in the following section.
For additional information on transporting chil-
dren safely, refer to page46.
Airbags
Always maintain an adequate distance
between yourself and the airbags. Always
grip the steering wheel on the rim, with your
hands in the 3 o'clock and 9 o'clock positions,
to minimize the risk of injury to the hands or
arms in the event of the airbag being triggered
off.
No one and nothing is to come between the air-
bags and the seat occupant.
Do not use the cover of the front airbag on the
front passenger side as a storage area. Make
sure that the front passenger is sitting correctly
and does not rest feet or legs on the instrument
panel, otherwise leg injuries can occur if the
front airbag is triggered. Never let an occu-
pant's head rest near or on a side airbag
because the inflating airbag could cause a seri-
ous or fatal injury.<
Even if you adhere to all the instructions, inju-
ries resulting from contact with airbags cannot
be fully excluded, depending on the circum-
stances. The ignition and inflation noise may
provoke a mild hearing loss in extremely sensi-
tive individuals. This effect is usually only tem-
porary.
For airbag locations and additional information
on airbags, refer to page82.
Head restraint
A correctly adjusted head restraint reduces the
risk of neck injury in the event of an accident.
Adjust the head restraint in such a way
that its center is at approx. ear level. Oth-
erwise, there is a risk of injury should an acci-
dent occur.<
Safety belt
Before every drive, make sure that all occupants
wear their safety belts. Airbags complement the
safety belt as an additional safety device, but
they do not represent a substitute.
At all times, occupants should sit upright
and be properly restrained: infants and
small children in appropriate child-restraint sys-
tems; larger children and adults using the safety
belts. Never allow more than one person to
wear a single safety belt. Never allow infants or
small children to ride in a passenger's lap.
Expectant mothers should also wear the safety
belt, making sure that the strap in the pelvic
a r e a i s w e l l d o w n o n t h e h i p s a n d d o e s n o t p r e s s
against the abdominal region of the body.
Do not route the belt across your neck, or run it
across sharp edges. Be sure that the belt does
not become caught or jammed. The safety belt
should not be twisted and must be positioned
firmly over the pelvis and shoulder, as close to
the body as possible. It should not pass over
hard or fragile objects, otherwise the belt in the
pelvic area could slide over the hips in the event
of a head-on collision and injure the lower abdo-
men. Avoid wearing bulky clothing and regularly
pull the belt in the upper-body area taut, other-
wise its restraining effect could be impaired.<
Safety belts, refer to page43.
Page 43 of 223
Adjustments
42
Seat and mirror memory*
You can store and call up two different combi-
nations of driver's-seat and exterior-mirror
positions.
Settings for the seat back width and lumbar
support are not stored in memory.
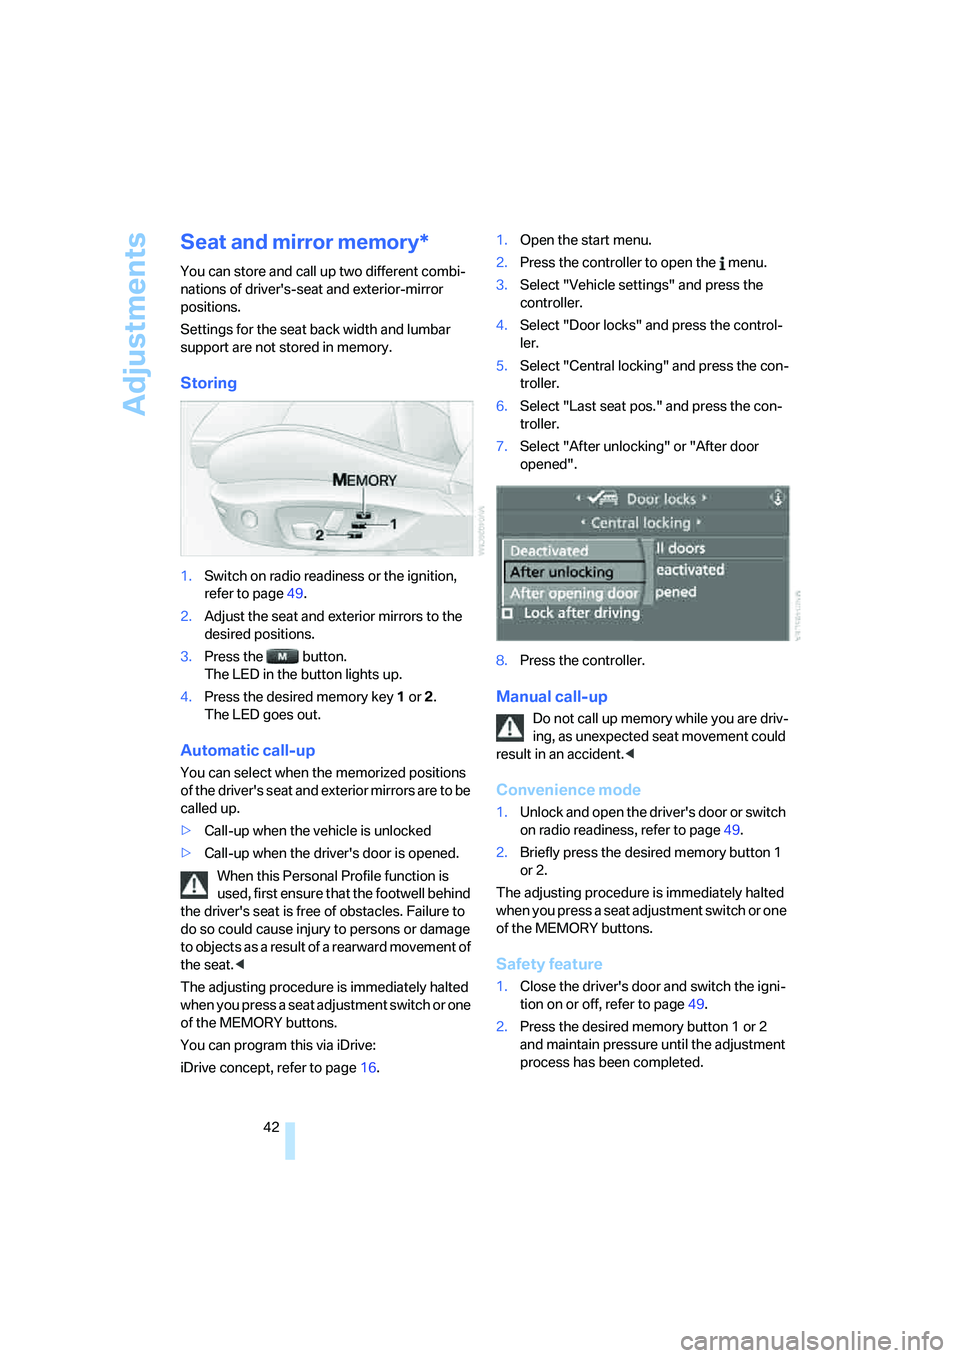
Storing
1.Switch on radio readiness or the ignition,
refer to page49.
2.Adjust the seat and exterior mirrors to the
desired positions.
3.Press the button.
The LED in the button lights up.
4.Press the desired memory key 1 or 2.
The LED goes out.
Automatic call-up
You can select when the memorized positions
of the driver's seat and exterior mirrors are to be
called up.
>Call-up when the vehicle is unlocked
>Call-up when the driver's door is opened.
When this Personal Profile function is
used, first ensure that the footwell behind
the driver's seat is free of obstacles. Failure to
do so could cause injury to persons or damage
to objects as a result of a rearward movement of
the seat.<
The adjusting procedure is immediately halted
when you press a seat adjustment switch or one
of the MEMORY buttons.
You can program this via iDrive:
iDrive concept, refer to page16.1.Open the start menu.
2.Press the controller to open the menu.
3.Select "Vehicle settings" and press the
controller.
4.Select "Door locks" and press the control-
ler.
5.Select "Central locking" and press the con-
troller.
6.Select "Last seat pos." and press the con-
troller.
7.Select "After unlocking" or "After door
opened".
8.Press the controller.
Manual call-up
Do not call up memory while you are driv-
ing, as unexpected seat movement could
result in an accident.<
Convenience mode
1.Unlock and open the driver's door or switch
on radio readiness, refer to page49.
2.Briefly press the desired memory button 1
or 2.
The adjusting procedure is immediately halted
when you press a seat adjustment switch or one
of the MEMORY buttons.
Safety feature
1.Close the driver's door and switch the igni-
tion on or off, refer to page49.
2.Press the desired memory button 1 or 2
and maintain pressure until the adjustment
process has been completed.
Page 45 of 223
Adjustments
44 The positions of the exterior mirrors are stored
for the remote control currently used
*, refer to
Personal Profile, page29.
Manual adjustment
The mirrors can also be adjusted manually, if
necessary: press the edge of the glass.
To prevent the exterior mirrors on this
vehicle from being damaged, always fold
them in by hand before entering an automatic
car wash.<
Automatic heating*
At outside temperatures below a certain limit,
both exterior mirrors are automatically heated
while the engine is running or the ignition
switched on.
Passenger-side mirror tilt function* –
automatic curb monitor
Activating
1.Push the mirror selector switch to the posi-
tion for the driver's-side mirror 1.
2.Engage reverse gear or move the selector
lever to position R.
The glass of the mirror on the passenger
side tilts slightly down. This allows the
driver to see the area immediately adjacent
to the vehicle – such as a curb – when park-
ing, etc.
Deactivating
Push the mirror selector switch to the position
for the passenger-side mirror 2.
Interior rearview mirror
Turn the knob underneath the mirror to reduce
glare from the headlamps of cars behind you
when driving at night.
Automatically dimming mirrors, refer to
page107.
Steering wheel
Adjustments
Do not adjust the steering wheel position
while the car is in motion, or an accident
may result from any unexpected movement.<
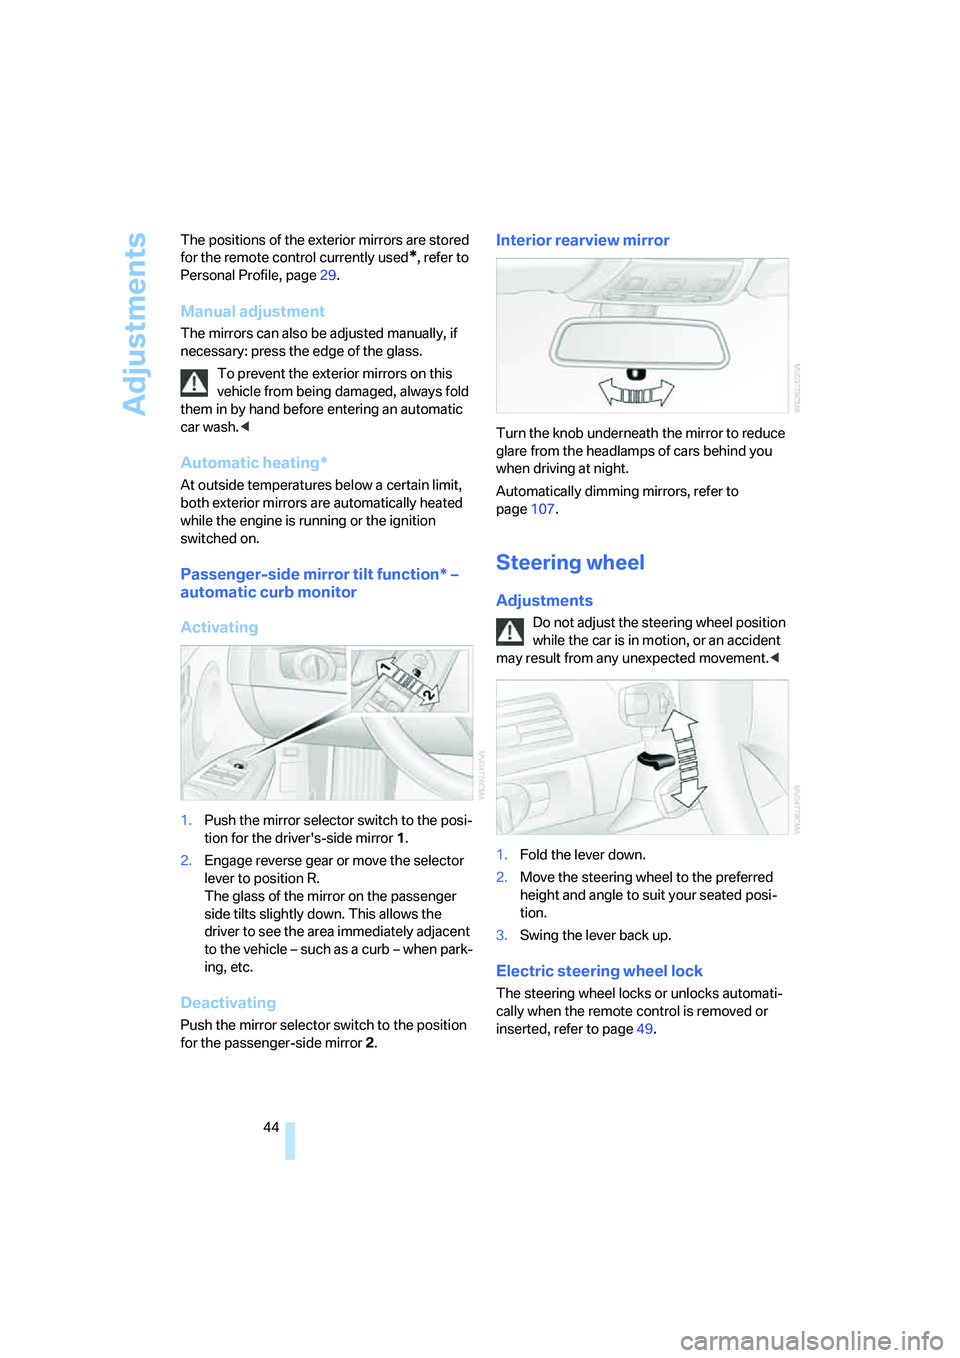
1.Fold the lever down.
2.Move the steering wheel to the preferred
height and angle to suit your seated posi-
tion.
3.Swing the lever back up.
Electric steering wheel lock
The steering wheel locks or unlocks automati-
cally when the remote control is removed or
inserted, refer to page49.