2005 BMW 330XI IDRIVE SEDAN handbrake
[x] Cancel search: handbrakePage 14 of 223
At a glance
13Reference
Controls
Driving tips
Communications
Navigation
Entertainment
Mobility
Indicator and warning lamps
The concept
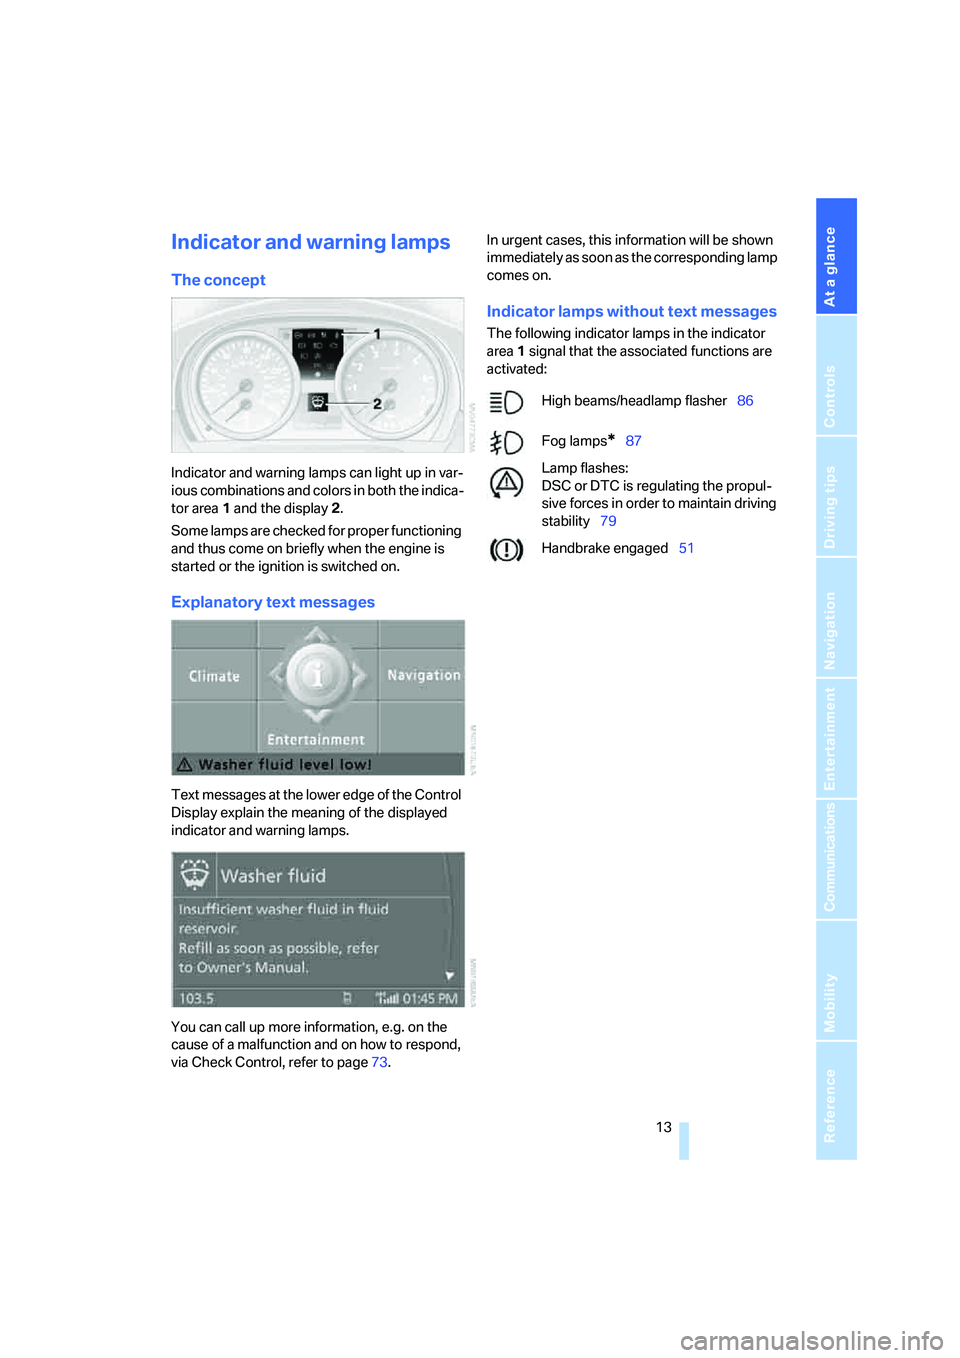
Indicator and warning lamps can light up in var-
ious combinations and colors in both the indica-
tor area 1 and the display 2.
Some lamps are checked for proper functioning
and thus come on briefly when the engine is
started or the ignition is switched on.
Explanatory text messages
Text messages at the lower edge of the Control
Display explain the meaning of the displayed
indicator and warning lamps.
You can call up more information, e.g. on the
cause of a malfunction and on how to respond,
via Check Control, refer to page73.In urgent cases, this information will be shown
immediately as soon as the corresponding lamp
comes on.
Indicator lamps without text messages
The following indicator lamps in the indicator
area1 signal that the associated functions are
activated:
High beams/headlamp flasher86
Fog lamps
*87
Lamp flashes:
DSC or DTC is regulating the propul-
sive forces in order to maintain driving
stability79
Handbrake engaged51
Page 51 of 223
Driving
50 The exhaust gases contain carbon monoxide,
an odorless and colorless, but highly toxic gas.
Never leave an unattended vehicle with the
engine running, as such a vehicle represents a
potential safety hazard.
Before leaving the car with the engine running,
place the transmission in idle or move the
selector lever to position P and apply the hand-
brake to prevent the car from moving.<
When starting the engine, do not press the
accelerator pedal.
Do not allow the engine to warm up by leaving it
running while the vehicle remains stationary.
Instead, begin to drive immediately at a moder-
ate engine speed.
Do not press either the brake pedal or the
clutch pedal until you are ready to start
the engine. The engine is started immediately
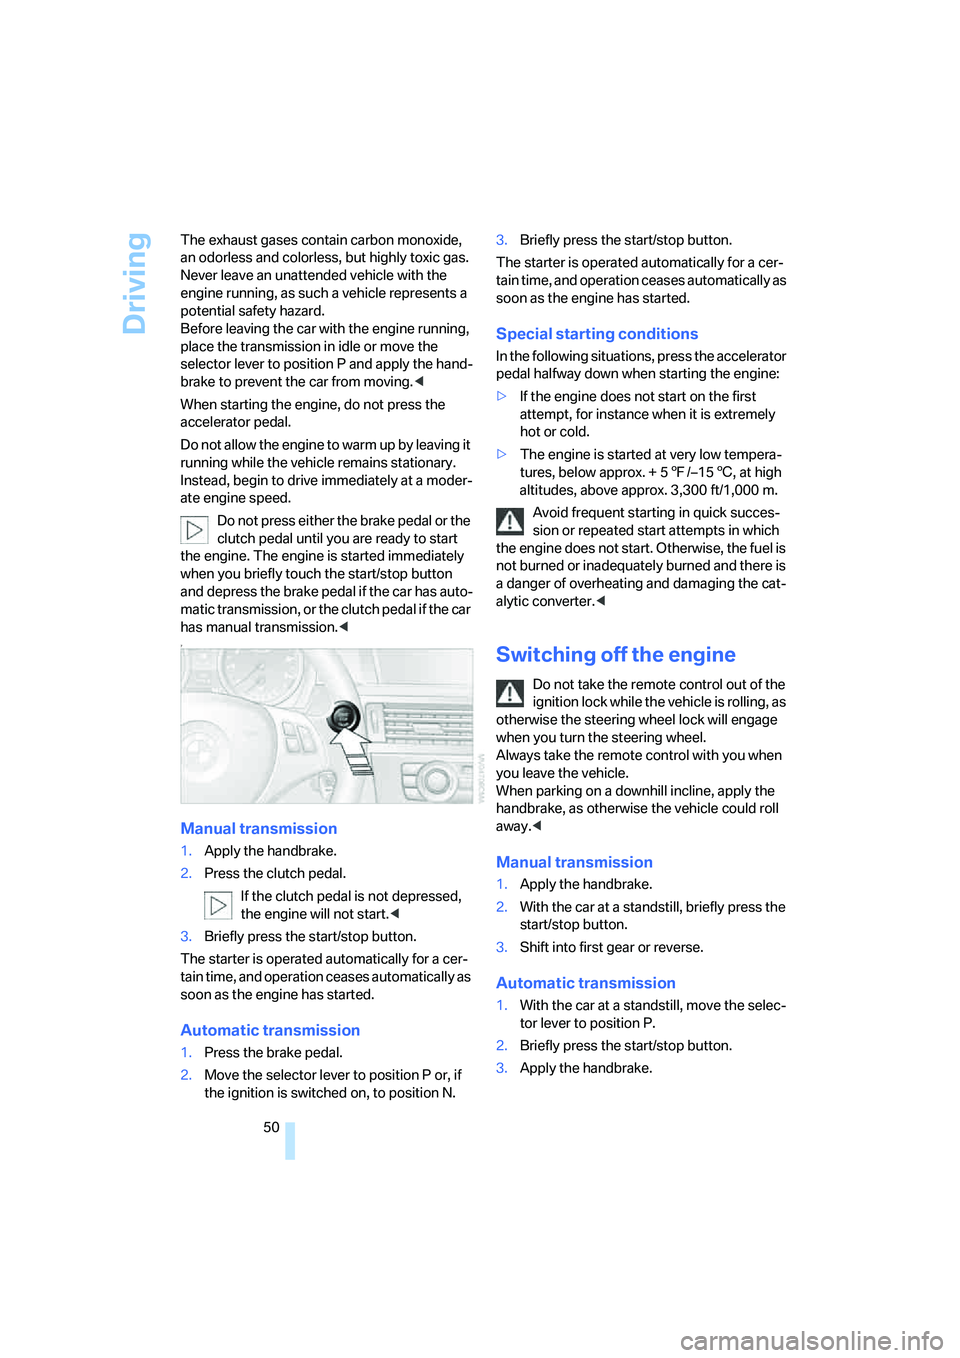
when you briefly touch the start/stop button
and depress the brake pedal if the car has auto-
matic transmission, or the clutch pedal if the car
has manual transmission.<
7
Manual transmission
1.Apply the handbrake.
2.Press the clutch pedal.
If the clutch pedal is not depressed,
the engine will not start.<
3.Briefly press the start/stop button.
The starter is operated automatically for a cer-
tain time, and operation ceases automatically as
soon as the engine has started.
Automatic transmission
1.Press the brake pedal.
2.Move the selector lever to position P or, if
the ignition is switched on, to position N.3.Briefly press the start/stop button.
The starter is operated automatically for a cer-
tain time, and operation ceases automatically as
soon as the engine has started.
Special starting conditions
In the following situations, press the accelerator
pedal halfway down when starting the engine:
>If the engine does not start on the first
attempt, for instance when it is extremely
hot or cold.
>The engine is started at very low tempera-
tures, below approx. + 57/–156, at high
altitudes, above approx. 3,300 ft/1,000 m.
Avoid frequent starting in quick succes-
sion or repeated start attempts in which
the engine does not start. Otherwise, the fuel is
not burned or inadequately burned and there is
a danger of overheating and damaging the cat-
alytic converter.<
Switching off the engine
Do not take the remote control out of the
ignition lock while the vehicle is rolling, as
otherwise the steering wheel lock will engage
when you turn the steering wheel.
Always take the remote control with you when
you leave the vehicle.
When parking on a downhill incline, apply the
handbrake, as otherwise the vehicle could roll
away.<
Manual transmission
1.Apply the handbrake.
2.With the car at a standstill, briefly press the
start/stop button.
3.Shift into first gear or reverse.
Automatic transmission
1.With the car at a standstill, move the selec-
tor lever to position P.
2.Briefly press the start/stop button.
3.Apply the handbrake.
Page 52 of 223
Controls
51Reference
At a glance
Driving tips
Communications
Navigation
Entertainment
Mobility
Handbrake
The handbrake is primarily intended to prevent
the vehicle from rolling while parked; it brakes
the rear wheels.
Indicator lamp
The indicator lamp is lit, and when you
drive off an acoustic signal sounds in
addition. The handbrake is still applied.
Indicator lamp for Canadian models.
Applying
The lever locks in position automatically.
Releasing
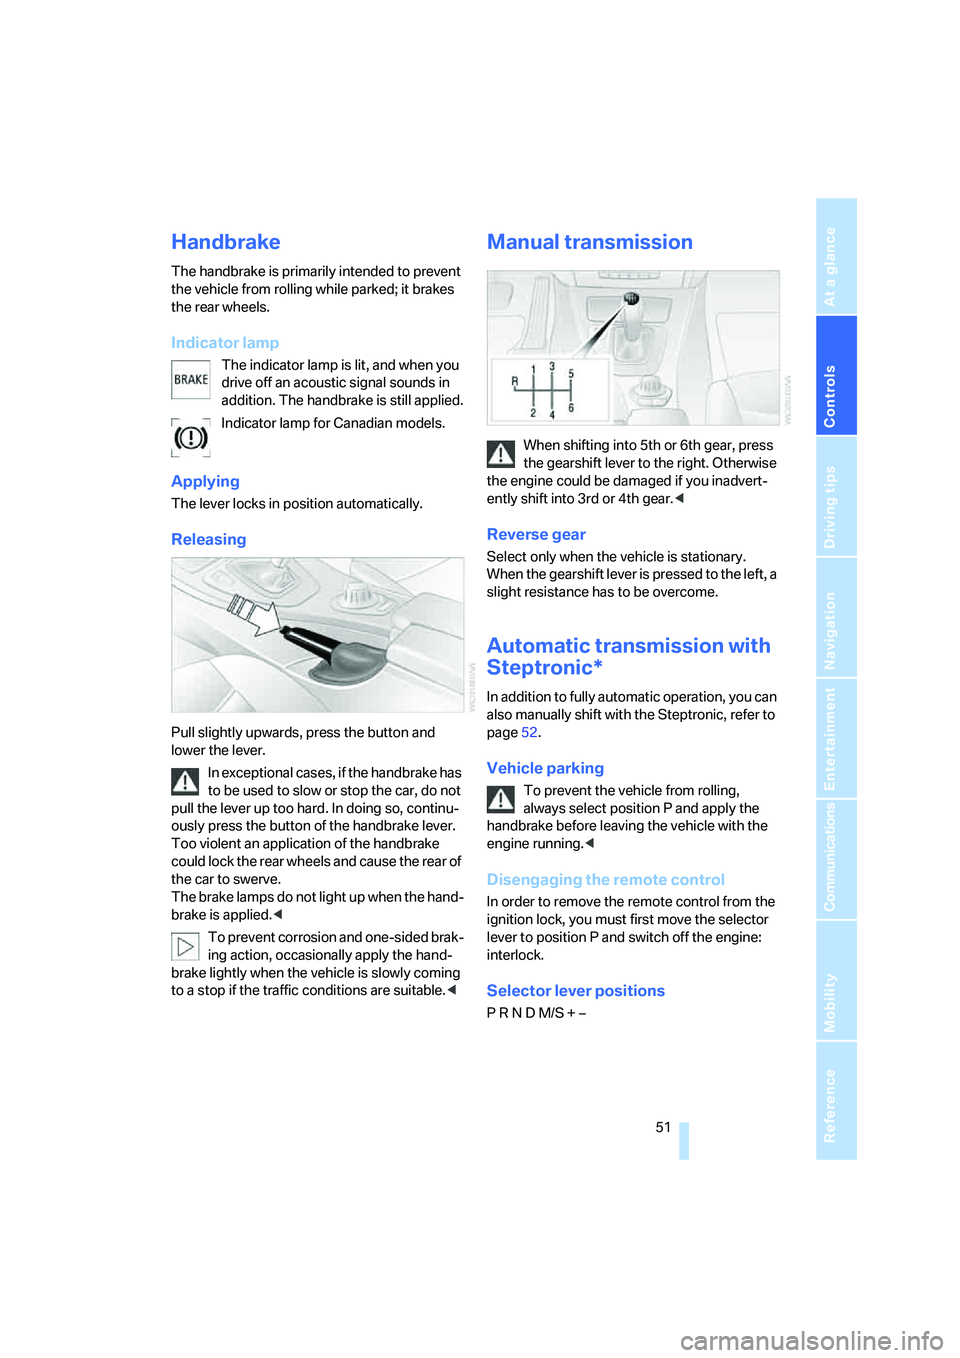
Pull slightly upwards, press the button and
lower the lever.
In exceptional cases, if the handbrake has
to be used to slow or stop the car, do not
pull the lever up too hard. In doing so, continu-
ously press the button of the handbrake lever.
Too violent an application of the handbrake
could lock the rear wheels and cause the rear of
the car to swerve.
The brake lamps do not light up when the hand-
brake is applied.<
To prevent corrosion and one-sided brak-
ing action, occasionally apply the hand-
brake lightly when the vehicle is slowly coming
to a stop if the traffic conditions are suitable.<
Manual transmission
When shifting into 5th or 6th gear, press
the gearshift lever to the right. Otherwise
the engine could be damaged if you inadvert-
ently shift into 3rd or 4th gear.<
Reverse gear
Select only when the vehicle is stationary.
When the gearshift lever is pressed to the left, a
slight resistance has to be overcome.
Automatic transmission with
Steptronic*
In addition to fully automatic operation, you can
also manually shift with the Steptronic, refer to
page52.
Vehicle parking
To prevent the vehicle from rolling,
always select position P and apply the
handbrake before leaving the vehicle with the
engine running.<
Disengaging the remote control
In order to remove the remote control from the
ignition lock, you must first move the selector
lever to position P and switch off the engine:
interlock.
Selector lever positions
P R N D M/S + –
Page 57 of 223
Driving
56
Increasing desired speed
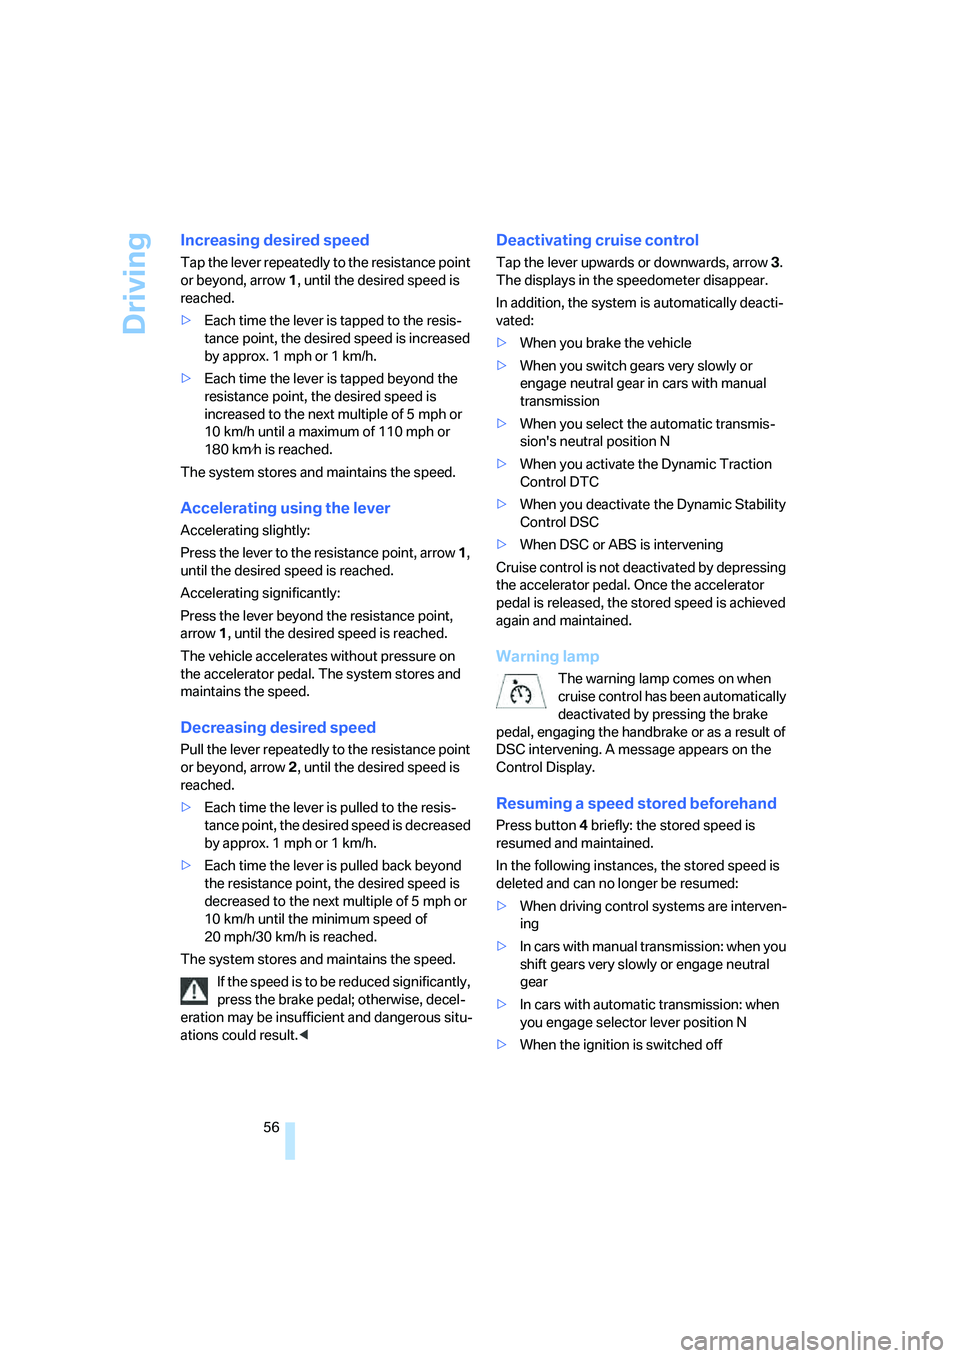
Tap the lever repeatedly to the resistance point
or beyond, arrow1, until the desired speed is
reached.
>Each time the lever is tapped to the resis-
tance point, the desired speed is increased
by approx. 1 mph or 1 km/h.
>Each time the lever is tapped beyond the
resistance point, the desired speed is
increased to the next multiple of 5 mph or
10 km/h until a maximum of 110 mph or
180 km⁄h is reached.
The system stores and maintains the speed.
Accelerating using the lever
Accelerating slightly:
Press the lever to the resistance point, arrow 1,
until the desired speed is reached.
Accelerating significantly:
Press the lever beyond the resistance point,
arrow 1, until the desired speed is reached.
The vehicle accelerates without pressure on
the accelerator pedal. The system stores and
maintains the speed.
Decreasing desired speed
Pull the lever repeatedly to the resistance point
or beyond, arrow 2, until the desired speed is
reached.
>Each time the lever is pulled to the resis-
tance point, the desired speed is decreased
by approx. 1 mph or 1 km/h.
>Each time the lever is pulled back beyond
the resistance point, the desired speed is
decreased to the next multiple of 5 mph or
10 km/h until the minimum speed of
20 mph/30 km/h is reached.
The system stores and maintains the speed.
If the speed is to be reduced significantly,
press the brake pedal; otherwise, decel-
eration may be insufficient and dangerous situ-
ations could result.<
Deactivating cruise control
Tap the lever upwards or downwards, arrow3.
The displays in the speedometer disappear.
In addition, the system is automatically deacti-
vated:
>When you brake the vehicle
>When you switch gears very slowly or
engage neutral gear in cars with manual
transmission
>When you select the automatic transmis-
sion's neutral position N
>When you activate the Dynamic Traction
Control DTC
>When you deactivate the Dynamic Stability
Control DSC
>When DSC or ABS is intervening
Cruise control is not deactivated by depressing
the accelerator pedal. Once the accelerator
pedal is released, the stored speed is achieved
again and maintained.
Warning lamp
The warning lamp comes on when
cruise control has been automatically
deactivated by pressing the brake
pedal, engaging the handbrake or as a result of
DSC intervening. A message appears on the
Control Display.
Resuming a speed stored beforehand
Press button4 briefly: the stored speed is
resumed and maintained.
In the following instances, the stored speed is
deleted and can no longer be resumed:
>When driving control systems are interven-
ing
>In cars with manual transmission: when you
shift gears very slowly or engage neutral
gear
>In cars with automatic transmission: when
you engage selector lever position N
>When the ignition is switched off
Page 61 of 223

Driving
60 >When you deactivate the Dynamic Stability
Control DSC
>When DSC or ABS is intervening
>When the system does not recognize any
objects for a longer period of time, e.g. on
infrequently traveled roads without a shoul-
der or guard rails, or if the radar sensor is
covered with dirt, refer to page61
>When you actuate the handbrake while driv-
ing
When the system is deactivated, you
must brake the vehicle yourself and/or
maneuver as necessary, otherwise there is a
risk of accident.<
Warning lamp
The warning lamp comes on when
active cruise control has been auto-
matically deactivated due to one of
the following factors: you are driving under a
speed of 20 mph or 30 km/h, the handbrake is
applied, or DSC is intervening. A message
appears on the Control Display.
Resuming stored desired speed and
distance
Press button 4.
The stored speed and distance are regained
and maintained.
In the following instances, the stored speed is
deleted and can no longer be resumed:
>When driving control systems are interven-
ing
>In cars with manual transmission: when you
shift gears very slowly or engage neutral
gear
>In cars with automatic transmission: when
you engage selector lever position N
>When the ignition is switched off
Displays in the instrument cluster
1Stored desired speed
2Shows yellow: vehicle detected ahead
Flashes in red: system cannot maintain dis-
tance; driver must brake the vehicle
Flashes in yellow: driving control systems
are intervening; cruise control is deacti-
vated
3Selected distance to vehicle ahead
The indicator lights up as soon as the sys-
tem is activated.
4Selected desired speed is temporarily dis-
played
If --- mph or --- km/h temporarily appears
in the instrument cluster display, it is pos-
sible that the system prerequisites for operation
are currently not met. Calling up Check Control
messages, refer to page74.<
Warning lamps
The indicator2 flashes in red; a
signal sounds.
The system indicates that you
must brake and/or maneuver the
vehicle yourself. Active cruise con-
trol cannot automatically restore the distance to
the vehicle ahead.
This indicator does not release you, however,
from your responsibility to adapt your desired
speed and driving style to prevailing driving
conditions.
The indicator 2 flashes in yellow.
The prerequisites for operating
active cruise control are not met,
e.g. as a result of ABS or DSC
Page 81 of 223
Technology for driving comfort and safety
80 If the warning lamps for DSC come
on. DSC including DTC and DBC is
malfunctioning.
The stabilizing action and brake-
servo boost are no longer available. The vehicle
remains operational. Have the system checked
as soon as possible.
Drive-off assistant
The drive-off assistant enables you to drive off
smoothly on uphill gradients. It is not necessary
to use the handbrake for this.
1.Hold the car in place by pressing the brake
pedal.
2.Release the brake pedal and drive off with-
out delay.
The drive-off assistant holds the car in
place for approx. 2 seconds after the
brake pedal is released. Depending on vehicle
load, the car may roll backwards a little during
this time span. Drive off without delay after
releasing the brake pedal. Otherwise, the drive-
off assistant will no longer hold the car in place
after approx. 2 seconds and the car will start to
roll backwards.<
Malfunction
The warning lamps for the brake sys-
tem light up in yellow. The drive-off
assistant has failed. The car will not
be held in place after the brake pedal
is released. Have the system checked as soon
as possible.
Display of this malfunction on Cana-
dian models.
Flat Tire Monitor FTM
The concept
The Flat Tire Monitor monitors tire pressures
while the car is being driven. The system
reports any significant loss of pressure in one
tire in relation to another.If a tire loses pressure, its rolling radius
changes, and this in turn alters the speed of
rotation. This change is detected and is
reported as a flat tire.
Functional requirement
In order to assure the reliable reporting of a flat
tire, the system must be initialized for the cor-
rect tire inflation pressure.
The system must be reinitialized each
time a tire inflation pressure has been cor-
rected or a wheel or tire has been changed.<
System limitations
The Flat Tire Monitor is unable to warn
the driver of sudden, severe tire damage
caused by external factors, nor can it identify
the gradual loss of pressure that will inevitably
occur in all four tires over a lengthy period of
time.<
In the following situations, the system could be
delayed or malfunction:
>System has not been initialized
>Driving on snowy or slippery road surface
>Performance-oriented style of driving: slip
in the drive wheels, high lateral acceleration
>If snow chains are attached
Initializing the system
The initialization is completed during driv-
ing, which can be interrupted at any time.
When driving resumes, the initialization is con-
tinued automatically.
Do not initialize the system while snow chains
are attached.<
iDrive concept, refer to page16.
1.Press the button.
This opens the start menu.
2.Press the controller to open the menu.
3.Select "Vehicle settings" and press the
controller.
Page 108 of 223
Driving tips
107Reference
At a glance
Controls
Communications
Navigation
Entertainment
Mobility
Interior and exterior mirrors, automatic
dimming feature*
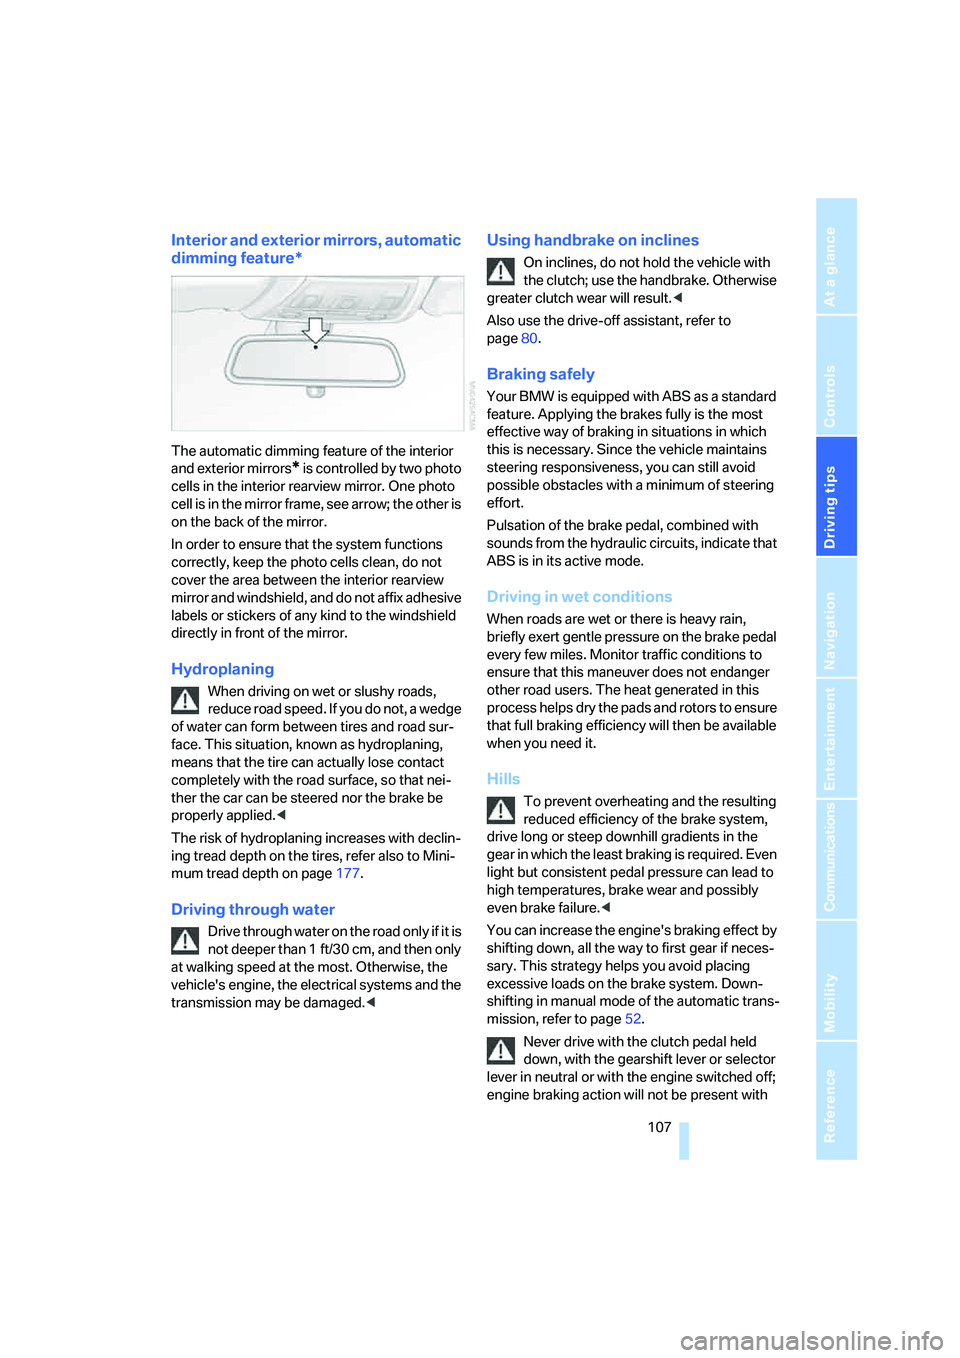
The automatic dimming feature of the interior
and exterior mirrors
* is controlled by two photo
cells in the interior rearview mirror. One photo
cell is in the mirror frame, see arrow; the other is
on the back of the mirror.
In order to ensure that the system functions
correctly, keep the photo cells clean, do not
cover the area between the interior rearview
mirror and windshield, and do not affix adhesive
labels or stickers of any kind to the windshield
directly in front of the mirror.
Hydroplaning
When driving on wet or slushy roads,
reduce road speed. If you do not, a wedge
of water can form between tires and road sur-
face. This situation, known as hydroplaning,
means that the tire can actually lose contact
completely with the road surface, so that nei-
ther the car can be steered nor the brake be
properly applied.<
The risk of hydroplaning increases with declin-
ing tread depth on the tires, refer also to Mini-
mum tread depth on page177.
Driving through water
Drive through water on the road only if it is
not deeper than 1 ft/30 cm, and then only
at walking speed at the most. Otherwise, the
vehicle's engine, the electrical systems and the
transmission may be damaged.<
Using handbrake on inclines
On inclines, do not hold the vehicle with
the clutch; use the handbrake. Otherwise
greater clutch wear will result.<
Also use the drive-off assistant, refer to
page80.
Braking safely
Your BMW is equipped with ABS as a standard
feature. Applying the brakes fully is the most
effective way of braking in situations in which
this is necessary. Since the vehicle maintains
steering responsiveness, you can still avoid
possible obstacles with a minimum of steering
effort.
Pulsation of the brake pedal, combined with
sounds from the hydraulic circuits, indicate that
ABS is in its active mode.
Driving in wet conditions
When roads are wet or there is heavy rain,
briefly exert gentle pressure on the brake pedal
every few miles. Monitor traffic conditions to
ensure that this maneuver does not endanger
other road users. The heat generated in this
process helps dry the pads and rotors to ensure
that full braking efficiency will then be available
when you need it.
Hills
To prevent overheating and the resulting
reduced efficiency of the brake system,
drive long or steep downhill gradients in the
gear in which the least braking is required. Even
light but consistent pedal pressure can lead to
high temperatures, brake wear and possibly
even brake failure.<
You can increase the engine's braking effect by
shifting down, all the way to first gear if neces-
sary. This strategy helps you avoid placing
excessive loads on the brake system. Down-
shifting in manual mode of the automatic trans-
mission, refer to page52.
Never drive with the clutch pedal held
down, with the gearshift lever or selector
lever in neutral or with the engine switched off;
engine braking action will not be present with
Page 185 of 223
Under the hood
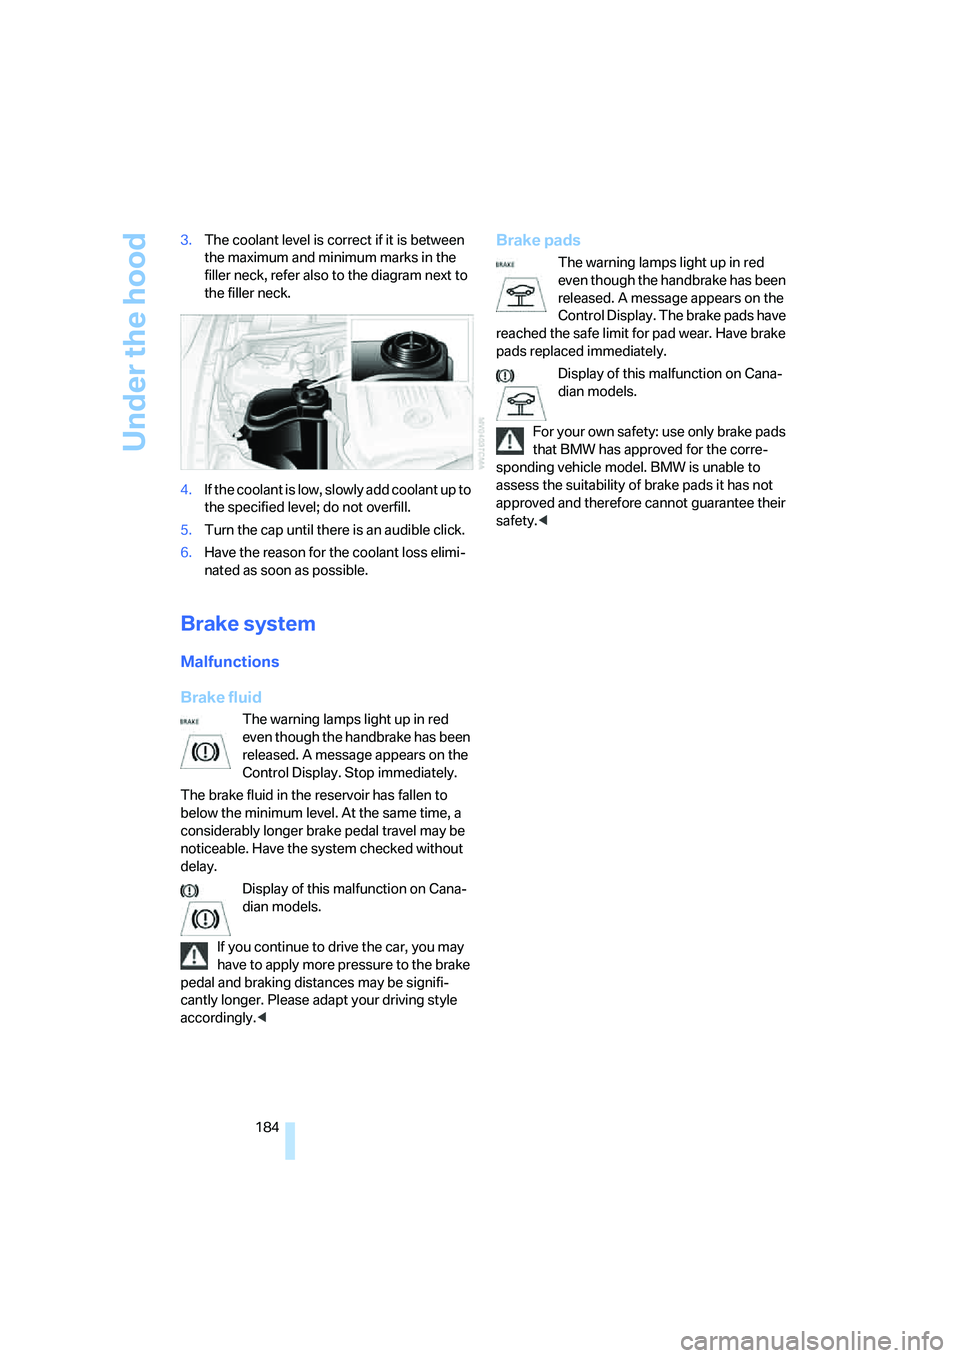
184 3.The coolant level is correct if it is between
the maximum and minimum marks in the
filler neck, refer also to the diagram next to
the filler neck.
4.If the coolant is low, slowly add coolant up to
the specified level; do not overfill.
5.Turn the cap until there is an audible click.
6.Have the reason for the coolant loss elimi-
nated as soon as possible.
Brake system
Malfunctions
Brake fluid
The warning lamps light up in red
even though the handbrake has been
released. A message appears on the
Control Display. Stop immediately.
The brake fluid in the reservoir has fallen to
below the minimum level. At the same time, a
considerably longer brake pedal travel may be
noticeable. Have the system checked without
delay.
Display of this malfunction on Cana-
dian models.
If you continue to drive the car, you may
have to apply more pressure to the brake
pedal and braking distances may be signifi-
cantly longer. Please adapt your driving style
accordingly.<
Brake pads
The warning lamps light up in red
even though the handbrake has been
released. A message appears on the
Control Display. The brake pads have
reached the safe limit for pad wear. Have brake
pads replaced immediately.
Display of this malfunction on Cana-
dian models.
For your own safety: use only brake pads
that BMW has approved for the corre-
sponding vehicle model. BMW is unable to
assess the suitability of brake pads it has not
approved and therefore cannot guarantee their
safety.<