2005 BMW 330I SEDAN display
[x] Cancel search: displayPage 93 of 223
Controlling the climate for pleasant driving
92
Switching the cooling function on and
off
The cooling function cools and
dehumidifies the incoming air
before also reheating it as
required, according to the temperature setting.
Depending on the weather, the windshield may
fog over briefly when the engine is started.
The cooling function is only available when the
engine is running and is switched on automati-
cally with the AUTO program.
Rear window defroster
When the rear window defroster is
switched on, the LED comes on.
The defroster switches off auto-
matically after a certain time.
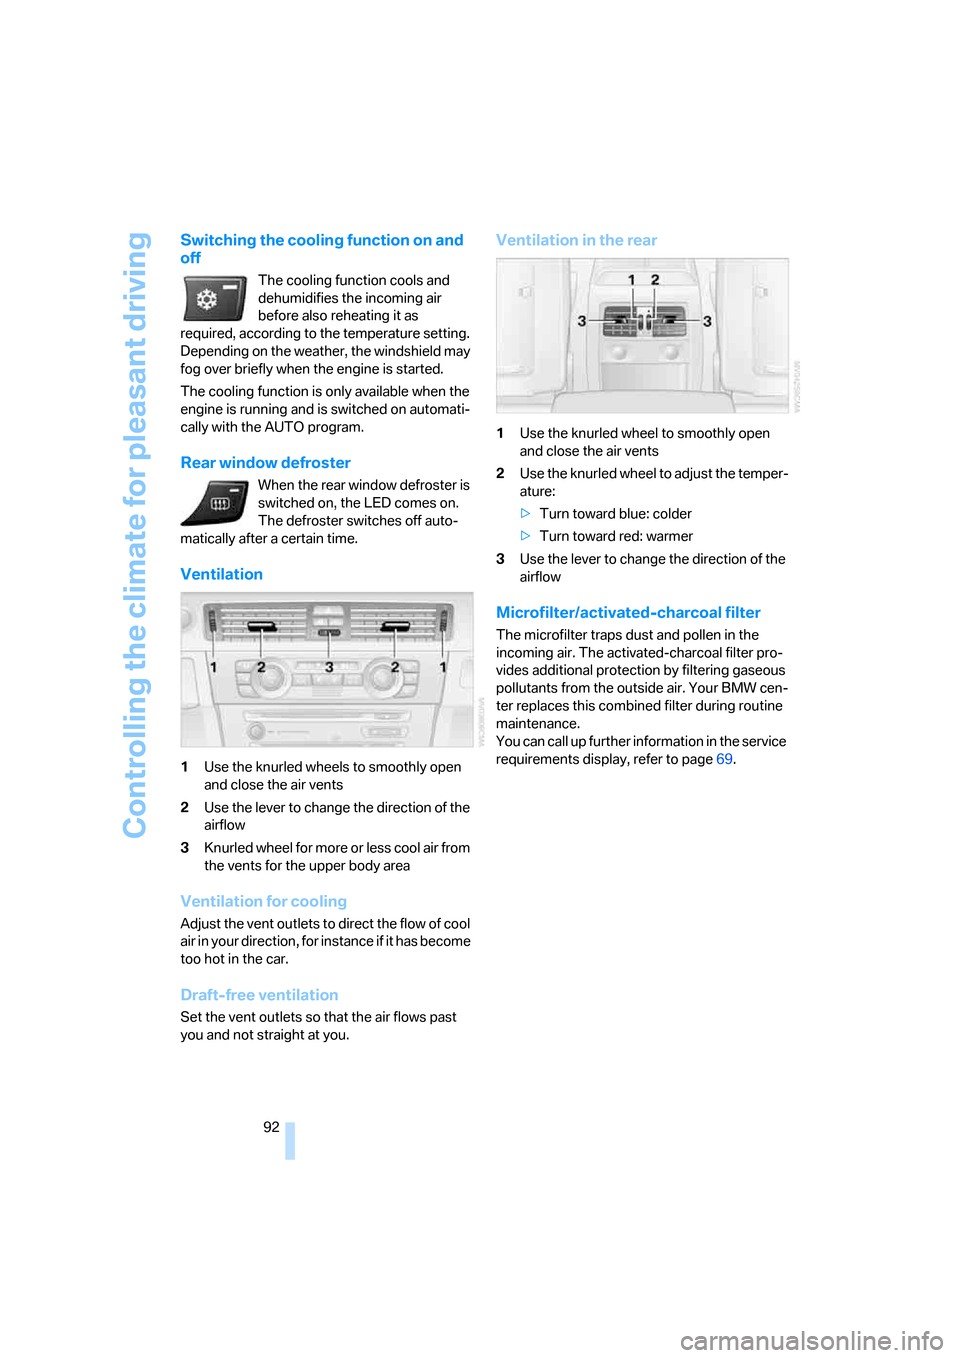
Ventilation
1Use the knurled wheels to smoothly open
and close the air vents
2Use the lever to change the direction of the
airflow
3Knurled wheel for more or less cool air from
the vents for the upper body area
Ventilation for cooling
Adjust the vent outlets to direct the flow of cool
air in your direction, for instance if it has become
too hot in the car.
Draft-free ventilation
Set the vent outlets so that the air flows past
you and not straight at you.
Ventilation in the rear
1Use the knurled wheel to smoothly open
and close the air vents
2Use the knurled wheel to adjust the temper-
ature:
>Turn toward blue: colder
>Turn toward red: warmer
3Use the lever to change the direction of the
airflow
Microfilter/activated-charcoal filter
The microfilter traps dust and pollen in the
incoming air. The activated-charcoal filter pro-
vides additional protection by filtering gaseous
pollutants from the outside air. Your BMW cen-
ter replaces this combined filter during routine
maintenance.
You can call up further information in the service
requirements display, refer to page69.
Page 95 of 223

Practical interior accessories
94 The corresponding memory button 1 is now
programmed with the signal of the original
hand-held transmitter.
You can operate the system when the engine is
running or when the ignition is switched on.
If the system fails to function even after
repeated programming, check whether
the original hand-held transmitter uses an alter-
nating-code system. To do so, either read the
instructions for the original hand-held transmit-
ter or hold down the programmed memory
button1 of the integrated universal remote
control. If the LED2 on the integrated universal
remote control flashes rapidly for a short while
and then remains lit for about two seconds, the
original hand-held transmitter uses an alternat-
ing-code system. If it uses an alternating-code
system, program the memory buttons1 as
described under Alternating-code hand-held
transmitters.<
Alternating-code hand-held
transmitters
To program the integrated universal remote
control, consult the operating instructions for
the device to be set. You will find information
there on the possibilities for synchronization.
When programming hand-held transmitters that employ an alternating code, please observe
the following supplementary instructions:
Programming will be easier with the aid of
a second person.<
1.Park your vehicle within the range of the
remote-controlled device.
2.Program the integrated universal remote
control as described above in the section
Fixed-code hand-held transmitters.
3.Locate the button on the receiver of the
device to be set, e.g. on the drive unit.
4.Press the button on the receiver of the
device to be set. After step 4, you have
approx. 30 seconds for step 5.
5.Press the programmed memory button1 of
the integrated universal remote control
three times.
The corresponding memory button 1 is now
programmed with the signal of the original
hand-held transmitter.
If you have any questions, please contact
your BMW center.<
Deleting stored programs
Press both outer memory buttons1 for approx.
20 seconds until the LED2 flashes: all stored
programs are cleared.
It is not possible to clear individual programs.
Interior rearview mirror with digital compass*
1Adjustment button
2Display
The display shows you the main or subcardinal
direction in which you are driving.
Setting compass zones
Depending on the vehicle's geographic loca-
tion, the relevant compass zone must be set.
Refer to the world map with compass zones
below.
Page 96 of 223

Controls
95Reference
At a glance
Driving tips
Communications
Navigation
Entertainment
Mobility
To set a compass zone, press the adjustment
button on the bottom of the interior rearview
mirror with a pointed object, such as a pen, for
approx. 3-4 seconds. The number of the com-
pass zone set is shown in the display.
To change the zone setting, press the adjust-
ment button repeatedly until the display shows
the number of the compass zone in which you
are currently driving:
The compass is operational again after approx.
10 seconds.
For information on the automatic dimming fea-
ture, refer to Interior and exterior mirrors, auto-
matic dimming feature, page107.
Calibrating the digital compass
The digital compass must be calibrated in the
following situations:
>C or CAL is displayed.
>The compass shows the wrong cardinal
direction.
>The cardinal direction shown does not
change although the direction of travel
does.
>Not all cardinal directions are shown.
Procedure
1.Make sure that no large metal objects or
overhead power lines are in the vicinity of
your vehicle and that you have enough
space to drive in a circle.
2.Set the currently valid compass zone.
3.Press the adjustment button to call up C or
CAL. Then drive in one full circle at a speed
of no more than 4 mph or 7 km/h.
If calibration is successful, the C or CAL dis-
play is replaced by the cardinal directions.
Roller sun blinds*
Rear window blind
Tap the button in the center console to raise or
lower the roller sun blind.
Page 115 of 223

Starting the navigation system
114
Starting the navigation system
Your navigation system can use satellites to
ascertain the precise position of your vehicle
and guide you reliably to any destination you
enter.
Navigation DVD
The navigation system requires a special navi-
gation DVD. You can obtain the latest version at
your BMW center.
Inserting navigation DVD
1.Insert the navigation DVD with the labeled
side up.
2.Wait for several seconds to allow the con-
tents of the DVD to be read in.
Removing navigation DVD
1. Press button 1.
The DVD emerges slightly from the drive.
2.Remove the DVD.
If the DVD is not ejected from the drive, it is pos-
sible that it is blocked.
Display in the assistance
window
You can display the route or the current position
in the assistance window. This display remains
visible even if you change to another applica-
tion.1.Move the controller to the right to enter the
assistance window.
2.Press the controller.
Other menu items are displayed.
3.Select the desired route view or "Current
position".
4.Press the controller.
The contents of the assistance window are con-
tinually updated as you drive.
*
Page 117 of 223
Destination entry
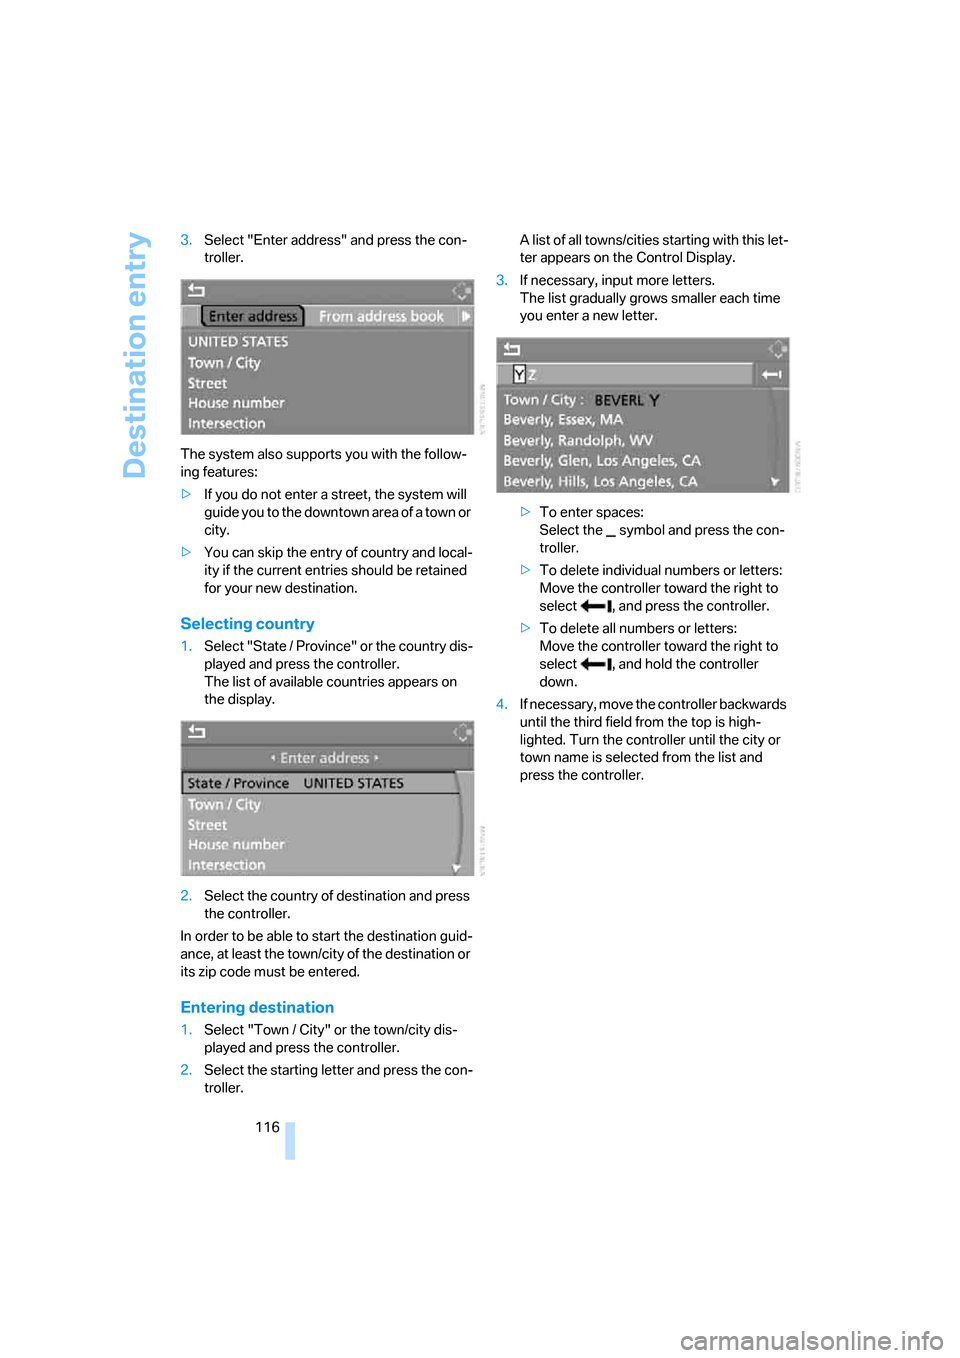
116 3.Select "Enter address" and press the con-
troller.
The system also supports you with the follow-
ing features:
>If you do not enter a street, the system will
guide you to the downtown area of a town or
city.
>You can skip the entry of country and local-
ity if the current entries should be retained
for your new destination.
Selecting country
1.Select "State / Province" or the country dis-
played and press the controller.
The list of available countries appears on
the display.
2.Select the country of destination and press
the controller.
In order to be able to start the destination guid-
ance, at least the town/city of the destination or
its zip code must be entered.
Entering destination
1.Select "Town / City" or the town/city dis-
played and press the controller.
2.Select the starting letter and press the con-
troller.A list of all towns/cities starting with this let-
ter appears on the Control Display.
3.If necessary, input more letters.
The list gradually grows smaller each time
you enter a new letter.
>To enter spaces:
Select the symbol and press the con-
troller.
>To delete individual numbers or letters:
Move the controller toward the right to
select , and press the controller.
>To delete all numbers or letters:
Move the controller toward the right to
select , and hold the controller
down.
4.If necessary, move the controller backwards
until the third field from the top is high-
lighted. Turn the controller until the city or
town name is selected from the list and
press the controller.
Page 118 of 223
Navigation
Driving tips
117Reference
At a glance
Controls
Communications
Entertainment
Mobility
Inputting destination by zip code
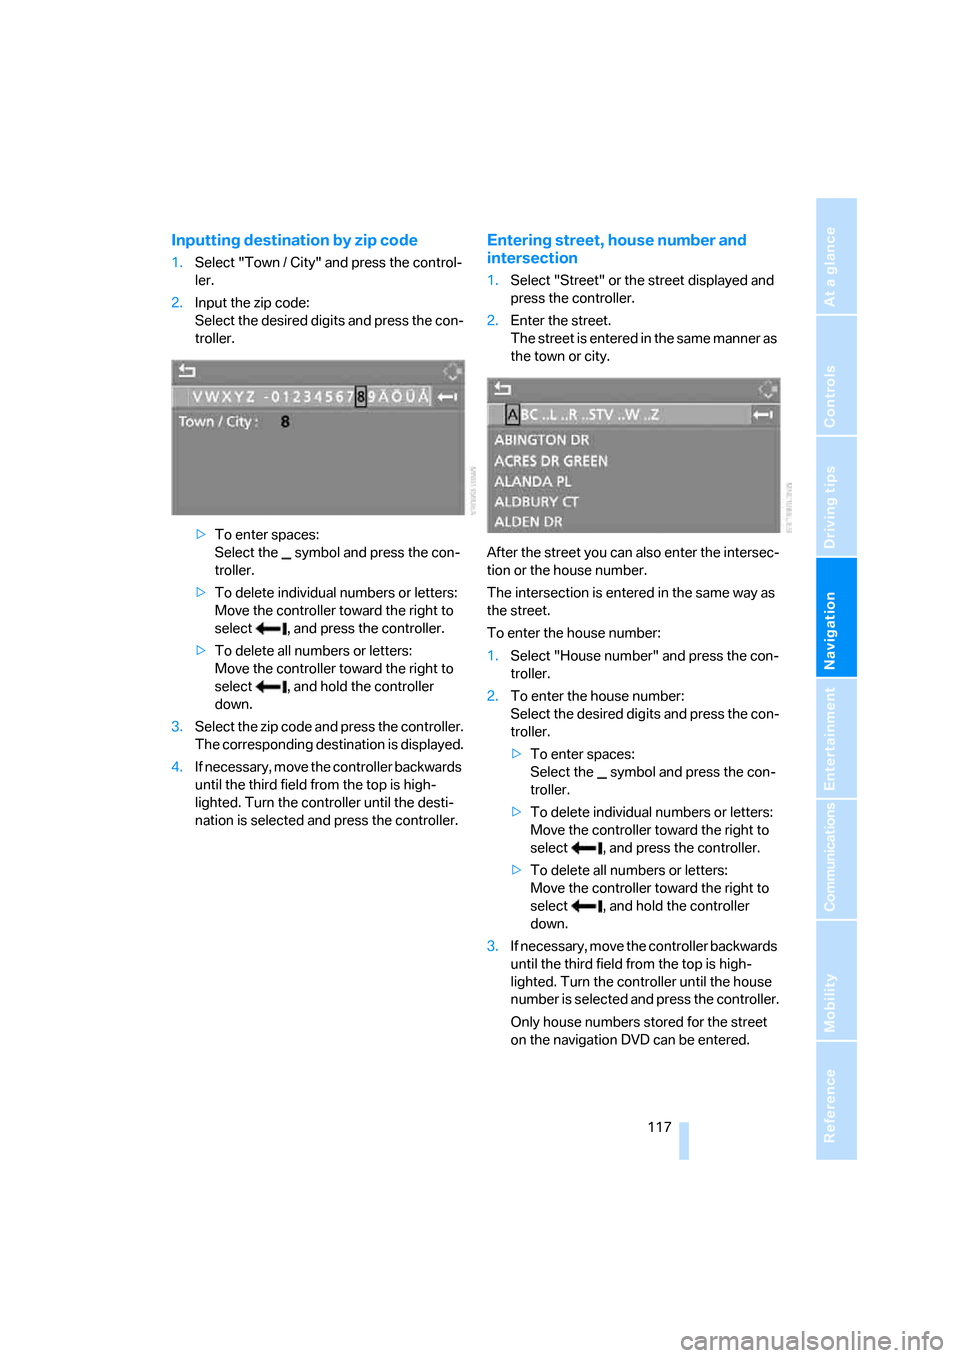
1.Select "Town / City" and press the control-
ler.
2.Input the zip code:
Select the desired digits and press the con-
troller.
>To enter spaces:
Select the symbol and press the con-
troller.
>To delete individual numbers or letters:
Move the controller toward the right to
select , and press the controller.
>To delete all numbers or letters:
Move the controller toward the right to
select , and hold the controller
down.
3.Select the zip code and press the controller.
The corresponding destination is displayed.
4.If necessary, move the controller backwards
until the third field from the top is high-
lighted. Turn the controller until the desti-
nation is selected and press the controller.
Entering street, house number and
intersection
1.Select "Street" or the street displayed and
press the controller.
2.Enter the street.
The street is entered in the same manner as
the town or city.
After the street you can also enter the intersec-
tion or the house number.
The intersection is entered in the same way as
the street.
To enter the house number:
1.Select "House number" and press the con-
troller.
2.To enter the house number:
Select the desired digits and press the con-
troller.
>To enter spaces:
Select the symbol and press the con-
troller.
>To delete individual numbers or letters:
Move the controller toward the right to
select , and press the controller.
>To delete all numbers or letters:
Move the controller toward the right to
select , and hold the controller
down.
3.If necessary, move the controller backwards
until the third field from the top is high-
lighted. Turn the controller until the house
number is selected and press the controller.
Only house numbers stored for the street
on the navigation DVD can be entered.
Page 119 of 223
Destination entry
118
Starting destination guidance with
manual destination entry
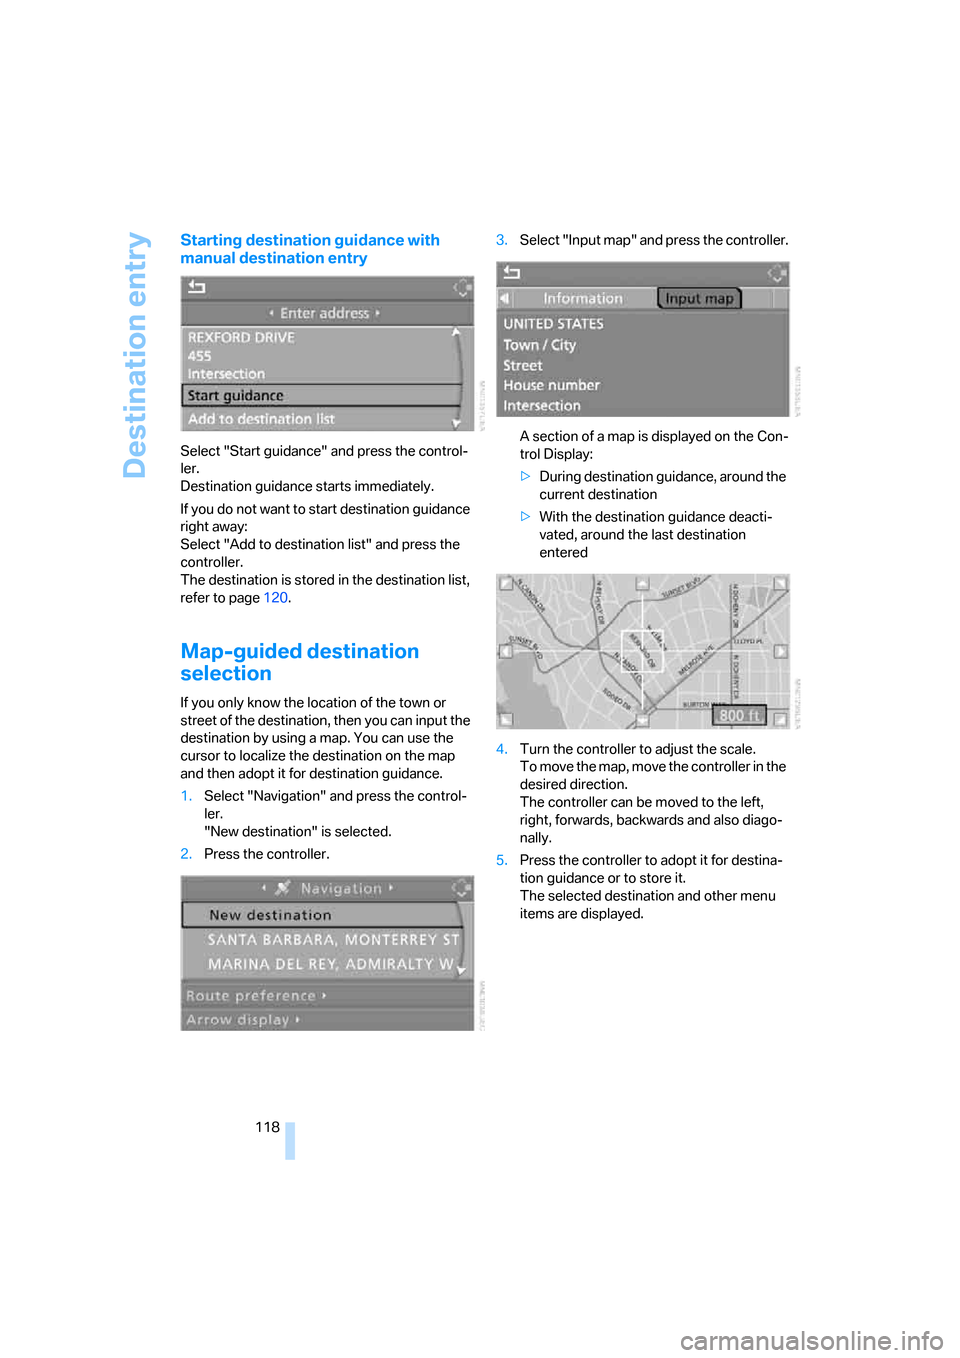
Select "Start guidance" and press the control-
ler.
Destination guidance starts immediately.
If you do not want to start destination guidance
right away:
Select "Add to destination list" and press the
controller.
The destination is stored in the destination list,
refer to page120.
Map-guided destination
selection
If you only know the location of the town or
street of the destination, then you can input the
destination by using a map. You can use the
cursor to localize the destination on the map
and then adopt it for destination guidance.
1.Select "Navigation" and press the control-
ler.
"New destination" is selected.
2.Press the controller.3.Select "Input map" and press the controller.
A section of a map is displayed on the Con-
trol Display:
>During destination guidance, around the
current destination
>With the destination guidance deacti-
vated, around the last destination
entered
4.Turn the controller to adjust the scale.
To move the map, move the controller in the
desired direction.
The controller can be moved to the left,
right, forwards, backwards and also diago-
nally.
5.Press the controller to adopt it for destina-
tion guidance or to store it.
The selected destination and other menu
items are displayed.
Page 120 of 223
Navigation
Driving tips
119Reference
At a glance
Controls
Communications
Entertainment
Mobility
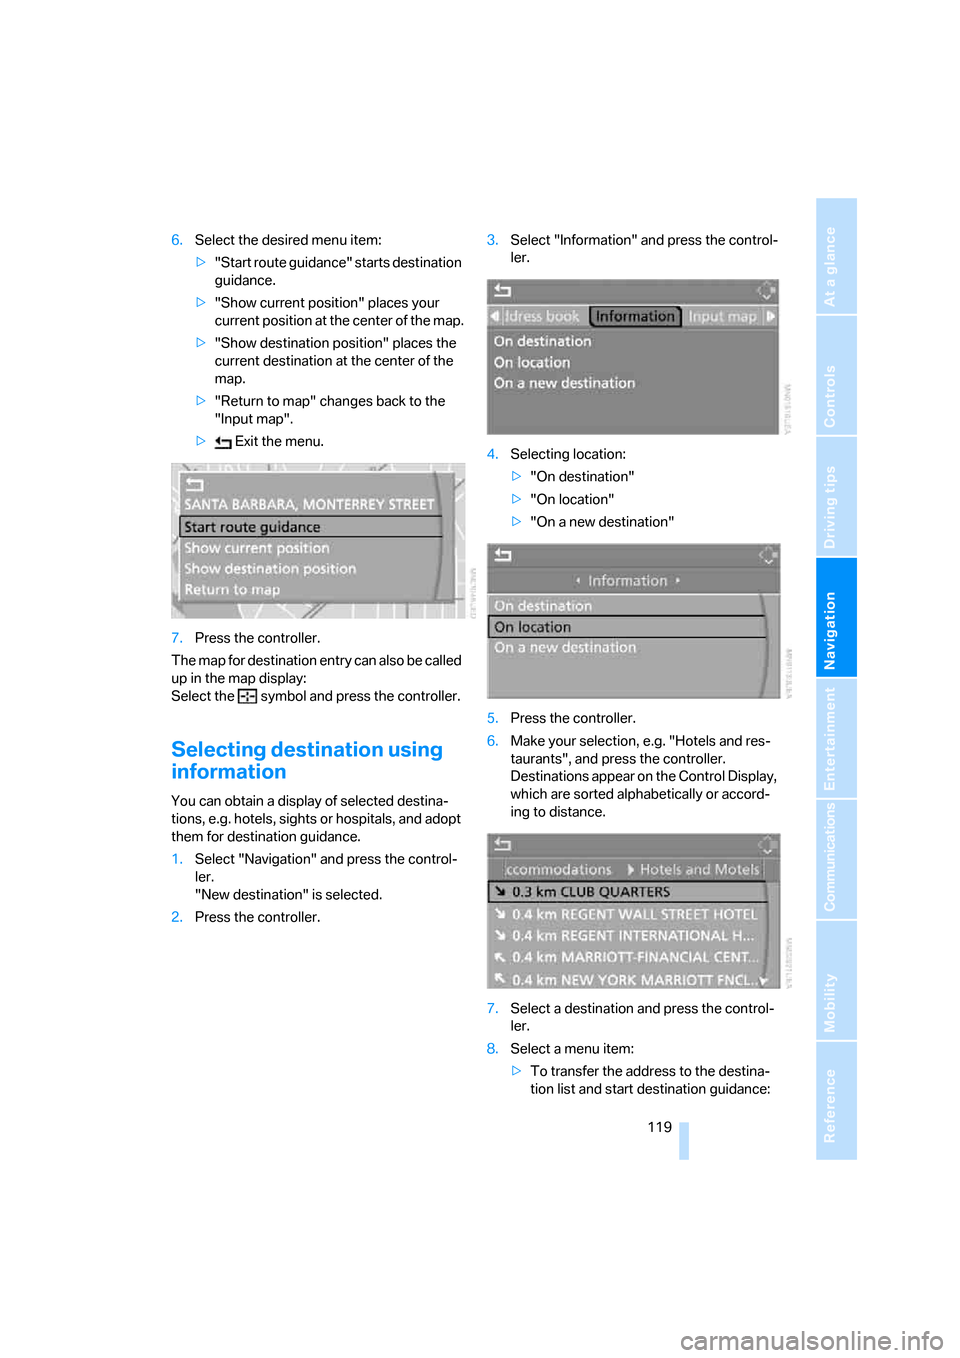
6.Select the desired menu item:
>"Start route guidance" starts destination
guidance.
>"Show current position" places your
current position at the center of the map.
>"Show destination position" places the
current destination at the center of the
map.
>"Return to map" changes back to the
"Input map".
> Exit the menu.
7.Press the controller.
The map for destination entry can also be called
up in the map display:
Select the symbol and press the controller.
Selecting destination using
information
You can obtain a display of selected destina-
tions, e.g. hotels, sights or hospitals, and adopt
them for destination guidance.
1.Select "Navigation" and press the control-
ler.
"New destination" is selected.
2.Press the controller.3.Select "Information" and press the control-
ler.
4.Selecting location:
>"On destination"
>"On location"
>"On a new destination"
5.Press the controller.
6.Make your selection, e.g. "Hotels and res-
taurants", and press the controller.
Destinations appear on the Control Display,
which are sorted alphabetically or accord-
ing to distance.
7.Select a destination and press the control-
ler.
8.Select a menu item:
>To transfer the address to the destina-
tion list and start destination guidance: