2005 BMW 325XI TOURING ECU
[x] Cancel search: ECUPage 61 of 178

61
Vehicle Memory, Key MemoryHow the system functionsNo doubt you have often reflected on
how great it would be if you could per-
manently configure your vehicle's vari-
ous features and adjustments to mirror
your own personal preferences. In engi-
neering your vehicle, BMW has
included a number of options for stor-
ing personal adjustment data. These
can be programmed at your BMW cen-
ter.
The available configuration data fall into
two categories, according to whether
their primary orientation is the vehicle –
Vehicle Memory – or the individual –
Key Memory. Provided that each per-
son has a separate remote-control key,
you can have your BMW center enter
basic adjustment data for up to four
individuals in the system.
The system relies on a bilateral data
exchange to identify the individual user
and executes the selected settings
whenever the remote control unit is
used to disengage the locks.
Distinguishing between keysColor-coded decals have been pro-
vided to help you distinguish the differ-
ent keys with their individual settings.What the system can doYou can learn about the entire array of
features this system offers at your BMW
center. Here are just a few examples:
You will see this symbol through-
out the Owner's Manual. It is to
remind you at appropriate places of the
settings that are available to you.<
Examples for Vehicle Memory:
>Various signals as acknowledgment
when locking or unlocking your vehi-
cle, refer to pages 31, 34
>Activates/deactivates the 'Follow me
home' function, refer to page 93
>Activates/deactivates daytime driv-
ing lamps, refer to page 93
>Sets the units of measure for display-
ing time, outside temperature, dis-
tance traveled and fuel consumption
in the instrument cluster
>When you shift into Reverse, an
acoustic signal indicates that PDC
has been activated, refer to page 85
>Switches on rear window defroster
automatically, to pages 98, 103
>Activates/deactivates various alarm
system functions, refer to page 39
>After giving an ice warning, the
onboard computer display returns to
the previous setting, to page 83.
Examples for Key Memory:
>Locks the vehicle automatically after
starting off, refer to page 35
>Unlocks the driver's door first, then
the vehicle's remaining locks, refer to
page 35
>Opens the tailgate instead of the rear
window with the remote control, refer
to page 32
>Automatically adjusts the driver's
seat to the personal programmed
settings when the vehicle is
unlocked, refer to page 50
OverviewControlsMaintenanceRepairsDataIndex
Page 65 of 178

65
Switching off the engine
You should never remove the igni-
tion key when the vehicle is in
motion, as the steering lock could
engage.
When you leave the vehicle, always
remove the ignition key and engage the
steering lock.
Always engage the parking brake when
parking on downhill roads. Engaging a
gear may not sufficiently secure the
vehicle against rolling.<
Manual transmissionTurn the ignition key to position 1 or 0.Automatic transmissionMove the selector lever into position P,
and turn the ignition key to position 1 or
0.SMG gearboxIf you turn the ignition key to position 1
or 0 with the selector lever in position
R, or in sequential mode, a gear auto-
matically remains engaged.
If you turn the ignition key to position 1
or 0 with the selector lever in neutral
position N, a warning tone and the
flashing gear indicator in the display
remind you that no gear is engaged to
secure the vehicle against rolling.
The warning stops after approx.
9 seconds.
Parking brakeThe parking brake is designed primarily
to prevent the vehicle from rolling when
it is parked. It operates against the rear
wheels.To engageThe detent engages automatically, and
the indicator lamp in the instrument
cluster comes on when the ignition key
is in position 2, refer to page 18.To releasePull up slightly on the lever, press the
button and lower the lever.
OverviewControlsMaintenanceRepairsDataIndex
Page 68 of 178

68
RReverseSelect only when the vehicle is station-
ary.NNeutralAlways engage before starting the
engine, refer to Starting the engine on
page 64.Sequential modeEach time the engine is started, the
sequential mode is activated as soon as
you move the selector lever into the for-
ward driving position while the brake is
depressed.
The gears are shifted via the shift pad-
dles or the selector lever.
It is also possible to drive off in second
gear, e.g. on snow-covered roads.DDrive modeIn the drive mode all forward gears are
shifted automatically.
To switch from sequential to drive
mode: tap the selector lever to the right
toward D.
For rapid acceleration, e.g. during
passing, depress the accelerator pedal
completely: kickdown.To switch back to sequential mode: tap
the selector lever again to the right
toward D or change the current gear via
the shift paddles or the selector lever.
KickdownYou can achieve maximum acceleration
using kickdown.
Depress the accelerator pedal past the
increased resistance point at the full-
throttle position.
Shifting gearsWith selector lever:
>To upshift, tap the selector lever
toward +
>To downshift, tap the lever toward —.
With shift paddles on steering wheel:
>To upshift, pull one of the shift pad-
dles
>To downshift, push the paddle.
You accelerate from higher gears, e.g.
during passing, by manually downshift-
ing.
In the following situations, the SMG in
the sequential mode assists you:
>The transmission will only execute
upshifts and downshifts that will
result in an appropriate combination
of vehicle speed and engine rpm. For
Sequential manual gearbox SMG*
Page 69 of 178

69
instance, downshifts that would
result in excessive engine speed can-
not be executed
>When you brake the car to a stop, the
transmission automatically shifts
down to first gear
>As speed diminishes, the transmis-
sion will shift down automatically,
without any action on your part, just
before the vehicle slows to below
each gear's minimum speed.
Available displaysR N 1 2 3 4 5 6
D1 D2 D3 D4 D5 D6
The currently engaged gear, the
selected mode, and any malfunctions
are displayed in the instrument cluster.Indicator lamp
If the indicator lamp comes on,
there is a malfunction in the
transmission system.
All selector lever positions can still be
engaged, but in the forward driving
positions only certain gears are actually
available when the vehicle is driven.
Avoid extreme loads and proceed to
the nearest BMW center.
For information on jump-starting and
towing the vehicle, refer to page 153.Warning toneAn acoustic signal sounds if the SMG
gearbox overheats; if possible you
should either stop or increase your pull-
away speed so that the system can
cool down.
Sequential manual gearbox SMG*
OverviewControlsMaintenanceRepairsDataIndex
Page 71 of 178

71
Automatic transmission with Steptronic*You can drive as with a normal auto-
matic transmission. In addition, you can
also shift manually.
When you move the selector lever from
the D position to the left into the M/S
range, the performance-oriented shift
programs of the automatic transmission
are engaged. Steptronic enters the
manual selection mode and executes
the desired shift whenever you tap the
selector lever in the direction indicated
by + or –. Whenever you want to use
automatic again, just move the selector
lever toward the right to position D.
Under normal operating conditions, fuel
consumption is lowest when driving in
position D.
Selector lever positionsP R N D M/S + –Starting the engineThe engine can only be started in selec-
tor lever positions P – for Park – or N –
for Neutral.Range selectionA catch prevents inadvertent movement
of the selector lever to positions R and
P. To deactivate the catch, press the
button on the front of the selector lever
knob, see arrow.
While the vehicle is stationary and
before shifting out of Park or Neu-
tral, depress the footbrake in order to
disengage the selector lever's lock
mechanism – Shiftlock.<
Hold the footbrake down until
starting off. The vehicle will other-
wise 'creep' when a drive position is
engaged. To prevent the vehicle from
starting off on its own, always move the
selector lever to position P and engage
the parking brake before leaving your
vehicle with the engine running.
Do not leave the vehicle unattended
with the engine running. An unattended
vehicle with a running engine repre-
sents a safety hazard.<
PParkSelect only when the vehicle is station-
ary. Transmission locks to prevent rear
wheels from turning.RReverseSelect only when the vehicle is station-
ary.NNeutralSelect only when stopping for an
extended period.
OverviewControlsMaintenanceRepairsDataIndex
Page 72 of 178

72
DDrive – automatic shift programThis position is designed for driving
under all normal operating conditions.
All forward gears are available.KickdownIn the kickdown mode, you achieve
maximum acceleration and top speed
in position D.
Depress the accelerator pedal past the
increased resistance point at the full-
throttle position.
M/S manual operation and Sport
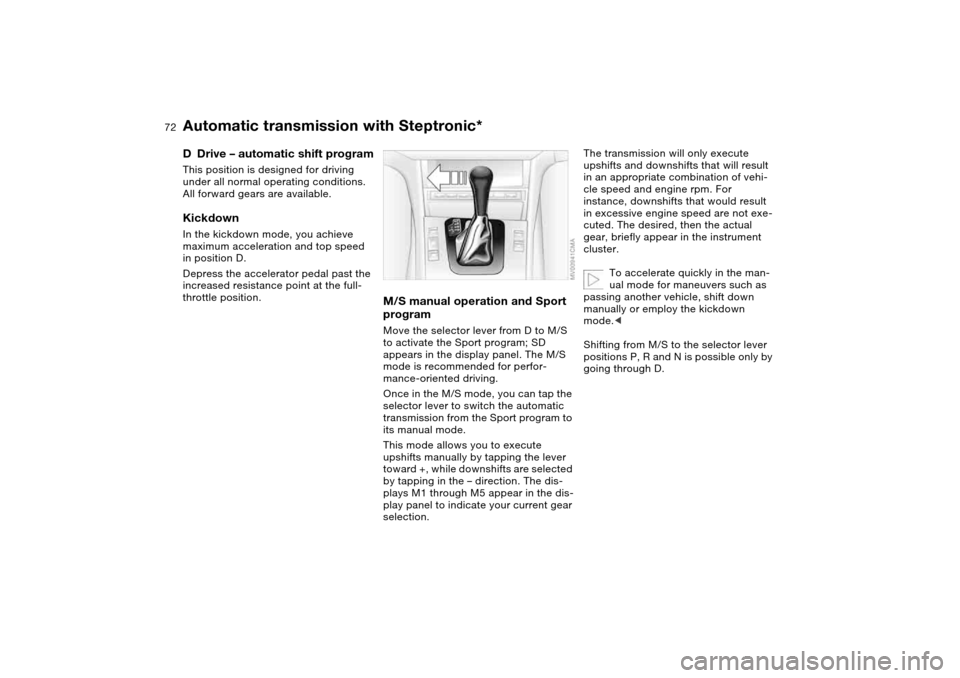
programMove the selector lever from D to M/S
to activate the Sport program; SD
appears in the display panel. The M/S
mode is recommended for perfor-
mance-oriented driving.
Once in the M/S mode, you can tap the
selector lever to switch the automatic
transmission from the Sport program to
its manual mode.
This mode allows you to execute
upshifts manually by tapping the lever
toward +, while downshifts are selected
by tapping in the – direction. The dis-
plays M1 through M5 appear in the dis-
play panel to indicate your current gear
selection.
The transmission will only execute
upshifts and downshifts that will result
in an appropriate combination of vehi-
cle speed and engine rpm. For
instance, downshifts that would result
in excessive engine speed are not exe-
cuted. The desired, then the actual
gear, briefly appear in the instrument
cluster.
To accelerate quickly in the man-
ual mode for maneuvers such as
passing another vehicle, shift down
manually or employ the kickdown
mode.<
Shifting from M/S to the selector lever
positions P, R and N is possible only by
going through D.
Automatic transmission with Steptronic*
Page 110 of 178

110Loading and transporting
Ski bag*The ski bag allows the safe and clean
transport of up to 4 pairs of standard
skis or up to two snowboards.
The length of the ski bag and the addi-
tional space provided in the cargo area
make it possible to carry skis up to
6 ft 10 in / 2.10 m long. Because of the
tapered shape of the bag, only two
pairs of skis longer than 6 ft 10 in /
2.10 m can be carried.
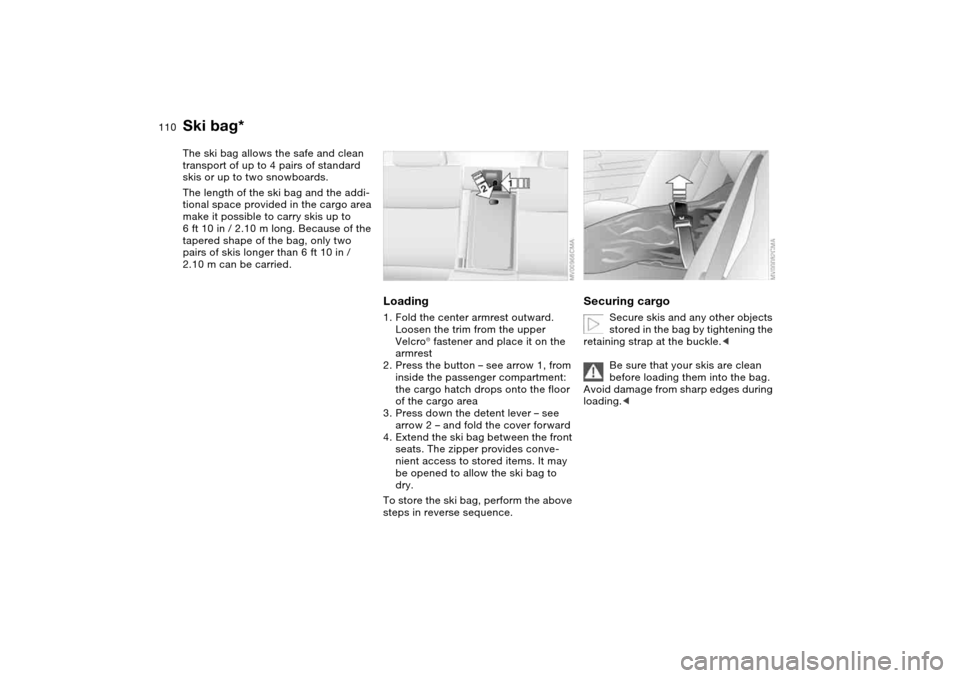
Loading1. Fold the center armrest outward.
Loosen the trim from the upper
Velcro® fastener and place it on the
armrest
2. Press the button – see arrow 1, from
inside the passenger compartment:
the cargo hatch drops onto the floor
of the cargo area
3. Press down the detent lever – see
arrow 2 – and fold the cover forward
4. Extend the ski bag between the front
seats. The zipper provides conve-
nient access to stored items. It may
be opened to allow the ski bag to
dry.
To store the ski bag, perform the above
steps in reverse sequence.
Securing cargo
Secure skis and any other objects
stored in the bag by tightening the
retaining strap at the buckle.<
Be sure that your skis are clean
before loading them into the bag.
Avoid damage from sharp edges during
loading.<
Page 111 of 178

111
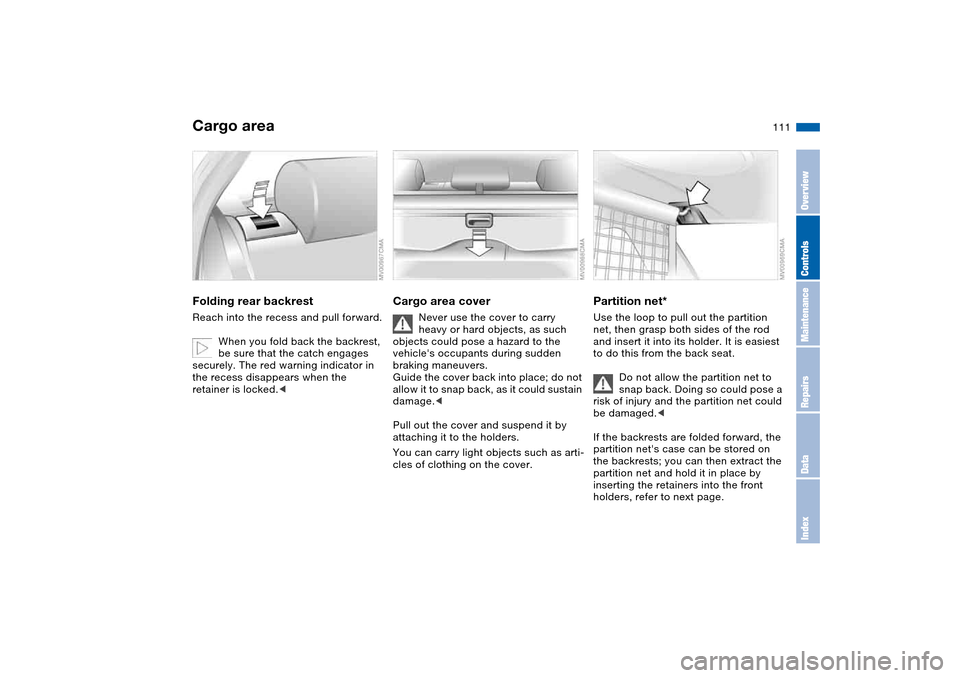
Cargo areaFolding rear backrestReach into the recess and pull forward.
When you fold back the backrest,
be sure that the catch engages
securely. The red warning indicator in
the recess disappears when the
retainer is locked.<
Cargo area cover
Never use the cover to carry
heavy or hard objects, as such
objects could pose a hazard to the
vehicle's occupants during sudden
braking maneuvers.
Guide the cover back into place; do not
allow it to snap back, as it could sustain
damage.<
Pull out the cover and suspend it by
attaching it to the holders.
You can carry light objects such as arti-
cles of clothing on the cover.
Partition net*Use the loop to pull out the partition
net, then grasp both sides of the rod
and insert it into its holder. It is easiest
to do this from the back seat.
Do not allow the partition net to
snap back. Doing so could pose a
risk of injury and the partition net could
be damaged.<
If the backrests are folded forward, the
partition net's case can be stored on
the backrests; you can then extract the
partition net and hold it in place by
inserting the retainers into the front
holders, refer to next page.
OverviewControlsMaintenanceRepairsDataIndex