2005 BMW 325XI TOURING instrument panel
[x] Cancel search: instrument panelPage 54 of 178

54Passenger safety systems
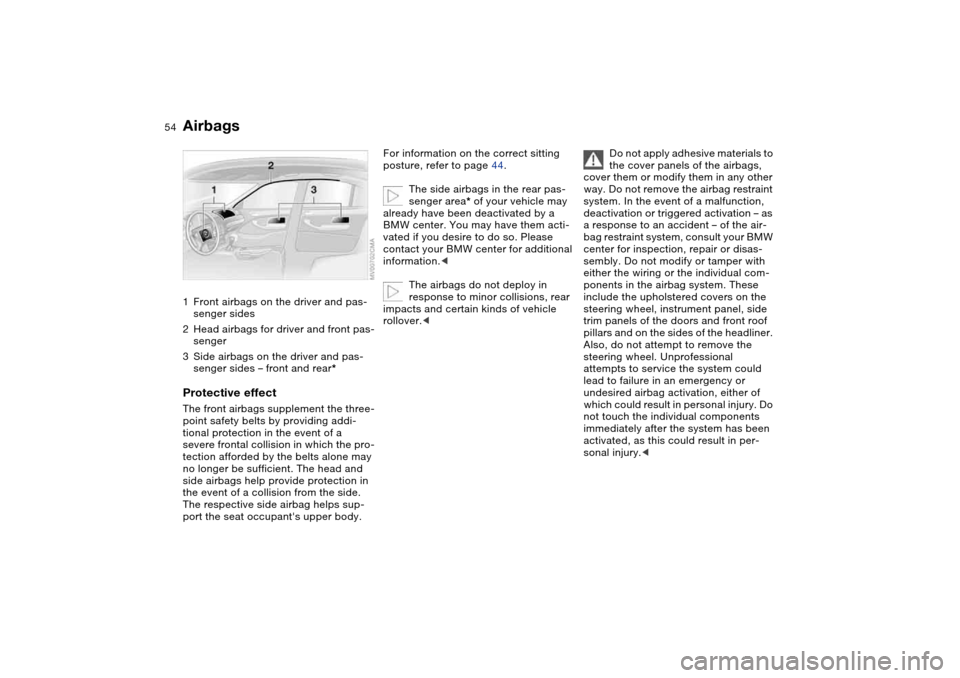
Airbags1Front airbags on the driver and pas-
senger sides
2Head airbags for driver and front pas-
senger
3Side airbags on the driver and pas-
senger sides – front and rear*Protective effectThe front airbags supplement the three-
point safety belts by providing addi-
tional protection in the event of a
severe frontal collision in which the pro-
tection afforded by the belts alone may
no longer be sufficient. The head and
side airbags help provide protection in
the event of a collision from the side.
The respective side airbag helps sup-
port the seat occupant's upper body.
For information on the correct sitting
posture, refer to page 44.
The side airbags in the rear pas-
senger area* of your vehicle may
already have been deactivated by a
BMW center. You may have them acti-
vated if you desire to do so. Please
contact your BMW center for additional
information.<
The airbags do not deploy in
response to minor collisions, rear
impacts and certain kinds of vehicle
rollover.<
Do not apply adhesive materials to
the cover panels of the airbags,
cover them or modify them in any other
way. Do not remove the airbag restraint
system. In the event of a malfunction,
deactivation or triggered activation – as
a response to an accident – of the air-
bag restraint system, consult your BMW
center for inspection, repair or disas-
sembly. Do not modify or tamper with
either the wiring or the individual com-
ponents in the airbag system. These
include the upholstered covers on the
steering wheel, instrument panel, side
trim panels of the doors and front roof
pillars and on the sides of the headliner.
Also, do not attempt to remove the
steering wheel. Unprofessional
attempts to service the system could
lead to failure in an emergency or
undesired airbag activation, either of
which could result in personal injury. Do
not touch the individual components
immediately after the system has been
activated, as this could result in per-
sonal injury.<
Page 58 of 178

58
Before installing any child-
restraint device or child seat,
please read the following:
Never install a rearward-facing child-
restraint system in the front passenger
seat of this vehicle.
Your vehicle is equipped with an airbag
supplemental restraint system for the
front passenger. Because the backrest
on any rearward-facing child-restraint
system – of the kind designed for
infants under 1 year and 20 lbs/9 kg –
would be within the airbag's deploy-
ment range, you should never mount
such a device in the front passenger
seat, since the impact of the airbag
against the child-restraint's backrest
could lead to serious or fatal injuries.
If it is necessary for a child – not an
infant – to ride in the front seat, certain
precautions should be taken. First,
move the passenger seat as far away
from the instrument panel as possible.
This important precaution is intended to
maximize the distance between the air-
bag and the child. Older children
should be tightly secured with a safety
belt after they have outgrown a booster
seat that is appropriate for their age,
height, and weight. Younger children
should be secured in an appropriate
forward-facing child-restraint system
that has first been properly secured
with a safety belt.
Never install a rearward-facing child-
restraint system in the front passenger
seat.
We strongly urge you to carefully read
and comply with the instructions for
installation and use provided by the
child-restraint's manufacturer whenever
you use such a device. Do not attempt
to modify child-restraint systems. If you
do this, the protection provided by
these systems could be impaired.
Be sure that all occupants – of all ages –
remain properly and securely restrained
at all times.<
All rear seating positions in your vehicle
meet the recommendations of
SAEJ1819, an industry-recommended
practice for securing child-restraint sys-
tems in motor vehicles.
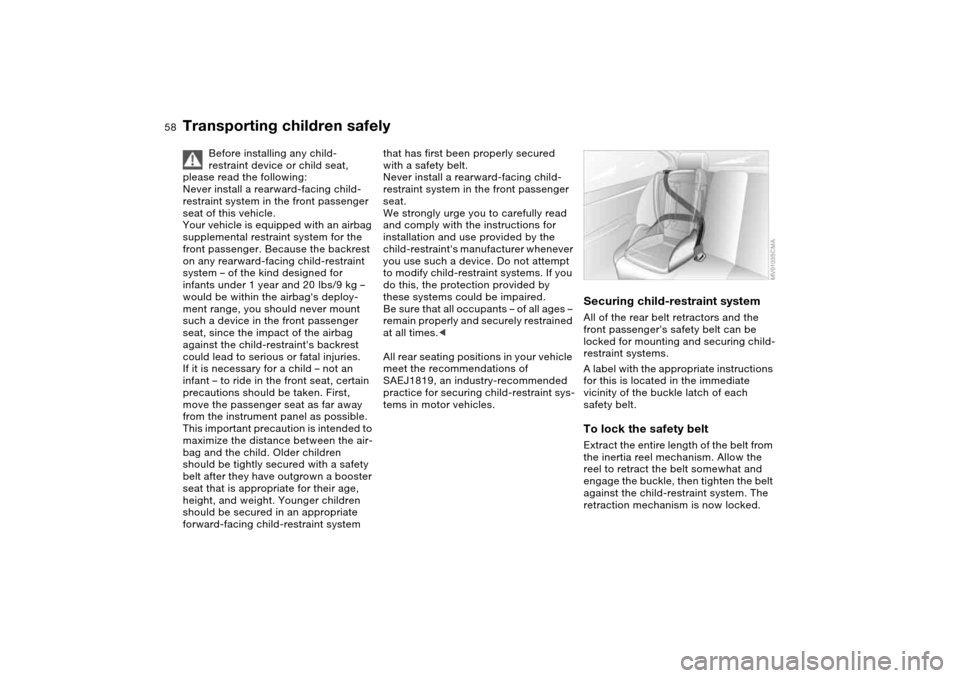
Securing child-restraint systemAll of the rear belt retractors and the
front passenger's safety belt can be
locked for mounting and securing child-
restraint systems.
A label with the appropriate instructions
for this is located in the immediate
vicinity of the buckle latch of each
safety belt.To lock the safety beltExtract the entire length of the belt from
the inertia reel mechanism. Allow the
reel to retract the belt somewhat and
engage the buckle, then tighten the belt
against the child-restraint system. The
retraction mechanism is now locked.
Transporting children safely
Page 72 of 178

72
DDrive – automatic shift programThis position is designed for driving
under all normal operating conditions.
All forward gears are available.KickdownIn the kickdown mode, you achieve
maximum acceleration and top speed
in position D.
Depress the accelerator pedal past the
increased resistance point at the full-
throttle position.
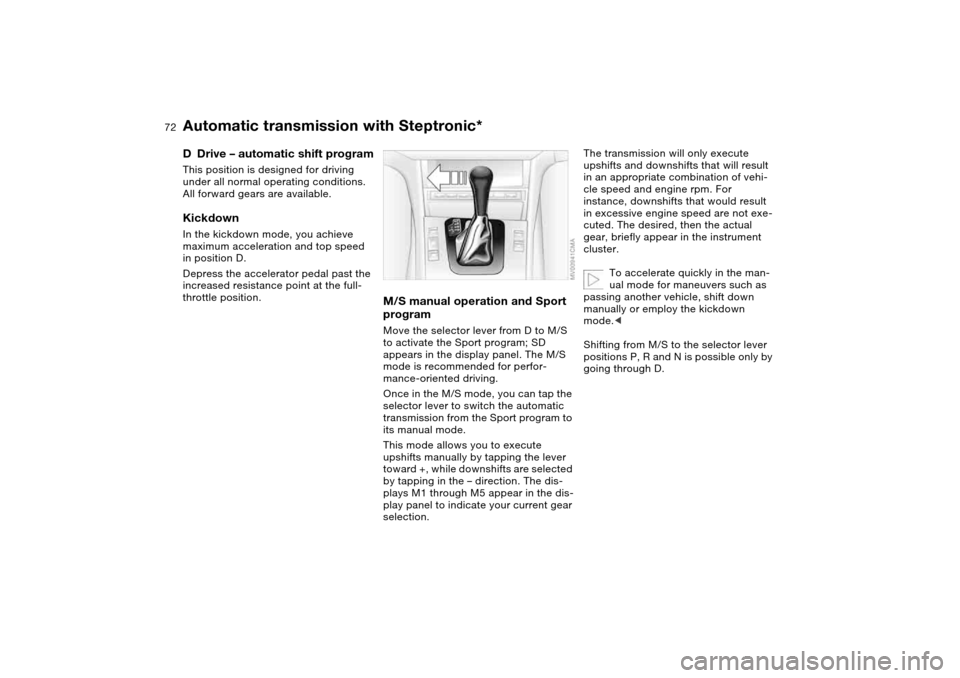
M/S manual operation and Sport
programMove the selector lever from D to M/S
to activate the Sport program; SD
appears in the display panel. The M/S
mode is recommended for perfor-
mance-oriented driving.
Once in the M/S mode, you can tap the
selector lever to switch the automatic
transmission from the Sport program to
its manual mode.
This mode allows you to execute
upshifts manually by tapping the lever
toward +, while downshifts are selected
by tapping in the – direction. The dis-
plays M1 through M5 appear in the dis-
play panel to indicate your current gear
selection.
The transmission will only execute
upshifts and downshifts that will result
in an appropriate combination of vehi-
cle speed and engine rpm. For
instance, downshifts that would result
in excessive engine speed are not exe-
cuted. The desired, then the actual
gear, briefly appear in the instrument
cluster.
To accelerate quickly in the man-
ual mode for maneuvers such as
passing another vehicle, shift down
manually or employ the kickdown
mode.<
Shifting from M/S to the selector lever
positions P, R and N is possible only by
going through D.
Automatic transmission with Steptronic*
Page 129 of 178

129 In the engine compartment
HoodTo releasePull the lever located under the left-
hand side of the instrument panel.
Do not attempt to service your
vehicle if you do not have the
required technical background. Failure
to work in an informed, professional
manner when servicing components
and materials constitutes a safety haz-
ard for vehicle occupants and other
road users. If you are not familiar with
the guidelines, BMW recommends that
you have the operations performed by
your BMW center.<
To openPull the release handle and open the
hood.
To closeAllow the hood to fall from a height of
about 1 ft/30 cm so that it audibly
engages.
To avoid injuries, be sure that the
travel path of the hood is clear
when it is closed, following the same
safety precautions used in all closing
procedures.
If you determine while driving that the
hood is not completely closed, stop
immediately and close it securely.<
OverviewControlsMaintenanceRepairsDataIndex
Page 171 of 178

Everything from A to Z
171
Ignition lock 63
Imprint 4
Indicator lamps 18
Indicator/warning lamp
airbags 18
alarm system 38
brakes 18, 19
Check Gas Cap 19
coolant 19, 80
DSC 19
Flat Tire Monitor
18, 19, 92
fog lamps 20
Please fasten safety
belts 18
reserve 80
Service Engine Soon 19
Individual air distribution 102
Individual settings, refer to
Vehicle Memory, Key
Memory 61
Inflation pressure 124
Inflation pressure monitor-
ing, refer to Flat Tire Moni-
tor 91
Inflation pressure, tires 25
INSPECTION 81
Instrument cluster 16
Instrument lighting 94
Instrument panel 14
Interface socket for onboard
diagnostics (OBD) 138Interior lamps 95
remote control 32
Interior motion sensor 38
switching off 39
Interior rearview mirror 53
automatic dimming
feature 53
Interior temperature
adjusting 98, 102
Interlock, refer to Steering
wheel lock 63
Intermittent
mode, wipers 75
Interval
display, service 81
J
Jack 147
Jacking points 148
Jump-starting 153
K
Key Memory 61
Keys 30
with remote control 30
Kickdown 68, 72
L
Lamp defect 143
Lamps and bulbs 143
Lashing down loads, refer to
Cargo loading 113Lashing eyelets, refer to
Securing cargo 115
Lashing fittings, refer to
Securing cargo 115
LATCH child-restraint
mounting system 59
Leather care, refer to the
Caring for your vehicle
brochure
LEDs light-emitting
diodes 95
Length, refer to
Dimensions 161
License plate lamp
bulb replacement 146
Light switch 93
Light-emitting diodes
LEDs 95
Lighter 108
LIGHTS ON warning 93
Lights, refer to Parking
lamps/Low beams 93
Litter bag holder 107
Load, refer to Cargo
loading 113
Loading
vehicle 113
Lock buttons on doors, refer
to Locking 35
Lock, steering wheel 63Locking
from inside 35
from outside 31, 34
Locking and unlocking
doors
from inside 35
from outside 31, 34
Low beams 93
automatic 93
bulb replacement 143
indicator lamp, defective
lamp 81
Lug bolts 148
key 148
torque 148
Luggage area cover, see
Cargo area cover 111
Luggage compartment, refer
to Cargo area 37
Luggage net, refer to Parti-
tion net 111
Luggage rack, refer to Roof-
mounted luggage rack 116
Luggage straps 37
Lumbar support 47
M
M+S tires, refer to Winter
tires 127
Maintenance 81, 136
Maintenance system 136
OverviewControlsMaintenanceRepairsDataIndex