2005 BMW 325I SEDAN Control
[x] Cancel search: ControlPage 82 of 223

Controls
81Reference
At a glance
Driving tips
Communications
Navigation
Entertainment
Mobility
4.Select "FTM" and press the controller.
5.Start the engine, but do not start driving.
6.Select "Set tire pressure" and press the
controller.
7.Select "Yes" and press the controller.
8.Start to drive.
"Status: Active" reappears in the Control
Display. Initialization is then completed
while the car is in motion.
Indication of a flat tire
The warning lamps come on in yellow
and red. A message appears on the
Control Display. In addition, an
acoustic signal sounds. There is a flat
tire or substantial loss of tire pressure.
1.Cautiously reduce speed to below 50 mph
or 80 km/h. Avoid sudden braking and
steering maneuvers. Do not exceed a speed
of 50 mph or 80 km/h.
If the car is not equipped with Run-
Flat Tires, refer to page178, the stan-
dard equipment by design, do not continue
driving. Any attempt to drive on after a
puncture can result in a severe accident.<
2.At the next opportunity, check the air pres-
sure in all four tires.If all four tires are inflated to the cor-
rect pressures, the Flat Tire Monitor
might not have been initialized. The system
must then be initialized.<
3.In the event of complete tire pressure loss,
0 psi/0 kPa, you can estimate the possible
distance for continued driving on the basis
of the following guidelines:
>With a light load:
1 to 2 persons without luggage:
approx. 155 miles/250 km
>With a medium load:
2 persons, luggage compartment full, or
4 persons without luggage:
approx. 90 miles/150 km
>With a full load:
4 or more persons, luggage compart-
ment full:
approx. 30 miles/50 km
Drive reservedly and do not exceed a
speed of 50 mph or 80 km/h. In the event
of pressure loss, vehicle handling changes. This
includes reduced tracking stability in braking,
extended braking distance and altered natural
steering characteristics.
If unusual vibration or loud noises occur during
the journey, this may be an indication that the
damaged tire has finally failed. Reduce your
speed and pull over to the side of the road at the
earliest opportunity. Otherwise, parts of the tire
could come loose and cause an accident. Do
not continue driving. Contact your BMW cen-
ter.<
Malfunction
The warning lamps come on in yel-
low. A message appears on the Con-
trol Display. The Flat Tire Monitor has
a malfunction or has failed. Have the
system checked as soon as possible.
Active steering*
The concept
Active steering varies the turning angle of the
front wheels in relation to steering wheel move-
Page 84 of 223

Controls
83Reference
At a glance
Driving tips
Communications
Navigation
Entertainment
Mobility
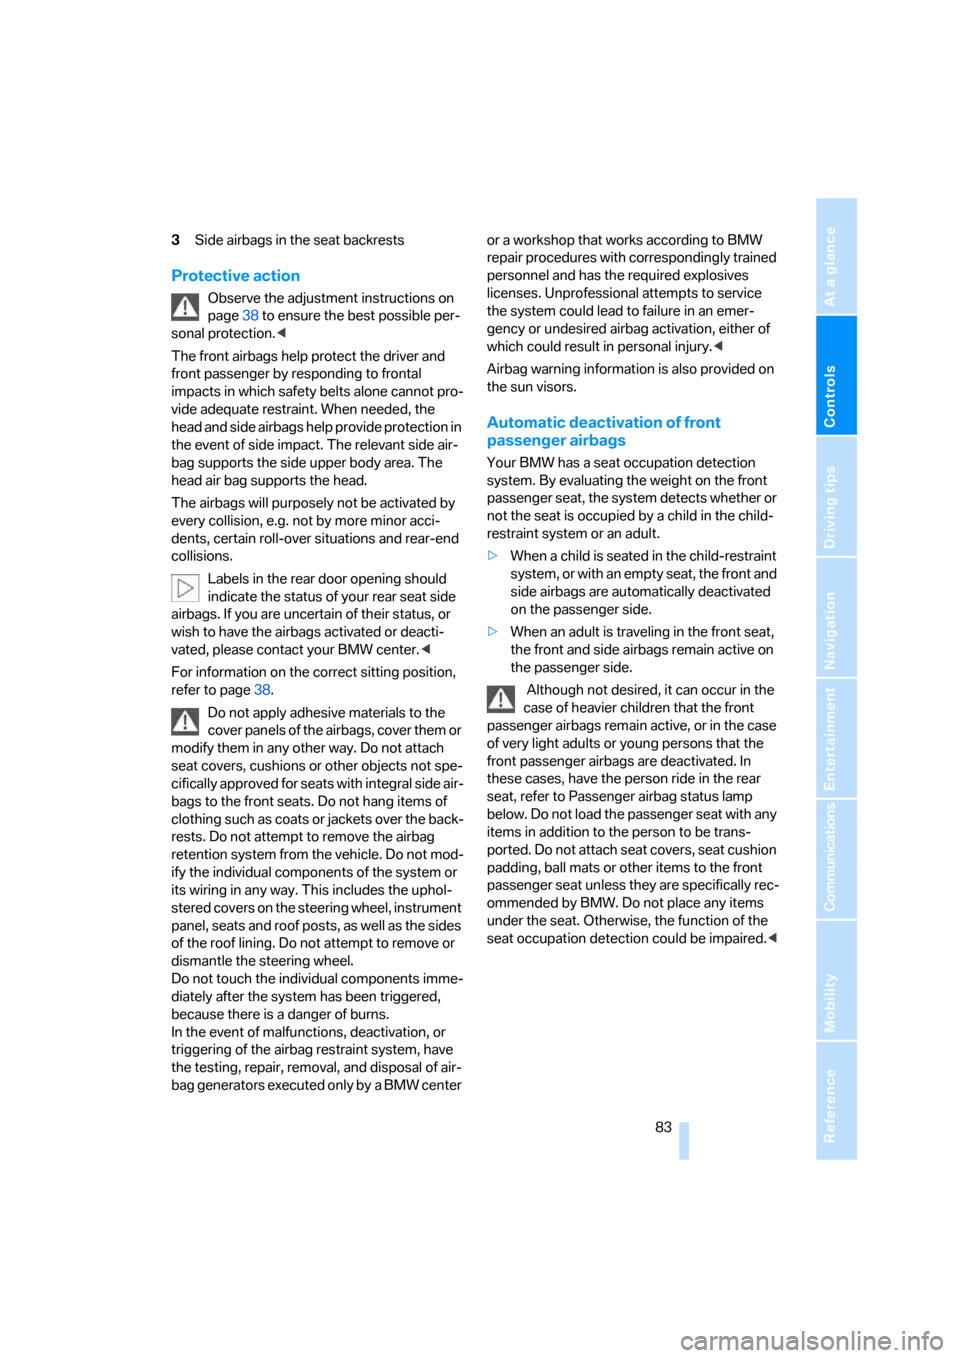
3Side airbags in the seat backrests
Protective action
Observe the adjustment instructions on
page38 to ensure the best possible per-
sonal protection.<
The front airbags help protect the driver and
front passenger by responding to frontal
impacts in which safety belts alone cannot pro-
vide adequate restraint. When needed, the
head and side airbags help provide protection in
the event of side impact. The relevant side air-
bag supports the side upper body area. The
head air bag supports the head.
The airbags will purposely not be activated by
every collision, e.g. not by more minor acci-
dents, certain roll-over situations and rear-end
collisions.
Labels in the rear door opening should
indicate the status of your rear seat side
airbags. If you are uncertain of their status, or
wish to have the airbags activated or deacti-
vated, please contact your BMW center.<
For information on the correct sitting position,
refer to page38.
Do not apply adhesive materials to the
cover panels of the airbags, cover them or
modify them in any other way. Do not attach
seat covers, cushions or other objects not spe-
cifically approved for seats with integral side air-
bags to the front seats. Do not hang items of
clothing such as coats or jackets over the back-
rests. Do not attempt to remove the airbag
retention system from the vehicle. Do not mod-
ify the individual components of the system or
its wiring in any way. This includes the uphol-
stered covers on the steering wheel, instrument
panel, seats and roof posts, as well as the sides
of the roof lining. Do not attempt to remove or
dismantle the steering wheel.
Do not touch the individual components imme-
diately after the system has been triggered,
because there is a danger of burns.
In the event of malfunctions, deactivation, or
triggering of the airbag restraint system, have
the testing, repair, removal, and disposal of air-
bag generators executed only by a BMW center or a workshop that works according to BMW
repair procedures with correspondingly trained
personnel and has the required explosives
licenses. Unprofessional attempts to service
the system could lead to failure in an emer-
gency or undesired airbag activation, either of
which could result in personal injury.<
Airbag warning information is also provided on
the sun visors.
Automatic deactivation of front
passenger airbags
Your BMW has a seat occupation detection
system. By evaluating the weight on the front
passenger seat, the system detects whether or
not the seat is occupied by a child in the child-
restraint system or an adult.
>When a child is seated in the child-restraint
system, or with an empty seat, the front and
side airbags are automatically deactivated
on the passenger side.
>When an adult is traveling in the front seat,
the front and side airbags remain active on
the passenger side.
Although not desired, it can occur in the
case of heavier children that the front
passenger airbags remain active, or in the case
of very light adults or young persons that the
front passenger airbags are deactivated. In
these cases, have the person ride in the rear
seat, refer to Passenger airbag status lamp
below. Do not load the passenger seat with any
items in addition to the person to be trans-
ported. Do not attach seat covers, seat cushion
padding, ball mats or other items to the front
passenger seat unless they are specifically rec-
ommended by BMW. Do not place any items
under the seat. Otherwise, the function of the
seat occupation detection could be impaired.<
Page 85 of 223

Technology for driving comfort and safety
84
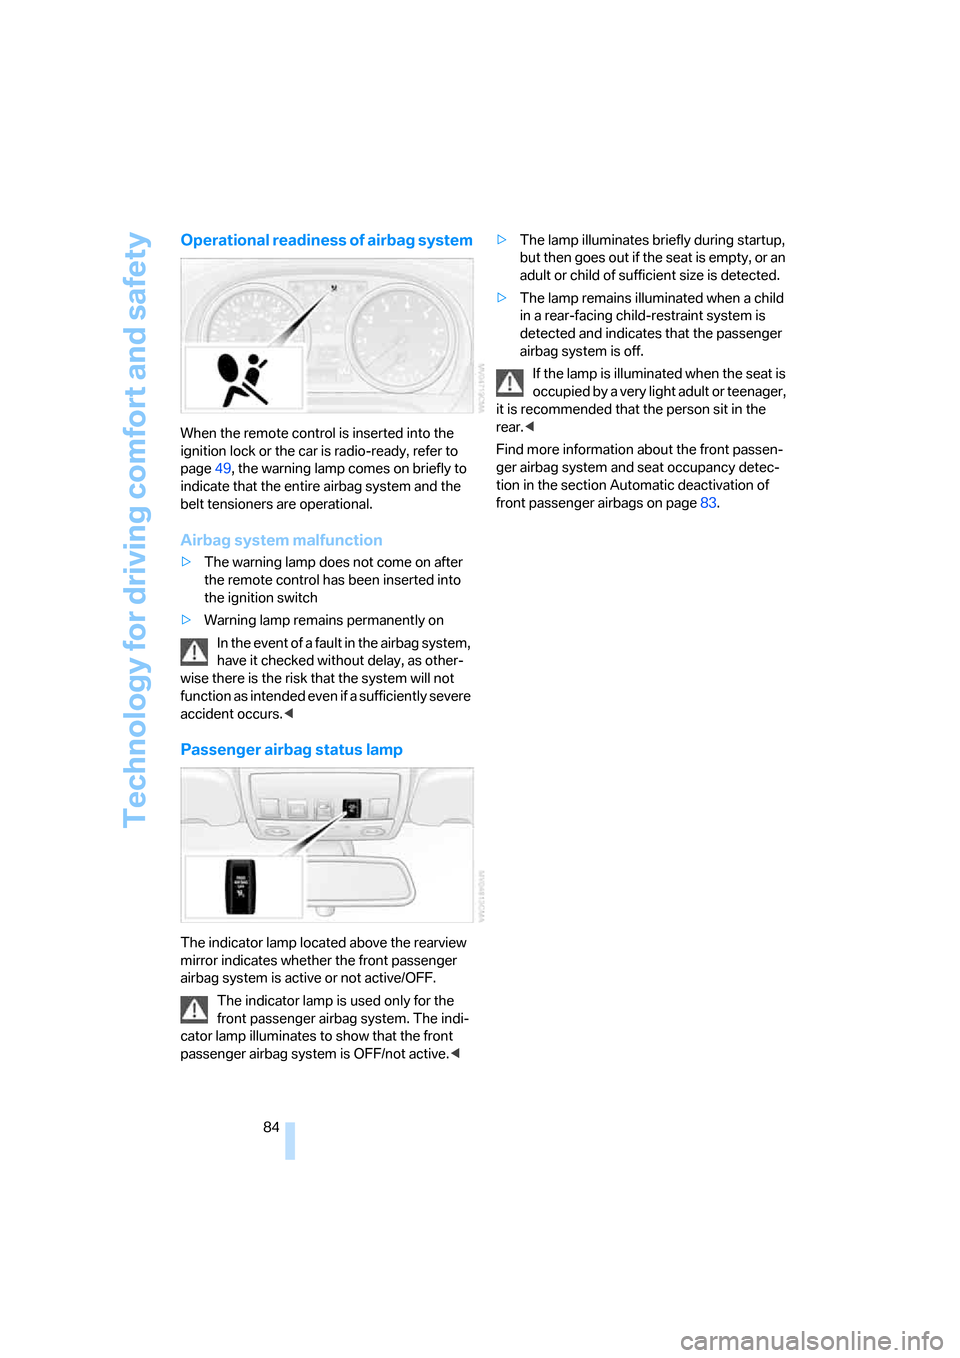
Operational readiness of airbag system
When the remote control is inserted into the
ignition lock or the car is radio-ready, refer to
page49, the warning lamp comes on briefly to
indicate that the entire airbag system and the
belt tensioners are operational.
Airbag system malfunction
>The warning lamp does not come on after
the remote control has been inserted into
the ignition switch
>Warning lamp remains permanently on
In the event of a fault in the airbag system,
have it checked without delay, as other-
wise there is the risk that the system will not
function as intended even if a sufficiently severe
accident occurs.<
Passenger airbag status lamp
The indicator lamp located above the rearview
mirror indicates whether the front passenger
airbag system is active or not active/OFF.
The indicator lamp is used only for the
front passenger airbag system. The indi-
cator lamp illuminates to show that the front
passenger airbag system is OFF/not active.<>The lamp illuminates briefly during startup,
but then goes out if the seat is empty, or an
adult or child of sufficient size is detected.
>The lamp remains illuminated when a child
in a rear-facing child-restraint system is
detected and indicates that the passenger
airbag system is off.
If the lamp is illuminated when the seat is
occupied by a very light adult or teenager,
it is recommended that the person sit in the
rear.<
Find more information about the front passen-
ger airbag system and seat occupancy detec-
tion in the section Automatic deactivation of
front passenger airbags on page83.
Page 86 of 223

Controls
85Reference
At a glance
Driving tips
Communications
Navigation
Entertainment
Mobility
Lamps
Parking lamps/low beams
1Automatic headlamp control*/Adaptive
Head Light
*
2Parking lamps
3Low beams
Automatic headlamp control*
When the switch is in position1, the low beams
are switched on and off automatically depend-
ing on ambient light conditions, e.g. in a tunnel,
in twilight, rain or snow. The LED next to the
symbol is illuminated when the low beams are
on.
You can leave the switch in position1 when you
switch off the engine. Once you open the
driver's door while the ignition is switched off,
the outside lamps automatically go out.
The low beams remain switched on inde-
pendent of the ambient lighting condi-
tions when you switch on the fog lamps
*.<
The automatic headlamp control cannot
serve as a substitute for your personal
judgment in determining when the lamps
should be switched on in response to ambient
lighting conditions. For example, the system
cannot detect fog. To avoid safety risks, you
should always switch on the lamps manually
under these conditions.<
Adjusting sensitivity
iDrive concept, refer to page16.1.Press the button.
This opens the start menu.
2.Press the controller to open the menu.
3.Select "Vehicle settings" and press the
controller.
4.Select "Lighting" and press the controller.
5.Select "Auto. headlamps" and press the
controller.
6.Select a menu item:
>"Sensitive"
>"Normal"
>"Slower"
7.Press the controller.
Parking lamps
In switch position2, the front, rear and side
vehicle lighting is switched on. You can use the
parking lamps for parking. For lighting on one
side for parking as an additional feature, refer to
page86.
The parking lamps will discharge the bat-
tery. Do not use them for unduly long
periods of time, as otherwise the battery might
not have enough power to start the engine.<
Low beams
When the switch is in position3, the low beams
are on only when the ignition is on; with the igni-
tion off the parking lamps are on.
Page 87 of 223

Lamps
86
Pathway lighting
If you activate the headlamp flasher after park-
ing the car, with the lights switched off, the low
beams come on and remain on for a certain
time. You can adjust the operating period or
deactivate the function using iDrive.
1.Open the start menu.
2.Press the controller to open the menu.
3.Select "Vehicle settings" and press the
controller.
4.Select "Lighting" and press the controller.
5.Select "Pathway lighting" and press the
controller.
6.Turn the controller to select the corre-
sponding duration.
7.Press the controller to apply the setting.
Daytime driving lamps*
If desired, the light switch can remain in the low-
beam headlamp position or the automatic
headlamp control position.
After you have switched off the ignition, refer to
page49, and opened the driver's door, the out-
side lights switch off automatically.
Always observe all applicable laws governing
the use of daytime driving lamps.
You can switch on the parking lamps when
needed using the standard procedure
described under Parking lamps.
Adaptive Head Light*
The concept
Adaptive Head Light is a variable headlamp
control system that enables better illumination
of the road surface. Depending on the steering
angle and other conditions, the light from the
headlamp follows the course of the road.
Activating Adaptive Head Light
With the ignition on, turn the light switch to the
automatic headlamp control position, refer to
page85.
To avoid dazzling the drivers of oncoming vehi-
cles, Adaptive Head Light is not active when the
car is driven in reverse, and directs the light to
the front passenger's side when the vehicle is at
a standstill.
Malfunction
The LED next to the symbol for automatic head-
lamp control flashes. Adaptive Head Light is
malfunctioning or has failed. Have the system
checked as soon as possible.
High beams/roadside parking
lamps
1High beams
2Headlamp flasher
3Roadside parking lamps
*
Roadside parking lamps, left or right*
There is an additional option of switching on the
lamps on the side of the car facing the road
when parked, if permitted in the country of use.
Page 88 of 223

Controls
87Reference
At a glance
Driving tips
Communications
Navigation
Entertainment
Mobility
With the remote control removed or with radio
readiness and ignition switched off, refer to
page49, press the stalk beyond its resistance
point in the appropriate direction 3. The flash-
ing turn signals must remain off.
The roadside parking lamps drain the bat-
tery. Do not use them for unduly long
periods of time, as otherwise the battery might
not have enough power to start the engine.<
Fog lamps*
The parking lamps or low beams must
be switched on for the fog lamps to
operate. The green indicator lamp in
the instrument cluster lights up whenever the
fog lamps are on.
The fog lamps are switched off whenever the
high beams are switched on.
If the automatic headlamp control is acti-
vated, the low beams will come on auto-
matically when you switch on the fog lamps.<
Instrument lighting
You can adjust the brightness of the instrument
lighting only when the parking lamps or the low
beams are switched on.1.Lightly push button 1 repeatedly up or
down until the appropriate symbol appears
in the display, accompanied by the bright-
ness and the word "SET".
2.Press button 2.
3.Lightly push button 1 up or down to select
the brightness; the setting is stored imme-
diately.
4.Press button 2 in the turn indicator stalk.
The display again shows the outside tem-
perature and the time.
Interior lamps
The interior lamps, the footwell lamps*, the lug-
gage compartment lamp and the courtesy
lamps
* are controlled automatically.
The LEDs for the courtesy lamps
are set in the
door handles and illuminate the ground in front
of the doors.
To avoid draining the battery, all lamps
inside the car are switched off about
15 minutes after radio readiness is switched off,
refer to Start/stop button on page49.<
Page 90 of 223

Controls
89Reference
At a glance
Driving tips
Communications
Navigation
Entertainment
Mobility
Controlling the climate for pleasant driving
1Airflow directed toward the windshield and
side windows
2Air to the upper body area
Draft-free ventilation92
3Air to the footwell
4Air distribution, manual
5Temperature adjustment, left-hand side of
passenger compartment
6Maximum cooling
7AUTO program
8Air flow rate, manual
9AUC Automatic recirculated-air control/
Recirculated-air mode10Temperature adjustment, right-hand side
of passenger compartment
11Residual heat
12Defrosting windows and removing conden-
sation
13Switching cooling function on/off manually
14Rear window defroster
15Air grill for interior temperature sensor –
please keep clear and unobstructed
The current setting for the air distribution is dis-
played on the Control Display, refer to page90.
Page 91 of 223

Controlling the climate for pleasant driving
90
Automatic climate control
Comfortable interior climate
AUTO program7 offers the ideal air distribution
and air flow rate for practically all conditions,
refer to AUTO program below. All you need to
do is select an interior temperature which is
comfortable for you.
The following sections inform you in detail
about how to adjust the settings.
Most settings are stored for the remote control
currently in use, refer also to Personal Profile
settings on page29.
Adjusting air distribution manually
Direct the flow of air to the win-
dows, to the upper body area or to
the footwell.
You can switch the automatic air
distribution back on by pressing the AUTO but-
ton.
Manual fine adjustments in air
distribution
You can set the rate of incoming airflow for
manual air distribution.
iDrive concept, refer to page16.
1.Press the button.
This opens the start menu.
2.Move the controller to the left to call up "Cli-
mate".
3.Select "Vent settings" and press the con-
troller.
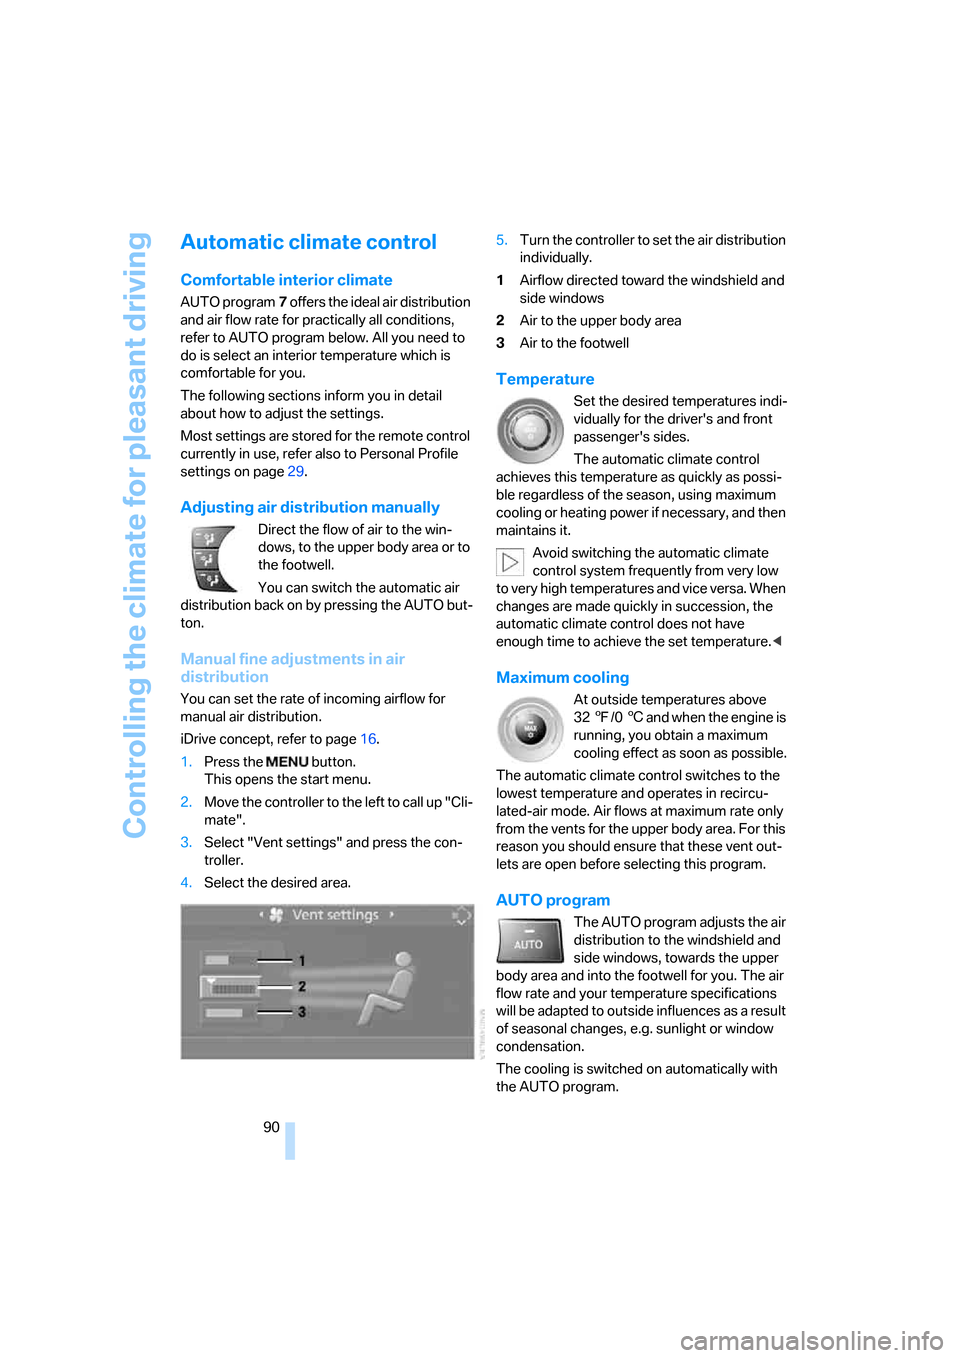
4.Select the desired area.5.Turn the controller to set the air distribution
individually.
1Airflow directed toward the windshield and
side windows
2Air to the upper body area
3Air to the footwell
Temperature
Set the desired temperatures indi-
vidually for the driver's and front
passenger's sides.
The automatic climate control
achieves this temperature as quickly as possi-
ble regardless of the season, using maximum
cooling or heating power if necessary, and then
maintains it.
Avoid switching the automatic climate
control system frequently from very low
to very high temperatures and vice versa. When
changes are made quickly in succession, the
automatic climate control does not have
enough time to achieve the set temperature.<
Maximum cooling
At outside temperatures above
327/06 and when the engine is
running, you obtain a maximum
cooling effect as soon as possible.
The automatic climate control switches to the
lowest temperature and operates in recircu-
lated-air mode. Air flows at maximum rate only
from the vents for the upper body area. For this
reason you should ensure that these vent out-
lets are open before selecting this program.
AUTO program
The AUTO program adjusts the air
distribution to the windshield and
side windows, towards the upper
body area and into the footwell for you. The air
flow rate and your temperature specifications
will be adapted to outside influences as a result
of seasonal changes, e.g. sunlight or window
condensation.
The cooling is switched on automatically with
the AUTO program.