2005 BMW 325I lock
[x] Cancel search: lockPage 38 of 166
Adjustments
36
Manual call-up
Do not call up memory while you are driv-
ing, otherwise unexpected seat move-
ment could result in an accident.<
Convenience mode
1.Unlock and open the driver's door or switch
on radio readiness, refer to page42.
2.Briefly press the desired memory button1
or 2.
The adjusting procedure is immediately halted
when you touch a seat adjustment switch or
one of the MEMORY buttons.
Safety feature
1.Close the driver's door and switch the igni-
tion on or off, refer to page42.
2.Press the desired memory button1 or2
and maintain pressure until the adjustment
process has been completed.
If the button was pressed accidentally:
press the button again; the LED goes out.
Safety belts
Observe the adjustment instructions on
page31 to ensure the best possible per-
sonal protection.<
Before every drive, make sure that all occupants
wear their safety belts. Airbags complement the
safety belt as an additional safety device, but
they do not represent a substitute.
On the rear seats, the center belt buckle marked
with the letters CENTER is solely intended for
the center passenger.
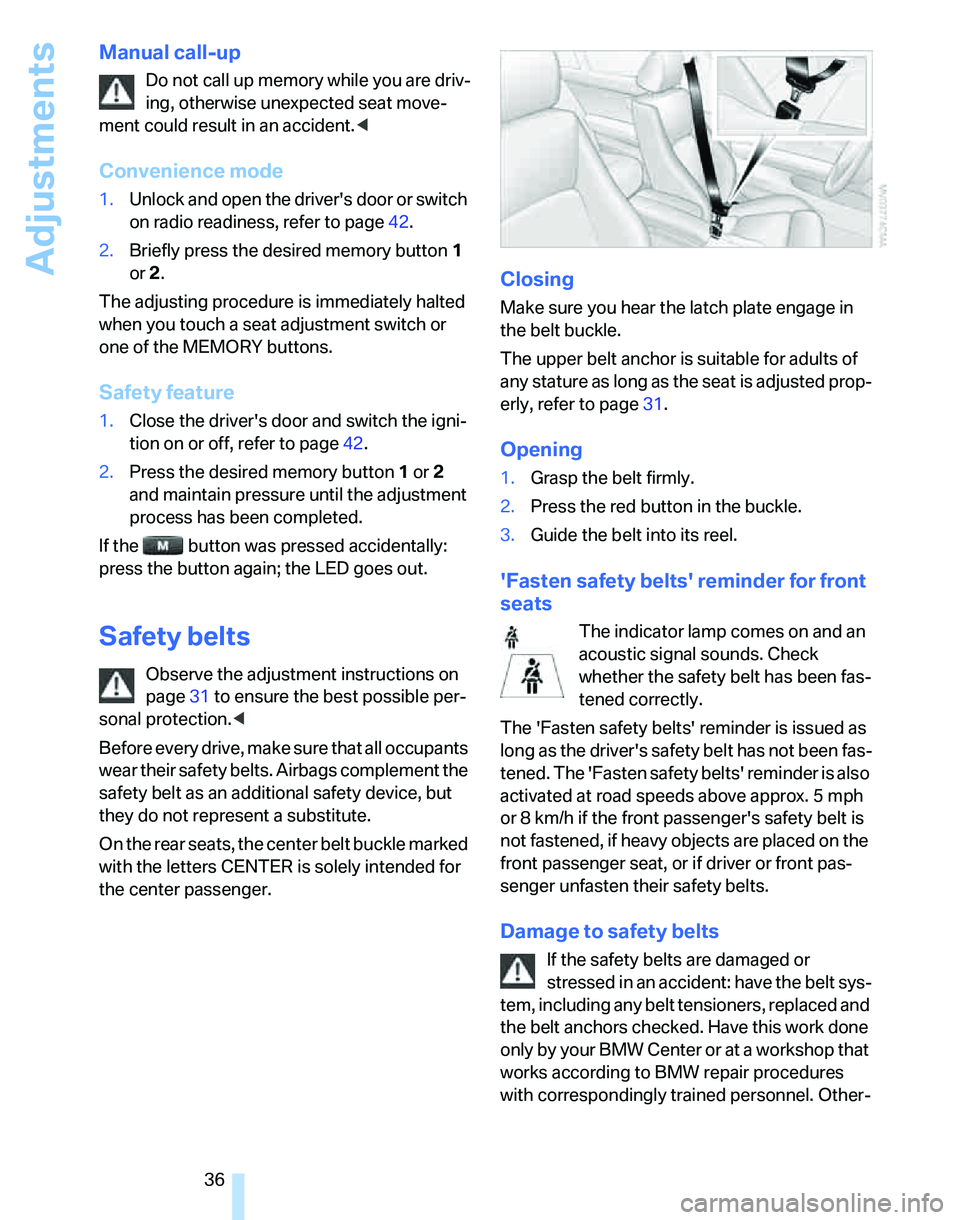
Closing
Make sure you hear the latch plate engage in
the belt buckle.
The upper belt anchor is suitable for adults of
any stature as long as the seat is adjusted prop-
erly, refer to page31.
Opening
1.Grasp the belt firmly.
2.Press the red button in the buckle.
3.Guide the belt into its reel.
'Fasten safety belts' reminder for front
seats
The indicator lamp comes on and an
acoustic signal sounds. Check
whether the safety belt has been fas-
tened correctly.
The 'Fasten safety belts' reminder is issued as
long as the driver's safety belt has not been fas-
tened. The 'Fasten safety belts' reminder is also
activated at road speeds above approx. 5 mph
or 8 km/h if the front passenger's safety belt is
not fastened, if heavy objects are placed on the
front passenger seat, or if driver or front pas-
senger unfasten their safety belts.
Damage to safety belts
If the safety belts are damaged or
stressed in an accident: have the belt sys-
tem, including any belt tensioners, replaced and
the belt anchors checked. Have this work done
o nly by your BMW Center o r at a workshop that
works according to BMW repair procedures
with correspondingly trained personnel. Other-
Page 40 of 166
Adjustments
38
Steering wheel
Adjustments
Do not adjust the steering wheel position
while the car is in motion, or an accident
may result from any unexpected movement.<
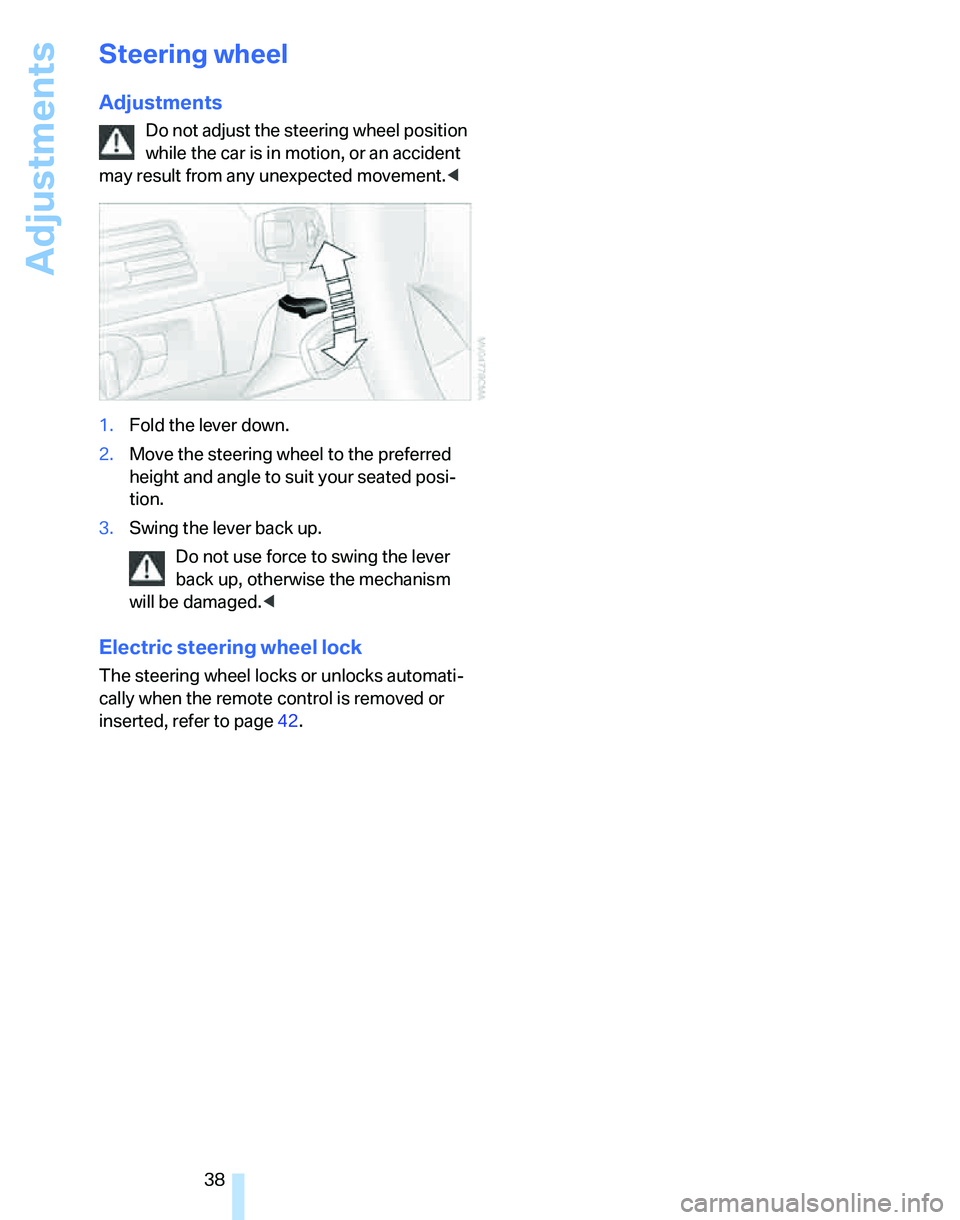
1.Fold the lever down.
2.Move the steering wheel to the preferred
height and angle to suit your seated posi-
tion.
3.Swing the lever back up.
Do not use force to swing the lever
back up, otherwise the mechanism
will be damaged.<
Electric steering wheel lock
The steering wheel locks or unlocks automati-
cally when the remote control is removed or
inserted, refer to page42.
Page 42 of 166
Transporting children safely
40
Child seat security
All rear safety belts and the front passenger's
safety belt can be prevented from being pulled
out in order to fasten child-restraint systems.
To lock the safety belt
1.Secure the child-restraint system with the
belt.
2.Pull the belt strap all the way out.
3.Allow the belt strap to retract and pull it taut
against the child-restraint system.
The safety belt is locked.
To unlock the safety belt
1.Open the belt buckle
2.Remove the child-restraint system.
3.Allow the safety belt strap to retract all the
way.
Child-restraint system with tether
strap
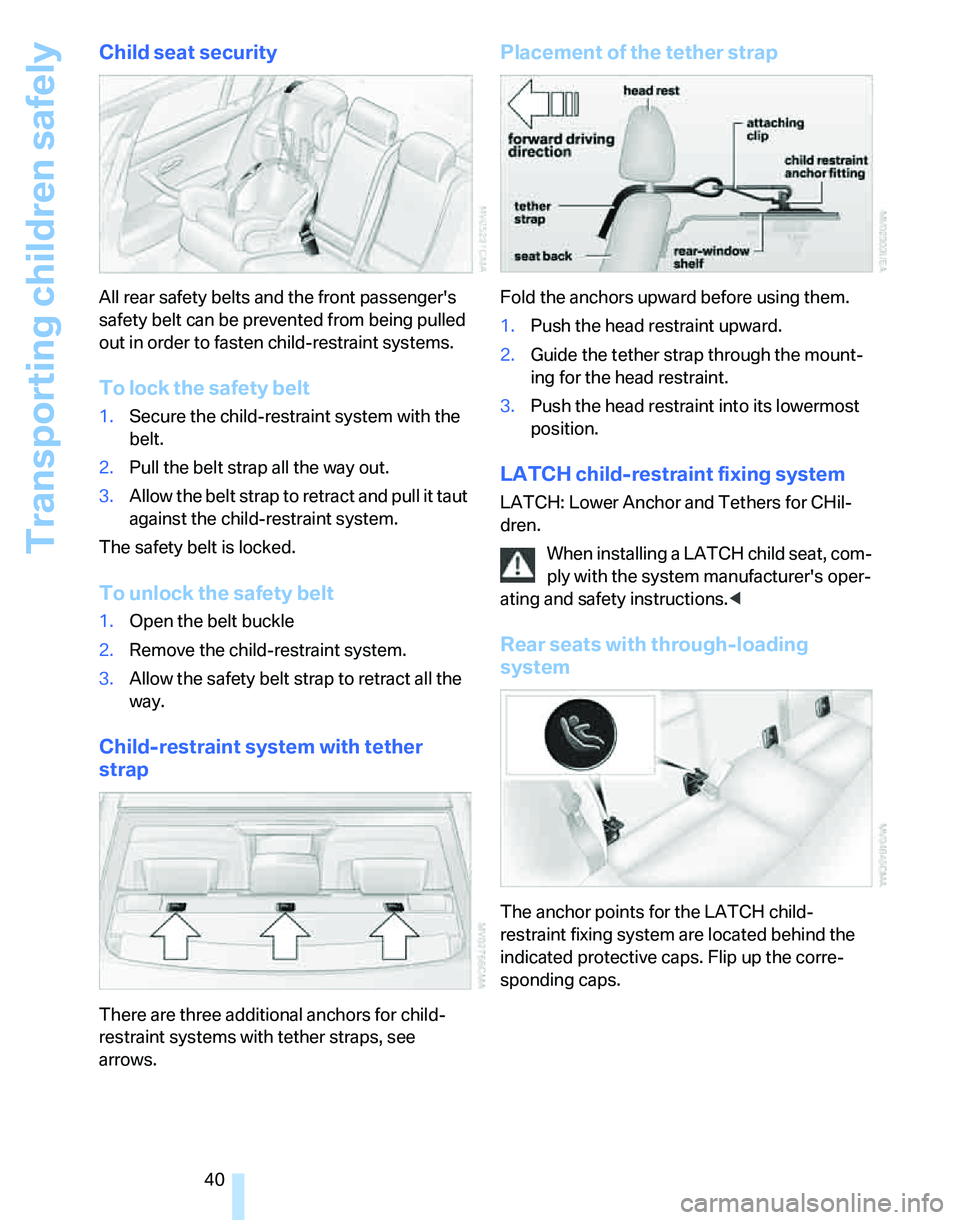
There are three additional anchors for child-
restraint systems with tether straps, see
arrows.
Placement of the tether strap
Fold the anchors upward before using them.
1.Push the head restraint upward.
2.Guide the tether strap through the mount-
ing for the head restraint.
3.Push the head restraint into its lowermost
position.
LATCH child-restraint fixing system
LATCH: Lower Anchor and Tethers for CHil-
dren.
When installing a LATCH child seat, com-
ply with the system manufacturer's oper-
ating and safety instructions.<
Rear seats with through-loading
system
The anchor points for the LATCH child-
restraint fixing system are located behind the
indicated protective caps. Flip up the corre-
sponding caps.
Page 43 of 166
Reference
At a glance
Controls
Driving tips
Mobility
41
Rear seats without through-loading
system
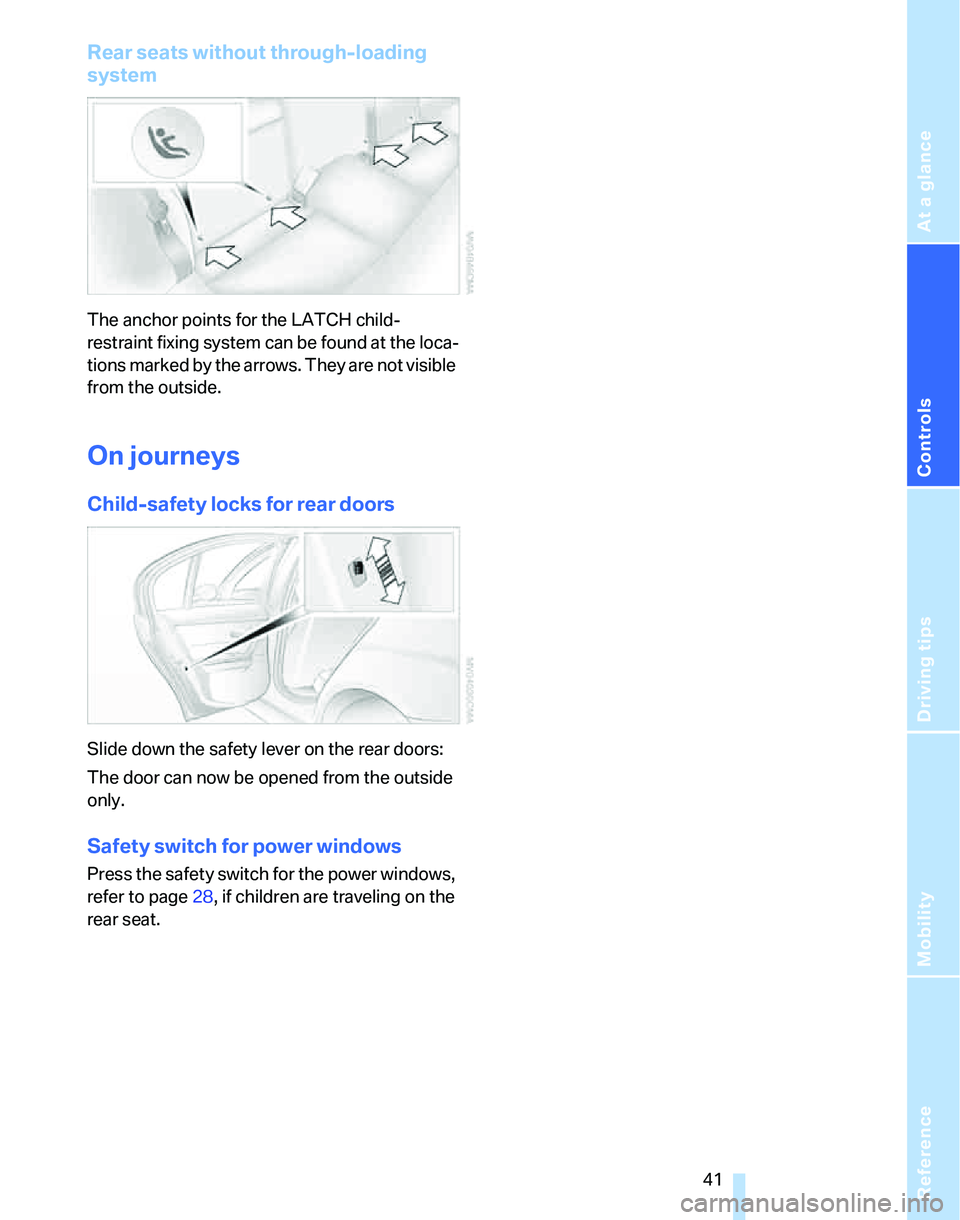
The anchor points for the LATCH child-
restraint fixing system can be found at the loca-
tions marked by the arrows. They are not visible
from the outside.
On journeys
Child-safety locks for rear doors
Slide down the safety lever on the rear doors:
The door can now be opened from the outside
only.
Safety switch for power windows
Press the safety switch for the power windows,
refer to page28, if children are traveling on the
rear seat.
Page 44 of 166

Driving
42
Driving
Ignition lock
Insert the remote control all the way into the
ignition lock.
>Radio readiness switches on.
Individual electrical consumers can operate.
>The electric steering wheel lock disen-
gages audibly.
Insert the remote control into the ignition
lock before you move the vehicle, other-
wise the electric steering wheel lock will not dis-
engage and you will not be able to steer the
car.<
Removing the remote control from the
ignition lock
Press the remote control in briefly; it is ejected
part of the way.
At the same time:
>The ignition switches off if it was on before-
hand.
>The electric steering wheel lock engages
audibly.
Automatic transmission
You cannot take out the remote control unless
the selector lever is in the P position: interlock.
Start/stop button
Each time the start/stop button is pressed,
radio readiness or the ignition is switched on or
off.
Briefly pressing the start/stop button
while the brake or clutch is depressed
starts the engine.<
Radio readiness
Individual electrical consumers can operate.
The time and the outside temperature are dis-
played in the instrument cluster.
Radio readiness is switched off automatically:
>Immediately when the remote control is
removed from the ignition lock
>In cars with convenient access
*, by touch-
ing the surface above the door lock, refer to
Locking on page26
Ignition on
Most of the indicator and warning lamps in the
indicator area1 of the instrument cluster, refer
to page13, light up and remain on for different
lengths of time.
Radio readiness and ignition off
All indicator and warning lamps in the instru-
ment cluster go out.
Page 46 of 166

Driving
44 handbrake, otherwise the vehicle could roll
away.<
Manual transmission
1.Apply the handbrake.
2.With the car at a standstill, briefly press the
start/stop button.
3.Shift into first gear or reverse.
Automatic transmission
1.With the car at a standstill, move the selec-
tor lever to position P.
2.Briefly press the start/stop button.
3.Apply the handbrake.
Sequential manual gearbox SMG
1.Apply the handbrake.
2.Engage a drive position.
3.Briefly press the start/stop button.
If the engine is switched off while N is engaged,
this will be signaled visually and acoustically.
Handbrake
The handbrake is primarily intended to prevent
the vehicle from rolling while parked; it brakes
the rear wheels.
Indicator lamp
The indicator lamp is lit, and when you
drive off an acoustic signal sounds in
addition. The handbrake is still applied.
Indicator lamp for Canadian models.
Applying
The lever locks in position automatically.
Releasing
Pull slightly upwards, press the button and
lower the lever.
In exceptional cases, if the handbrake has
to be used to slow or stop the car, do not
pull the lever up too hard. In doing so, continu-
ously press the button of the handbrake lever.
Otherwise, too violent an application of the
handbrake can overbrake the rear axle and
cause the rear of the car to swerve.<
To prevent corrosion and one-sided brak-
ing action, occasionally apply the hand-
brake lightly when the vehicle is slowly coming
to a stop if the traffic conditions are suitable.
The brake lamps do not light up when the hand-
brake is applied.<
Manual transmission
When shifting into 5th or 6th gear, press
the gearshift lever to the right. Otherwise
the engine could be damaged if you inadvert-
ently shift into 3rd or 4th gear.<
Page 47 of 166
Reference
At a glance
Controls
Driving tips
Mobility
45
Reverse gear
Select only when the vehicle is stationary.
When the gearshift lever is pressed to the left, a
slight resistance has to be overcome.
Sequential manual gearbox
SMG*
The concept
The sequential manual gearbox SMG is an
automated transmission in which operation of
the clutch and gearshifts are performed by an
electro-hydraulic system.
SMG is operated via the selector lever in the
center console and two shift paddles on the
steering wheel.
It offers you the following functions:
>Choice of manual or automatic operation:
sequential mode or Drive mode
>Choice of two driving programs: Normal or
Sport, refer to Dynamic Driving Control,
page46
>Automatic downshifting and prevention of
misshifting in sequential mode as well
>Acceleration assistant, refer to page47
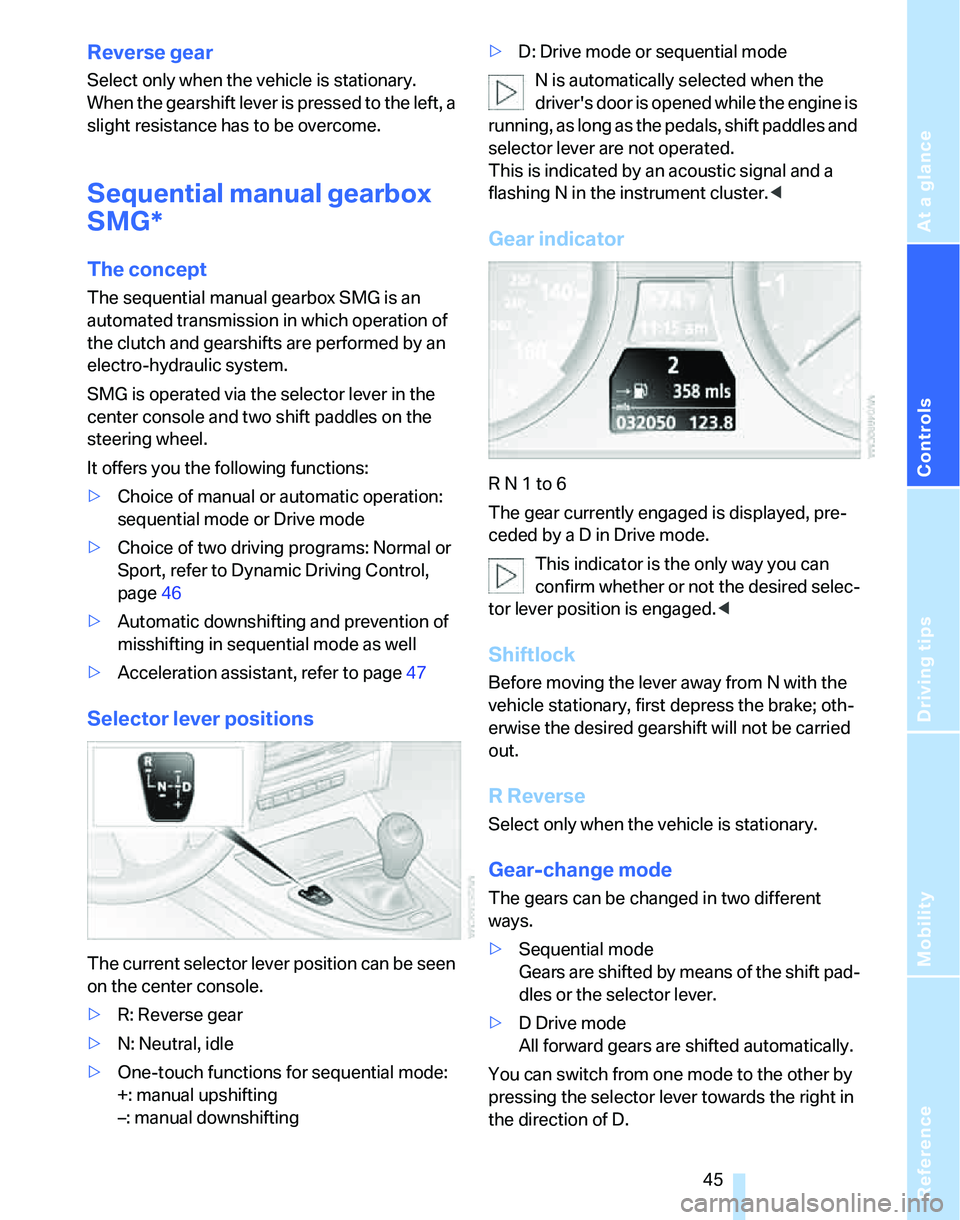
Selector lever positions
The current selector lever position can be seen
on the center console.
>R: Reverse gear
>N: Neutral, idle
>One-touch functions for sequential mode:
+: manual upshifting
–: manual downshifting>D: Drive mode or sequential mode
N is automatically selected when the
driver's door is opened while the engine is
running, as long as the pedals, shift paddles and
selector lever are not operated.
This is indicated by an acoustic signal and a
flashing N in the instrument cluster.<
Gear indicator
R N 1 to 6
The gear currently engaged is displayed, pre-
ceded by a D in Drive mode.
This indicator is the only way you can
confirm whether or not the desired selec-
tor lever position is engaged.<
Shiftlock
Before moving the lever away from N with the
vehicle stationary, first depress the brake; oth-
erwise the desired gearshift will not be carried
out.
R Reverse
Select only when the vehicle is stationary.
Gear-change mode
The gears can be changed in two different
ways.
>Sequential mode
Gears are shifted by means of the shift pad-
dles or the selector lever.
>D Drive mode
All forward gears are shifted automatically.
You can switch from one mode to the other by
pressing the selector lever towards the right in
the direction of D.
Page 49 of 166
Reference
At a glance
Controls
Driving tips
Mobility
47
Acceleration assistant
The acceleration assistant provides for optimal,
racing-style acceleration when starting off on a
non-slippery surface.
Do not use the acceleration assistant too
frequently, otherwise components could
wear prematurely.<
1.Activate Dynamic Driving Control.
2.Deactivate DSC, refer to page68.
3.Quickly depress the accelerator pedal all
the way: kick-down. The optimal engine
speed for pulling away is achieved.
To maintain driving stability, reactivate
DSC afterward.<
Automatic transmission with
Steptronic*
In addition to fully automatic operation, you can
also manually shift with the Steptronic, refer to
page48.
Vehicle parking
To prevent the vehicle from rolling,
always select position P and apply the
handbrake before leaving the vehicle with the
engine running.<
Disengaging the remote control
In order to remove the remote control from the
ignition lock, you must first move the selector
lever to position P and switch off the engine:
interlock.
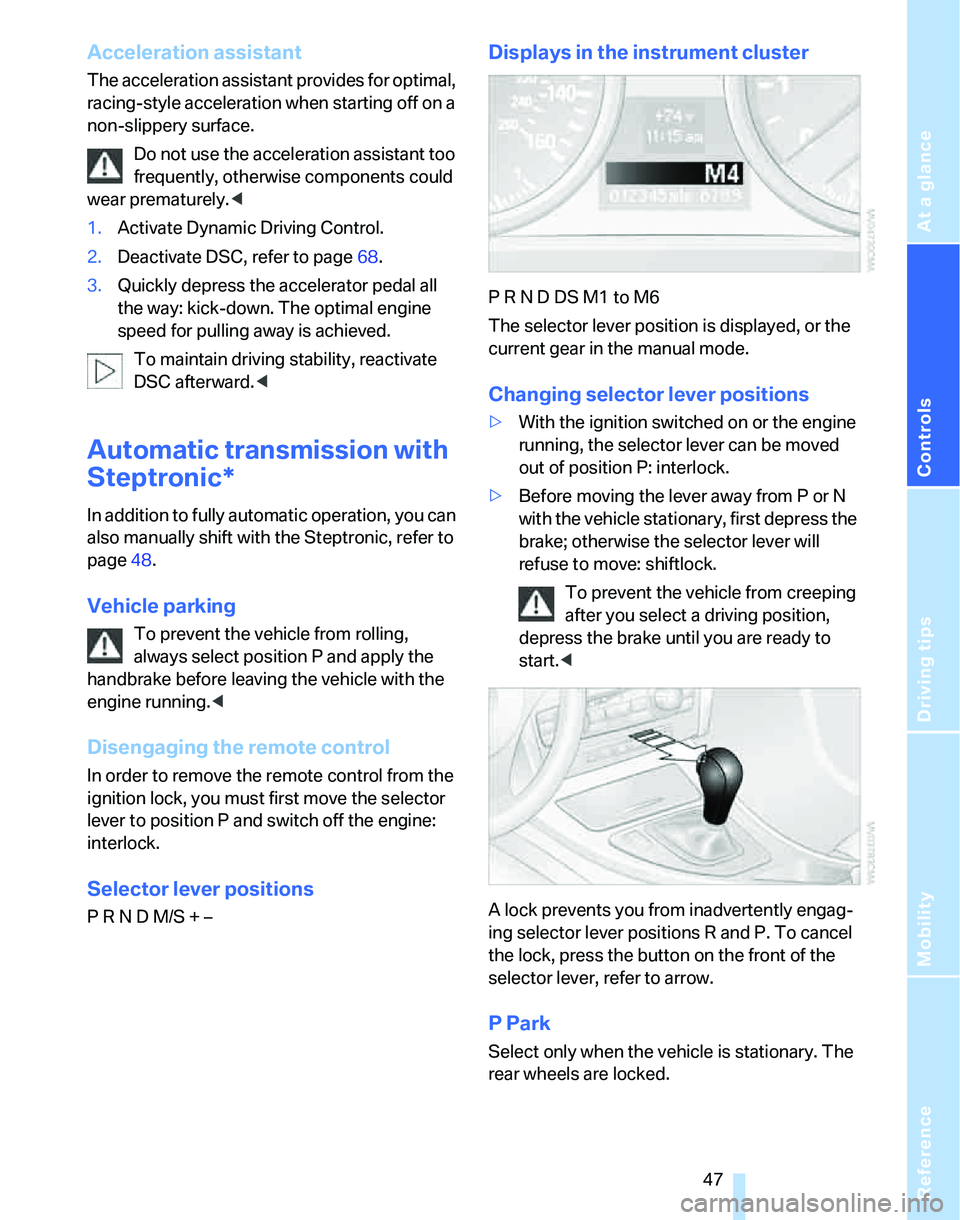
Selector lever positions
P R N D M/S + –
Displays in the instrument cluster
P R N D DS M1 to M6
The selector lever position is displayed, or the
current gear in the manual mode.
Changing selector lever positions
>With the ignition switched on or the engine
running, the selector lever can be moved
out of position P: interlock.
>Before moving the lever away from P or N
with the vehicle stationary, first depress the
brake; otherwise the selector lever will
refuse to move: shiftlock.
To prevent the vehicle from creeping
after you select a driving position,
depress the brake until you are ready to
start.<
A lock prevents you from inadvertently engag-
ing selector lever positions R and P. To cancel
the lock, press the button on the front of the
selector lever, refer to arrow.
P Park
Select only when the vehicle is stationary. The
rear wheels are locked.