Page 135 of 394

Here are the settings activated with
the remote;Driving position memory
(see page ).
To turn of f this f eature, press and
hold the LOCK and UNLOCK
buttonsatthesametime.TheLED
in the remote will blink once. Then
release the buttons. Doing this
cancels the keyless memory settings
f or that remote and restores the
def ault settings. Audio system settings
(see page ). Customized settings
(see page ).
Climate control settings
(see page ).
Navigation system pref erences
(see the navigation system owner’s
manual).
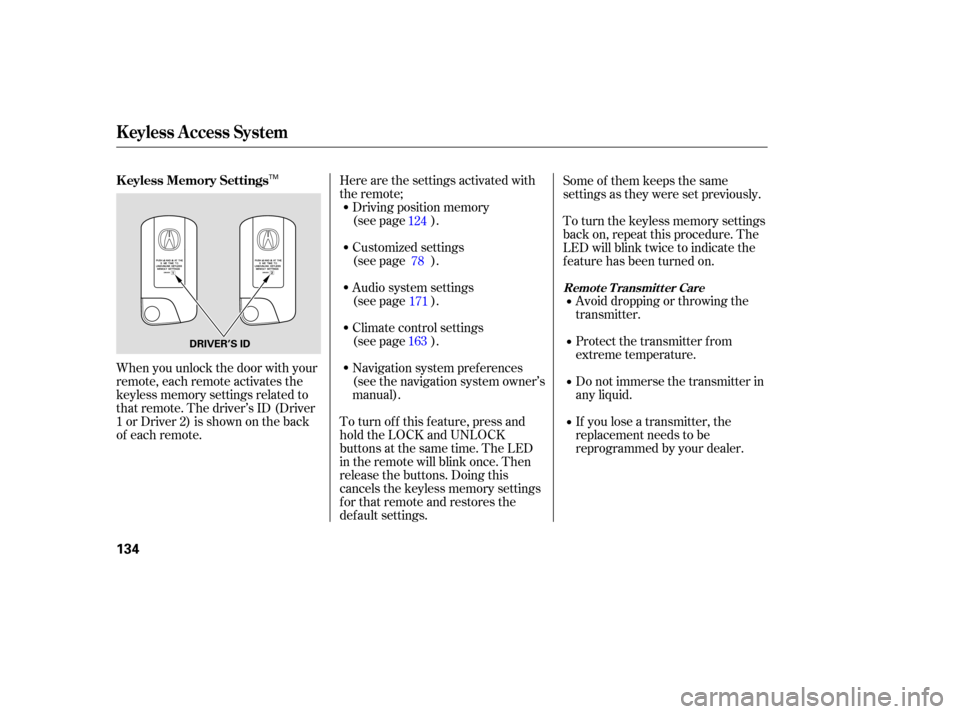
When you unlock the door with your
remote, each remote activates the
keyless memory settings related to
that remote. The driver’s ID (Driver
1orDriver2)isshownontheback
of each remote. Some of them keeps the same
settings as they were set previously.
To turn the keyless memory settings
back on, repeat this procedure. The
LED will blink twice to indicate the
f eature has been turned on.
Avoid dropping or throwing the
transmitter.
Protect the transmitter from
extreme temperature.
Do not immerse the transmitter in
any liquid.
If you lose a transmitter, the
replacement needs to be
reprogrammed by your dealer.
124
171
163 78
K eyless A ccess System
K eyless Memory Settings
Remote Transmitter Care
134
DRIVER’S ID
TM
Page 161 of 394
Af ter pushing the DOOR button, all
the lights come on when you open
any door, unlock the doors with the
remote or built-in key, or turn the
ignition switch f rom the ON (II) or
ACCESSORY (I) position to the
LOCK (0) position. The indicator in
the button comes on as a reminder.
The f ront and rear of the ceiling
have ceiling lights. To change the ‘‘INTERIOR LIGHT
DIMMING TIME’’ setting, see page.
Push each ceiling light button to turn
its light on and of f .
Push the ON button to turn on all the
ceiling lights. Push the OFF button
to turn them off. 92
Ceiling L ights
Interior Lights
160
ON
BUTTON
OFF
BUTTON
DOOR
BUTTON FRONT
REAR
CEILING LIGHT
BUTTONS
CEILING LIGHT
BUTTONS
Page 170 of 394

The automatic climate control
system adjusts the f an speed and
airflow levels to maintain the interior
temperature you select.
In the AUTO mode, the vehicle’s
interior temperature is
independently regulated f or the
driver and passenger. If the driver’s
side of the vehicle is getting too
much sun, the system will adjust to a
lower temperature.Press the AUTO button.
Set the desired temperature with
the temperature control bars.
You will see AUTO in the display
if theclimatemodeisselected. The system automatically selects the
proper mix of conditioned and/or
heated air that will, as quickly as
possible, raise or lower the interior
temperature to your pref erence.
When you set the temperature to its
lower or its upper limit, the system
runs at f ull cooling or heating only. It
does not regulate the interior
temperature.
When you change the f an speed, the
f an is taken out of AUTO mode and
starts to run at the selected speed.
You can manually select various
f unctions of the climate control
system when it is in f ully automatic
mode. All other f eatures remain
automatically controlled. Making any
manual selection causes the word
AUTO in the display to go out.
Press the OFF button. However, a
lack of airf low can cause the
windowstofogup.Youshouldkeep
the fan on at all times so stale air and
moisture do not build up in the
interior and cause f ogging.
1.
2. Automatic Climate Control
Semi-automatic Operation
To Turn Everything Of f
Vents, Heating, and A/C, Climate Control
Features
169
Page 174 of 394

�µ
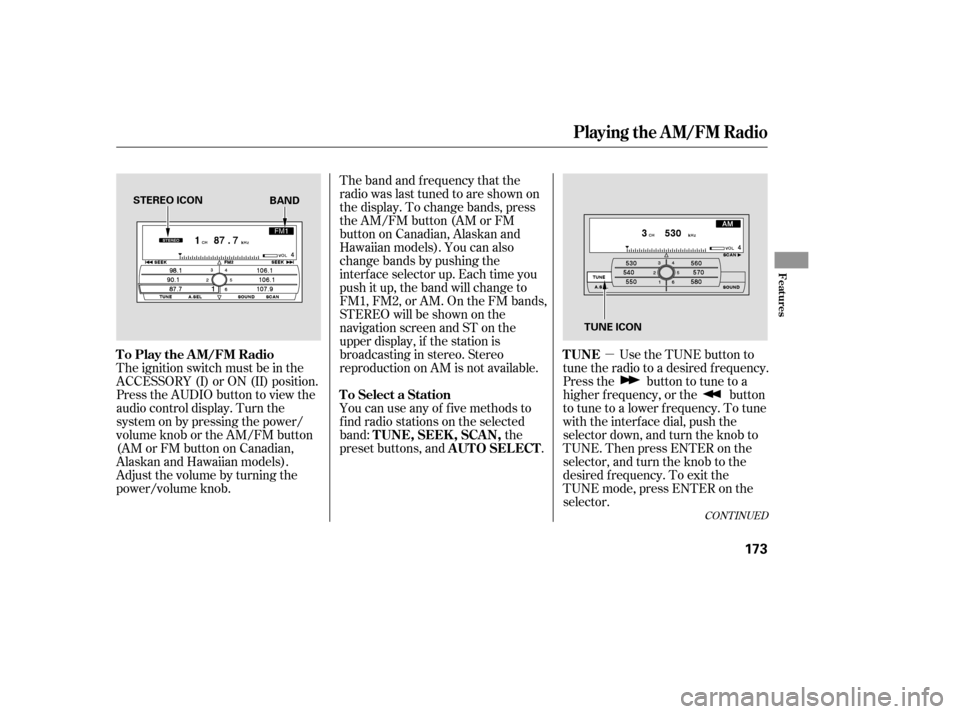
The band and f requency that the
radio was last tuned to are shown on
the display. To change bands, press
the AM/FM button (AM or FM
button on Canadian, Alaskan and
Hawaiian models). You can also
change bands by pushing the
interf ace selector up. Each time you
push it up, the band will change to
FM1, FM2, or AM. On the FM bands,
STEREO will be shown on the
navigation screen and ST on the
upper display, if the station is
broadcasting in stereo. Stereo
reproduction on AM is not available.
Use the TUNE button to
tune the radio to a desired f requency.
Press the button to tune to a
higher f requency, or the button
to tune to a lower f requency. To tune
with the interf ace dial, push the
selector down, and turn the knob to
TUNE. Then press ENTER on the
selector, and turn the knob to the
desired f requency. To exit the
TUNE mode, press ENTER on the
selector.
You can use any of f ive methods to
f ind radio stations on the selected
band:
the
preset buttons, and .
The ignition switch must be in the
ACCESSORY (I) or ON (II) position.
Press the AUDIO button to view the
audio control display. Turn the
system on by pressing the power/
volume knob or the AM/FM button
(AMorFMbuttononCanadian,
AlaskanandHawaiianmodels).
Adjust the volume by turning the
power/volume knob.
CONT INUED
TUNE
To Play the AM/FM Radio
To Select a StationTUNE,SEEK,SCAN, AUTO SELECT
Playing the AM/FM Radio
Features
173
STEREO ICON
TUNE ICON
BAND
Page 191 of 394

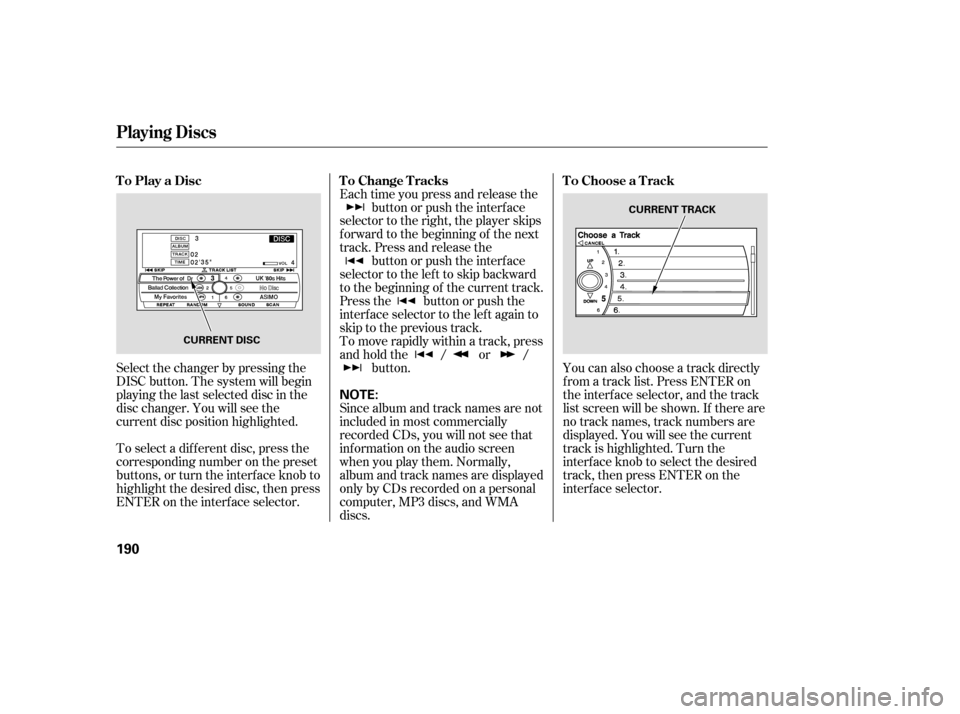
Select the changer by pressing the
DISC button. The system will begin
playing the last selected disc in the
disc changer. You will see the
current disc position highlighted.
To select a dif f erent disc, press the
corresponding number on the preset
buttons, or turn the interf ace knob to
highlight the desired disc, then press
ENTER on the interf ace selector.Each time you press and release the
button or push the interface
selector to the right, the player skips
f orward to the beginning of the next
track. Press and release the button or push the interface
selector to the left to skip backward
to the beginning of the current track.
Press the button or push the
interface selector to the left again to
skip to the previous track.
To move rapidly within a track, press
andholdthe / or / button. You can also choose a track directly
f rom a track list. Press ENTER on
the interf ace selector, and the track
list screen will be shown. If there are
no track names, track numbers are
displayed. You will see the current
track is highlighted. Turn the
interf ace knob to select the desired
track, then press ENTER on the
interf ace selector.
Since album and track names are not
included in most commercially
recorded CDs, you will not see that
inf ormation on the audio screen
when you play them. Normally,
album and track names are displayed
only by CDs recorded on a personal
computer, MP3 discs, and WMA
discs.
ToPlayaDisc
ToChangeTracksToChooseaTrack
Playing Discs
190
NOTE:
CURRENT DISC CURRENT TRACK
Page 196 of 394

To remove a different disc from the
changer,firstselectitbypressing
the corresponding number on the
preset button or turning the
interf ace knob, and pressing ENTER
on the interf ace selector. When that
disc begins playing, press the eject
button.
To eject all discs, press and hold the
eject button. To eject one disc, press and release
the eject button. You can also eject discs when the
ignition switch is of f : When you press the eject button
while listening to the radio, or with
the audio system turned of f , the disc
that was last selected is ejected.
Af ter that disc is ejected, pressing
the eject button again will eject the
next disc in numerical order. By
doing this six times, you can remove
all the discs f rom the changer.
To remove the disc that is currently
playing, press the eject button. You
will see ‘‘EJECT’’ in the upper display.
When you remove the disc f rom the
slot, the system automatically enters
the previous mode [AM, FM1, FM2,
or XM Satellite Radio (U.S. models
except Alaskan and Hawaiian)]. The
system also begins the load
sequence so you can load another
disc. If you do not load another disc,
the load sequence is cancelled, and
the system continues playing in the
previous mode.
If you do not remove the disc f rom
the slot, the system will reload the
disc af ter 15 seconds and put the
disc changer in pause mode. To
begin playing the disc, press the disc
button. Removing Discs f rom the
Changer
Playing Discs
Features
195
Page 199 of 394

�Û�Ý�´
�µ �´
�µ
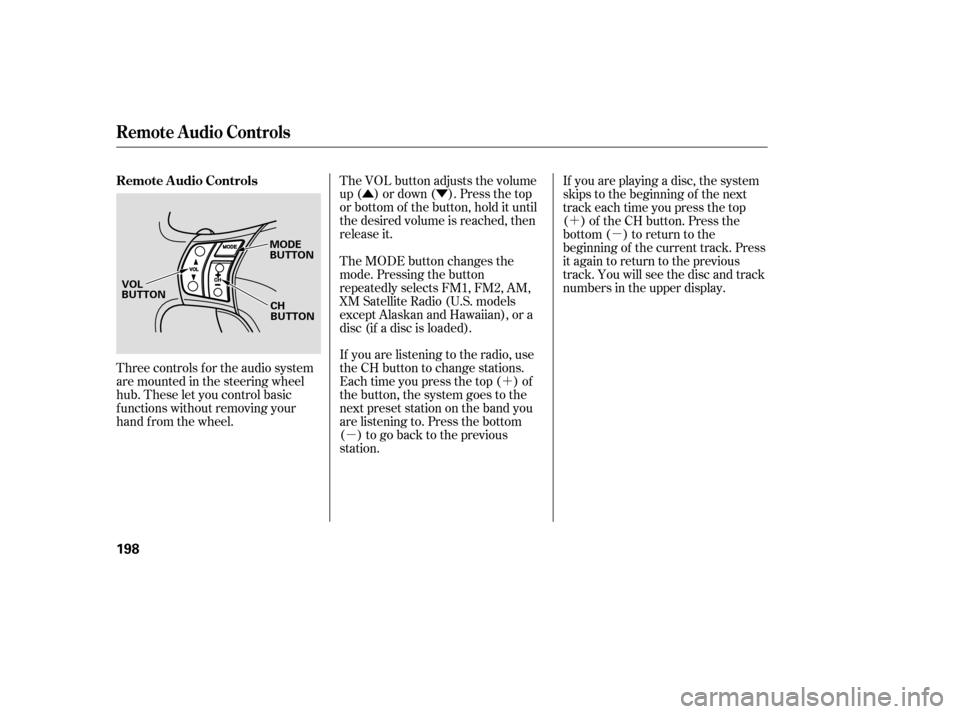
Three controls f or the audio system
are mounted in the steering wheel
hub. These let you control basic
f unctions without removing your
hand f rom the wheel. The VOL button adjusts the volume
up ( ) or down ( ). Press the top
or bottom of the button, hold it until
the desired volume is reached, then
release it.
If you are listening to the radio, use
the CH button to change stations.
Each time you press the top ( ) of
the button, the system goes to the
next preset station on the band you
are listening to. Press the bottom
( ) to go back to the previous
station.If you are playing a disc, the system
skips to the beginning of the next
track each time you press the top
( ) of the CH button. Press the
bottom ( ) to return to the
beginning of the current track. Press
it again to return to the previous
track. You will see the disc and track
numbers in the upper display.
The MODE button changes the
mode. Pressing the button
repeatedly selects FM1, FM2, AM,
XM Satellite Radio (U.S. models
except Alaskan and Hawaiian), or a
disc (if a disc is loaded).
Remote Audio Controls
Remote Audio Controls
198
MODE
BUTTON
CH
BUTTON
VOL
BUTTON
Page 200 of 394

Your vehicle’s audio system will
disable itself if it is disconnected
f rom electrical power f or any reason.
To make it work again, you must
enter a specif ic f ive-digit code with
the preset buttons. Because there
are hundreds of number
combinations possible f rom the f ive
digits, making the system work
without knowing the exact code is
nearly impossible.
Youshouldhavereceivedacardthat
lists your audio system code number
and serial number. It is best to store
this card in a saf e place at home. In
addition, you should write the audio
system’s serial number in this owner’s
manual.
If you lose the card, you must obtain
the code number f rom your dealer.
To do this, you will need the audio
system’s serial number.If your vehicle’s battery is discon-
nected or goes dead, or the radio
f use is removed, the audio system
will disable itself . If this happens,
youwillsee‘‘ ’’intheupper
display the next time you turn on the
system. Use the preset buttons to
enter the f ive-digit code. The code is
locatedontheradiocodecard
included in your owner’s manual kit.
When it is entered correctly, the
radio will start playing.
If you make a mistake entering the
code, do not start over; complete the
f ive-digit sequence, then enter the
correct code. You have ten tries to
enter the correct code. If you are
unsuccessful in ten attempts, you
must then leave the system on for 1
hour bef ore trying again.
If thecodecardislost,yourdealer
can access your code with your
radio’s serial number. To access the
serial number, turn the radio on. Itmust display ‘‘ ’’, then turn
the radio off. Push and hold the
preset 1 and preset 6 buttons, then
push the POWER/VOLUME knob.
The serial number will appear in two
sets of f our digits.
The system will retain your A/M and
F/M presets even if power is
disconnected.
Radio T hef t Prot ect ion
Features
199