2004 VOLVO XC90 ECU
[x] Cancel search: ECUPage 170 of 245
2004 VOLVO XC90
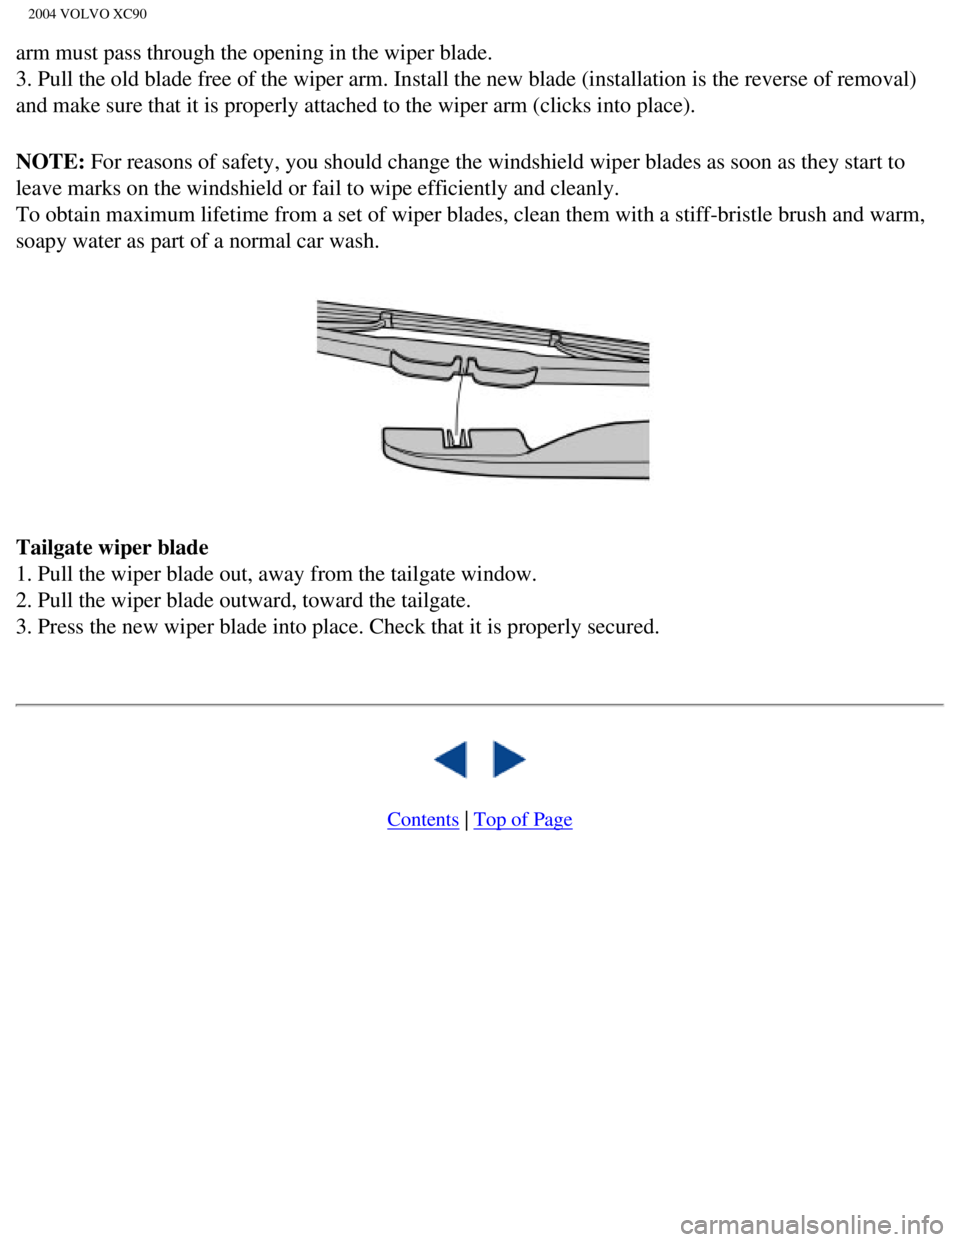
arm must pass through the opening in the wiper blade.
3. Pull the old blade free of the wiper arm. Install the new blade (ins\
tallation is the reverse of removal)
and make sure that it is properly attached to the wiper arm (clicks int\
o place).
NOTE: For reasons of safety, you should change the windshield wiper blades as \
soon as they start to
leave marks on the windshield or fail to wipe efficiently and cleanly.
To obtain maximum lifetime from a set of wiper blades, clean them with a\
stiff-bristle brush and warm,
soapy water as part of a normal car wash.
Tailgate wiper blade
1. Pull the wiper blade out, away from the tailgate window.
2. Pull the wiper blade outward, toward the tailgate.
3. Press the new wiper blade into place. Check that it is properly secur\
ed.
Contents | Top of Page
file:///K|/ownersdocs/2004/2004_XC90/04xc90_09a.htm (14 of 14)12/30/20\
06 4:35:26 PM
Page 171 of 245
2004 VOLVO XC90
pg. 132 Maintenance
Battery Maintenance
The battery in your vehicle is located under the floor of the cargo comp\
artment.
Driving habits and conditions, climate, the number of starts, etc. all a\
ffect the service life and function of
the battery. In order for your battery to perform satisfactorily, keep t\
he following in mind:
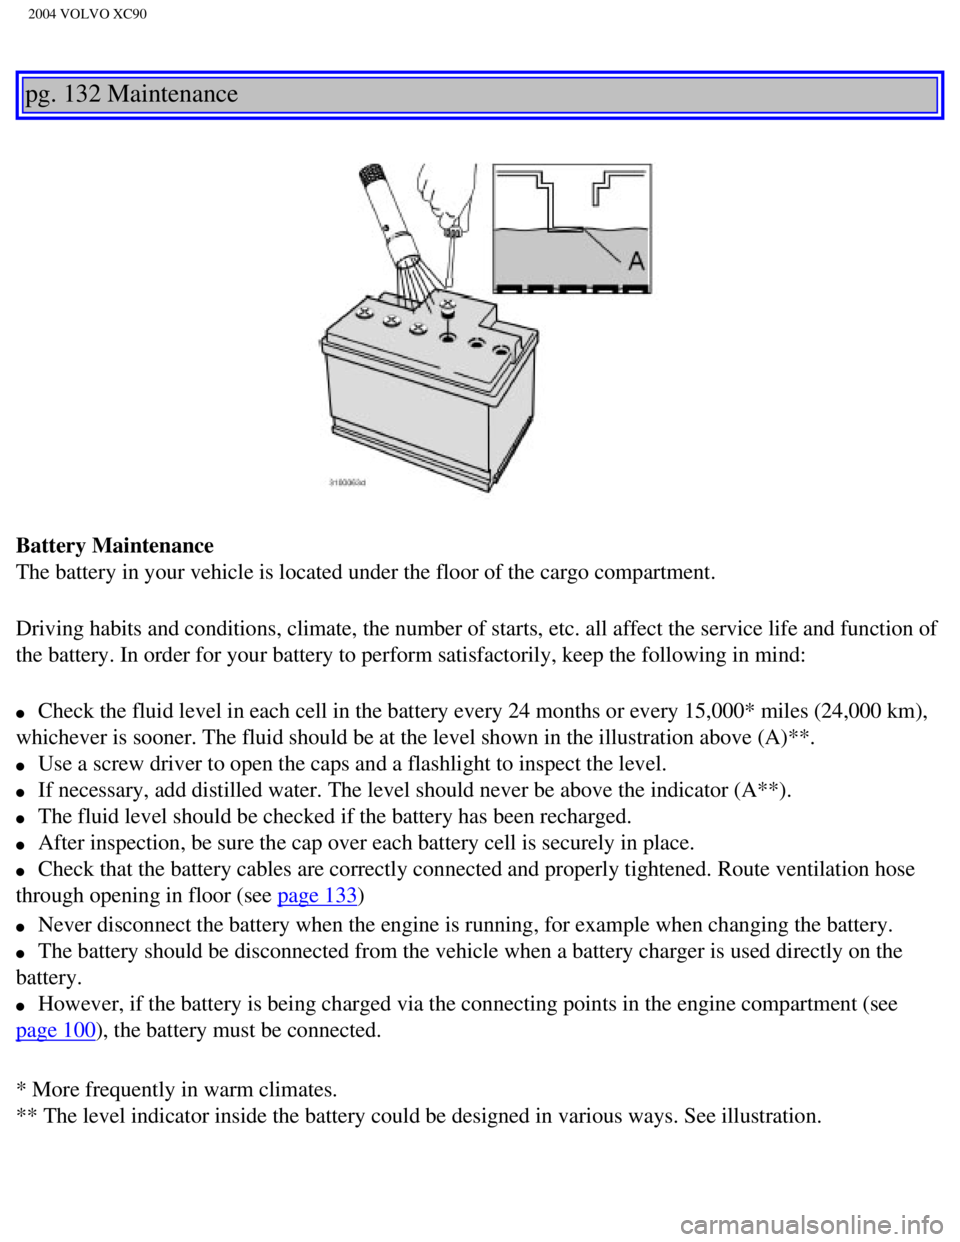
l Check the fluid level in each cell in the battery every 24 months or eve\
ry 15,000* miles (24,000 km),
whichever is sooner. The fluid should be at the level shown in the illus\
tration above (A)**.
l Use a screw driver to open the caps and a flashlight to inspect the leve\
l.
l If necessary, add distilled water. The level should never be above the i\
ndicator (A**).
l The fluid level should be checked if the battery has been recharged.
l After inspection, be sure the cap over each battery cell is securely in \
place.
l Check that the battery cables are correctly connected and properly tight\
ened. Route ventilation hose
through opening in floor (see
page 133)
l Never disconnect the battery when the engine is running, for example whe\
n changing the battery.
l The battery should be disconnected from the vehicle when a battery charg\
er is used directly on the
battery.
l However, if the battery is being charged via the connecting points in th\
e engine compartment (see
page 100), the battery must be connected.
* More frequently in warm climates.
** The level indicator inside the battery could be designed in various w\
ays. See illustration.
file:///K|/ownersdocs/2004/2004_XC90/04xc90_09b.htm (1 of 23)12/30/200\
6 4:35:28 PM
Page 173 of 245
2004 VOLVO XC90
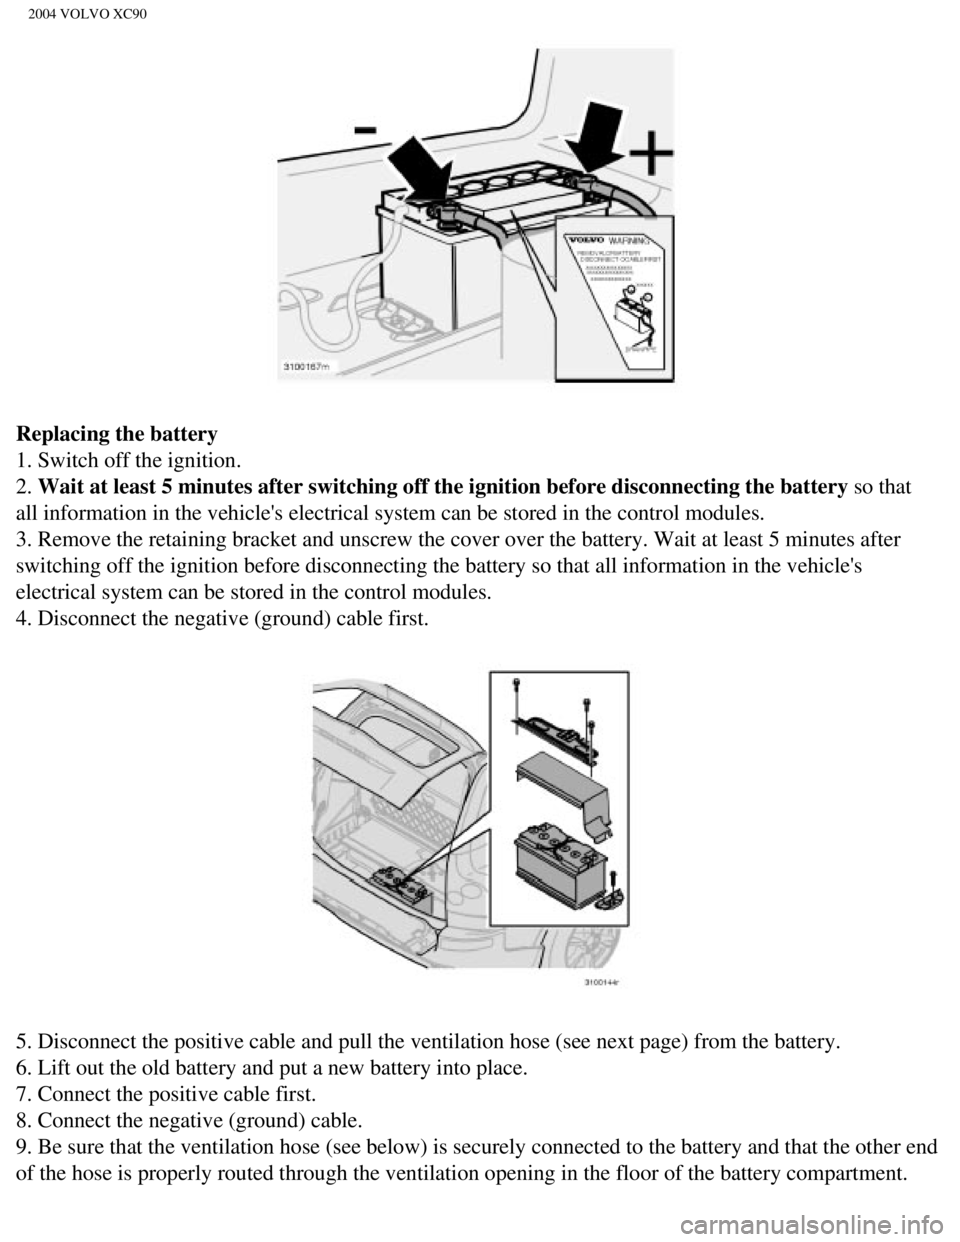
Replacing the battery
1. Switch off the ignition.
2. Wait at least 5 minutes after switching off the ignition before disconne\
cting the battery so that
all information in the vehicle's electrical system can be stored in the \
control modules.
3. Remove the retaining bracket and unscrew the cover over the battery. \
Wait at least 5 minutes after
switching off the ignition before disconnecting the battery so that all \
information in the vehicle's
electrical system can be stored in the control modules.
4. Disconnect the negative (ground) cable first.
5. Disconnect the positive cable and pull the ventilation hose (see nex\
t page) from the battery.
6. Lift out the old battery and put a new battery into place.
7. Connect the positive cable first.
8. Connect the negative (ground) cable.
9. Be sure that the ventilation hose (see below) is securely connected\
to the battery and that the other end
of the hose is properly routed through the ventilation opening in the fl\
oor of the battery compartment.
file:///K|/ownersdocs/2004/2004_XC90/04xc90_09b.htm (3 of 23)12/30/200\
6 4:35:28 PM
Page 174 of 245
2004 VOLVO XC90
10. Reinstall the cover and retaining bracket and screw it securely in p\
lace.
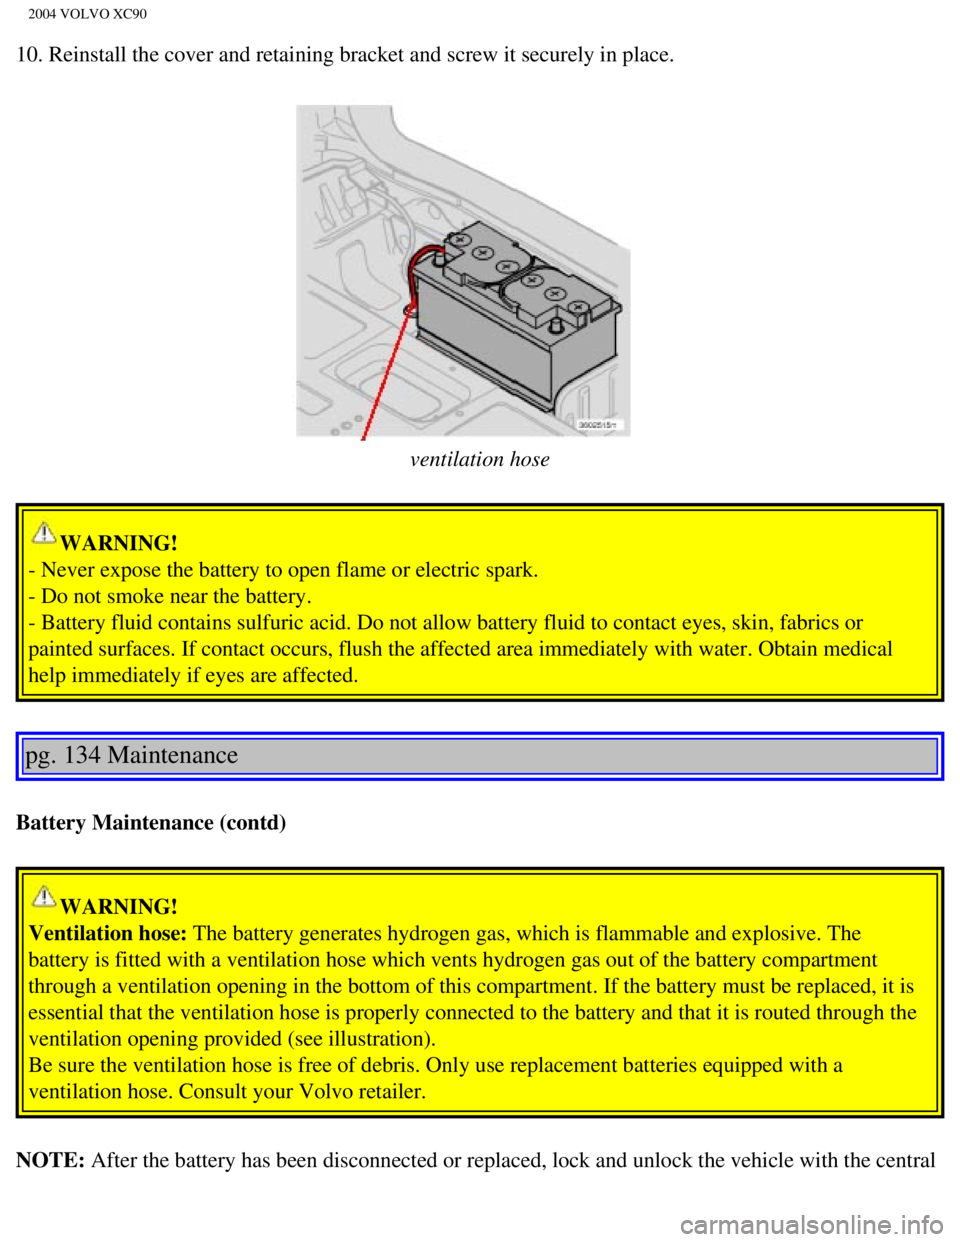
ventilation hose
WARNING!
- Never expose the battery to open flame or electric spark.
- Do not smoke near the battery.
- Battery fluid contains sulfuric acid. Do not allow battery fluid to co\
ntact eyes, skin, fabrics or
painted surfaces. If contact occurs, flush the affected area immediately\
with water. Obtain medical
help immediately if eyes are affected.
pg. 134 Maintenance
Battery Maintenance (contd)
WARNING!
Ventilation hose: The battery generates hydrogen gas, which is flammable and explosive. T\
he
battery is fitted with a ventilation hose which vents hydrogen gas out o\
f the battery compartment
through a ventilation opening in the bottom of this compartment. If the \
battery must be replaced, it is
essential that the ventilation hose is properly connected to the battery\
and that it is routed through the
ventilation opening provided (see illustration).
Be sure the ventilation hose is free of debris. Only use replacement bat\
teries equipped with a
ventilation hose. Consult your Volvo retailer.
NOTE: After the battery has been disconnected or replaced, lock and unlock the\
vehicle with the central
file:///K|/ownersdocs/2004/2004_XC90/04xc90_09b.htm (4 of 23)12/30/200\
6 4:35:28 PM
Page 229 of 245
2004 VOLVO XC90
l Never attempt to play a disc which is damaged in any way.
l When not in use, the discs should be stored in their covers. Avoid stori\
ng discs in excessive heat,
direct sunlight or dusty locations.
pg. 180 Audio
HomeLink® Universal Transceiver
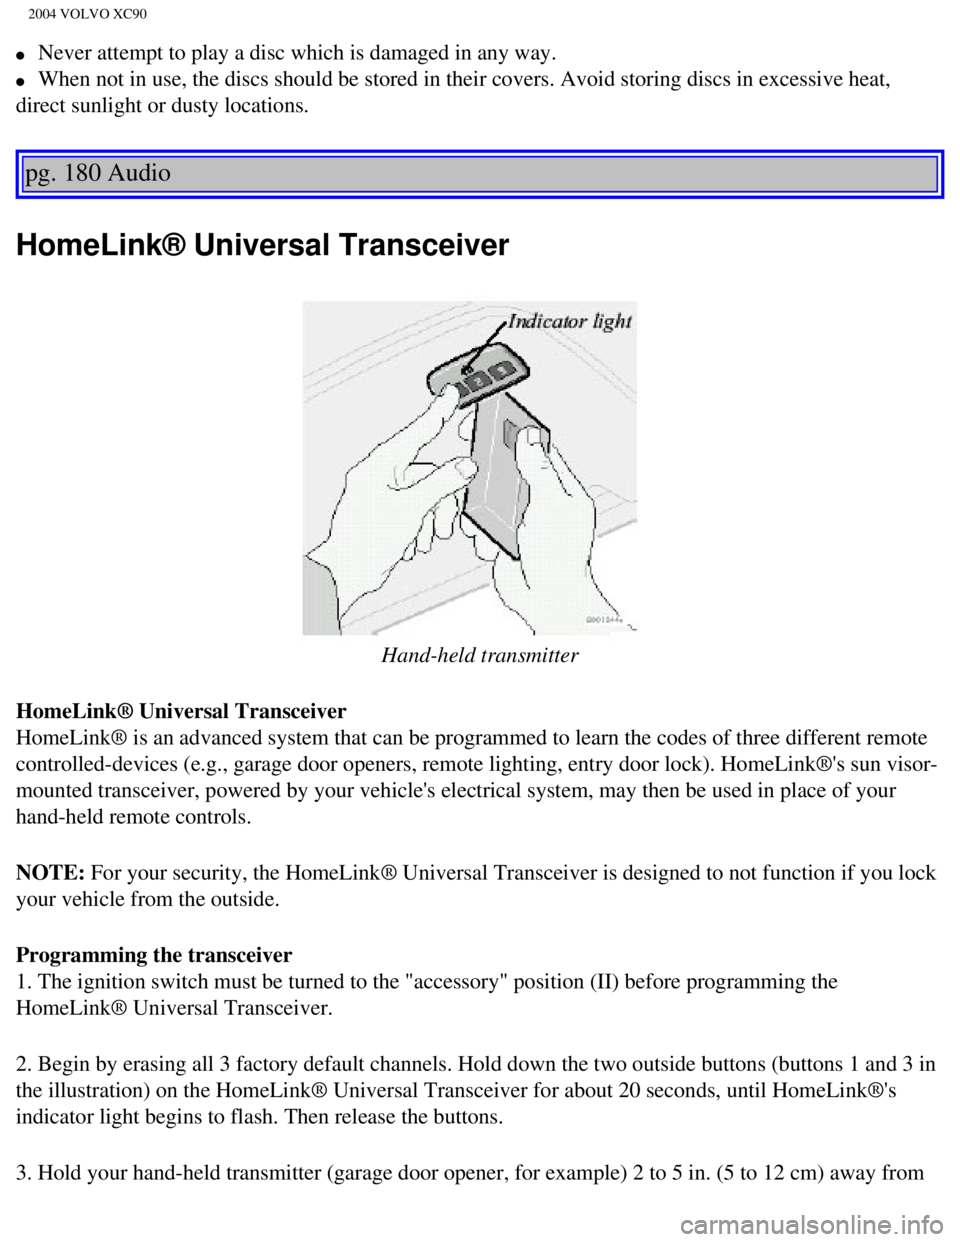
Hand-held transmitter
HomeLink® Universal Transceiver
HomeLink® is an advanced system that can be programmed to learn the c\
odes of three different remote
controlled-devices (e.g., garage door openers, remote lighting, entry d\
oor lock). HomeLink®'s sun visor-
mounted transceiver, powered by your vehicle's electrical system, may th\
en be used in place of your
hand-held remote controls.
NOTE: For your security, the HomeLink® Universal Transceiver is designed to\
not function if you lock
your vehicle from the outside.
Programming the transceiver
1. The ignition switch must be turned to the "accessory" position (II)\
before programming the
HomeLink® Universal Transceiver.
2. Begin by erasing all 3 factory default channels. Hold down the two ou\
tside buttons (buttons 1 and 3 in
the illustration) on the HomeLink® Universal Transceiver for about 2\
0 seconds, until HomeLink®'s
indicator light begins to flash. Then release the buttons.
3. Hold your hand-held transmitter (garage door opener, for example) 2\
to 5 in. (5 to 12 cm) away from
file:///K|/ownersdocs/2004/2004_XC90/04xc90_11b.htm (8 of 11)12/30/200\
6 4:35:32 PM
Page 231 of 245
2004 VOLVO XC90
programmed button does not activate the garage door, your garage door op\
ener may have a rolling code.
l Press the programmed HomeLink® button. If the garage door opener has \
the rolling code feature, the
HomeLink® indicator light flashes rapidly and then glows steadily aft\
er approximately 2 seconds.
To train a rolling code garage door opener,
follow these instructions after programming the desired transceiver butt\
on according to "Programming
the transceiver." The help of a second person may make training easier.
1. Locate the training button on the garage door opener motor head unit.\
The location and color of the
training button may vary. If you encounter difficulty, refer to the gara\
ge door opener owner's manual or
call toll-free 1-800-355-3515 (Internet:
www.HomeLink.com).
2. Press the "training" button on the garage door opener motor head unit\
until the "training" light comes
on.
3. Press and release the programmed HomeLink® button. Press and relea\
se the programmed
HomeLink® button a second time to complete the training process.
4. Some garage door openers may require you to do this procedure a third\
time to complete the training.
5. The programmed button on your HomeLink® Universal Transceiver shou\
ld now operate your garage
door opener. The original hand-held transmitter can also be used, as des\
ired, to operate the garage door.
The remaining two HomeLink® buttons can be programmed in the same way\
. In the event of any
problems in programming the HomeLink® Universal Transceiver, call tol\
l-free 1-800-355-3515
(Internet:
www.HomeLink.com).
Operating the HomeLink® Universal Transceiver
Once programmed, the HomeLink® Universal Transceiver can be used in p\
lace of your handheld
transmitters.
To operate, the key must be turned to the "accessory" position (II) or\
the engine must be running. Press
the programmed HomeLink® button to activate the garage door, driveway\
gate, security lighting, home
security system, etc.
pg. 182 Audio
Your original hand-held transmitters may, of course, be used at any time\
.
Erasing programmed buttons
Individual buttons cannot be erased. To erase all three programmed butto\
ns:
1. Turn the ignition key to the "accessory" position (II).
2. Hold down the two outside buttons on the HomeLink® Universal Trans\
ceiver for about 20 seconds,
until HomeLink®'s indicator light begins to flash.
3. Release both buttons.
file:///K|/ownersdocs/2004/2004_XC90/04xc90_11b.htm (10 of 11)12/30/20\
06 4:35:32 PM
Page 232 of 245

2004 VOLVO XC90
The HomeLink® buttons can be reprogrammed using the procedures descri\
bed on the previous page.
Reprogramming a single HomeLink® button
1. Press and hold the desired HomeLink® button. Do not release the bu\
tton until step 3 has been
completed.
2. When the indicator light begins to flash slowly (after approximately\
20 seconds), position your hand-
held transmitter 2 to 5 in. (5 to 12 cm) away from the HomeLink® su\
rface.
3. Press and hold the hand-held transmitter button. The HomeLink® ind\
icator light will flash first
slowly, then rapidly. When the indicator light flashes rapidly, release \
both buttons.
The previously programmed device has now been erased and the new device \
can be activated by
pressing the HomeLink® button that has just been programmed. This pro\
cedure will not affect any other
programmed HomeLink® buttons.
NOTE:
l Retain the original transmitter(s) for future programming procedures (\
e.g., if you purchase a new
vehicle).
l For your own security, erase all programmed buttons on the HomeLink® \
Universal Transceiver when
you sell your vehicle.
l Metallic sun protection films should not be used on any windows in a veh\
icle equipped with
HomeLink® Universal Transceiver. This could interfere with the transc\
eiver's function.
Contents | Top of Page
file:///K|/ownersdocs/2004/2004_XC90/04xc90_11b.htm (11 of 11)12/30/20\
06 4:35:32 PM