2004 VOLKSWAGEN GOLF steering wheel
[x] Cancel search: steering wheelPage 120 of 444
Have th e a irbag system inspected by you r authorize d Volkswagen deale r or qualified
workshop immediately. Always carefully follow instructions from
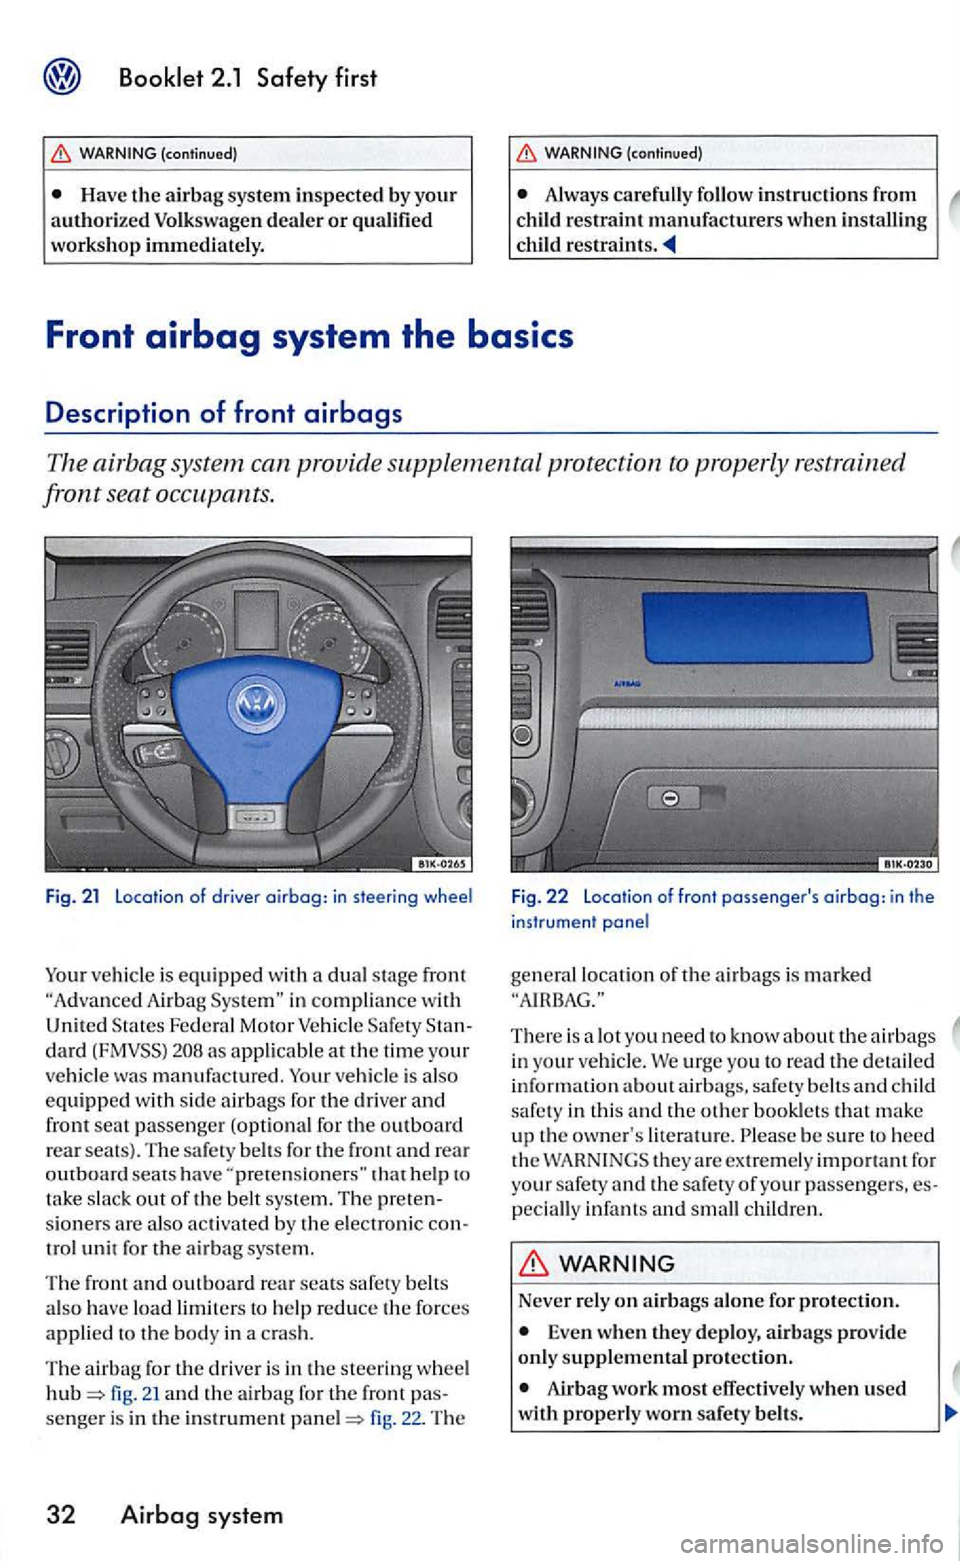
Fig. 21 Location of driver airbag: in steering wheel
ve hicl e is equipped with a dual s tage front A ir bag in compliance w ith
Unit ed Fede ra l Motor Veh icle dard as applicable at th e time your ve hicl e was manufa ctured . vehi cle is also equipped w ith sid e airbags for the driver and fron t se at passenge r (opt io nal for the outboard re a r seats). The sa fety belts for th e front and re a r outboard seats have ''pretensioners"
fig. 21 and th e ai rbag for the front fig. 22. The
32 Airbag system
F ig. 22 Location of front passenger's airbag: in the
instrument panel
gen era l lo ca tion of the a irba gs is marked
There is a lot you need to know about th e airbags in yo ur veh icle . We urg e you to read the detailed
information abo ut airb ags. safety belts and child
safe ty in thi s and the o th er bookle ts th at m ake
up the own er' s literature. be sur e to heed
th e th ey are extrem ely important for
your safet y and t h e s afety of yo ur passe nge rs, pecially infan ts and small c hildr en.
WARNING
Never rely on airb ags alone for protect ion.
Even when they deplo y, airbags provide only supplem ental protection.
Airbag work most effective ly w he n used
with properl y worn safet y belts.
Page 121 of 444
Therefore, always wear your safety belts and make sure that everybody in your vehicl e
i s properly re strained.
A person o n the front passenger seat, cially infants and small
Although the Advanced Airbag System in your vehicle is designed to turn orr the front passenger airbag if an in fant or a small child in one of the child restraints used to certify the Advanced Airbag System is on the front
tion s is impossible in all conceivabl e situa-
Applies to vehicles: with advanced front airbag system
Advanced front airbag system
Your vehicl e is equipped with a front Advanced
A irbag System in complia nce with States Federal Motor Vehicle Safety Standard as applicable the time your hicle was manufactured.
The front Advanced AirbagSystem supplemems the s afety belt s to provide additional protection
for the driver's and front passenge r' s head s and upper bodi es in frontal crashes. The airbags
straint system in your vehicle. Always remember that the a irba g system can only help to protect if you are sittin g upright, wearin g your safe ty belt and wearing it properly. This is why
yo u and your passengers must always be erly restrained, not just because the law requi res you to be.
The Adva nced Airbag System in yo ur ve hicl e has been to meet the ment s for 3 and 6 yea r-old childr en (as defined
in the s tandard) on the passenger sid e and very
The Advanced AirbagSyste m can deploy in accordance with the
fant restrained in one of the fonvard facing or rearward facing child seats wit h which
plo yment arc met.
Accident statistic s have shown that
For their own safety, all children, especially 12 years and younger, should always ride in the back properly restrained for their age and
small adult s on the driver side. ployment occurs in those crashes th at tak e place
troni c control unit. The low risk deployment teria are intended to help reduce the ris k of jury through interact ion with th e front airbag
t hat can occur in these collisions, for example.
b y
being too close to the steering wheel and
deplo yme nt to occur. the PASSENGER light mus t be orr "Monito ring the Advanced Airbag
year old. restrained in one of the rearward-facing or forward-facing
child restraims (listed in Federal Motor Vehicle Safety Standard with which the Advanced
A irbag System in yo ur veh icle was the PASSENGER BAG light mayor may not come on. Wh en the PASSENGER light is off, the fron t airbag on the passe nge r side may or may not deploy depending o n the nature
Airbog system 33
Page 132 of 444
BAG light does not go off when an adult is sitting on the front
passenger scat after taking the s te p s described
above, make sure the adult i s properl y seated
and r estrai ned at one of the rear seating posi
tions.
Have the a irba g sys te m inspecte d by your authorized Volkswagen dealer or qualified
workshop before transporting anyon e o n th e
front passenger seat.
be turn ed off, and th e BAG light on.
o r th e front passe nger sa fety belt its elf is buckled and th e
f ru nt seat i s not occ upied . th e co me on.
Repair, care and
re moving, servicing or repairing a
Never cover, obstruct, or change the
steeri ng wheel horn pad or airbag cover or the in strument panel or m odify them in any
Never attach any o bj ects such as cup holders or te lephone mountings to the surfaces covering the airbag units.
For cleaning the horn pad or instrument panel, use only a soft, dry cloth or one moi st
e ned w ith plain water. Solvents or cleaners
co uld damage the airbag cover or change the
s tiffn ess or strengt h of the material so that the
a irbag cannot deploy and protect properly.
Never repair, adjust, or change any parts of the a irba g system.
All work on the steering wheel, instrument panel, front seats or ele ctri cal sys tem (in-
44 Airbag system
{ continu ed )
eluding the installation of audio equipment ,
ce llular te lephones and C B radios, etc.) must be performed by a qualified tech nici an who
h as the training and special equipment neces
sary.
For any work on the airbag s ys te m , we strongly recommend that yo u see you r authorized Volkswagen dealer or qualified work
shop.
Never modify the front bumper or parts of the vehicl e body.
Alwa ys make sure that the s ide airbag can inflate witho ut interference:
Neve r scat covers or rep lacement upholstery over the front scat backs that have no t been specifically approved by Volkswagen.
Never use additional seat cushions that cover the areas where t11e sid e a irba gs in
flate .
Damage to the original scat cove rs or to
th o scam in the area of tho side airbag module must always be re p ai red immediate ly by an authorized Volkswagen deale r or qualified workshop.
The airbag sy stem can be activated only
o n ce. After an airba g has inflated, it must be replaced.
trained t echnician who has th e necessary
too ls and diagnostic equipment to properly
Page 165 of 444
belts 13, 19
Extender 23
How can I adjust the heigh t o f my safery
belt? 25
How
do you put on you r safery belt
correct l
y? 19
Improperly worn 26
Installing child restraint 63
Not worn
16
belt position 21
instructio ns 17
Specia l consid erations for pregnant
women 22
Switc hab le locki ng feature 65
Unfa stening safe ty belt s 25
Warning light
14 What happen s to occupants not wearing
safety
belt s? 16 Why assume the co rrect seatin g
position? 28
W hy safery belts protec t? 17
Why wear safery belts? 15, 28
belts protect 17
Monitoring the Advanced Airbag
43
seatin g positi on for the driver 4
seating position for the front
passenger 5
belt extender 23
Curtain airbags 52
Seating capacity 13
Sea ting position Distance between driver and steering
wheel 4
Driver 4
Front
passenger 5
Improper seat in g positi on s
4
Rear
passe ngers 6
air bags 46
Description 46
Ho w
they work?
in structio n s 48
airbags
Desc ripti
on
How they work? 5 1
instructions 52
Steer ing w hee l
Distance
to the driver 4
Sw itchable locking f
eature
Activating 65
Deactivating 67
T
Tether anchors 68
T
ether strap 69
Tie -
downs 12
Torn or f rayed safety bel ts 1 7
Trunk
u
Unfasten ing
belts 25
Upholstery
v
Ventil ation slit s ll
w
Wa rning light
belts 14
Wa rnin g lights
Page 173 of 444
Booklet 3.1 Controls and Equipment
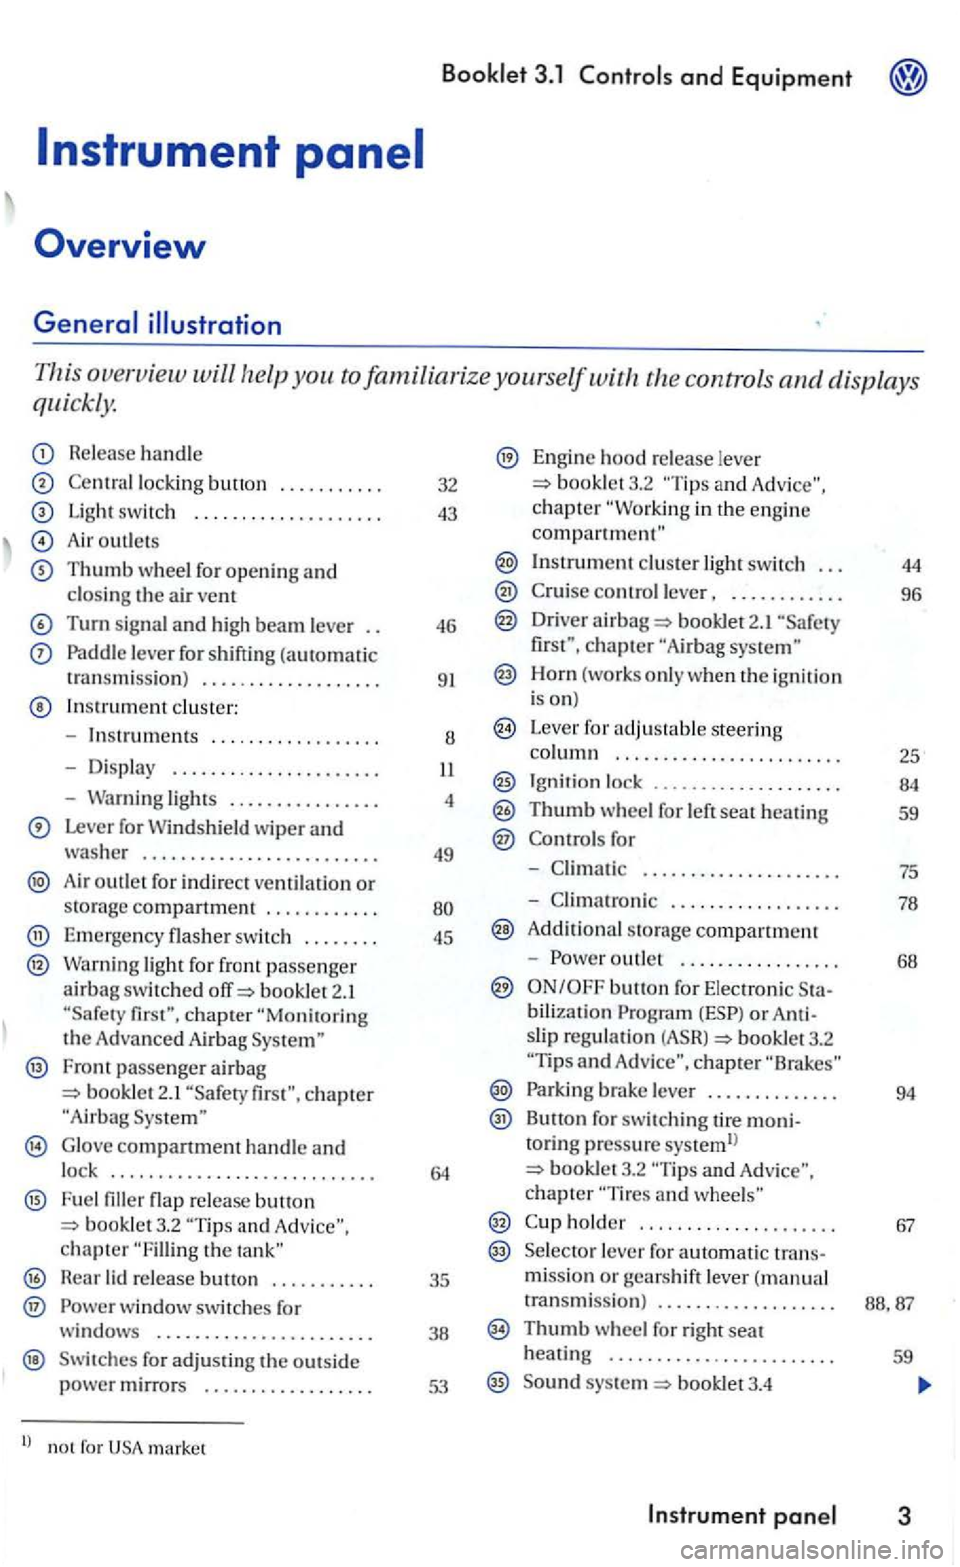
This overview will the controls and displays
quickly.
Release handle
lock ing button ...... .... .
Light switc h ................... .
Air outlet s
Thumb wheel for opening and closin g the a ir vent
Turn signal and high beam leve r
Paddle leve r for shifting (automatic
t ransmiss ion ) .................. .
In strument cluste r:
- Instru
ments ... ...........• ...
- Dis pla y ..
-Warning lights ............... .
Lever for Windshield wiper and washer ........................ .
Air outlet for in d irect ventilatio n or storag e compartment ........... .
Emerge ncy flasher sw itch ....... .
Warning light for front passenge r airbag switc hed booklet 2.1
Fron t passenger airbag bookle t 2.1
G lo ve compartment handle and lock ........................... .
F u e l flap re lease button and chapter the
H ear lid re lease .......... .
® w indow switches for
windows ...................... .
Swit ches for adjus ti n g the outs id e power mirrors ................. .
l) no t for market 32
43
46
9
1
8
4
49
45
35
38
53
Engine hood re lease lever booklet3.2 and c h a pter in the engin e compartment"
Instrument cluster light switch . . . 44
control lever, . . . . . . . . . . . . 96
Driver airba g 2.1 chapter
Horn (works o nly when the ig niti on
i s on)
Leve r for adjus table steering column . . . . . . . . . . .. . . . . . . . . . . . . 25
Ignit ion lock ...... 00............ 84
Thumb wheel for left seat heating 59
for
-. . . . . . . . . . . . . . . . . . . . . 75
- Climatro nic . . . . . . . . . . . . . . . . . . 78
A ddit iona l s torage compartment
-
outle t . . . . . . . . . . . . . . . . . 68
bilization or slip regulatio n booklet3.2 and chapte r
Parki ng brake lever . . . . . . . . . . . . . . 94
Button for switc hing tire moni-toring p ressure systemll booklet3.2 chapter
holder . . . . . . . . . . . . . . . . . . . . . 67
Se lecto r lever fo r automatic trans-missio n or gears h ift lever ( m anual
transmissi o n) . . . . . . . . . . . . . . . . . . .
Thumb w heel for right seat
heatin g . . . . . . . . . . . . . . . . . . . . . . . . 59
Sound syste m booklet3.4
Page 183 of 444
3.1 and Equipment
Failure to heed warning light s and other important vehicl e information can lead to a
breakdown in traffi c, collis io n and se rious personal injury.
Never ignore warni ng lights and warning m essages !
Wheneve r stall ed or stopped for repair,
m ove the vehicle a safe distance off the road,
s top th e e ngin e, and turn on th e emergency flas he r a nd use other warn ing dev ices to warn approaching traffic.
Before workin g in the engine compartment, always read and heed all WARNLNGS bookle t 3.2 in the engine The engi ne compartmen t of motor ve hicl e is a potentially dangerous area and can cause serio us personal injury .
Note
Failure to observe warning lights or wa rning
text s can cause damage to you r veh icle.
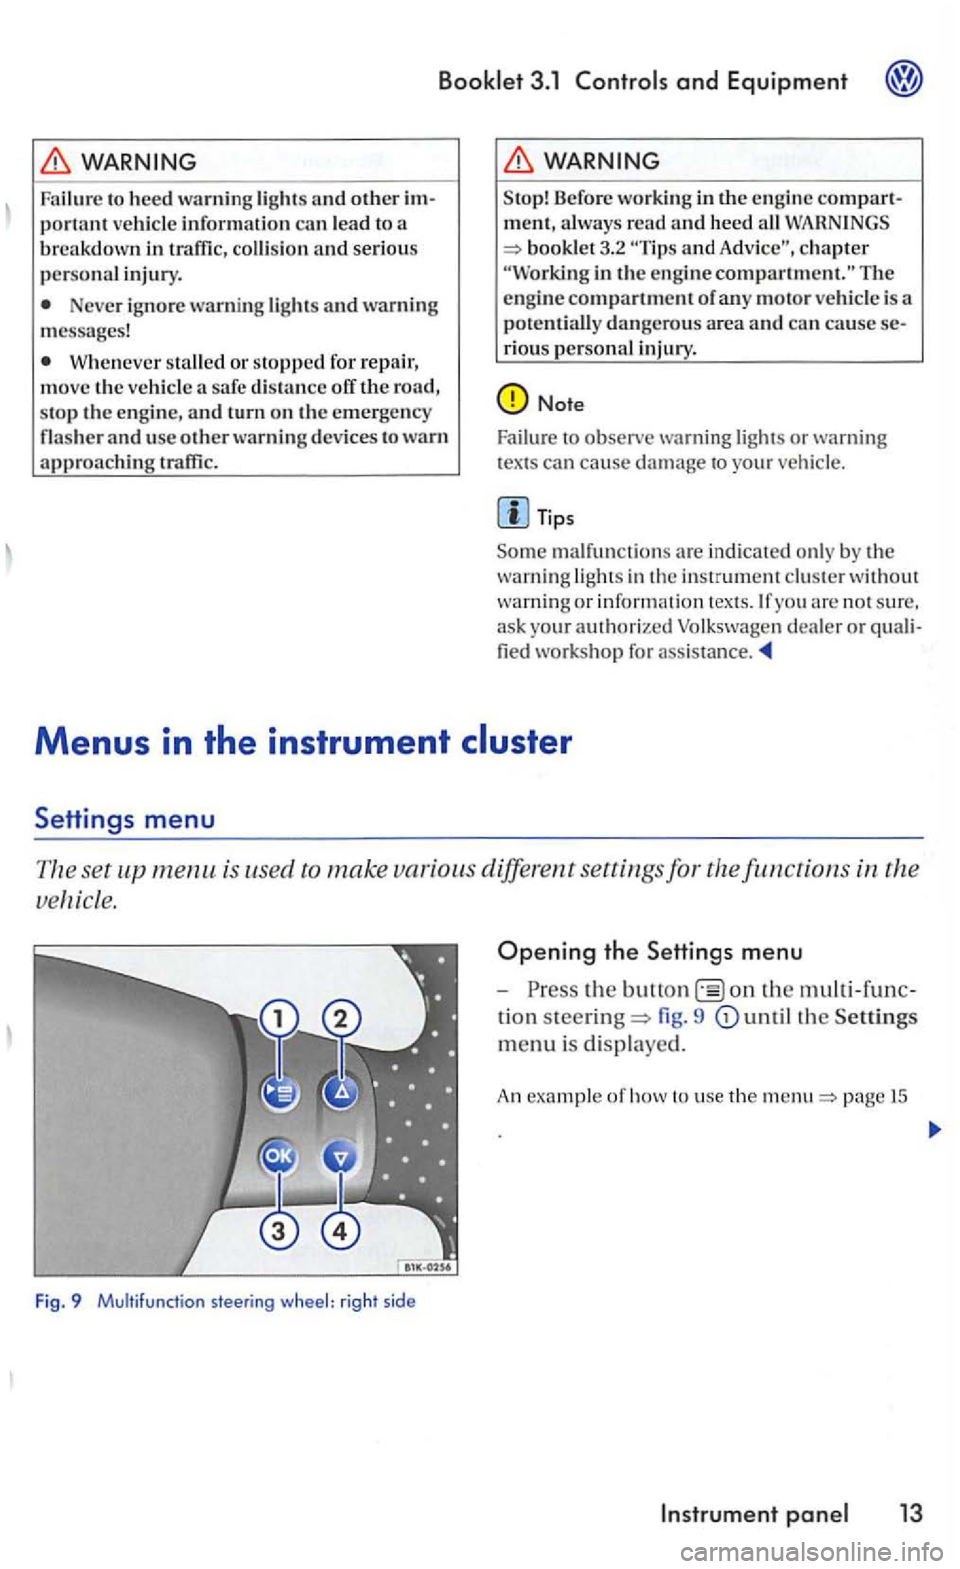
is used to make various different settings for the
Fig. 9 Multifunction steering wheel: right sid e
Opening the Settings menu
-the on the
tion steering= fig. 9
page 15
Page 185 of 444
Booklet 3.1 and Equipment
Co mfo rt indi c.
Factory settin g
Bac k
Display off
WARNING
Driver distraction can cause accidents and rious personal injury.
Neve r select menus w hen the ve hicl e is mov ing.
Tip s
The menus sh own in the display depends on the ve hicl e electron ics and the options i nstalle d on your ve hicle. you are not sure, ask you r thorized Volkswagen d ealer or qualified
authorized Volk swagen dealer or
T he menu can only be ope ned w hen th e ve hicl e is at a stan dstill.
Appl ies to with display area in the instrumen t and the
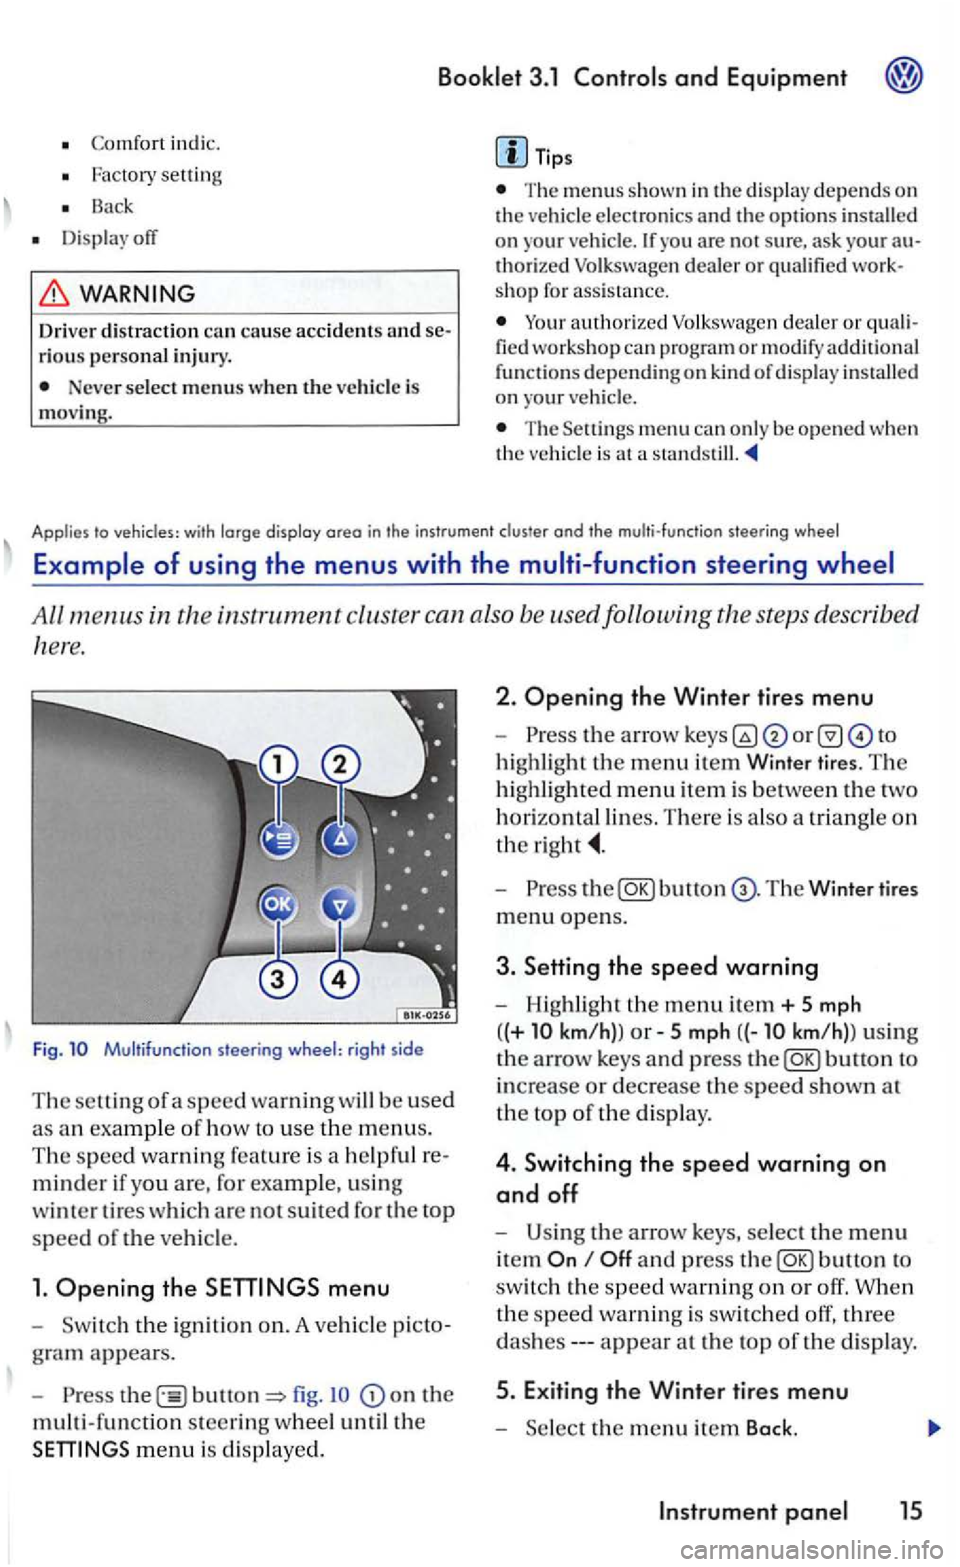
All m enus in the instrument cluste r can also be used following the step s describ ed
here.
F ig. Multifunction steering wheel: right side
Th e
minder if yo u are, for example, u sin g
w int
er tir es which are not suit ed for th e top
speed of the ve hicle.
1. Opening the
the ign itio n on. A ve hicle
fig . on the
multi-funct ion steerin g w heel until the
Opening the Winter tires menu
-or to
highlight
the m enu item Winter tires . The
highl ighted menu item is between th e two
horizo ntal lines. Th ere is a lso a triang le on
the
-bu tto n T he Winter tires
m enu opens.
3. Setting the speed warning
- Highligh t the menu ite m + 5 mph
( (+
km/h)) 5 km/ h)l u sin g
th e
arrow keys and press
and p ress button to
switc h th e
speed warnin g on or off . When
th e s pee d wa rnin g is
swit ch ed off, three
appear at th e top of the displa y.
th e m enu item Back.
Page 186 of 444
3.1 and Equipment
T he function will generate ibl e has
r e a ched th e set speed.
The examp le menu Winter tires
+ 5 mph
Tips
Function
The name of the dis pl ayed menu
Displays the speed currently set or dashes if the fun ction is switched off .
Switches the fun ction on or off.
the set value by 5 mph km/h ).
Decre a ses the set value by 5 mph km/h).
The Winte r tires menu and th e last d isplaye d menu opens again.
The m enus s hown in the disp lay depends on the on
your are not sure. ask your rized Volkswage n dealer or qualified workshop for assis tance.
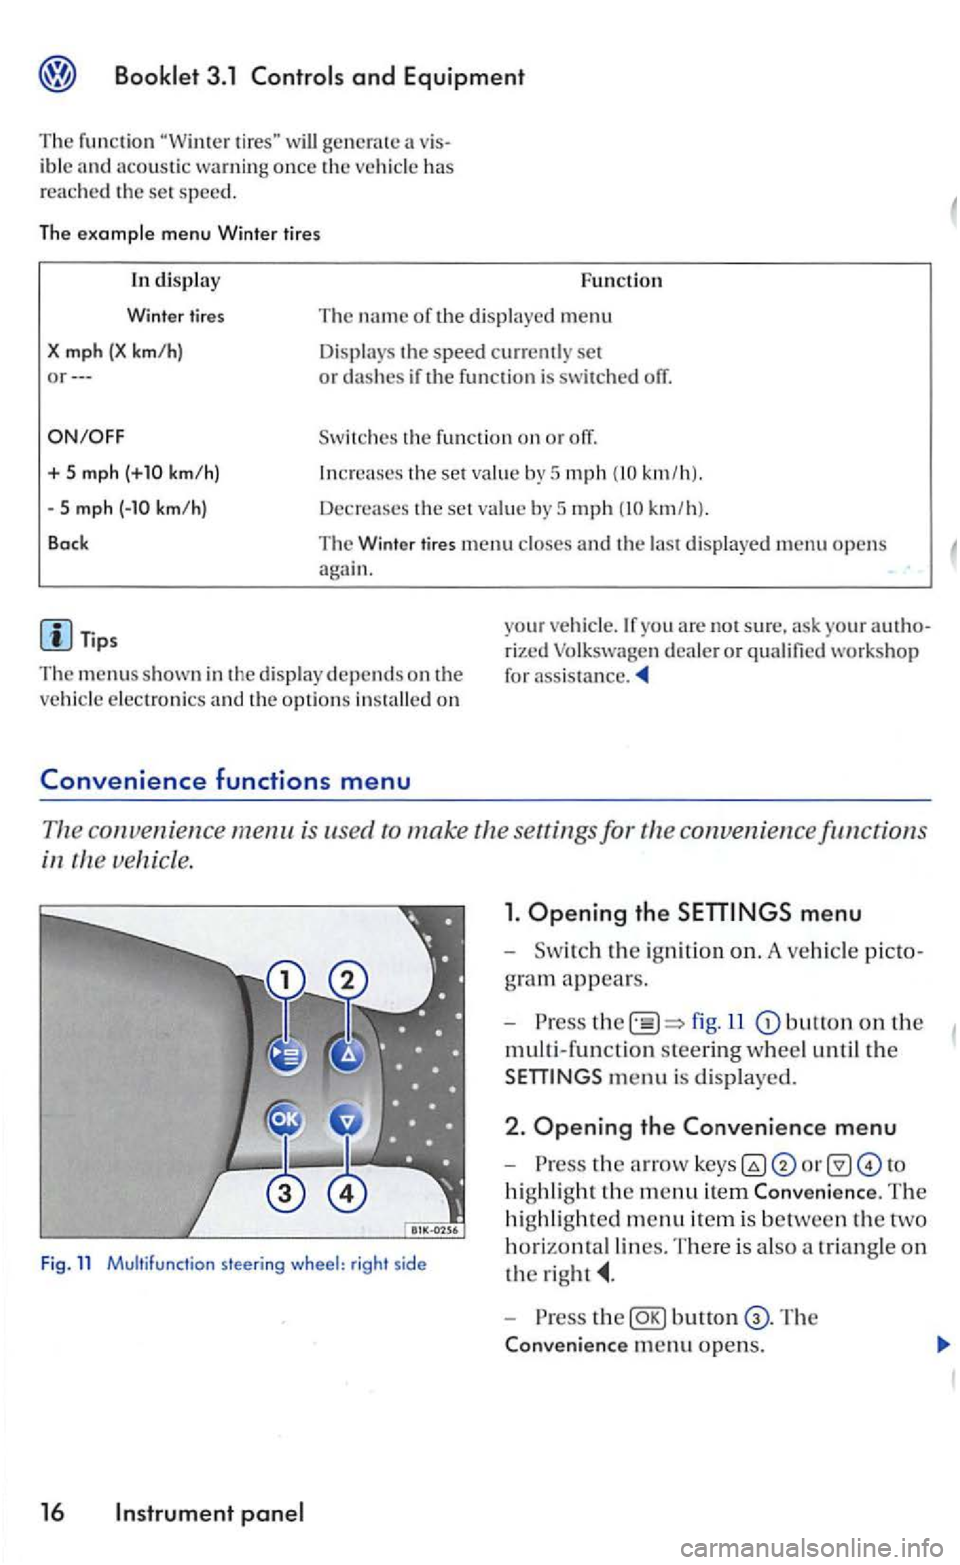
convenien ce menu is use d to make the
ve hicle.
Fig. 11 Multifunction steering wheel: right side
16
fig.ll button on the
multi-function steering w heel until the
the arro w to
highli ght the menu item Conveni ence. The
hi ghl ig
hted menu it e m is between th e
horizonta l lines. T here is a lso a triangle on
the
-the The
Conven i
ence menu opens.