Page 242 of 506

04 SIENNA_U (L/O 0408)
236
2004 SIENNA from Aug. ’04 Prod. (OM45422U)
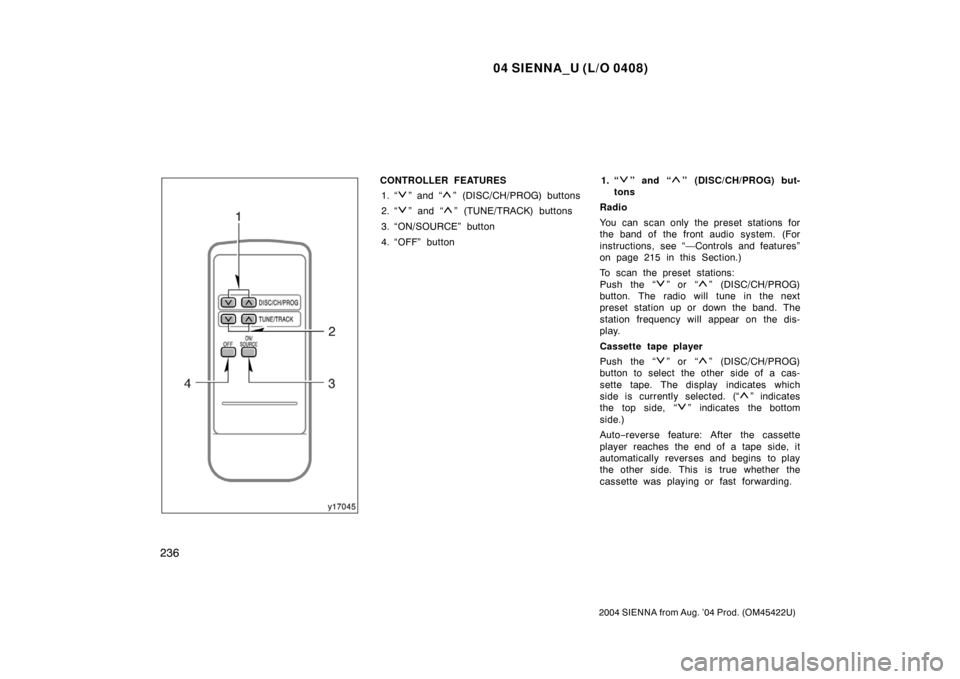
CONTROLLER FEATURES1. “
” and “” (DISC/CH/PROG) buttons
2. “
” and “” (TUNE/TRACK) buttons
3. “ON/SOURCE” button
4. “OFF” button 1. “
” and “” (DISC/CH/PROG) but-
tons
Radio
You can scan only the preset stations for
the band of the front audio system. (For
instructions, see “—Controls and features”
on page 215 in this Section.)
To scan the preset stations:
Push the “
” or “” (DISC/CH/PROG)
button. The radio will tune in the next
preset station up or down the band. The
station frequency will appear on the dis-
play.
Cassette tape player
Push the “
” or “” (DISC/CH/PROG)
button to select the other side of a cas-
sette tape. The display indicates which
side is currently selected. (“
” indicates
t he top si de, “
” indicates the bottom
side.)
Auto −reverse feature: After the cassette
player reaches the end of a tape side, it
automatically reverses and begins to play
the other side. This is true whether the
cassette was playing or fast forwarding.
Page 254 of 506
04 SIENNA_U (L/O 0408)
248
2004 SIENNA from Aug. ’04 Prod. (OM45422U)
1. “DVD” buttonThis button turns on the DVD mode.
2. “SOURCE” button This button turns on the rear seat en-
tertainment system and selects the
mode.
3. “OFF” button
This button turns off the rear seat en-
tertainment system.
4. Joy stick This joy stick selects a control switch,
mode switch on the screen or the
menu for the disc.
5. “ENT” button
This button inputs the selected switch
or the selected menu for the disc.
6. “DISC/CH/PROG” button This button skips directly to a desired
preset station, disc, track or chapter.
7. “ �� ” button
This button fast forwards a screen
when the DVD player is operated.
8. “RETURN” button
This button skips to the predetermined
scene for the disc.
—Control buttons
�Controller
Page 256 of 506
04 SIENNA_U (L/O 0408)
250
2004 SIENNA from Aug. ’04 Prod. (OM45422U)
1. “” button
This button ejects a disc.
2. “SOURCE” button
This button turns on the rear seat en-
tertainment system and selects the
mode.
3. “TUNE/TRACK” button This button operates the front audio
system or select the track/chapter
when the DVD player is operated.
4. “DISC/CH/PROG” button This button skips directly to a desired
preset station, disc, track or chapter.
5. “CURSOR (REMOTE)” button
This button indicates the control
switches on the screen when the DVD
player is operated. This button also
can be used when you lose sight of
the controller.
6. Joy stick
This joy stick selects a control switch,
mode switch on the screen or the
menu for the disc.
�
Buttons on the DVD player unit
Page 260 of 506

04 SIENNA_U (L/O 0408)
254
2004 SIENNA from Aug. ’04 Prod. (OM45422U)
When you select a mode, the screen indi-
cates which is selected.
Radio
AM mode:
When you select the AM mode, “AM” will
appear on the screen.
FM mode:
When you select the FM mode, “FM1” or
“FM2” will appear on the screen.
Tape mode
“TAPE” appears on the screen while this
mode is selected.
Compact disc mode
“CD” appears on the screen while this
mode is selected.
The screen shows the track, or track and
disc number currently being played.
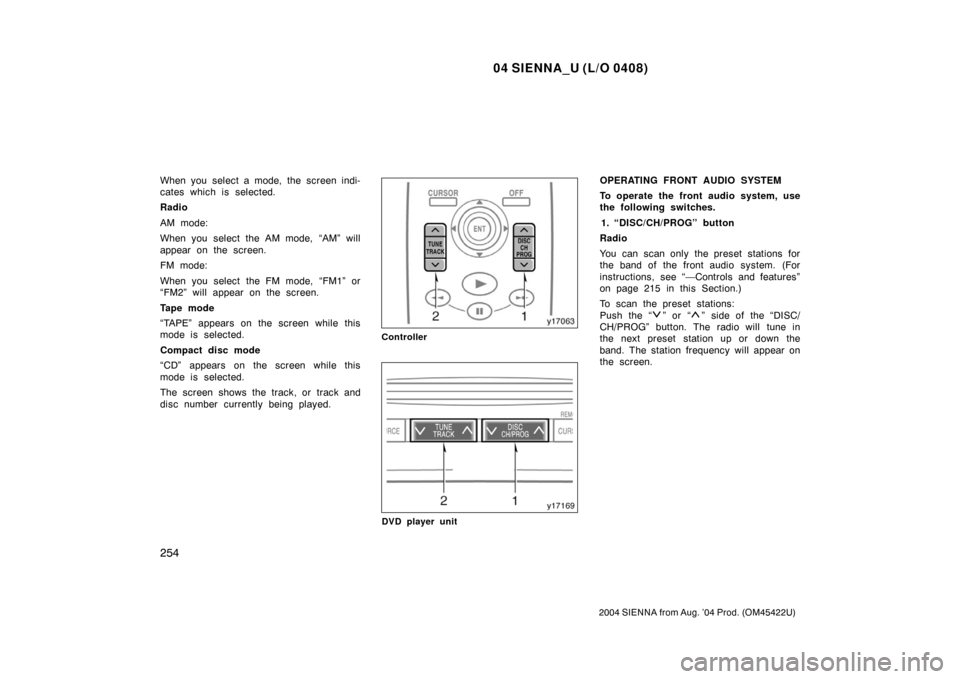
Controller
DVD player unit
OPERATING FRONT AUDIO SYSTEM
To operate the front audio system, use
the following switches.1. “DISC/CH/PROG” button
Radio
You can scan only the preset stations for
the band of the front audio system. (For
instructions, see “—Controls and features”
on page 215 in this Section.)
To scan the preset stations:
Push the “
” or “” side of the “DISC/
CH/PROG” button. The radio will tune in
the next preset station up or down the
band. The station frequency will appear on
the screen.
Page 328 of 506

04 SIENNA_U (L/O 0408)
322
2004 SIENNA from Aug. ’04 Prod. (OM45422U)
The outside temperature and cruise in-
formation display indicates the follow-
ing information.1. Outside temperature
2. Average fuel consumption
3. Instantaneous fuel consumption
4. Distance to empty
5. Display off (no compass)
Every time you push the “MODE” button,
the display toggles through this informa-
tion.
During the off mode, the compass display
is also turned off.
The displayed values in the cruise infor-
mation display indicate general driving
conditions. Accuracy varies with driving
habits and road conditions.
To set the unit, push the “E/M” button
until the desired unit display appears. (At
this time, front and rear air conditioning
displays also change.) 1. Outside temperature
The outside temperature display indi-
cates the outside air temperature.
The displayed value is updated every 1
second.
The displayed temperature ranges from
− 30 �C ( −22 �F) up to 50 �C (122 �F).
If there is some abnormality in the con-
nection of the outside air temperature sen-
sor, “ −−�C” (“ −−�F”) will appear on the
display. If “ −−�C” (“ −−�F”) appears on the
display, contact your Toyota dealer.
There may be a case that “−− �C” (“ −−�F”)
appears momentarily when the ignition is
quickly turned to “ON”. It is normal if it
goes out soon.
2. Average fuel consumption (“AVG”)
Average fuel consumption is calculated
and displayed based on total driving
distance and total fuel consumption
with the engine running.
The displayed value is updated every 1
seconds.
To reset the calculations, return the mode
to “AVG” and push and hold the “MODE”
and “E/M” button simultaneously for 2 sec-
onds. 3. Instantaneous fuel consumption
(“INST”)
The instantaneous fuel consumption is
calculated and displayed based on dis-
tance and fuel consumption for 1 sec-
onds with the engine running.
The displayed value is updated every 2
seconds.
Note that an accurate figure may not be
shown in the following cases.
�When the vehicle is stopped with the
engine running, the display will indicate
the extremely high fuel consumption.
�When the vehicle is driving down a
long slope, applying the engine brake,
the display will indicate the extremely
low fuel consumption.
The calculation is reset when the ignition
switch is turned off. 4. Distance to empty (“DTE”)
The distance the vehicle can travel with
the remaining fuel is calculated and
displayed based on the quantity of re-
maining fuel and past fuel consumption.
The displayed value is updated every 1
second.
Page 329 of 506

04 SIENNA_U (L/O 0408)
323
2004 SIENNA from Aug. ’04 Prod. (OM45422U)
Every time you refuel the vehicle, the cal-
culation is reset.
The actual driving range varies with driv-
ing habits and road conditions. If fuel con-
sumption is good, the driving range will be
longer. If fuel consumption is poor, the
driving range will be shorter.
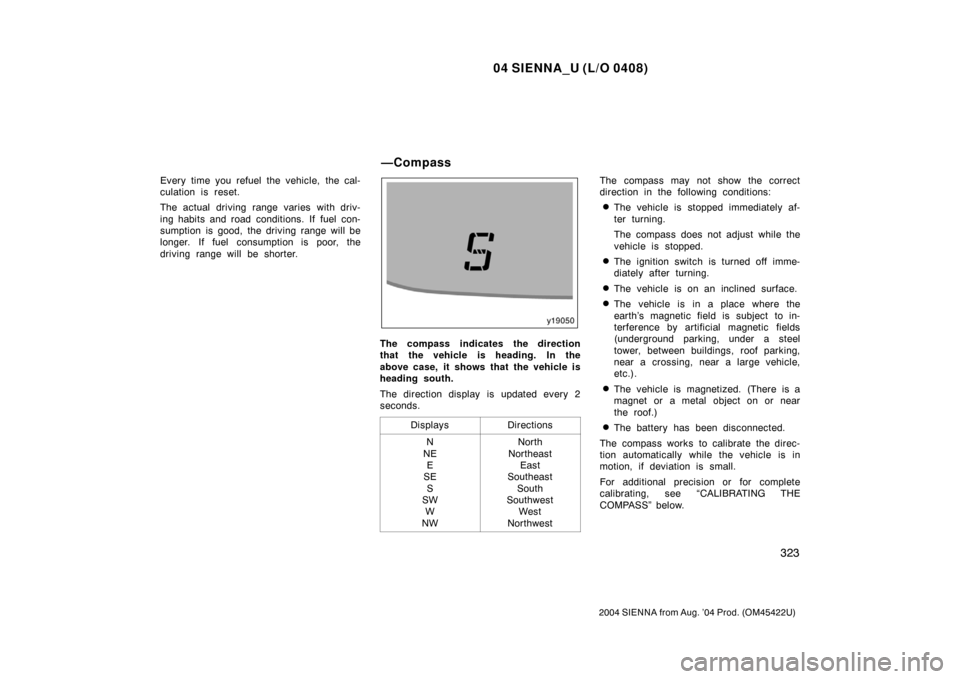
The compass indicates the direction
that the vehicle is heading. In the
above case, it shows that the vehicle is
heading south.
The direction display is updated every 2
seconds.Displays
Directions
N
NE E
SE
S
SW W
NWNorth
Northeast East
Southeast
South
Southwest West
Northwest
The compass may not show the correct
direction in the following conditions:
�The vehicle is stopped immediately af-
ter turning.
The compass does not adjust while the
vehicle is stopped.
�The ignition switch is turned off imme-
diately after turning.
�The vehicle is on an inclined surface.
�The vehicle is in a place where the
earth’s magnetic field is subject to in-
terference by artificial magnetic fields
(underground parking, under a steel
tower, between buildings, roof parking,
near a crossing, near a large vehicle,
etc.).
�The vehicle is magnetized. (There is a
magnet or a metal object on or near
the roof.)
�The battery has been disconnected.
The compass works to calibrate the direc-
tion automatically while the vehicle is in
motion, if deviation is small.
For additional precision or for complete
calibrating, see “CALIBRATING THE
COMPASS” below.
—Compass
Page 334 of 506
04 SIENNA_U (L/O 0408)
328
2004 SIENNA from Aug. ’04 Prod. (OM45422U)
To reset the hour: Push the “H” button.
To reset the minutes: Push the “M” button.
The key must be in the “ACC” or “ON”
position.
If the electrical power source has been
disconnected from the clock, the time dis-
play will automatically be set to 1:00 (one
o’clock).
When the instrument panel lights are
turned on, the brightness of the time in-
dication will be reduced.The conversation mirror is designed for
the driver and front passenger to be
able to look at the rear passengers
without turning around.
CAUTION
Do not adjust the mirror while the
vehicle is moving. Be sure to adjust
the mirror only when the vehicle is
stopped.
To use the mirror, push it down.
Conversation mirror